
Subscribe to Our Youtube Channel
Related Manuals for Tsun TSOL-MX800


Summary of Contents for Tsun TSOL-MX800
- Page 1 Microinverter TSOL-MX400 TSOL-MX450 TSOL-MX500 TSOL-MX800 TSOL-MX900 TSOL-MX1000 V1.0 - 1 -...
-
Page 2: Trademarks And Permissions
Microinverter Trademarks and Permissions TSUN and other TSUNESS trademarks are trademarks of TSUNESS Co., Ltd. All other trademarks and trade names mentioned in this document are the property of their respective holders. TSUNESS Co., Ltd makes no representations express or implied, concerning this... -
Page 3: Table Of Contents
Microinverter Content Trademarks and Permissions ............................. - 1 - Audience ....................................- 2 - Content ....................................- 3 - Read This First ...................................- 4 - Important Safety Information ..................................- 4 - Product Label ......................................- 4 - System Introduction ................................- 5 - Product Description .................................... -
Page 4: Read This First
Microinverter Read This First Dear customer, thank you for choosing the microinverter from TSUN. We hope you will find our products meet your needs for renewable energy. Meantime, we appreciate your feedback regarding our products. A solar microinverter, or simply microinverter, is a plug-and-play device used in photovoltaics, that converts direct current (DC) generated by a single solar module to alternating current (AC). -
Page 5: System Introduction
The microinverter is used in grid-tied applications, comprised of two key elements: Microinverter. TSUN monitoring system. The microinverter converts the DC electricity generated by solar panels into AC electricity which is in accordance with the requirements of the public grid and sends the AC into the grid, reducing the load pressure of the grid. - Page 6 Microinverter TSOL- MX400/MX450/MX500 TSOL- MX800/MX900/MX1000 The microinverter is integrated with the Wi-Fi module and connects to the home Wi-Fi router directly. Users can monitor the power generation of the system by TSUN monitoring App. V1.0 - 6 -...
-
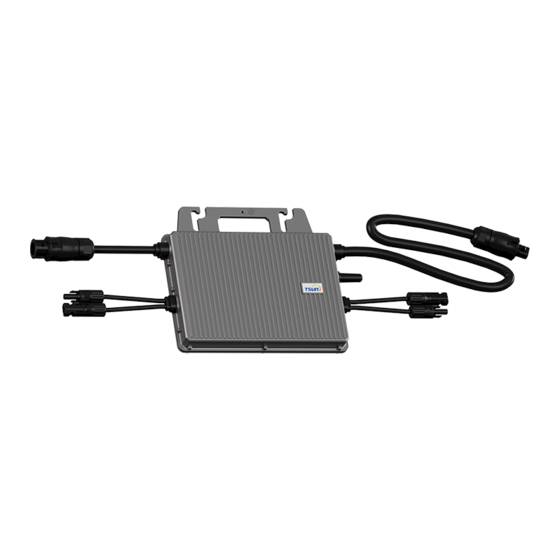
Page 7: Product Description
Microinverter Product Description TSOL- MX400/MX450/MX500 TSOL- MX800/MX900/MX1000 Mounting Hole AC Cable Grounding Hole Antenna DC Cables Status Light Datasheet Model MX400 MX450 MX500 Input Data (DC) Recommended Module Power (Wp) 300 - 550 Start up Voltage per Input@Rated condition (V) MPPT Voltage Range per Input (V) 16 - 60 Nominal DC voltage(V) - Page 8 Microinverter array (A) Output Data (AC) Max. Continous Output Power (VA) Nominal Continous Output Power (W) Nominal Output Current (A) 1.74 1.96 2.17 Max. Output Current (A) 2.00 2.25 2.50 Nominal Output Voltage (V) 220/230/240, L/N/PE Nominal Frequency (Hz) 50/60 Power Factor >0.99 default 0.8 leading …...
- Page 9 Microinverter Max. Input Voltage per Input (V) Short-current(A) Max. Input Current per Input (A) 2 × 14 Quantity of MPPTs Number of Inputs per MPPT Max. inverter backfeed current to the array (A) Output Data (AC) Max. Continous Output Power (VA) 1000 Nominal Continous Output Power (W) 1000...
-
Page 10: Microinverter Installation
Pre-installation Check Check the Package Although TSUN’s microinverters have surpassed stringent testing and are checked before they leave the factory, it is uncertain that the microinverters may suffer damage during transportation. Please check the package for any obvious signs of damage, and if such evidence is present, do not open the package and contact your dealer as soon as possible. - Page 11 Microinverter Step 1. Fix the microinverter. DANGER ·Do not install the equipment in adverse environmental conditions such as flammable, explosive, corrosive, extremely high or low temperature, and humid. WARNING ·Choose the installation location carefully and adhere to specified cooling requirements. Micro-inverter should be installed in a suitable position with good ventilation and no direct sunshine.
- Page 12 Microinverter Step 2. Connect the ground cable WARNING ·Ensure that all the microinverters are well grounded. ·Use ɸ6 screw for the ground port. Connect the ground cable to the enclosure of the microinverter. Step 3. Connect the AC cable of two microinverters WARNING ·According to the max current of the AC cables, there is a max installation quantity for the micro-inverter in each cable section.
- Page 13 Microinverter Use Nylon cable ties to fix the AC cables onto the frame. Use a Connector Protective Cap to make sure the unused AC connector to be closed. Step 4. Connect the AC end cable of each cable section DANGER ·Do not install the AC junction box without first removing AC power from the system.
- Page 14 Microinverter Separate the AC connector as shown below. Get the AC cable through the shell of AC connector and connect the cable to the right port. The definition of the port is shown below: Live (Brown/Red) Neutral (Blue/Black) Ground (Yellow-Green) Reassemble the AC connector as shown below.
- Page 15 ·Use MC4 compatible DC connectors in the inverter side of the DC extension cable, or get the DC connectors from TSUN. ·Contact PV module manufacturers for the requirements of the DC connectors in the module side of DC extension cable.
- Page 16 Microinverter Step 6. Make an installation map CAUTION ·If there is more than one installation site, please make the installation map separately and give a clear description of the installation site. ·The row of the table corresponds to the shorter side of the PV module and the column of the table corresponds to the longer side of the PV module.
-
Page 17: Remote Active Power Control
(input port) to cease the output of active power or limit active power to a regulated level. This logic input can be the RS485 port, Ethernet port, and so on. TSUN microinverter provides an extra power control device that contains an RS485 port for this remote active power control. For more information, refer to the “User Manual of TSUN power control device”. -
Page 18: Fault Code And Troubleshooting
Check the voltage of the PV module and make sure that the PV1VoltOver_Fault below the maximum DC input voltage of the voltage is microinverter. If this fault appears continuously, please contact the TSUN PV2VoltOver_Fault service. This warning mostly appears in the morning or at dusk. It’s PV1VoltLow_Fault normal and will disappear automatically. -
Page 19: Maintenance Guide
Microinverter Maintenance Guide Routine Maintenance Only authorized personnel are allowed to carry out the maintenance operations and are responsible for reporting any anomalies. Always use the personal protective equipment provided by the employer when carrying out maintenance. During normal operation, check that the environmental and logistic conditions are appropriate. Make sure that the conditions have not changed over time and that the equipment is not exposed to adverse weather conditions and has not been covered with foreign bodies. -
Page 20: Recycling And Disposal
Microinverter Recycling and Disposal This device should not be disposed of as residential waste. A Microinverter that has reached the end of its life is not required to be returned to the dealer. Users must find an approved collection and recycling facility in the area. -
Page 21: Distributor Responsibility
Within the warranty period of the microinverter, the invoice and date of purchase are required for the service. Besides, the trademark on the product should be visible, otherwise, warranty is not available. More information can be found in TSUN Warranty Policy. V1.0... - Page 22 Microinverter V1.0 - 22 -...
Need help?
Do you have a question about the TSOL-MX800 and is the answer not in the manual?
Questions and answers