
Related Manuals for Spirit CU800+


Summary of Contents for Spirit CU800+
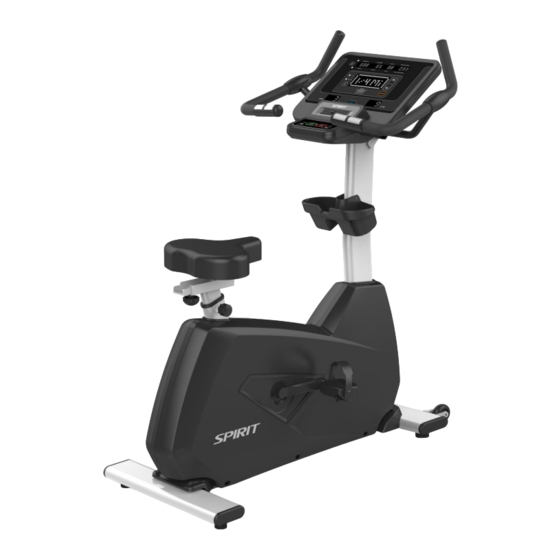
- Page 1 CU800+ Upright Bike OWNER’S MANUAL Please carefully read this entire manual before operating your new upright bike.
-
Page 2: Table Of Contents
TABLE OF CONTENTS Important Safety Instructions………………………………………………………………… Important Operation Instructions…………………………………………………………….. Assembly Instructions…………………………………………………………….…………… 4 Operation of Your Console………………………………………………….……....Using a heart rate transmitter………………………………………………………..... General Maintenance………………………………………………………………………… Exploded View Diagram………………………………………………………………………. Parts List..………………………………………………………………………………………. 30 XU880-SB023_2104(SP)A... -
Page 3: Important Safety Instructions
IMPORTANT SAFETY INSTRUCTIONS WARNING - Read all instructions before using this exercise equipment. WARNING - Heart rate monitoring systems may be inaccurate. Over exercising may result in serious injury or death. If you feel faint stop exercising immediately. Do not operate bike on deeply padded, plush or shag carpet. Damage to both carpet and bike may result. -
Page 4: Important Operation Instructions
IMPORTANT ELECTRICAL INSTRUCTIONS WARNING! Be aware that the generator is producing A.C. power while the fitness bike is being used. Do not service the fitness bike while the generator is spinning; serious electric shock could occur. NEVER expose this bike to rain or moisture. This product is NOT designed for use outdoors, near a pool or spa, or in any other high humidity environment. -
Page 5: Assembly Instructions
ASSEMBLY INSTRUCTIONS UNPACKING 1. Cut the straps then lift the box over the unit and unpack. 2. Locate the hardware package. The hardware is separated into four steps. Remove the tools first. Remove the hardware for each step as needed to avoid confusion. The numbers in the instructions that are in parenthesis (#) are the item number from the assembly drawing for reference. - Page 6 STEP 1 #151 - 3/8" x 23 x2.0T Flat Washer (2pcs) #50 - 3/8” x 135mm Hex Head Bolt (2pcs) STEP 2 #51 - 5/16” x 5/8” #99 - 5/16"x19 x1.5T #72 - 5/16"x19 x1.5T Hex Head Bolt (7pcs) Curved Washer (1pcs) Flat Washer (6pcs) STEP 3 #51 - 5/16”...
- Page 7 STEP 1 1. Install the Rear Stabilizer (No.5) onto the Main Frame (No.1) with the 2 Bolts (No.50) and 2 Washers (No.151).
- Page 8 STEP 2 1. Unravel the Computer Cable (No.29) and snake it through the Console Mast Cover (No.38) and the Console Mast (No.2) until the cable connector comes out the top opening of the console mast. Slide the Plastic Cover (No.38) onto the Console Mast, ensuring the correct orientation of the cover.
- Page 9 STEP 3 1. Run the 2 Hand Pulse Wires (No.26) and the Computer Cable (No.29) into the hole in the handle bar mounting plate and out through the hole in the console plate. Install the Handle Bar (No.3) onto the Console Mast (No.2)) with 2 Bolts (No.51), 2 Washers (No.72) and 2 Split Washers (No.103) being careful not to pinch the hand pulse wires.
- Page 10 STEP 4 1. Insert the Computer Cable (No.29) and 2 Hand Pulse Cables (No.26, 28) into the connectors in the back of the Console (No.34). Install the Console (No.34) onto the Console Mast (No.2). Secure with 4 bottom Screws (No.58). 2.
- Page 11 Suggested Posture: For proper positioning when riding the BIKE begin by adjusting the seat to approximately hip height while standing next to the bike. This will get the seat close to a position so that when the ball of your foot is on the pedal and the pedal is at the bottom of the stroke your knee will have a slight bend (approximately 5 degrees) when riding the bike.
-
Page 12: Operation Of Your Console
OPERATION OF YOUR CONSOLE Scan Button for LED Windows Dot Matrix LED Data Display Message Center Windows Scan Button for Dot Matrix Up, Down, Program Controls Charger Start, Stop, Level Controls POWER The bike has a built-in generator for power and do not need to be plugged into an AC outlet. To power up the bike simply start to pedal, the console will turn on automatically. - Page 13 Quick Start This is the quickest way to start a workout. After the console powers up you just press the Start key to begin. This will initiate the Quick Start mode. In Quick Start the Time will count up from zero, all workout data will start to accrue and the workload may be adjusted manually by pressing the Level Up and Down buttons.
- Page 14 BASIC INFORMATION The Dot Matrix Message Center, or Profile Window, will display the workout Profile. The LED Data Display Window displays pertinent exercise data. There is a RPM window for pedal speed and a Level window indicating machine resistance. The LED Data Display Windows will initially be displaying Distance, Calories, Pulse and Time Elapsed information.
- Page 15 MANUAL The Manual program works as the name implies, manually. This means that you control the workload yourself and not the computer. To start the Manual program follow the instructions below. 1. Using the Program button choose Manual then press the Enter button. 2.
- Page 16 PRESET PROGRAMS The fitness bike has five different programs that have been designed for a variety of workouts. These five programs have factory preset work level profiles for achieving different goals. HILL This program follows a triangle or pyramid type of gradual progression from approximately 10% of maximum effort (the level that you chose before starting this program) up to a maximum effort which lasts for 10% of the total workout time,...
- Page 17 PROGRAMMING PRESET PROGRAMS 1. Using the Program button select your desired program then press the Enter button. 2. The Dot Matrix Message Center will ask you to enter your Age. You may adjust the age setting, using the Up and Down keys, then press the Enter key to accept the new number and proceed on to the next screen.
- Page 18 HIIT PROGRAM The HIIT, or High Intensity Interval Training, program takes advantage of the latest trend in fitness. During the pro -gram you will perform short bursts of high intensity sprinting followed by short rest periods. HIIT is a fully customizable interval training program. You can enter the number of intervals, time of each interval Sprint and Rest periods and the work intensity of the levels.
- Page 19 CONSTANT POWER PROGRAM A Watts program is a controllable constant power whose Level adjusts when the speed is changed. To start the Constant Power program follow the instructions below. 1. Using the Program button choose the Constant Power program, then press the Enter button. 2.
- Page 20 CUSTOM PROGRAM You can build your own custom program by following the instructions below. 1. Using the Program button choose Custom program then press the Enter button to begin programming. 2. Enter your name in the Dot Matrix Message Center, the letter “A” will be blinking. Use the Up/Down buttons to select the appropriate first letter of your name (pressing the UP button will switch to the letter “B”;...
- Page 21 FITNESS TEST PROGRAM The VO2 program is based on the YMCA protocol and is a sub-maximal test that uses pre-determined, fixed work levels that are based on your heart rate readings as the test progresses. The test will take anywhere between 6 to 15 minutes to complete, depending on your level of fitness. The test ends when your heart rate reaches 85% of maximum at any time during the test or your heart rate is between 110 bpm and 85% at the end of two consecutive stages.
- Page 22 FITNESS TEST PROGRAMMING 1. Using the Program button choose Fitness Test and press Enter. 2. The Dot Matrix Message Center will display Gender. Use the Up and Down arrows if you need to change, then press Enter. The choice of gender determines which workload chart will be used for the test.
- Page 23 What your score means: VO2max Chart for males and very fit females 18-25 26-35 36-45 46-55 56-65 years years years years years years excellent >60 >56 >51 >45 >41 >37 good 52-60 49-56 43-51 39-45 36-41 33-37 above average 47-51 43-48 39-42 35-38...
- Page 24 With all Spirit Fitness machines you may use the heart rate monitor feature without using the Heart Rate program. However, when using the heart rate monitor feature in conjunction with the Heart Rate...
- Page 25 HEART RATE PROGRAM OPERATION Heart rate information is read wireless chest strap. To start the HR program, follow the directions in the Dot Matrix Message Center. 1. Using the Program button choose the HR program (65% or 80% )then press the Enter key. 2.
- Page 26 RATE OF PERCEIVED EXERTION Heart rate is important but listening to your body also has a lot of advantages. There are more variables involved in how hard you should workout than just heart rate. Your stress level, physical health, emotional health, temperature, humidity, the time of day, the last time you ate and what you ate, all contribute to the intensity at which you should workout.
-
Page 27: Using A Heart Rate Transmitter
USING A HEART RATE TRANSMITTER (OPTIONAL) How to wear your wireless chest strap transmitter: Attach the transmitter to the elastic strap using the locking parts. Adjust the strap as tightly as possible as long as the strap is not too tight to remain comfortable. -
Page 28: General Maintenance
GENERAL MAINTENANCE 1. Wipe down all areas in the sweat path with a damp cloth after each workout. 2. If a squeak, thump, clicking or rough feeling develops the main cause is most likely one of two reasons: a. The hardware was not sufficiently tightened during assembly. All bolts that were installed during assembly need to be tightened as much as possible. -
Page 29: Exploded View Diagram
EXPLODED VIEW DIAGRAM... -
Page 30: Parts List
PARTS LIST DESCRIPTION Q'TY Main Frame Console Mast Handle Bar Rear Stabilizer Seat Slider Sliding Seat Mount Fix Plate Idler Wheel Assembly Crank Axle Chain Cover Bracket Drive Belt Drive Pulley Crank Arm(L) Crank Arm(R ) 6004_Bearing 6203_Bearing Seat Generator/Brake Generator/Brake Controller Magnet 450m/m_Sensor W/Cable... - Page 31 DESCRIPTION Q'TY 34-12 Console Key Board 34-13 Wind Duct 34-14 End Cap 34-15 Deflector Fan Grill 34-16 Fan Grill Anchor Ø 35 × 10m/m_Rubber Foot Side Case (L) Sider Case (R) Console Mast Cover Front Stabilizer Cover Rear Stabilizer Cover Handgrip Side Cap (Top) Handgrip Side Cap (Bottom) Pedal...
- Page 32 DESCRIPTION Q'TY M4 × P0.7 × 5T_Nylon Nut 3/8" × 7T_Nut M10 × P1.25 × 10T_Nut Seat Fore/Aft Adjustment Knob 13/15m/m_Wrench Phillips Head Screw Driver Crank Arm End Cap Ø 5/16" × 19 × 1.5T_Curved Washer 12/14m/m_Wrench Ø 5/16" × 16 × 1.0T_Flat Washer Ø...
Need help?
Do you have a question about the CU800+ and is the answer not in the manual?
Questions and answers