Table of Contents
Advertisement
Quick Links
Advertisement
Table of Contents

Related Manuals for EVIQO EVIPOWER

Summary of Contents for EVIQO EVIPOWER
- Page 2 EVIQO TECHNOLOGIES LIMITED. The trademarks and service marks "EVIQO" and "EVIPOWER" are registered trademarks of EVIQO TECHNOLOGIES LIMITED in the United States and other countries and cannot be used without the prior written...
-
Page 3: Table Of Contents
USER MANUAL consent of EVIQO TECHNOLOGIES LIMITED. TABLE OF CONTENTS 1. IMPORTANT SAFETY INSTRUCTIONS 2. PRODUCT INTRODUCTION AND DATA SHEET 3. VERIFY CONTENTS 4. GATHER TOOLS 5. PLAN THE INSTALLATION TYPE 6. WIRE THE CIRCUIT 7. PLAN THE MOUNTING LOCATION 8. -
Page 4: Important Safety Instructions
1. Important Safety Instructions PLEASE KEEP THESE INSTRUCTIONS SAFE WARNING: This User Manual contains important instructions for your EVIQO Smart EV Charger. Remember to always follow simple precautions when using electronic products, including the following guidelines. CAUTION: Please note that strictly following the information provided in this manual does not exempt the user from their responsibility to comply with all relevant codes and safety standards. - Page 5 Circuit Breaker Rating (A) 1.2 Installation Requirements WARNING: For the installation of your EVIQO Smart EV Charger, it is recommended to only engage licensed electrician with proper qualification and sufficient installation experience to ensure compliance with both national and local building and electrical codes and standards as well as all applicable safety standards, codes, ordinances and any local safety regulations.
-
Page 6: Product Introduction And Data Sheet
CAUTION: Avoid placing the charger near hot objects and at high temperature locations and away from dangerous substances such as flammable gases and corrosive materials. Do not install EVIQO Smart EV Charger near flammable, combustible or explosive materials. ● CAUTION: Do not put heavy objects on the charger to avoid danger. - Page 7 2.2 Basic Dimensions eviqo.io...
- Page 8 2.3 Specifications of EVIQO Smart EV Charger Model Number EVIPOWER Rated Input Voltage 208-240 V AC Rated Output Current 16/32/40/48A Power Cable 39.4” cable with NEMA 14-50 plug AC Power Frequency 60 Hz Input Protection UVP, OVP, RCD (CCID20), SPD,...
-
Page 9: Verify Contents
3. Verify Contents Check the list to ensure you have this Installation Guide and all the parts listed below: eviqo.io... - Page 10 Note: If you are missing any of these parts, please contact EVIQO support. Product Name Quantity Description EVIPOWER Smart EV With attached input power cable Charger by EVIQO with NEMA 14-50 plug and output charging cable with J1772 connector Installation Guide...
-
Page 11: Gather Tools
4. Gather Tools For proper installation of the EVIQO Smart EV Charger and depending on the type of installation - plugged-in or hardwired, you need: 1) One NEMA 14-50 outlet (consult with the licensed electrician for the alternative type of... -
Page 12: Plan The Installation Type
48 Amps (which requires 60 Amps Dedicated Circuit) - please switch to “3” on the Amperage Dial Switch. To decrease the default Max Output Load of EVIQO Smart EV Charger to 32 Amps or 16 Amps - choose “1” or “0” on the Amperage Dial Switch, respectively. - Page 13 48 A 50 A 40 A 40 A 32 A 30 A 24 A 20 A 16 A CAUTION : In Canada, a plug-in installation is permitted exclusively with a 50 A dedicated circuit, according to the regulatory requirements. eviqo.io...
-
Page 14: Wire The Circuit
Do not modify the plug provided with the product – if it doesn’t fit the outlet, have a proper outlet installed by a qualified electrician. eviqo.io... -
Page 15: Plan The Mounting Location
HAZARD: If the status light indicators turn on when the EV charger is plugged in, the circuit is not off. STOP IMMEDIATELY. Unplug EVIPOWER charger and switch off the power to the outlet at the circuit breaker until the installation is complete. eviqo.io... -
Page 16: Mounting
C. Please make sure the ground in your NEMA 14-50 outlet is placed on the top to match with the plug of the input power cable which has the ground prong facing up. D. If you decide to install the EVIQO Smart EV Charger outdoors, this requires using an outdoor-rated, weather-resistant NEMA 14-50 outlet or hardwired installation. - Page 17 EVIQO Smart EV Charger onto the wall. STEP 3 Align the rear notches of the EVIQO Smart EV Charger with the wall-mounted bracket. Insert the Anti-Theft Countersunk Head Screws through the screw holes on the right and left sides of the bracket.
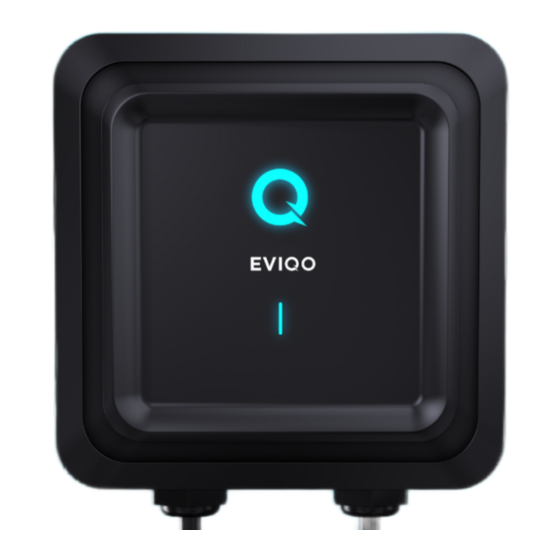
- Page 18 After plugging in the EVIQO Smart EV Charger following the installation, the charging status Q-indicator will illuminate green, indicating it is ready to charge. The smaller status indicator below will start blinking electric blue, indicating it has entered into a configuration mode.
-
Page 19: Configuring Your Device
EV Charger and pressing the RESET button located internally. This will clear the device's configuration. Note: To download the EVIQO mobile app, please use the QR codes. Once the EVIQO mobile app is downloaded, please follow the steps in EVIQO APP GUIDE:... - Page 20 Main smart features to note Please note that EVIQO Smart EV Charger is equipped with the input power cable with NEMA 14-50 plug and is ready to supply the default 40 Amps right after it’s plugged in. The device is set to the default 'Plug and Charge' mode, enabling seamless charging without any prior configuration.
-
Page 21: Light Codes
The EVIQO app offers valuable features to enhance your charging experience. It sends reminders to plug in before scheduled sessions, provides push notifications with session stats upon completion, and prevents conflicting schedules that overlap. With these capabilities, you can stay on top of your charging routine, receive important charging updates, and ensure smooth and efficient scheduling without any conflicts. - Page 22 Voltmeter Fault Flashing red 1 time Meter fault b) If the fault persists, contact EVIQO technical support. a) Unplug the connector and reboot the charger. b) Make sure the CP (Control Pilot) line is fixed in the right place.
- Page 23 Flashing red 8 a) Unplug the connector and Relay failure during Relay Fault times reboot the charger if the problem charging 3 seconds interval persists after the unplugging. eviqo.io...
- Page 24 When the EV Charger is a) Reboot the charger. Flashing red 10 powered on, it will b) Please contact a licensed RCD Self-Test Fault times self-detect whether the electrician to fix the hardware 3 seconds interval leakage detection issue. mechanism is effective. eviqo.io...
-
Page 25: Limited Warranty
All other warranties are excluded to the maximum extent permitted by law. If any implied warranty cannot be disclaimed under Contact the EVIQO support team for more details on how to extend the Limited Warranty and obtain a total of three (3) years of coverage. - Page 26 Any damage or defects not directly attributable to manufacturing or workmanship issues. 10. Any damage caused by using any third-party unauthorized software, interface, parts, or supplies not supplied and/or approved by EVIQO TECHNOLOGIES in advance in writing. ATTENTION: The Warranty will not be applicable if the original...
- Page 27 Step-by-step instruction to obtain the Warranty service: Contact Customer Service at +1 504 384 7667 (504-EVIQOUS) or support@eviqo.io to request a Return Material Authorization (“RMA”) number from EVIQO, if at any point during the Warranty period you believe you have a defective EV Charger. Please provide: ●...
-
Page 28: Compliance
For safe operation, it should be installed and used with a minimum distance of 20 cm between the radiator and your body. To ensure proper functioning, it is important to avoid placing this transmitter in proximity to any other antenna or transmitter. eviqo.io... - Page 29 eviqo.io...
Need help?
Do you have a question about the EVIPOWER and is the answer not in the manual?
Questions and answers
Can I set the dip switch to 0 for 20 amps on a unit that has a plug, i.e not hard wired. I have #12 wire and a 20 amp breaker
No, the dip switch cannot be set to 0 for 20 amps on the EVIQO EVIPOWER unit with a plug. The 20A (16A output) setting is only available for hardwired installations, not for plug-in use.
This answer is automatically generated