Table of Contents
Advertisement
Quick Links
CAUTION! Risk of Fire! DO NOT store instruction manuals inside fireplace cavity. High temperatures
could cause a fire.
INSTALLER: Leave this manual with the appliance, not inside the appliance.
CONSUMER: Retain this manual for future reference. Do not store inside the appliance
NOTICE: DO NOT discard this manual!
Models:
SUPREME-I25-IFT
SUPREME-I25-BIR
SUPREME-I30-IFT
SUPREME-I30-BIR
SUPRM-I30LP-IFT
SUPREME-I35-IFT
SUPREME-I35-BIR
This appliance may be installed as an OEM
installation in manufactured home (USA
only) or mobile home and must be installed
in accordance with the manufacturer's
instructions and the Manufactured Home
Construction and Safety Standard, Title 24
CFR, Part 3280 in the United States, or the
Standard for Installation in Mobile Homes,
CAN/CSA Z240 MH Series, in Canada.
This appliance is only for use with the type(s)
of gas indicated on the rating plate. This
appliance is not convertible for use with other
gases, unless a certified kit is used.
Heat & Glo • SUPREME-I25/30/35-IFT, SUPREME-I25/30/35-BIR, SUPRM-I30LP-IFT Installation Manual • 2532-980 Rev. AD • 3/24
Installation Manual
Installation and Appliance Setup
WARNING:
FIRE OR EXPLOSION HAZARD
Failure to follow safety warnings exactly
could result in serious injury, death, or
property damage.
• DO NOT store or use gasoline or other flam-
mable vapors and liquids in the vicinity of this
or any other appliance.
• What to do if you smell gas
- DO NOT try to light any appliance.
- DO NOT touch any electrical switch. DO
NOT use any phone in your building.
- Leave the building immediately.
- Immediately call your gas supplier from
a neighbor's phone. Follow the gas sup-
plier's instructions.
- If you cannot reach your gas supplier, call
the fire department.
• Installation and service must be performed
by a qualified installer, service agency, or the
gas supplier.
DANGER
DO NOT TOUCH GLASS
NEVER ALLOW CHILDREN
A barrier designed to reduce the risk of
burns from the hot viewing glass is provided
with this appliance and must be installed for
the protection of children and other at-risk
individuals.
Pour demander un exemplaire en français de ce manuel
d'installation, visitez www.heatnglo.com.
HOT GLASS WILL
CAUSE BURNS.
UNTIL COOLED.
TO TOUCH GLASS.
1
Advertisement
Table of Contents

Related Manuals for Heat & Glo SUPREME-I25-IFT


Summary of Contents for Heat & Glo SUPREME-I25-IFT
- Page 1 Failure to follow safety warnings exactly could result in serious injury, death, or property damage. Models: • DO NOT store or use gasoline or other flam- SUPREME-I25-IFT mable vapors and liquids in the vicinity of this SUPREME-I25-BIR or any other appliance. SUPREME-I30-IFT •...
-
Page 2: Table Of Contents
Safety Alert Key: • DANGER! Indicates a hazardous situation which, if not avoided will result in death or serious injury. • WARNING! Indicates a hazardous situation which, if not avoided could result in death or serious injury. • CAUTION! Indicates a hazardous situation which, if not avoided, could result in minor or moderate injury. •... -
Page 3: Installation Standard Work Checklist
Customer: Date Installed: Lot/Address: Location of Fireplace: Installer: Model (circle one): SUPREME-I25-IFT, SUPREME-I30-BIR Dealer/Distributor Phone # SUPREME-I30-IFT, SUPRM-I30LP-IFT, SUPREME-I35-IFT Serial #: SUPREME-I25-BIR, SUPREME-I35-BIR WARNING! Risk of Fire or Explosion! Failure to install appliance according to these instructions could lead to a fire or explosion. -
Page 4: Product Specific And Important Safety Information
Product Specific and Important Safety Information D. High Altitude Installations A. Appliance Certification NOTICE: If the heating value of the gas has been reduced, MODELS: SUPREME-I25-IFT, SUPREME-I25-BIR, these rules do not apply. Check with your local gas utility SUPREME-I30-IFT, SUPREME-I30-BIR, or authorities having jurisdiction. -
Page 5: Getting Started
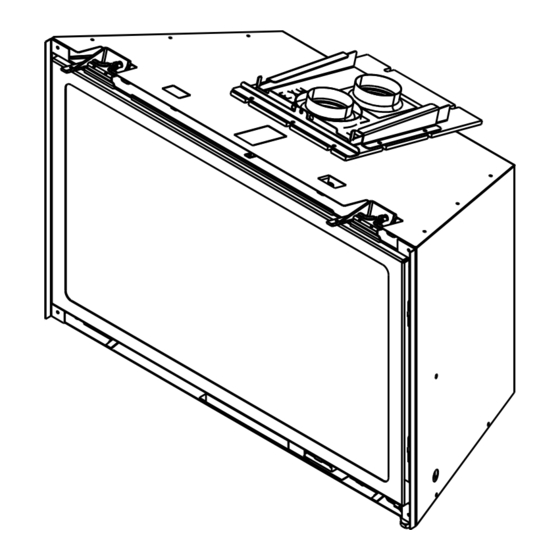
Getting Started A. Design and Installation Considerations Multi-Purpose Tool WARNING! Risk of Fire or Explosion! Read all instruc- • See Figure 2.1 for multi-purpose tool functions and tions before starting the installation features. • See Figure 2.2 for multi-purpose tool shipping location. Gas inserts are designed for installations into solid fuel masonry or UL127 listed factory built fireplaces. - Page 6 Multi-Purpose Tool - Shipping Location Multi-Purpose Tool - Storage Options OPTION A Multi-purpose tool can be stored behind the appliance front. MULTI-PURPOSE TOOL SHIPPED ZIP- TIED IN THIS AREA OF THE APPLIANCE MULTI-PURPOSE TOOL NOTE: This is not an option for all Inside Fit (INFIT) fronts.
-
Page 7: Good Faith Wall Surface
B. Good Faith Wall Surface D. Inspect Appliance and Components • Carefully remove the appliance and components from CEILING the packaging. 106 ºF • The vent system components, decorative barrier fronts SURROUND 108 ºF OPENING and surrounds are shipped in separate packages. 52 IN. -
Page 8: Appliance/Decorative Barrier Front Dimension Diagrams
Appliance / Fireplace Requirements and Clearances A. Appliance/Decorative Barrier Front Dimension Diagrams Dimensions are actual appliance dimensions. Use for reference only. For addditional clearances refer to Sections 3.D and 3.E. TOP VIEW ELECTRICAL ACCESS GAS LINE ACCESS FRONT VIEW RIGHT SIDE LEFT SIDE MODEL DIMENSIONS MODEL DIMENSIONS... - Page 9 DO NOT operate the fireplace with the barrier removed. Decorative barrier front must be ordered at time of fireplace purchase. If decorative barrier front is not present, contact dealer. NOTICE: 1/2 inch gap must be maintained or components will overheat. SUPREME-I25-IFT 22-5/8 12-9/16 1-7/8 25-5/8...
- Page 10 DECORATIVE BARRIER FRONTS - FIRESCREEN NOTICE: 1/2 inch gap must be maintained or components will overheat. SUPREME-I25-IFT 27-5/16 15-1/8 2-1/4 19-1/2 FS-MI25 SUPREME-I25-BIR SUPREME-I30-IFT 32-5/16 19-1/2 2-1/4 23-1/2 SUPREME-I30-BIR FS-MI30 SUPRM-I30LP-IFT 37-5/16 23-1/2 2-1/4 26-1/2 SUPREME-I35-IFT FS-MI35 SUPREME-I35-BIR 1041 Figure 3.3 Decorative Barrier Front Dimensions - Firescreen...
- Page 11 DECORATIVE BARRIER FRONTS - IRON AGE NOTICE: 1/2 inch gap must be maintained or components will overheat. SUPREME-I25-IFT 23-5/8 13-7/16 2-3/8 19-1/2 IA-MI25 SUPREME-I25-BIR SUPREME-I30-IFT 28-9/16 17-1/16 2-3/8 23-1/2 SUPREME-I30-BIR IA-MI30 SUPRM-I30LP-IFT 33-9/16 20-1/2 2-3/8 26-1/2 SUPREME-I35-IFT IA-MI35 SUPREME-I35-BIR 1041 Figure 3.4 Decorative Barrier Front Dimensions - Iron Age...
- Page 12 DECORATIVE BARRIER FRONTS - HALSTON ARCH NOTICE: 1/2 inch gap must be maintained or components will overheat. SUPREME-I25-IFT 26-3/8 12-1/16 3-7/8 31-1/4 19-1/2 HARC-MI25 SUPREME-I25-BIR SUPREME-I30-IFT 31-3/8 15-9/16 3-7/8 36-1/4 23-1/2 SUPREME-I30-BIR HARC-MI30 SUPRM-I30LP-IFT 36-3/8 19-1/16 3-7/8 41-1/4 26-1/2 SUPREME-I35-IFT...
-
Page 13: Minimum Fireplace Opening
• The metal floor of the solid fuel firebox may be removed B. Minimum Fireplace Opening to facilitate the installation of the insert. Minimum fireplace opening requirements for a standard 3/4 • A metal lip protuding above the hearth pad of the solid inch deep surround are shown in Figure 3.8. - Page 14 TOP VIEW FRONT VIEW SIDE VIEW 7/8 in. (Standard) 2 in. (Deep) STANDARD SURROUND MINIMUM FIREBOX OPENING 25 inch 30 inch 35 inch Location Inches Millimeters Inches Millimeters Inches Millimeters Opening Width - Rear 15-1/8 20-1/8 25-1/8 Opening Width - Front 26-5/8 31-5/8 36-5/8...
-
Page 15: Zero Clearance Wall Extension
C. Zero Clearance Wall Extension UNIT (min) (min) Surrounds MUST overlap wall extension. 25 in. 30 in. 33-1/2 A non-combustible wall extension can be used to cover 35 in. an existing masonry surface. Wall extensions are typically used to improve cosmetics. WARNING! Risk of Fire! Comply with all minimum clear- ances to combustibles as specified. - Page 16 Painting If desired finishing includes a painted wall, a high-quality 100% acrylic latex paint with a high-quality latex primer base coat are recommended around the appliance to limit STEEL STUD SIDE VIEW discoloration. Oil-based or standard acrylic paints may be more prone to discoloration due to heat exposure. MASONRY 12 in.
-
Page 17: Mantel, Wall Projections, & Hearth Extensions
D. Mantel, Wall Projections, & Hearth Ex- Mantels or Wall Projections - Non-Combustible tensions WARNING! Risk of Fire! Comply with all minimum clear- ances to combustibles as specified. Framing or finishing 12 in. material closer than the minimums listed must be construct- ed entirely of noncombustible materials (i.e., steel studs, concrete board, etc). -
Page 18: Hearth Extension
Mantels - Combustible E. Hearth Extension 12 in. 12 in. 1/2 in. Measurement to bottom Measurement of appliance: from surround = 29-1/4 in. (25") opening. = 32-3/4 IN. (30") Figure 3.17 Minimum Required 1/2 in. Gap to Bottom of Front = 36-1/4 IN. - Page 19 Vinyl Flooring SIDE VIEW Vinyl flooring is sensitive to heat. To avoid damage to the vinyl flooring, a 12 inch minimum x 12 inch mini- mum hearth is recommended when using vinyl flooring up to the wall. See Figure 3.19. If no hearth is used, it is recommended to provide a minimum of 24 inches of clearance in front of the appliance to the vinyl floor- ing OR the bottom of the appliance should be raised a...
-
Page 20: Installation Preparation
Installation Preparation D. Fireplace Conversion Notice Prepare the existing solid fuel masonry or factory built non-combustible firebox for installation. The fireplace conversion notice is included in the appliance manual bag. Permanently attach the label with the follow- A. Cleaning ing warning to the inside lower back of the fireplace firebox Prior to installing the gas insert: into which the insert is being installed. -
Page 21: Installing Vent Pipe And Appliance
Installing Vent Pipe and Appliance A. Vent Limits CAUTION! ALL vent specifications MUST be followed. This product is tested and listed to these specifications. The abbreviations listed in this vent table key are used in Appliance performance will suffer if specifications are not the vent diagrams. -
Page 22: Using Vertical Restrictor
B. Using Vertical Restrictor When 20-25+ feet of vertical venting is used, vertical restrictors will need to be adjusted. See Figure 5.2 and 5.3. TERMINATION INLET COLLAR EXHAUST COLLAR EXHAUST VENT PIPE V = 10 FT. MINIMUM 50 FT. MAXIMUM RESTRICTOR DOORS FRONT VIEW SHOWS RESTRICTORS IN THE OPEN POSITION AND BENT AT 90º... -
Page 23: Venting Components
C. Venting Components To prevent odors and cold air drafts, it may be necessary to place non-combustible insulation or field fabricated metal CAUTION! Risk of Cuts/Abrasions/Flying Debris. plates around the vent pipe flues as they go through the Wear protective gloves and safety glasses during instal- damper. -
Page 24: Connecting To Slp
D. Connecting to SLP This appliance is listed for use with LINK-DV systems and components only. It is permissible to extend venting Terminating horizontally is not allowed. above existing chimney (within specified maximum ver- Vertical terminations are measured to top of chimney. tical limits) using SLP series 6-5/8 inch gas direct-vent pipe. -
Page 25: Connecting Vent Pipe
E. Connecting Vent Pipe Reference instructions in the termination kit. • Install the 3 in. flexible vent pipe(s) down through the chimney. • Secure the exhaust flexible vent pipe to the exhaust starting collar on top of the appliance with three screws. See Figure 5.1. -
Page 26: Placing, Securing And Leveling The Appliance
F. Placing, Securing and Leveling the Appli- ance WARNING! Risk of Explosion/Combustion Fumes! Connect vent sections per installation instructions. NOTE: Use Allen bolts to • Connect exhaust vent pipe ONLY to exhaust starting adjust rear level legs. collar and termination cap center collar. •... -
Page 27: Installing Termination Cap
G. Installing Termination Cap WARNING Fire Risk. Maintain vent clearance to combustibles as specified. • DO NOT pack air space with insulation or other materials. Failure to keep insulation or other materials away from vent pipe may cause overheating and fire. CAUTION! Risk of Cuts/Abrasions/Flying Debris. -
Page 28: Electrical Information
Electrical Information A. General Information Appliance Cord Length (approximate) WARNING! Risk of Shock or Explosion! DO NOT wire Appliance Size Left Side Right Side 110-120 VAC to the valve or to the appliance wall switch. 25 in. 10 ft. 6 in. 8 ft. -
Page 29: Wiring Requirements
B. Wiring Requirements IntelliFire Touch Ignition System Wiring ® WARNING! Risk of Shock or Explosion! DO NOT wire IPI controlled appliance power cord to a switched circuit. Incorrect wiring will override IPI safety lockout. • Refer to Figure 6.2, IntelliFire Touch (IPI) Wiring Diagram. •... -
Page 30: Installation / Service For Fan
Battery Pack C. Installation / Service for Fan On units already installed, removal of decorative barrier Battery pack is not factory installed in appliances. See front and gas insert may be required. appliance manual bag for battery pack. Battery pack may be installed without batteries during normal opera- Option 1: tion. -
Page 31: Installation / Service For Halogens
D. Installation / Service for Halogens On units already installed, removal of decorative barrier front and gas insert may be required. Option 1: Option 2: • Detach flexible liner from top of unit if insert is installed by • Remove appliance front, glass, logs, base pan assem- removing the collar slide plate screw. -
Page 32: Gas Information
Gas Information A. Fuel Conversion COMPONENT • Make sure the appliance is compatible with available gas TRAY RECEIVER types. • Conversions must be made by a qualified service PRESS TAB TO technician using Hearth & Home Technologies specified RELEASE and approved parts. COMPONENT •... -
Page 33: Gas Pressure
B. Gas Pressure C. Gas Connection • Optimum appliance performance requires proper input • Refer to Reference Section 3 for location of gas line pressures. access in appliance. • Gas line sizing requirements will be determined in ANSI • The gap between supply piping and gas access hole Z223.1 National Fuel Gas Code in the USA and CAN/ may be caulked with caulk with a minimum of 300 CGA B149 in Canada. -
Page 34: High Altitude Installations
Figure 7.5. NOTICE: If sooting occurs, provide more air by opening the air shutter. Figure 7.6 Gas Valve Detail Figure 7.5 Air Shutter Air Shutter Settings Propane SUPREME-I25-IFT 1/2 in. 1/2 in. SUPREME-I30-IFT 1/2 in. Full Open SUPREME-I30-BIR 1/2 in. -
Page 35: Finishing
Finishing A. Mantel, Wall Projections & Hearth Exten- Mantels or Wall Projections - Non-Combustible sions WARNING! Risk of Fire! Comply with all minimum clear- ances to combustibles as specified. Framing or finishing 12 in. material closer than the minimums listed must be construct- ed entirely of noncombustible materials (i.e., steel studs, concrete board, etc). -
Page 36: Hearth Extension
Mantels - Combustible B. Hearth Extension 12 in. 12 in. 1/2 in. Measurement to bottom Measurement of appliance: from surround = 29-1/4 in. (25") opening. Figure 8.4 Minimum Required 1/2 in. Gap = 32-3/4 IN. (30") = 36-1/4 IN. (35") •... - Page 37 NO VINYL / ADHESIVE FLOORING Figure 8.6 Hearth - Combustible Material Exception Vinyl / Adhesive Flooring - Minimums Appliance Size Depth (X) Width (Y) 25 in. 16 in 25-3/4 in. 30 in. 16 in 30-3/4 in. 35 in. 16 in 35-3/4 in.
-
Page 38: Appliance Setup
Appliance Setup A. Fixed Glass Assembly WARNING! Risk of Asphyxiation! Handle fixed glass assembly with care. Inspect the gasket to ensure it is undamaged and inspect the glass for cracks, chips or scratches. • DO NOT strike, slam or scratch glass. •... -
Page 39: Remove The Shipping Materials
B. Remove the Shipping Materials 2. When servicing or replacing a fan, note the location of the fan and fan dampener as shown in Figure 9.4. Remove shipping brace and screws supporting logs and The fan dampener will be located under the fan. The discard (on SUPREME-I30-BIR appliance only) materials gap between the back of the outer wrap and the fan from inside or underneath the firebox. -
Page 40: Clean The Appliance
C. Clean the Appliance Clean/vacuum any sawdust that may have accumulated inside the firebox or underneath in the control cavity. D. Accessories Install approved accessories per instructions included with accessories. Contact your dealer for a list of ap- proved accessories. WARNING! Risk of Fire and Electric Shock! Use ONLY Hearth &... -
Page 41: Install The Log Assembly
LOG PLACEMENT INSTRUCTIONS G. Install the Log Assembly LOGS-2531, LOGS-2532, LOGS-2533, LOGS-2532-BIRCH, LOGS-2531- BIRCH, LOGS-2533-BIRCH MODELS: SUPREME-I25-IFT, SUPREME-I25-BIR, SUPREME-I30-IFT, SUPREME-I30-BIR, SUPRM-I30LP-IFT, SUPREME-I35-IFT, SUPREME-I35-BIR, I25X-AU, I30X-AU, I35X-AU Installation Instructions MODEL: SUPREME-I25-IFT, SUPREME-I25-BIR, Leave this manual with party responsible for use and operation. - Page 42 LOG #2: Set Log #2 on the burner between pins B and C. Rotate the log counter clockwise until it contacts both pins B and C and slide it back until it contacts the Air Scoop. Ensure Log #2 is not covering any ports. See Figure 4. AIR SCOOP AIR SCOOP SHOULDER SCREW...
- Page 43 MODELS: SUPREME-I30-IFT, SUPREME-I30-BIR, SUPRM-I30LP-IFT, I30X-AU SUPREME-I30-IFT, SUPRM-I30LP-IFT I30X-AU SRV LOGS LOG ID SRV PART # MOLDED LOG # SRV2532-711 32-1 SRV2532-712 32-2 SRV2532-713 32-3 SRV2532-714 32-4 SRV2532-715 32-5 NOTICE: To simplify the installation process, use Figure 10A and 10B to positively identify each individual log before beginning installation.
- Page 44 LOG #2: With the bark end of Log #2 towards the back of the firebox, set the log onto the burner behind log pins B and C as shown in Figure 13. Rotate the log counter clockwise so that it contacts the air scoop, along with pins B and C. LOG #3: With the burnout of Log #3 facing left, set the large end against log pin D, place the small end on the flat spot of Log #1.
- Page 45 MODELS: SUPREME-I35-IFT, SUPREME-I35-BIR, I35X-AU SUPREME-I35-IFT SRV LOGS LOG ID SRV PART # MOLDED LOG # SRV2533-711 33-1 SRV2533-712 33-2 SRV2533-713 33-3 SRV2533-714 33-4 SRV2532-715 33-5 SRV2538-715 33-5 NOTICE: To simplify the installation process, use Figure 17 to positively identify each individual log before beginning installation.
- Page 46 LOG #2: The short side of the Y on Log #2 will sit between log pins D and E, the long end of the Y will sit against log pin C. The opposite end of Log #2 will sit on the air scoop. See Figure 20. LOG #3: With the burnout facing left, place the big end of Log #3 against log pin F and slide back until it contacts log pin G as shown in Figure 21.
-
Page 47: Install Decorative Barrier Front And Surround
H. Install Decorative Barrier Front and Sur- round A decorative barrier front and surround is required to complete this installation. Installation instructions are included with the decorative barrier front and surround. Consult your dealer for a list of decorative barrier front and surround options. -
Page 48: Appliance Break-In
I. Appliance Break-In J. Heat Management Follow the initial break-in procedure below to cure the Heat Output materials used to manufacture the fireplace and the Heat Output is managed through the RC400 remote con- finishing materials around it. trol that comes standard with the fireplace. •... -
Page 49: Reference Materials
Reference Materials A. Vent Components Direct Vent Flex Liner Kits (see Figure 10.1) LINK-DV30B: Masonry 3 inch flex liner kit. Expands to 30 feet. Includes: two liners, termination cap and flashing. LINK-DV4-30B: Masonry 3 inch flex liner kit. Expands to 30 feet and 4 feet respectively. -
Page 50: Accessories
B. Accessories Optional Halogen Lights Install approved accessories per instructions included If desired, a halogen light kit may be added. Contact your with accessories. Contact your dealer for a list of ap- dealer to order the correct halogen light kit. Follow the proved accessories.
Need help?
Do you have a question about the SUPREME-I25-IFT and is the answer not in the manual?
Questions and answers