Table of Contents

Related Manuals for Oceanic Apollo 0CAPS40


Summary of Contents for Oceanic Apollo 0CAPS40
- Page 1 S a u n a & S t e a m Apollo Sauna Heater with Steam Unit OSX Saunarium Controls Assembly and operating manual Oceanic Ltd, Pountney Street, Wolverhampton, WV2 4HX Phone: 01902 450 550 sales@oceanic-saunas.co.uk www.oceanic-saunas.co.uk...
-
Page 2: Table Of Contents
12. Guarantee ..........19 Oceanic Saunas 01902 450 550 sales@oceanic-saunas.co.uk www.oceanic-saunas.co.uk... -
Page 3: Introduction
Apollo Steam OSX Introduction Thank you for choosing to buy our Oceanic Apollo Sauna Heater with steam unit and Saunarium controller please take the time to read these instructions before you begin as they contain important information about the installation and maintenance requirements. - Page 4 C - 40-50% humidity Max Temp 48 C - 50-60% humidity Sauna Caldarium Very High Heat - No Steam High Heat - Low Steam Max Temp 100 Max Temp 65 C - 30-40% humidity Oceanic Saunas 01902 450 550 sales@oceanic-saunas.co.uk www.oceanic-saunas.co.uk...
-
Page 5: Cable Requirements
Fig 1b. External View of Wiring Panel Fig 1c. Internal View of Wiring Panel with inner cladding removed Note: A Wiring panel is supplied with Oceanic Traditional Finnish to show internal cable Saunas. The internal structure of the panel includes a conduit for cables routing to run through vertically. -
Page 6: Sauna Heater Parameters
Sauna Caldarium Sanarium Tepidarium Chart 2c. OC-APS60 Sauna Heater with Steam unit Mode Heater Mini Steam Total Max Temp Steamer Power (kW) Power (kW) Power (kW) (oC) Operation (%) Sauna Caldarium Sanarium Tepidarium Oceanic Saunas 01902 450 550 sales@oceanic-saunas.co.uk www.oceanic-saunas.co.uk... -
Page 7: General Setup Overview
OC - ST Temperature Sensor 4 core 12v cable Lighting circuit - 240v (4m Supplied) Blue - 12 volts Switched from button on Keypad Mains in 230v 1N Black - 240 volts or 400v 3N Oceanic Saunas 01902 450 550 sales@oceanic-saunas.co.uk www.oceanic-saunas.co.uk... -
Page 8: Installing The Sauna Heater
The dowel plugs should be tapped in to cover the screw heads then chiselled1-2mm proud and sanded flush. Cover Trim Dowel Plug Angled 40mm screw Bracket Heater shell Fig2b. Heater Guard Fig2b. Guard Assembly Fig2c. Angled Bracket Oceanic Saunas 01902 450 550 sales@oceanic-saunas.co.uk www.oceanic-saunas.co.uk... - Page 9 640mm if installed across a glazed panel from our Vision Range saunas. Fix the guard to the wall rail using the 2No flat brackets and 35mm screws provided from beneath Flat Bracket Fig2f. Flat Bracket Oceanic Saunas 01902 450 550 sales@oceanic-saunas.co.uk www.oceanic-saunas.co.uk...
-
Page 10: Sauna Rocks
Rearrange the rocks in the heater at least once a year or twice if it is in frequent use (maximum 500 hrs). To decide the correct volume of rocks in heater, refer to table 1. Fig2g. Sauna Rock Basket Oceanic Saunas 01902 450 550 sales@oceanic-saunas.co.uk www.oceanic-saunas.co.uk... -
Page 11: Sauna Heater Parts
Cover the electrical parts Terminal plate Access to terminals Mounting To fix steam generator to bracket heater central body Feet Raise heater off ground Under tray Collect excess water Fig 3c Sauna Heater Part Diagram Oceanic Saunas 01902 450 550 sales@oceanic-saunas.co.uk www.oceanic-saunas.co.uk... -
Page 12: Minimum Clearnaces
9.3. Heater Circuit Diagram AC 230V 1N or 400V 3N AC 230V 1N or 400V 3N Fig. From control box Terminal From control box Terminal Fig 5.b OCAPS60, OCAPS75, OCA90 Fig 5.a OCAPS 40 / 50 Oceanic Saunas 01902 450 550 sales@oceanic-saunas.co.uk www.oceanic-saunas.co.uk... -
Page 13: Steam Generator Unit
Carefully remove screws holding the cover trim in place. • Line the mounting tabs on the steamer with gaps in heater cover trim • Slide steamer into position and fix to tabs Fig 6b using the screws Oceanic Saunas 01902 450 550 sales@oceanic-saunas.co.uk www.oceanic-saunas.co.uk... -
Page 14: Safety Precautions
(fig 6c). Do not add aroma directly into the tank as it may cause boiling water to spit out of the top rather than steam. iii. Make sure to drain down the mini steam generator at the end of your bathing session Oceanic Saunas 01902 450 550 sales@oceanic-saunas.co.uk www.oceanic-saunas.co.uk... -
Page 15: Temperature Sensor
9 To temperature sensor Fig 10. Control Box Parts 11.2. Saunarium Control Parameters Model Working Temperature Dimension Time (m) L x W x H (mm) OC-ST 15-240 30 - 100 150 x 92 x 22 Oceanic Saunas 01902 450 550 sales@oceanic-saunas.co.uk www.oceanic-saunas.co.uk... -
Page 16: Saunarium Control Box Circuit Diagram
Controller(Voltage:DC5V) K5~K8 on For OSX Touchscreen keypad the switches J4,J5,J6 should be be positioned to the left as shown in the diagram. For saunarium (stauna) ensure switch JP3 is in the right postion. Oceanic Saunas 01902 450 550 sales@oceanic-saunas.co.uk www.oceanic-saunas.co.uk... - Page 17 Drill 30mm hole for the cable and pre drill the four holes using a 3mm drill bit. • Fit backbox to the front of the sauna (or wall) using 30mm screws. • Connect cable and push keypad in to the backbox. Oceanic Saunas 01902 450 550 sales@oceanic-saunas.co.uk www.oceanic-saunas.co.uk...
- Page 18 To remove back box use a flat head screwdriver at the tabs along the long edges of the back- box to lift the keypad away from the casing. Suggested cut out dimensions Back-box dimensions Oceanic Saunas 01902 450 550 sales@oceanic-saunas.co.uk www.oceanic-saunas.co.uk...
- Page 19 Both the Keypad and the Control box must be installed outside the sauna cabin. The control box can be located on top of the sauna and the keypad should be located on the front of the sauna normally on the front of a wiring panel if supplied as part of an Oceanic saunarium cabin.
- Page 20 Light button Switches light on Changes white once pressed Fan button Activates fan (optional, not supplied with Oceanic Saunarium. Can be used as a secondary light circuit) Settings button Enter settings page Oceanic Oceanic Saunas 01902 450 550 sales@oceanic-saunas.co.uk www.oceanic-saunas.co.uk...
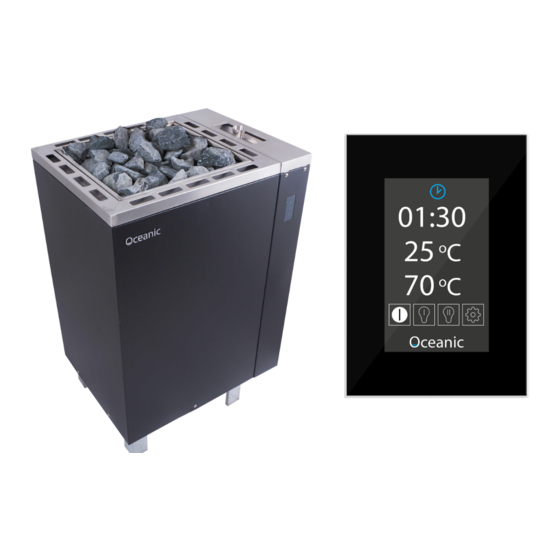
- Page 21 Time remaining until heater switches off 25/40 Steam mode icon showing Tepidarium Touch icon to enter steam mode settings Temperature display Current temperature / Set temperature Oceanic Light Icon White Shows light is switched on Oceanic Saunas 01902 450 550 sales@oceanic-saunas.co.uk www.oceanic-saunas.co.uk...
- Page 22 Click to change between heat mode and wait mode Cancel/Back Button Cancel changes and return to previous screen OK Button Confirm changes and return to previous screen. Settings will be saved even if screen is turned off. Oceanic Saunas 01902 450 550 sales@oceanic-saunas.co.uk www.oceanic-saunas.co.uk...
- Page 23 Use slider to set the brightness of the lighting circuit Cancel Button Cancel changes and return to previous screen OK Button Confirm changes and return to previous screen. Settings will be Oceanic saved even if screen is turned off. Oceanic Saunas 01902 450 550 sales@oceanic-saunas.co.uk www.oceanic-saunas.co.uk...
- Page 24 PIN is entered and settings unlocked. Only Power On/Off, Light, and Fan can be operated if settings Unlock Settings are locked. Unlock Settings (selected) Unlocks the settings to allow adjustments to be made. Oceanic Oceanic Saunas 01902 450 550 sales@oceanic-saunas.co.uk www.oceanic-saunas.co.uk...
- Page 25 Then push down the black cap on top of the overheat button. Plastic Cover Plastic Cover Temperature Sensor Reset Button Bracket Overheat Button Oceanic Saunas 01902 450 550 sales@oceanic-saunas.co.uk www.oceanic-saunas.co.uk...
-
Page 26: Maintenance
13.1. Sauna Heaters & Sauna Cabins Maintenance All Sauna products supplied by Direct Saunas Limited and Oceanic Saunas are for use in an indoor environment such as a domestic house or a club building and should not be used in any other circumstances. -
Page 27: Steam Unit Maintenance
Low levels of hardness descale once every 250 to 1000 hours of operation. To descale the generator use a solution of weak acid crystals (such as citric acid) mixed with water Citric acid can be purchased from: www.oceanic-saunas.co.uk Descaling procedure i.
Need help?
Do you have a question about the Apollo 0CAPS40 and is the answer not in the manual?
Questions and answers