
Subscribe to Our Youtube Channel
Related Manuals for Weather Fast 1934795


Summary of Contents for Weather Fast 1934795
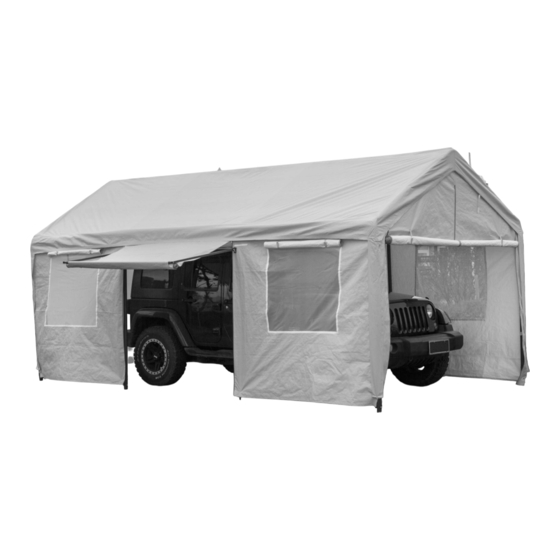
- Page 1 PARTY TENT 10' x 20' x 9'2" (3 x 6 x 2.8 m) ASSEMBLY MANUAL Model NO.: 1934795 Tools required for assembly (not included)
-
Page 2: Table Of Contents
TABLE OF CONTENTS IMPORTANT SAFETY INSTRUCTIONS…..................................................................................2 INTENDED USE PARTS LIST............................................3-4 ASSEMBLY PREPARATION ........................................4 ASSEMBLY ............................................5-11 IMPORTANT NOTICE ..........................................12 IMPORTANT SAFETY INSTRUCTIONS WARNING! Read all safety instructions to reduce the risk of injury or death. This is a temporary structure and is not recommended as a permanent structure. Choose your shelter's location carefully. -
Page 3: Parts List
PARTS LIST Qty. Part# Description Drawing Incline Bar Horizontal Tube Post Tube Post Tube 1 3-Way Connector 4-Way Connector Awning Arm Awning Front Girder Foot Plate M6X16 Bolt M6X30 Bolt Handle Bolt... -
Page 4: Assembly Preparation
PARTS LIST Qty. Part# Description Drawing M8 Nut Roof Cover Side Panel with Door Side Panel without Door Front Door Panel Back Door Panel Ball Tie Down Ground Stake Nylon Rope Allen Wrench Expansion Bolt ASSEMBLY PREPARATION ● Place all parts from the packaging box in a cleared area and arrange them on the ground in front of you. ●... -
Page 5: Assembly
ASSEMBLY Step 1 Lay out the roof frame parts as shown below. ● ● Please note: The Parts #2 are used to form the side and peak. The Parts #1 are used to form the roof rafter. Start with the center and complete the center frame first. Then assemble each side. ●... - Page 6 ASSEMBLY Step 2 Connect 4 legs of one side to the 4-way and 3-way connectors. ● Note: Post Tubes #4 are designed for side panel with door, so please choose the right position for Post Tube #4. Please also note that there are holes on Post Tube #4 and they should be assembled as shown below. Step 3 Unfold the cover with the grommets toward the cover's bottom and place the cover over the frame.
- Page 7 ASSEMBLY Step 4 ● Connect the other 4 legs for the other side the same way. Step 5 Insert the eight legs into the foot plates and secure with Handle Bolts #13 and M8 Lock Nuts #14. ●...
- Page 8 ASSEMBLY Step 6 Door Panel and Side Panel Assembly. ● There are two door panels(one front panel and one back panel) and two side panels(one with zippers and one without) in ● total. Side panel with zippers should be assembled to the side with Post Tube #4.
- Page 9 ASSEMBLY A) Attach the Door Panels to the inclined Bars of the rears frame with Ball Tie Downs as shown in Diagram A. ● Insert the ball tie down into the eyelet and wrap the cord around the tube, then hook it over the ball. ●...
- Page 10 ASSEMBLY Step 7 ● Anchoring the canopy. There are two ways provided to anchor this canopy to the ground. ● Option 1 Assemble the canopy on grass or dirt. Secure the canopy to the ground by inserting 8 ground stakes #21 through each foot plate. Then tie the nylon rope to each corner of the canopy and secure to the 4 ramaining ground stakes.
- Page 11 ASSEMBLY Step 8 ● Assemble the side panel door support. ● Attach the Awning Arms #7 to the Post Tubes #4 with M6X16 Bolts #10 by Allen Wrench #23 Thread the Awning Front Girder #8 through sleeve of the side panel and attach each end of the Girder to the other end of Awning Arms #7 with M6X30 Bolts #11 by Allen Wrench #23.
-
Page 12: Important Notice
IMPORTANT NOTICE IMPORTANT NOTICE: PLEASE READ CAREFULLY PRECAUTIONS WHICH MUST BE FOLLOWED: Keep all flame and heat sources away from this tent fabric. The tent fabric will burn if left in continuous contact with any flame source. DO NOT cook underneath or near canopy. DO NOT store or use flammable liquids underneath or near canopy.
Need help?
Do you have a question about the 1934795 and is the answer not in the manual?
Questions and answers
How can I order a new roof cover?