Table of Contents
Advertisement
Quick Links
Advertisement
Table of Contents

Related Manuals for Woodway CLMBR 02


Summary of Contents for Woodway CLMBR 02
- Page 1 USER MANUAL...
-
Page 2: Table Of Contents
TABLE OF CONTENTS Safety Information Installation Ge ting Started Safety Labels Build Prep Moving The CLMBR Camera Console Leveling the CLMBR Screen Adjustment Base Stepping On Home Screen Notices Dip Bars Stepping O f Widgets Proper Form Handle In-Class Screen Support Handle Adjustments Display... -
Page 3: Safety Information
SAFETY INFORMATION SAFETY LABELS Consult a physician before incorporating CLMBR into your fitness routine. Maintain 5 feet of open space behind the CLMBR. Incorrect or excessive training may result in injury. If you experience faintness, chest pain, or shortness of breath while using the CLMBR, stop immediately and consult your physician. -
Page 4: Notices
NOTICES SUPPORT This device complies with part 15 of the FCC Rules. Operation is subject to the following two conditions: (1) this device must not cause harmful Member satisfaction is our priority. Should you need assistance or if you are having trouble with your CLMBR, please contact the CLMBR Customer interference, and (2) this device must not accept any interference received, including interference that may cause undesired operation. - Page 5 SPECIFICATIONS Machine Display *Connected display shown Base Dimensions Power Audio 2.1 Surround Sound System 35 in x 32 in Wa ts, wired connection Height Connectivity Screen Wi-fi 88 in / Fits any ceiling 8 t or over Anti-glare 21” HD Touchscreen Weight Mobile App Bluetooth...
-
Page 6: Overview
OVERVIEW Right Upright Le t Upright Le t Handle Touch Display Right Pedal Right Handle Display Tube Resistance Knob Center Console U-Base Water Bo tle Holder Le t Pedal Le t Dip Bar Leveling Feet Right Dip Bar OVERVIEW OVERVIEW... -
Page 7: Box Contents
INCLUDED TOOLS BOX CONTENTS Please verify that all tools are included in box. Please verify that all parts are included in box. Ratchet 6mm Hex L-Key 5mm Hex L-Key Console Pin (A) x2 Leveling Feet (E) x2 × 50mm (B) x2 ×... -
Page 8: Build Prep
STEP Build Prep... - Page 9 STEP 1a STEP 1b Do Not Remove Pins Clear enough space (approximately 8 t x 10 t or 2.4m x 3m) Place Center console so that the cable is by the upright to set up your CLMBR. Two people are recommended to with the jack.
-
Page 10: Console
STEP Hardware needed: Console Console Pins (A) x2 Install... - Page 11 STEP 2a STEP 2b STEP 2c STEP 2d Roll Center console forward. Lower console onto le t upright. With upright Insert console pin (A) into upright coupler pins still installed, the pedal or handle can be and console. Ensure the ring on the pin moved up and down to help align couplers.
- Page 12 STEP 2e STEP 2f Lower the right upright onto the console Rotate the machine down to the floor (fig. 2.1). Insert console pin (A) into upright (fig. 2.3). Plug the console power cable coupler and console (fig. 2.2). into the right upright jack (fig. 2.4). WARNING: Make sure console power cable does not get pinched.
- Page 13 STEP Hardware needed: × 50mm (B) x2 U-Base × 25mm (C) x8 Install Washer (D) x10 Leveling Feet (E) x2...
- Page 14 STEP 3a STEP 3b Plug the cable from the U-Base into the Slide the U-Base on to the grooved jack located on the face of the right part of the upright ankle. upright ankle. Ensure both sides slide on at the same rate.
- Page 15 STEP 3c Tools Needed: Thread the 2 leveling feet (E) all the way into the bo tom of the uprights, but do not tighten or they may be di ficult to 6mm Hex adjust later. Ratchet × 50mm (B) A tachment Washer (D) x2 Start threading by hand 2 long bolts (B) and 8 short bolts (C) with washers (D)
- Page 16 Step 3d Step 3e Remove the console pins (A). Rotate right STEP 3 | U-BASE INSTALL STEP 3 | U-BASE INSTALL...
-
Page 17: Dip Bars
STEP Hardware needed: Dip Bar Holder (F) x2 Dip Bars M × 110mm (G) x4 Install Le t Dip Bar Right Dip Bar... - Page 18 STEP 4a Tools Needed: If the bolts do not start threading, rock the console to help Repeat for the right dip bar. Tighten all 4 dip bar bolts. align the holes. Ratchet Hex L-Key 6mm Hex Right Dip Bar Loosely install 2 bolts (G) through one dip bar holder (F) and Ensure the dip bar curves down and out from under the the le t dip bar into the console.
- Page 19 STEP 4b STEP 4c Push the display tube forward to prevent damage while rolling Rotate Right the machine onto its back. STEP 4 | DIP BARS INSTALL STEP 4 | DIP BARS INSTALL...
-
Page 20: Handle
STEP Hardware needed: Handle Le t Handle Install Right Handle... - Page 21 STEP 5a STEP 5b Tools Needed: Li t the handle release lever and continue to slide the handle to the top of the track. Release the lever and ensure the handle locks into place. 5mm Hex L-Key Reinstall the stop bolt. Remove the lower stop bolt from the handle carriage.
-
Page 22: Display
STEP Hardware needed: Display M × 30mm (I) x2 Install... - Page 23 STEP 6a STEP 6b STEP 5c Raise the machine to standing. STEP 6 | DISPLAY INSTALL STEP 6 | DISPLAY INSTALL...
- Page 24 STEP 6d STEP 6e Tools Needed: Ratchet No. 2 Philips Head M × 30mm (I) x2 *Connected display shown. Both Pure and Connected displays mount and plug-in the same way. STEP 6 | DISPLAY INSTALL STEP 6 | DISPLAY INSTALL...
-
Page 25: Final Steps
STEP Hardware needed: Final Resistance Knob (H) Cup Holder (J) Steps M × 10mm (K) - Page 26 STEP 7a STEP 7b Slide the resistance knob (H) onto Remove pin from both uprights. Le t Upright Right Upright the console housing sha t by aligning the D-profiles. Press down firmly to fully seat the knob. Check that there is a clicking sound when the knob is turned.
- Page 27 STEP 7c STEP 7d STEP 7 | FINAL STEPS STEP 7 | FINAL STEPS...
-
Page 28: Ge Ting Started
Ge ting Started... -
Page 29: Moving The Clmbr
MOVING LEVELING THE CLMBR THE CLMBR Allow a clearance of 48in/122cm behind the Install the machine on a stable level surface. machine. Place a mat on the floor under the machine. Stand behind the machine with one foot on the u-base. Adjust the leveling feet under the base until the machine is level and stable. -
Page 30: Stepping On
STEPPING ON STEPPING OFF THE CLMBR THE CLMBR Use your foot to press one pedal to the Use your foot to press one pedal to the ground. ground. Ball of foot just beyond the center of pedal. Using the dip handles for stability, slide your foot o f of the higher pedal, stepping backward to the ground. -
Page 31: Proper Form
PROPER HANDLE FORM ADJUSTMENTS * Handle adjustments may vary Ball of foot just beyond the center of pedal Fig. 1 Fig. 1 Li t handle release lever then slide handle up Knees over ankles or down along track. Release the lever and ensure the handle is Neutral spine, with torso parallel to uprights locked into place. -
Page 32: Resistance Knob
RESISTANCE CAMERA KNOB The camera can be turned on or o f by sliding the The machine has resistance levels 1 – 11. switch at the top of the tablet. Turn the knob to the right to increase the The camera is on in the le t position, and o f in the resistance, and le t to reduce resistance. -
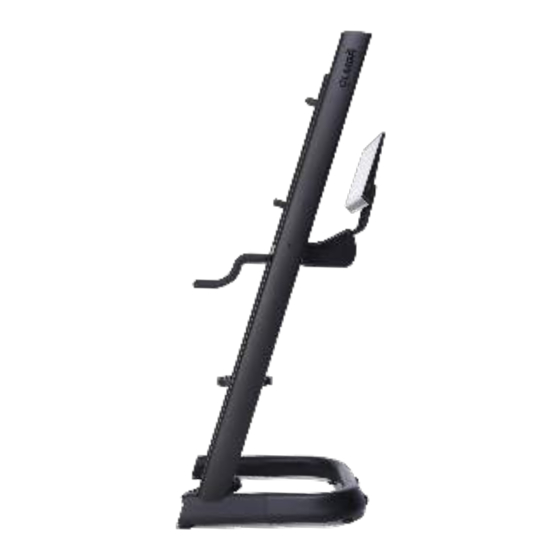
Page 33: Screen Adjustment
SCREEN ADJUSTMENT Tilt screen forward to optimize viewing angle for o f-machine workouts. Adjust volume as needed for o f-machine workouts. SCREEN ADJUSTMENT... -
Page 34: Home Screen
HOME SCREEN HOME SCREEN (WIDGET EDITOR) SETTINGS WIDGET SELECTION PANEL Wifi, Bluetooth, ANT+, and Volume Se tings EDIT WIDGETS CLOSED CAPTIONS OVERALL Toggle closed captions STATS on or o f WIDGET TYPE TOGGLE WIDGET TYPE USER EXPERIENCE LEVEL SWITCH USER NAVIGATION NOTIFICATIONS HOME SCREEN... - Page 35 HOME SCREEN WIDGETS Small Widgets Activity Friends Content Progress Featured Content Utilities HOME SCREEN | SMALL WIDGETS HOME SCREEN | SMALL WIDGETS...
- Page 36 HOME SCREEN WIDGETS Medium Widgets Category Lists HOME SCREEN | MEDIUM WIDGETS HOME SCREEN | MEDIUM WIDGETS...
-
Page 37: In-Class Screen
IN-CLASS SCREEN IN-CLASS SCREEN (PAUSED) HEART RATE ACHIEVEMENTS PACE RESISTANCE PAUSE/PLAY Measured in feet per Position of di ficulty minute 1-11 CALORIES TOGGLE ON/OFF MUSIC Display or hide widgets INFORMATION The current song title and album art is displayed CLOSED CAPTIONS Toggle closed captions on or o f REACH... -
Page 38: Faqs
CARE AND MAINTAINENCE Wipe down your machine a ter each use. DO NOT spray the machine or display directly with cleaner. Why does my machine not move? Why does my machine not move? Check that your upright lock out pins are removed from the machine. Lightly pull on the upright power cable, it should have some slack. Use dish soap and water or a mild household cleaner to clean the frame Only use cleaners specified for touch screens to clean the display. - Page 39 v4.3.4 Climb to elevate yourself © CLMBR 2023, CLMBR Inc. All rights reserved. CLMBR.COM...
Need help?
Do you have a question about the CLMBR 02 and is the answer not in the manual?
Questions and answers