Subscribe to Our Youtube Channel
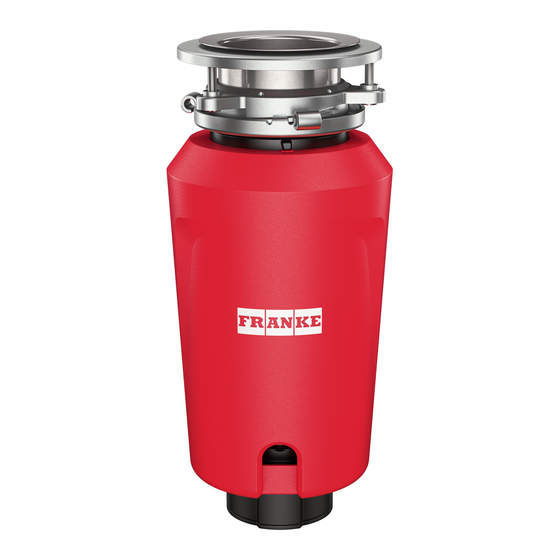
Summary of Contents for Franke SLIM45
- Page 1 SLIM45 SLIM75 SLIM100 SLIM50 SLIM75BF SLIM125 Food Waste Disposer User and installation manual IM-Franke-PL-231...
- Page 2 SLIM45 / SLIM50 / SLIM75 / SLIM75BF / SLIM100 / SLIM125 SLIM45 / SLIM50 SLIM75 / SLIM100 / SLIM125 SLIM75BF...
-
Page 3: Table Of Contents
SLIM45 / SLIM50 / SLIM75 / SLIM75BF / SLIM100 / SLIM125 Table of contents About this manual Intended use Safety information Assembly parts Removal of old unit Plumbing connection Installation of mounting assembly Electrical connection Attaching discharge elbow Air switch operated... -
Page 4: About This Manual
SLIM45 / SLIM50 / SLIM75 / SLIM75BF / SLIM100 / SLIM125 About this manual Keep the user manual. This user manual applies to several models of the device. Thus it may be possible that some Use the device described in this user manual of the described features and functions are not only according to the intended use. - Page 5 SLIM45 / SLIM50 / SLIM75 / SLIM75BF / SLIM100 / SLIM125 When not operating a disposer, leave the stopper in place to reduce the risk of objects falling into the disposer. Do not operate disposer unless splash guard is in place.
-
Page 6: Assembly Parts
SLIM45 / SLIM50 / SLIM75 / SLIM75BF / SLIM100 / SLIM125 Assembly parts Stopper Removable splash guard Sink flange Rubber gasket Flat gasket Support flange Upper mounting ring Mounting screws Retainer ring Cushion ring* Lower mounting ring* Mount tab Dishwasher inlet * The cushion ring and the lower mounting ring will remain attached to the disposer during installation. -
Page 7: Removal Of Old Unit
SLIM45 / SLIM50 / SLIM75 / SLIM75BF / SLIM100 / SLIM125 Removal of old unit Typical instructions, your model may vary. 4. To remove remaining mounting system from the sink, loosen the screws, push mounting Before starting this step, turn off electrical ring up. -
Page 8: Plumbing Connection
SLIM45 / SLIM50 / SLIM75 / SLIM75BF / SLIM100 / SLIM125 Plumbing connection If dishwasher and/or overflow is not to be Dishwasher Dishwasher Hose connected go on to next section. Connection If you are utilizing a dishwasher, this should Overflow... - Page 9 SLIM45 / SLIM50 / SLIM75 / SLIM75BF / SLIM100 / SLIM125 top of the disposer opening. Do not remove the cushion ring. 4. Be sure the sink is clean. Install a bead of plumbers putty to the sink flange (1). From...
-
Page 10: Electrical Connection
SLIM45 / SLIM50 / SLIM75 / SLIM75BF / SLIM100 / SLIM125 Electrical connection countertop and at a minimum of one meter from the side of the sink, away from water Connect disposer to appropriate splashes and out of the reach of children. -
Page 11: Attaching Discharge Elbow
SLIM45 / SLIM50 / SLIM75 / SLIM75BF / SLIM100 / SLIM125 5. Is the disposer earthed? Attaching discharge elbow Warning: this appliance must be earthed! 1. Connect the waste elbow to the disposer In the event of a malfunction of breakdown, by sliding the flange against the rubber earthing reduces the risk of shock. -
Page 12: Air Switch Operated
SLIM45 / SLIM50 / SLIM75 / SLIM75BF / SLIM100 / SLIM125 Air switch operated Installation and operating instructions 1. If a hole does not already exist - drill a hole of Disposer Air Switch Assembly 35 mm to 40 mm into the sink or countertop where the actuator button (1) is to be placed. - Page 13 SLIM45 / SLIM50 / SLIM75 / SLIM75BF / SLIM100 / SLIM125 Model SLIM75BF Do not put inside: – Caustic Soda and drain cleaning chemicals 1. Remove sink stopper. Turn on a medium (Hydrochloric and muriatic acid),as they flow of cold water.
-
Page 14: Troubleshooting
SLIM45 / SLIM50 / SLIM75 / SLIM75BF / SLIM100 / SLIM125 Troubleshooting Before seeking repair or replacement, we If turntable does not rotate freely: recommend that you review the following: 1. Turn off disposer, then check for any foreign object lodged between the turntable and Loud noises (other than those during grinding grind ring. -
Page 15: Disposal
SLIM45 / SLIM50 / SLIM75 / SLIM75BF / SLIM100 / SLIM125 Disposal disposal. The barred dustbin symbol on the The symbol on the product or on the appliance indicates that at the end of its packaging indicates that the device... - Page 16 WMTS. 028 WM-022380 SAA131664 * This product complies with conformity requirements of the applicable EU and UK and Australia Regulations.
- Page 17 United Kingdom Franke UK Ltd. Manchester M22 5WB Phone +44 161 436 6280 franke.com...


Need help?
Do you have a question about the SLIM45 and is the answer not in the manual?
Questions and answers