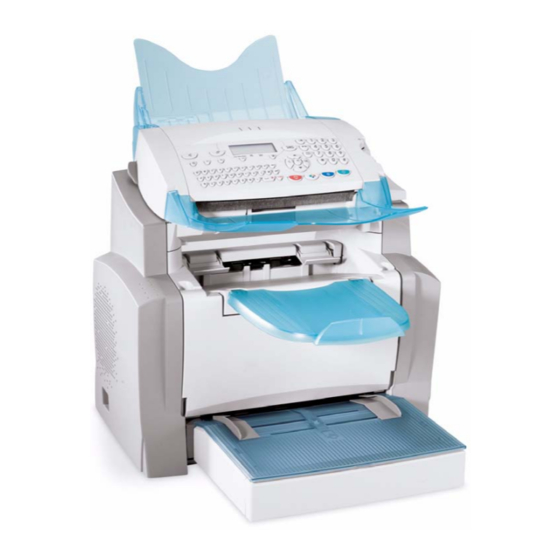
Xerox FaxCentre 2121 User Manual
Xerox faxcentre 2121: user guide
Hide thumbs
Also See for FaxCentre 2121:
- Service manual (226 pages) ,
- Specifications (2 pages) ,
- Quick reference manual (2 pages)
Table of Contents
Advertisement
Quick Links
Advertisement
Table of Contents

Related Manuals for Xerox FaxCentre 2121


Summary of Contents for Xerox FaxCentre 2121
-
Page 1: User Guide
FaxCentre 2121/2121L User Guide Part Number: - 252780989 Version: - 3.0 06.11.15... - Page 2 ® Xerox , and all Xerox products mentioned in this publication are trademarks of Xerox Corporation. Product names and trademarks of other companies are hereby acknowledged. Changes, technical inaccuracies and typographical errors will be corrected in subsequent...
-
Page 3: Table Of Contents
Table of Contents 1 Safety & Environment ........1-1 Operator Accessible Areas. - Page 4 Access to functions ..........3-3 Functions list .
- Page 5 Procedure........... . 5-8 Exporting a directory .
- Page 6 Communication errors ......... 7-15 Printer errors .
- Page 7 Control Panel Overview key: manual line taking, tone monitoring during fax transmission key: attachment to a typed-in mail key: scanning resolution during transmission or copy 4 Scanning resolution during fax transmission (Fine, SFine, Photo) "Line" icon: On: communication in progress, Blinking: communication being established Printer Paper Jam indicator "Toner"...
-
Page 9: Safety & Environment
Read these safety notes carefully before using this product to ensure you operate the equipment safely. Your Xerox product and supplies have been designed and tested to meet strict safety requirements. These include Safety Agency approval, and compliance to established environmental standards. -
Page 10: Maintenance
Safety & Environment Maintenance Any operator maintenance procedures will be described in the customer documentation supplied with the product. Do not carry out any maintenance on this product that is not described in the customer documentation. • This product is equipped with a 3-wire type plug, provided with a protective earthing pin. -
Page 11: Safety Standards
• This equipment is to be used on an appropriate branch circuit/electrical outlet. If this machine needs to be moved to a different location, contact a Xerox service representative or your authorized local representative or service support organisation. -
Page 12: Laser Safety Information
Safety & Environment USA/CANADA: This XEROX product is certified by the following Agency using the Safety Standards listed. Agency: UNDERWRITERS LABORATORIES INC. Standard: UL60950-1, 2003 Edition. Certification is based on reciprocity agreements, which include requirements for Canada. Laser Safety Information... -
Page 13: Radio Frequency Emissions
Shielded interface cables must be used with this equipment to maintain compliance with FCC regulations in the United States. CE Mark The CE mark applied to this product symbolizes Xerox's declaration of conformity with the following applicable Directives of the European Union as of the dates indicated: January 1, 1995: Council Directive 73/23/EEC amended by Council Directive 93/68/EEC, approximation of the laws of the member states related to low voltage equipment. -
Page 14: Regulatory Information
Safety & Environment In order to allow this equipment to operate in proximity to Industrial Scientific and Medical (ISM) equipment, the external radiation from the ISM equipment may have to be limited or special mitigation measures taken. Shielded interface cables must be used with this product to maintain compliance with Council Directive 89/336/EEC. - Page 15 Repairs to the machine and fax kit should be made only by a Xerox representative or an authorized Xerox service agency. This applies at any time during or after the service...
-
Page 16: Canadian Regulatory Information For The Fax Kit Option
If your office has specially wired alarm equipment connected to the telephone line, ensure the installation of this Xerox equipment does not disable your alarm equipment. If you have questions about what will disable alarm equipment, consult your telephone company or a qualified installer. -
Page 17: Illegal Copying
Republic Denmark Finland In the event of problems, you should contact your local Xerox representative in the first instance. This product has been tested to and is compliant with TBR21, a technical specification for terminal equipment for use on analogue switched telephone networks in the European Economic Area. - Page 18 Safety & Environment Certificates of Deposit National Bank currency Federal Reserve Bank Notes Gold Certificates Treasure Notes Fractional Notes Paper money Bonds and obligations of certain agencies of the government, such as FHA Bonds (US Savings Bonds may be photographed only for publicity purposes in connection with the campaign for the sale of such bonds.) Internal Revenue Stamps (If it is necessary to copy a legal document on which there is a cancelled revenue stamp, this may be done provided the reproduction of...
- Page 19 • Badges, identification cards, passes or insignias carried by military or Naval personnel, or by members of the various Federal Departments and Bureaus, such as the FBI and Treasury (unless the photograph is ordered by the head of such Department or Bureau). CAUTION: Copying of the following is also prohibited in certain states: automobile licences, driver’s licenses, and automobile Certificates of Title.
-
Page 20: Usa
Xerox ENERGY STAR equipment is preset at the factory to enter a “low power" state and/or shut off completely after a specified period of use. These energy-saving features can reduce product energy consumption in half when compared to conventional equipment. - Page 21 Safety & Environment exhibit compatibility with recycled supplies. Currently, Environmental Choice has more than 1600 approved products and 140 licensees. Xerox has been a leader in offering EcoLogo approved products. 1-13...
-
Page 22: Product Recycling And Disposal
Some equipment may be used in both a domestic/household and a professional/ business application. If you are managing the disposal of your Xerox product, please note that the product contains lead, mercury, and other materials whose disposal may be regulated due to environmental considerations in certain countries or states. -
Page 23: Mercury Safety
For more information about Xerox environmental programs, visit www.xerox.com/environment. If you are managing the disposal of your Xerox product, please note that the product may contain, lead, mercury, perchlorate and other materials whose disposal may be regulated due to environmental considerations. - Page 24 Safety & Environment 1-16...
-
Page 25: Installing Your Machine
2 Installing your machine Installation requirements The correct location helps to ensure that your machine provides you with the long service life for which it is designed. Check to make sure that the location you select has the following characteristics: •... -
Page 26: Operational Precautions
Installing your machine • has no possibility of the machine being splashed with water or other liquids; • is clean, dry, and free from dust. Operational precautions Note the following important precautions when using the machine. Operating environment The following describes the operating environment required when using the machine: •... - Page 27 • Do not allow water or other liquids to spill on or near the machine. Fire or electrical shock can occur should water or liquid come into contact with the machine. • Should liquid or any piece of metal accidentally get inside the machine, immedi- ately power off the machine, unplug the power cable, and contact your dealer.
-
Page 28: Unpacking The Machine Parts
Installing your machine Unpacking the machine parts Remove the packing materials and check for the parts shown below. 1: Document output tray 2: Printer output tray 3: Paper feed tray 4: AC power cable (depending on country) 5: Telephone line cable (depending on country) 6: Machine 7: Document feed tray... - Page 29 Installing your machine Pull out the two pads from the paper feed inlet. Move the paper size guides to one side and pull out the plastic tab and the shipping tape from the paper feed inlet.
-
Page 30: Machine Overview
Installing your machine Machine Overview Document feed tray Adjustable paper guide Scanner release button On/Off switch Second cassette paper tray (500 pages) Chip card reader Telephone line socket Telephone cable Scanner Control Panel Document output tray Paper output tray Machine Paper feed tray Second paper cassette (optional) -
Page 31: Installing The Removable Parts
Installing the removable parts This section describes the installation of the machine's removable parts. Installing the paper tray Line up the tray with the left and right guides and gently push the tray in until it stops (as illustrated below). Install the tray cover. -
Page 32: Installing The Document Feed Tray
Installing your machine Release the tray so that it recovers its initial shape. Installing the document feed tray Insert the base of the document feed tray into the two slots located behind the control panel on the back of the machine. -
Page 33: Installing The Original Document Output Tray
Installing the original document output tray Insert the document output tray into the two slots located just below the control panel on the front of the machine. Loading paper Move the paper size guide to one side. Place a stack of paper into the tray. In case of letterhead paper, be sure to place the paper printed side up. -
Page 34: Loading Paper Manually
Installing your machine Fit the paper tray cover into place. CAUTION: Do not load paper while the machine is printing. Loading paper manually When printing on special paper, such as 60 to 160 g/m² max. color paper or transparent film (laser printer compatible), load the paper manually, one sheet at a time: Adjust the paper size guides to their widest points. - Page 35 2 Place the machine on top of the base unit. Make sure to align the coupling pins of the base unit with the holes located underneath the machine. 4 Press down on the paper lifting plate located inside of tray 2 until it locks.
-
Page 36: Connections
Installing your machine CAUTION: Use both hands to remove or replace tray 2 to avoid damaging the cassette. Connections Key to the diagram: A: Telephone line socket B: AC power socket C: LAN socket 1: Phone cable (model depending on country) 2: AC power cable (model depending on country) 2-12... -
Page 37: Telephone And Lan Connection
Make sure the On/Off switch is set to 0 (Off). Telephone and LAN connection Plug end of the telephone cable (1) into the telephone socket on the machine (A), and the other end into the wall telephone socket. LAN connection (depending on model). Plug one end of the LAN cable (as provided by your network administrator) into port (C) of your machine and the other end into the local network port dedicated to your machine. - Page 38 Installing your machine 2-14...
-
Page 39: Getting Started
3 Getting started Navigation methods Presentation The navigator provides access to the screen menus. The navigator Use the 5 keys on the navigator to move within the menus. - Page 40 Getting started Menu Navigation Enter the main menu. Select the next line in a menu. Select the previous line in a menu. Confirm entry and go to the following menu. Return to the previous menu. Confirm and exit from the current menu. Exit without confirming from the current menu.
-
Page 41: Access To Functions
The display screen The screen has two lines of 16 characters. The cursor shows the line selected. DIRECTORY SETUP For menus with more than two options, use the lines of the menu (3, 4, etc.). Access to functions You can access the functions in two ways. •... -
Page 42: Functions List
Getting started Functions list Functions M 11 M 12 M 13 M 14 M 15 M 16 M 161 M 162 M 17 M 18 Functions M 21 M 211 M 212 M 22 M 23 M 231 M 232 M 233 M 24 M 241... - Page 43 Main menu 2: Setup Functions PC R M 243 ECEPT M 25 ETWORKS M 251 ETWORK M 2511 ETWORK M 252 REFIX M 253 OCAL ETWORK M 2531 ONFIGURATION IP A M 2532 DDRESS M 2533 UBNET M 2534 ATEWAY IEEE A M 2535 DDRESS...
- Page 44 Getting started Functions M 31 M 32 M 33 M 34 M 35 M 36 M 37 M 38 M 381 OK M 382 OK M 383 OK M 39 M 391 M 3911 OK M 3912 OK M 3913 OK M 392 M 3921 M 3922 OK...
- Page 45 Main menu 4: SMS service Functions M 433 M 44 RINT M 45 ARAMETERS M 451 UTO PRINT M 452 M 453 ENDER NAME M 454 TERM M 46 ERVER SMS C M 461 ENTRE M 4611 END NO M 4612 ECEIVE NO SMS C M 462...
- Page 46 Getting started Functions M 61 M 62 M 63 M 64 M 65 Functions M 71 M 72 M 73 M 74 M 75 Functions M 80 M 81 M 811 M 812 M 813 M 814 M 815 M 82 M 821 M 822 M 823...
- Page 47 Main menu 8: Advanced Functions Functions . & P M 84 RINT M 841 CANNER M 842 RINTER M 85 ONSUMABLES M 87 CAN TO M 871 CAN TO M 872 CAN TO M 88 OK CODES M 881 OK CTIVATION M 882 OK EW DEPT...
- Page 48 Getting started Functions M 9233 M 9234 M 924 M 9241 M 93 M 94 M 941 M 942 M 943 M 944 M 945 M 95 M 96 A. These menus will appear only with valid ISPN settings. 3-10 Main menu 9: Internet Primary DNS DNS 1...
-
Page 49: Setting The Machine
4 Setting the machine The parameters of the machine must be correctly set to obtain quality transmission and reception. Set the parameters of the machine by browsing remotely, or through the machine menus. The parameters are set remotely through the embedded web server, via a PC registered in the network (depending on model). -
Page 50: Main Settings
Setting the machine Main settings At the first power on, set up the machine settings, such as date and time, the network type, and language. Before transmission Date/Time Change the date and time on the machine at any time. The machine uses a 12 hour clock so you will need to set the time and either AM or PM. -
Page 51: Local Prefix
Country Choosing a country initializes: • the settings for the public telephone network, • the language by default. To select the country: Select the required option and press OK to confirm. Network This setting selects the type of public telephone network so that the machine can communicate over the public network of the country you have chosen in compliance with the applicable standards. -
Page 52: Transmission Report
Setting the machine • defining the outgoing local prefix of the company’s telephone network. This prefix will automatically be added as soon as an external number is dialled. CAUTION: Do not add a local prefix to the numbers stored in the directory, as the prefix will be automatically dialled with each number. -
Page 53: Before Reception
To select the way you want to feed the documents: Select MEMORY or FEEDER and press OK to confirm your choice. Note: In feeder mode, the reduced image will not appear on the transmission report. Economy period This function defers a fax transmission to "off-peak hours" and reduces the cost of the transmissions. -
Page 54: Reception Without Paper
Setting the machine Activating or deactivating the answering machine Enter the access code if required and press OK to confirm. Select the required option WITH or WITHOUT answering machine and press OK to confirm. Print fax messages stored in the memory Enter the access code if required and press OK. -
Page 55: Technical Parameters
Supply the remote fax with the document and the relay list number. The remote fax will then transmit this document to all numbers on the list. Once the relay is activated by the fax and as soon as the document is received by the remote fax, the document is printed before relaying to all numbers on the list. - Page 56 Setting the machine With the keys and press OK. Parameter 1 - SCANNING MODE 3 - TX SPEED 4 - ECHO PROTECT 6 - EPT MODE 7 - COM. DISPLAY 8 - ECO ENERGY 10 - RX HEADER 11 - RX SPEED 12 - RINGS 13 - DISCARD Size 20 - E.C.M.
-
Page 57: Parameter Setting
Parameter Setting 21 - RETRY DELAY 0 - 99 22 - NO. RETRIES 0 - 99 68 - FTP PORT 69 - SMTP PORT 70 - NET VALID 06:01 to 21:59 71 - NET ACTIVE 7 days / Week Mon to Fri 72 - MODEM SPEED 1 - 56000 2 - 33600... - Page 58 Setting the machine Parameter 75 - TEXT ATTACHM. 76 - ATTACHMENT FORMAT LAN SPEED 77 - 78 - WINS-DNA RE 80 - TONER SAVE 81 - FONT # 82 - FORM LINES 83 - FONT PITCH 84 - PT SIZE 85 - LINE TERM 86 - ORIENTATION 90 - RAW PORT...
-
Page 59: Local Area Network (Lan) Settings
Local Area Network (LAN) settings (depending on model) This is a new generation machine that will be part of the local network just like a PC. The built-in local network access card will enable you to send documents through an Simple Mail Transfer Protocol (SMTP) or Post Office Protocol (POP3) local message server (internally or externally, depending on the settings of the message server). -
Page 60: Manual Configuration
Setting the machine Manual configuration To configure the machine manually, you should obtain the usual information used to set a peripheral device (IP address, sub-network mask, network and gateway address). To configure the local network setting manually: M 2531 OK - SETUP / NETWORKS / LOCAL NETWORK / CONFIGURATION Choose MANUAL, and press OK to confirm. -
Page 61: Sntp Server Configuration
These two addresses must be filled in for the Scan To Disk function. Enter the IP address of each server, then press OK to confirm. SNTP server configuration The machine can automatically update the date and time when connecting to an Simple Network Time Protocol (SNTP) server. -
Page 62: L1 And L2 Line Network Configuration (2121L)
Setting the machine Summer time Select the appropriate time setting in the drop-down list: winter time, summer time +1 or summer time +2, then press OK to confirm. Note: This menu is not displayed if menu 212 is activated. L1 and L2 Line Network Configuration (2121L) You can define different characteristics for each telephone line in relation to the network type: public or private. -
Page 63: Recording The Line 2 Number (2121L)
To configure your machine in automatic transmission line selection mode, press keys M 2611. To configure your machine in manual transmission line selection mode, press keys M 2612. To configure your machine in systematic line 1 (L1)(2121) transmission line selection mode, press keys M 2613. To configure your machine in systematic line 2 (L2)(2121L) transmission line selection mode, press keys M 2614. -
Page 64: Dialling Prefix
Setting the machine not, the selection is not offered. The default transmission line offered is line 1 (L1). Dialling prefix Before each automatic call, your machine may add a prefix to the numbers you dial if they have a minimum length. This function is especially useful when your machine is installed behind a company telephone exchange: - The internal numbers, for which the prefix is not necessary, are short numbers... -
Page 65: Call Monitoring
Select the line in question (L1 or L2) using the Press the key again to confirm your selection. Note: If a call is in progress on line L2 (2121L), only line L1 may be picked up manually. In this case, the operation requested is performed without using the menu described. -
Page 66: Message Service And The Internet
Setting the machine In the call logs, the Note heading always contains the number of the line used: L1 for Line 1 and L2 for line 2. Example of a log: SID: Douglas Date / Time Subscriber 29-06 12;15 29-06 14;19 30-06 16;44 1 Date and time of the transmission or reception of the document. -
Page 67: Initialization Parameters
Before worldwide transmission, you must: • take out an Internet subscription from an Internet Service Provider (ISP), • check that all initialization parameters correspond to those provided by the ISP, • apply the correct settings, if needed, for the Internet connection. Connect to the Internet via the ISP to send and receive fax-Internet or E-mails. - Page 68 Setting the machine Enter E-MAIL ADR, press OK. Access to servers parameters Enter SMTP, press OK. Enter POP3, press OK. Enter DNS 1 (primary), press OK. Enter DNS 2 (secondary), press OK. Access to the authentification SMTP parameters In the ACTIVATION menu, select WITH to activate SMTP authentification then press OK to confirm In the PARAMETERS menu, select ID.
-
Page 69: Settings
Complete the following MENUS on the fax machine: Connection 9211 9212 9213 Message service 9221 9222 9223 Servers 9231 9232 9233 9234 smtp authent. 9241 The machine is now configured. Print the settings in order to check they have been acknowledged by pressing M, 9, 4, 5 and OK. - Page 70 Setting the machine • the type and frequency of the connection to the ISP. SET TIMES PERIODIC ON DEMAND A. Automatic connection occurs within 12 minutes of the selected time. • the type of transmission over the Internet. IMMEDIATE DURING CONNECTIONS Print the machine status settings at any time.
-
Page 71: Mail Sorting
Selecting the transmission type Select one of the transmission options IMMEDIATE or DURING CNX and press OK to confirm. Selecting the print mode for the deposit notice Select one of the deposit notice options WITH, WITHOUT, ALWAYS or ON ERROR and press OK to confirm. -
Page 72: Internet Connection
Setting the machine Share PC mode Select option SHARE PC and press OK to confirm. Transfer E-mails to a PC or use the fax as an E-mail printer. To transfer the E-Mails to a PC: Select option WITH PC TRANS. and press OK to confirm. Enter the PC E-Mail address and press OK to confirm. -
Page 73: Deactivating The Internet Function
Connect either immediately or automatically depending on the time periods defined. The triggering of a programmed Internet connection depends on the standard settings of the machine. Immediate connection to the Internet There are two methods to immediately connect to the Internet: Access through the menu: Direct access: Press the... -
Page 74: Sending An Sms
Setting the machine • beep activated during SMS reception, • send your details activated, • the address of the machine. The address is only modified if several machines are installed on the line. It is used to differentiate between two machines during SMS reception. Send the line number and machine address to your SMS contacts. -
Page 75: Erase An Sms
Dial the number of the recipient (mobile phone or any other SMS-compatible device) in one of the following ways: • dial the number by means of the numerical keypad, • enter the first letters of the recipient name, • press the key until the required name appears (names are classified in alpha- betical order), •... -
Page 76: Sms Reception
Setting the machine Erases all messages from memory. Select ALL using the Press OK to confirm. SMS Reception SMS messages received are automatically printed (you can modify this setting with M 451 OK - Auto print). If you disable automatic printing, the messages are automatically stored in the memory. -
Page 77: Sms Server
SMS Server This menu is used to set the transmission and reception numbers of your SMS centers. They will be provided by your access provider. You can define two SMS centres, one main and one secondary. The secondary centre may only be used for SMS reception. Access to server mode: Define SMS Centre 1 numbers: Define send number:... - Page 78 Setting the machine 4-30...
-
Page 79: Directory
5 Directory The fax lets you create a directory by storing subscriber records and subscriber lists. • The machine can store up to 500 subscriber records with names and phone numbers. • The machine can group several names to build a subscriber list with up to 32 subscribers. -
Page 80: Adding A Record
Directory • RATE: for each subscriber choose the fax transmission speed. The available rates are 2400, 4800, 7200, 9600, 12000, 14400 and 33600 bits per second (bps). With a good telephone connection, the highest rate of 33600 bps should be used. If your subscriber number has both TEL and E-MAIL listed, the validation key ( ) will determine if the document will be sent over the telephone network or Internet. -
Page 81: Creating Subscriber Lists
Select the option WITH the associated key if you want to associate a letter (shortcut key) with your contact. The first letter free is displayed by default. If you want to modify this, scroll through the alphabet by using keys confirm. -
Page 82: Adding Or Deleting A Number From The List
Directory There are three ways detailed in the table below, to modify a list. Press OK to confirm. From... subscriber name subscriber ID number subscriber directory Repeat the above steps for every subscriber included in the list. Press OK to confirm. -
Page 83: Consulting A Record Or A List
Press OK to display the SUBSCRIBER 1 field, and add or delete the subscriber as shown in the table as follows: To... delete Confirm the new list by pressing key Consulting a record or a list Press the The directory appears in alphabetical order. Select the subscriber record or subscriber list (L) you want to view. -
Page 84: Deleting A Record Or A List
Directory Deleting a record or a list The directory appears in alphabetical order. Use the deleted and confirm with OK. Press OK again to delete. The record or list is deleted from the directory. Printing the directory The machine can print all the numbers stored in the directory, including all the existing subscriber records or subscriber lists. -
Page 85: The File Structure
The file structure The electronic file containing the data in the directory must be structured into lines or records separated by a line break (carriage return). Each line must comprise of five fields separated from one another by a unique character (a tab stop, a comma or a semi-colon). -
Page 86: Procedure
Directory The rate is coded on a number, see the following board: Rate 1200 2400 4800 7200 9600 12000 14400 33600 Note: Enter the field separator character, even if one or more of the fields are left blank. In the above example, which uses a semi-colon as a separator, the entry for «... -
Page 87: Exporting A Directory
To disable importing: Select WITHOUT to prevent users from importing a directory. Exporting a directory The machine may also export a directory as a text file, and send it to any mail client (be it PC or fax based), in the form of an E-mail attachment entitled directoryxxx.csv. To export the directory: Key in the E-mail address of the PC or other fax machine to receive the exported directory. - Page 88 Directory 5-10...
-
Page 89: Operation
6 Operation Sending Faxes sent over the telephone network are sent from the machine’s document feeder or from memory. Documents sent over the Internet are first stored in memory and sent at the time of Internet connection. Over the telephone network: all fax transmissions are in black and white. Over the Internet: transmissions are either black and white documents (TIFF format) or color documents (JPEG format). -
Page 90: Choosing The Resolution/Contrast
Operation Note: You can also dial the fax number before positioning the originals on the document feeder. Choosing the resolution/contrast Resolution There are 4 modes for document transmission. The mode choice depends on the type of document to be transmitted: •... - Page 91 Assigned number dialling Press key The machine lists the subscribers records and lists in the Directory in alphabetical order. then Use the navigator keys to scroll through the subscribers available and choose the required subscriber or subscriber list. Press the key.
-
Page 92: Transmission Over The Public Switched Telephone Network (Pstn)
Operation Enter the fax or E-mail address, or use the Directory or key paragraphs). Press the subscriber list. Repeat this last step for all subscribers or subscriber lists (maximum 10 subscribers or subscriber lists). Press OK, operation. Transmission over the Public Switched Telephone Net- work (PSTN) Immediate transmission Position the document (refer to Document positioning on page 6-1). -
Page 93: Transmission With Auto Redial
The document is stored and will be sent at the new time. Transmission with auto redial Monitor the dialling operation during a fax transmission. In this case, the maximum transmission rate will be 14400 bps. This function allows the user for example: •... - Page 94 Operation Set the re-direction contact M 3912 OK - FAX / FAX FORWARD. / REROUTING / CALL NUMBER Using the directory is empty the display will show DIRECTORY EMPTY). Enter the fax number manually or store the name and related number in the directory (refer to Adding a record on page 5-2).
-
Page 95: Transmission Over The Internet
• If the short number is a telephone number or a mixed number (tel + E-mail or tel + FTP) the copy will be sent by fax to the recipient’s telephone number. • If the short number is an E-mail address or an FTP number, the copy will be sent in IP mode to the recipient’s E-mail or FTP address. - Page 96 Operation Sending a typed message to an E-Mail address Send a typed message to an E-mail mailbox and add a scanned document as an attachment. Access through the menu: Direct access: Press the Then, to send to E-mail address: Enter the addressee’s E-mail address or choose the dialling mode (refer to Dialling on page 6-2).
-
Page 97: Scan To Ftp (Depending On Model)
Scan to FTP (depending on model) Scan TIFF, JPEG and PDF files to an FTP server, for example, for archiving. To connect to the FTP server, you must know the name of the FTP user and the password. Note: This function is programmed by default on the F2 key. Deposit a file in an FTP server Position the document (refer to Document positioning on page 6-1). -
Page 98: Transmission Waiting Queue
Operation Transmission waiting queue Obtain a summary of all documents queuing, for transmission, including those in deposit or in delayed transmission, etc. • consult or modify the waiting queue. In this waiting queue the documents are coded the following way: Order number in the queue / document status / subscriber’s telephone number. -
Page 99: Cancelling A Transmission In Progress
View or modify the waiting queue Select the required document from the queue and press OK to confirm. Modify the document settings and press the Deleting a transmission on hold Select the required document from the queue and press OK to confirm. Printing a document in waiting or in deposit Select the required document from the queue and press OK to confirm. -
Page 100: Reception
Operation Reception Document reception over the Internet is automatic at each Internet connection. Reception of all documents over the telephone network is done one at a time at fax reception. Reception over the Public Switched Telephone Network (PSTN) Fax reception depends on the parameter settings of the machine. Reception over the Internet Reception is automatic at each Internet connection. -
Page 101: Copying
Copying The machine is able to print one or more copies of an original document with one or more pages. Local copy Standard copy Position the document face down (refer to Document positioning on page 6-1). Press the "Enhanced" copy Position the document face down (refer to Document positioning on page 6-1). -
Page 102: Scanner Settings
Operation Scanner settings: • RESOLUTION to set the photocopy resolution. • ZOOM settings to reduce or magnify any portion of a document by choosing the origin and value of the zoom to apply to that portion. • The assembly parameter to choose between ASSEMBLED or NOT ASSEMBLED copies. - Page 103 Assembly Choose the copy type between ASSEMBLED or NOT ASSEMBLED. Press OK to confirm. Origin Change the orientation of the scanner. Enter new values of X and Y given in mm (X < 210 and Y < 286) to move the scanning zone as shown on the figure below: Select the X and Y coordinates with the Set the required coordinates with the numeric keypad or...
-
Page 104: Printer Settings
Operation Paper Size Select the paper size in the tray to be used (A4, LETTER, LEGAL) using the keys. Press OK to confirm. Printer settings Paper Select the type of paper NORMAL or THICK with Press OK to confirm the settings. Note: When the THICK type of paper is selected, the printing speed is slowed down. -
Page 105: Other Functions
Other functions Logs The incoming and outgoing logs list the last 30 transmissions. An automatic print out will take place after every 30 transmissions. You can request a print out at any time. Each log (incoming or outgoing) contains a table with the following information: •... -
Page 106: Short Dial
Operation Short Dial The machine can memorize a sequence of keys (for example, to send a fax directly to one or multiple subscribers, to call a subscriber or to get access to a specific menu, etc.). This sequence is registered to the F2 key. Press this key to execute the registered sequence. -
Page 107: Counters
Counters View the activity counters on the machine. To get access to the counters of the machine: These counters indicate the number of: • sent pages, • received pages, • scanned pages, • printed pages. Deposit and polling Deposit a document in the machine and keep it available to one or more subscribers who can obtain a print of this document with the POLL function. -
Page 108: Lock/Secure Access
Operation Choose the type, according to the table below: Menu SIMPLE MULTIPLE Press OKto confirm. Polling a deposited document Enter the document poll number or choose the dialing mode (refer to Dialling on page 6-2). Note: You can poll several documents using the Depending on the type of poll you should: Choice Immediate poll... -
Page 109: Locking The Keyboard
To access the locking code: Enter the four-digit lock code on the keypad. Press OK to confirm. Confirm the lock code by entering the code one more time. Press OK to confirm. Note: Create a new code by modifying the existing one. Locking the keyboard This function prevents access by non-authorized persons. -
Page 110: Scan To Pc (Depending On Model)
Operation Changes to these settings may lead to repeated connection failures. The machine can still send documents to an E-mail address (M 95) and connect to the Internet (M 93). To access the Internet settings locking menu: Enter the four-digit locking code with the numerical keypad. Press OK to confirm. -
Page 111: Department Code
Department code Control Use of the machine to authorized personnel only within each department by setting up a master department code and individual department codes. Assign one master code and up to 98 department codes. The machine can monitor the usage for each department. -
Page 112: Creating A Department Code
Operation • Entering the master The screen displays: NEW DEPT. 00> FREE Using the browser Press OK to confirm. The screen displays: 8821>DEPT. CODE 8822 DEPT. NAME Press OK to confirm the line 8821>DEPT. CODE. The screen displays MASTERCODE and ****. Using the this code). -
Page 113: Deleting A Department Code
Press OK; the screen displays: DEPT. CODE 0 0 0 0 Enter a 4-digit code (remember it); if this code is already used by another service, the machine displays "CODE USED". In this case, enter another code. Press OK to confirm the selection. The machine gives the opportunity to modify the department name. -
Page 114: Use Of The Department Codes By A Department
Operation Printing the department report The administrator can print reports for all departments: Enter the administrator department number 00 and press OK to confirm. The machine prints the report, as shown in the illustration below: Use of the department codes by a department To access the different machine functions, each department must enter its own access code as provided by the administrator. -
Page 115: Masking The Charge Code
Masking the charge code Entering the masked charge code The charge code is a number that is sent on-line after the correspondent’s fax machine number. To add a charge code after entering the correspondent’s number: Press the Type the charge code. Example: 9738088444+**** The charge code will always be hidden. -
Page 116: Mbx Management
Operation • print the contents of an MBX, only possible if the MBX contains one or more doc- uments (with a star next to the MBX). When the contents of an MBX have been printed it becomes empty, • delete an MBX, only if the MBX is initialized and empty, •... -
Page 117: Printing The Mbx List
Printing the contents of an MBX Select a free MBX, or enter the number of a free MBX directly (1-31). Enter the MBX code, if needed, and press OK to confirm. All documents found in the MBX are printed and the MBX is emptied. Deleting an MBX Before deleting an MBX, you need to make sure it is empty, by printing its content. -
Page 118: Mbx Polling From A Remote Fax
Operation Confirm the transmission request to a remote MBX fax by pressing the In the case of an immediate transmission, the document is sent immediately. If the document is set for a postponed transmission the document will be stored in the memory and sent at the requested time. -
Page 119: Maintenance
7 Maintenance Maintenance General To maintain the best operating conditions for your machine, ensure that you: • Never leave the cover open unless required. • Do not attempt to oil the machine. • Always close the cover carefully and avoid vibrations. •... -
Page 120: Replacing The Consumables (Toner And Drum)
Maintenance Drum Cartridge The standard drum cartridge can produce up to 20000 pages. The initial drum cartridge that comes with the machine can produce up to 4000 pages. Various factors can influence the effective service life of the drum cartridge, namely the environment (temperature, humidity), the average number of pages per print operation and the type of paper used. - Page 121 CAUTION: The fusing unit located inside the printer may become very hot during operation. To avoid injury - do not touch. 2 - Remove the drum/toner cartridge assembly. Note: In order to protect the environment, do not throw away the used toner car- tridge.
- Page 122 Maintenance 3 - Turn the blue clip as shown in the illustration below to unlock the toner cartridge. 4 - Separate the drum cartridge from the toner cartridge. 5 - Remove the new toner cartridge from its box, holding it firmly in both hands. 6 - Shake the toner cartridge alternately in the directions shown by the arrows in the illustration below.
- Page 123 8 - Insert the new toner cartridge in the drum cartridge until locked in place. CAUTION: Do not touch the green drum roller located under the fold away flap of the drum cartridge. This will affect the print quality of your faxes and copies. CAUTION: Do not touch the metal parts located on the side of the toner/drum cartridge set as shown below.
- Page 124 Maintenance 9 - Insert the toner/drum cartridge in the printer as shown below. 10 - Close the printer cover pressing it carefully but firmly until it clicks into position. Press OK on the scanner control panel. The display shows: TUE 02 APR 13:39 INSERT GAUGE CARD...
- Page 125 Insert chip card (supplied with the toner cartridge) into the card reader ensuring that the chip is positioned as shown in the illustration below. The following message is displayed on the scanner control panel screen: CHANGE TONER? YES = OK - NO = C Press OK.
- Page 126 Maintenance 1 - Open the printer cover. 2 - Remove the drum/toner cartridge assembly.
- Page 127 Note: In order to protect the environment, do not throw away the used drum car- tridge. Used cartridges should be disposed of in accordance with local regulations concerning waste materials. CAUTION: The fusing unit located inside and at the bottom of the printer may become very hot during operation.
- Page 128 Maintenance 4 - Separate the drum cartridge from the toner cartridge. CAUTION: Do not touch the green drum roller located under the fold away flap of the drum cartridge. This will affect the print quality of your faxes and copies. CAUTION: Do not touch the metal parts located on the side of the toner/drum cartridge set as shown below.
- Page 129 Maintenance 5 - Insert the new toner cartridge in the drum cartridge until locked in place. 6 - Insert the toner/drum cartridge in the printer as shown below. 7-11...
- Page 130 Maintenance 7 - Close the printer cover pressing it carefully but firmly until it clicks into position. Press OK on the scanner control panel. The display shows: TUE 02 APR 13:39 INSERT GAUGE CARD Insert chip card (supplied with the drum cartridge) into the card reader ensuring that the chip is positioned as shown in the illustration below.
-
Page 131: Cleaning
Once the chip card has been read, the display shows: DRUM OK REMOVE CARD Remove the card. CAUTION: If the following message is displayed, check that you have inserted the chip card the right way up. CANNOT READ CARD REMOVE CARD Cleaning Cleaning the printer Dust, dirt and paper debris can affect printer performance. - Page 132 Maintenance Cleaning the paper feed roller 1 - Turn off the printer and unplug the power cable. 2 - Remove the drum/toner cartridge set from the machine. 3 - Use a soft cloth to clean the paper feed roller located under the fusing unit. 4 - Replace the drum/toner cartridge (refer to Replacing cartridges on page 7-2).
-
Page 133: Service
Service For guaranteed performance of your machine, some maintenance work (replacing the fusing unit and the transfer roll) should be carried out approximately every 50,000 printed pages. Please contact your supplier for this operation. Scanner calibration Perform this operation if the quality of photocopied documents is no longer satisfactory. Confirm your choice by pressing the OK key. -
Page 134: Communication Error Codes
Maintenance Communication error codes The communication error codes appear in the logs and transmission reports. General codes Code 01 - Busy or no fax answer This code appears after 6 failed attempts. Call later. Code 03 - User break A communication has been stopped by the user pressing the Code 04 - Non programmed number A number saved as a one-touch key or abbreviated number is not valid (example: a delayed transmission was programmed with a one-touch key and this key has been... - Page 135 Maintenance Code 0B - Wrong number of pages There is a difference between the number of pages indicated during preparation for the transmission and the number of pages sent; check the number of pages in the document. Code 0C - Received document error Ask the subscriber who called you to check the length of the document (it may be too long to be completely received).
- Page 136 Maintenance Internet codes Codes 40 and 41 - No reply from supplier The modem cannot connect to the Internet service provider. If this error always occurs, check the supplier’s dial-up number. Code 42 - Cannot access supplier The service provider refuses the connection, the service is temporarily unavailable. If this error always occurs, check the Internet connection settings.
-
Page 137: Printer Errors
Printer errors Error messages If the printer has one of the problems described below, the corresponding message is displayed on the screen. Message CHANGE TONER <OK> TO CONFIRM CHANGE DRUM <OK> TO CONFIRM CLOSE COVER PRINTER CLOSE UPPER COVER PRINTER DRUM NEAR END TONER NEAR END PAPER EMPTY... - Page 138 Maintenance Printer paper jam Inside the printer Use the following procedure to remove any sheets of paper jammed inside the printer. CAUTION: The fusing unit inside the printer can become very hot during operation. To avoid injury - do not touch. Open the front cover of the printer.
- Page 139 Paper jam at the feeders and trays The figures below show different type of paper jam you might experience when using your machine. Remove any jammed sheets as shown by the arrow depending on where the paper jam occurs At the paper tray Second cassette unit and paper tray (option) At the printer output stacker At the manual feed tray...
-
Page 140: Scanner Faults
Maintenance Scanner faults Scanner paper jam When a paper jam occurs, the message REMOVE DOCUMENT appears on the control panel screen. If jams often occur, check, clean or repair the specific part of the unit. Open the scanner cover by pressing key (A). Remove the jammed paper (B) without tearing it. -
Page 141: Machine Packing And Transportation
Remove wrinkles or creases from the document. The machine does not receive any faxes Check that the telephone line is correctly connected and that there is a tone signal on the telephone line by means of the You receive a blank page Make a photocopy of a document;... -
Page 142: Specifications
Maintenance Specifications Device type: Office fax machine, fast, operation with all Group 3 devices according to ITU-T recommendations. Machine Specifications Dimensions: Weight: Electric power supply: Power consumption (max. values): Operating temperature: Operating humidity: Original document size: Document feeder: Reception size (A4 size): Reception paper: Paper tray 1 capacity: Paper tray 2 capacity... - Page 143 Scanned image resolution: Reading system: Print type: Printer resolution: Communication rate: The effective transmission time for an A4 page ranges between a few seconds to approximately one minute (depending on line quality, modem bit rate, the amount of information on the original document and the resolution) (*) Not taking into account the exchange initialisation procedure.
- Page 144 Maintenance 7-26...
- Page 145 Call monitoring 4-17 Call reports and logs 4-17 CE Mark, Safety 1-5 Cleaning 7-13 Connections 2-12 Power line 2-13 Telephone and LAN 2-13 Consumables 7-1 Consumables, Replacing - See Replacing the consumables Consumables, Safety 1-4 Control Panel i Copying 6-13 Local copy 6-13 Specific copy settings 6-13 Counters 6-19...
- Page 146 Network 4-2 Number of copies, Fax 4-6 Prefix 4-3 Reception without paper 4-6 Relay broadcast 4-6 SMS - See SMS service Technical parameters 4-7 Transmission report 4-4 Mail box (MBX FAX) 6-27 Creating an MBX 6-28 Deleting an MBX 6-29 Management 6-28 MBX deposit in a remote fax 6-29 MBX deposit in your fax 6-29...