
Related Manuals for Knight Velocity Fixed


Summary of Contents for Knight Velocity Fixed
- Page 1 Velocity - Fixed Assembly Instructions - Double Sided (DSD) Tools Required: Power Drill knightgroup.co.nz...
- Page 2 Velocity - Fixed DSD Assembly Instructions Assembly Instructions Contents Double Sided Desk Page 1 Optional Studio50 or Active25 Screen Page 13 - Studio50 Page 13 - Active25 Page 19 knightgroup.co.nz...
- Page 3 Velocity - Fixed DSD Assembly Instructions Assembly Instructions IMPORTANT! MAINTENANCE Please carefully read the assembly manual and direction for use prior to • The table does not require any maintenance by the user installment, use and maintenance of the table frame to gain a complete •...
- Page 4 Velocity - Fixed DSD Page 1 Assembly Instructions Assembly Instructions Parts 2 x L&R Leg Pair 2 x Cross Rail and L&R Leg Rail (Pair) 2 x L&R Support Bar (Pair) 2 x L&R Tray Bracket (Pair) 2 x Side Rail with Cover 24 x M5x10 4 x Nut 1 x Cable Tray...
- Page 5 Velocity - Fixed DSD Page 2 Assembly Instructions Assembly Instructions Step 1 Loosen the screws. knightgroup.co.nz...
- Page 6 Velocity - Fixed DSD Page 3 Assembly Instructions Assembly Instructions Step 2 6 x M8x10 knightgroup.co.nz...
- Page 7 Velocity - Fixed DSD Page 4 Assembly Instructions Assembly Instructions Step 3 Repeat steps 1 - 3 to assemble the second frame. 4 x M8x10 knightgroup.co.nz...
- Page 8 Velocity - Fixed DSD Page 5 Assembly Instructions Assembly Instructions Step 4 16 x M5x10 knightgroup.co.nz...
- Page 9 Velocity - Fixed DSD Page 6 Assembly Instructions Assembly Instructions Step 5 Set the width and tighten the screws on the rails. Worktop Length 1200mm 1125mm 1500mm 1425mm 1800mm 1725mm knightgroup.co.nz...
- Page 10 Velocity - Fixed DSD Page 7 Assembly Instructions Assembly Instructions Step 6 Make sure to leave a 70mm gap if using Studio50 screen or 45mm gap if using Active25 screen. 12 x ST5.0x23 knightgroup.co.nz...
- Page 11 Velocity - Fixed DSD Page 8 Assembly Instructions Assembly Instructions Step 7 Place the brackets behind the screws and tighten them enough to hold the brackets in place. knightgroup.co.nz...
- Page 12 Velocity - Fixed DSD Page 9 Assembly Instructions Assembly Instructions Step 8 Take off the tray lids and loosen the nobs inside the tray to be able to adjust the tray width. knightgroup.co.nz...
- Page 13 Velocity - Fixed DSD Page 10 Assembly Instructions Assembly Instructions Step 9 4 x M5x10 4 x Nut knightgroup.co.nz...
- Page 14 Velocity - Fixed DSD Page 11 Assembly Instructions Assembly Instructions Step 10 4 x M5x10 knightgroup.co.nz...
- Page 15 Velocity - Fixed DSD Page 12 Assembly Instructions Assembly Instructions Step 1 - Power & Data Plate 2 x Power Plate 2 x Data Plate 10 x Screws knightgroup.co.nz...
- Page 16 Velocity - Fixed DSD Page 13 Assembly Instructions Assembly Instructions Step 2 - Power & Data Plate knightgroup.co.nz...
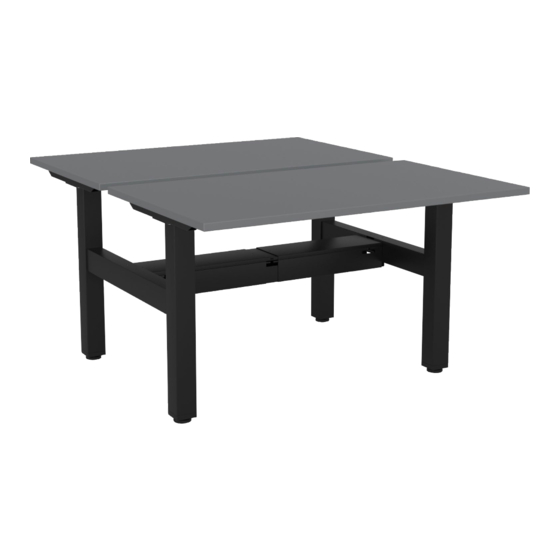
- Page 17 Velocity - Fixed DSD Page 14 Assembly Instructions Assembly Instructions Completed knightgroup.co.nz...
- Page 18 Optional Studio50 or Active25 Screen Page 15 Assembly Instructions Assembly Instructions Parts - Studio50 2 x M8x20 4 x M5x10 2 x Screen Bracket 8 x ST5.0x23 4 x Stabilizing Bracket knightgroup.co.nz...
- Page 19 Optional Studio50 or Active25 Screen Page 16 Assembly Instructions Assembly Instructions Step 1 - Studio50 2 x M8x20 knightgroup.co.nz...
- Page 20 Optional Studio50 or Active25 Screen Page 17 Assembly Instructions Assembly Instructions Step 2 - Studio50 knightgroup.co.nz...
- Page 21 Optional Studio50 or Active25 Screen Page 18 Assembly Instructions Assembly Instructions Step 3 - Studio50 4 x M5x10 knightgroup.co.nz...
- Page 22 Optional Studio50 or Active25 Screen Page 19 Assembly Instructions Assembly Instructions Step 4 - Studio50 8 x ST5.0x23 4 x Stabilizing Brackets knightgroup.co.nz...
- Page 23 Optional Studio50 or Active25 Screen Page 20 Assembly Instructions Assembly Instructions Completed - Studio50 knightgroup.co.nz...
- Page 24 Optional Studio50 or Active25 Screen Page 21 Assembly Instructions Assembly Instructions Parts - Active25 4 x M5x10 2 x Screen Bracket 6 x 6.3x25 knightgroup.co.nz...
- Page 25 Optional Studio50 or Active25 Screen Page 22 Assembly Instructions Assembly Instructions Step 1 - Active25 4 x M5x10 knightgroup.co.nz...
- Page 26 Optional Studio50 or Active25 Screen Page 23 Assembly Instructions Assembly Instructions Step 2 - Active25 knightgroup.co.nz...
- Page 27 Optional Studio50 or Active25 Screen Page 24 Assembly Instructions Assembly Instructions Step 3 - Active25 6 x 6.3x25 knightgroup.co.nz...
- Page 28 Optional Studio50 or Active25 Screen Page 25 Assembly Instructions Assembly Instructions Completed - Active25 knightgroup.co.nz...
- Page 29 0800 143 143 info@knightgroup.co.nz knightgroup.co.nz...
Need help?
Do you have a question about the Velocity Fixed and is the answer not in the manual?
Questions and answers