
Related Manuals for Donner DED-500


Summary of Contents for Donner DED-500
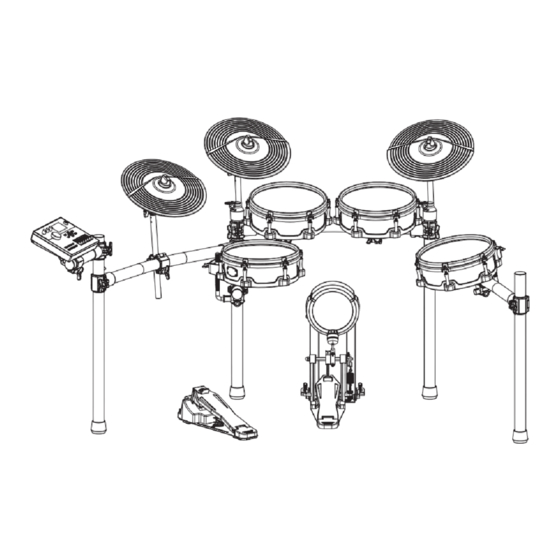
- Page 1 INSTALLATION INSTRUCTION DED-500/DED-500P Thank You for Choosing DONNER! Please Read This Guide Carefully Before Use. ENGLISH...
-
Page 2: Table Of Contents
CONTENTS 1. ASSEMBLE THE STAND ..............................1 2. ASSEMBLE THE PAD ..............................2 3. A-ATTACH THE CYMBALS ............................... 3 3. B-INSTALL THE HI-HAT STAND ............................4 4. ATTACH THE SOUND MODULE ............................5 5. ATTACH THE KICK PEDAL ............................... 6 6. -
Page 3: Assemble The Stand
1. ASSEMBLE THE STAND Middle bend + one side Install the other 820mm 630mm bend pipe + 700mm 820mm straight pipe straight pipe straight pipe on the right 630mm bend pipe + 820mm Install 350mm straight pipe A-Apply to 3 cymbals straight pipe on the left and 200mm straight pipe Install pad mount holder... -
Page 4: Assemble The Pad
A-Apply to 3 cymbals B-3 cymbals and Hi-Hat ● Expand the stand according to the figure. ● Assemble the stand and pad in turn according to above figure. 2. ASSEMBLE THE PAD Wing nut Pad nut ● Insert pad mount and tighten the wing nut... -
Page 5: A-Attach The Cymbals
3. A-ATTACH THE CYMBALS Knob nut Felt washer Check bracket Tighten screw ● Insert cymbal and align it with Sensing range of cymbal indentation. Adjust knob nut to fix it. -
Page 6: B-Install The Hi-Hat Stand
3. B-INSTALL THE HI-HAT STAND The screw should be the same side of the hole The screw should be the same side of the hole... -
Page 7: Attach The Sound Module
4. ATTACH THE SOUND MODULE Connect audio cable and fix it. Insert sound module and adjust wing knob to fix it. -
Page 8: Attach The Kick Pedal
5. ATTACH THE KICK PEDAL On the blanket ● Open the kick drum stand entirely and lock the screw at sides Position beater at the ● Install the beater into the holder securely by fixing center of kick drum the screw On the floot ●... -
Page 9: Power Connection And Wiring
6. POWER CONNECTION AND WIRING AC Adapter Audio Cable ● Connect the jacks as shown in the figure. -
Page 10: Performance Preparation
7. PERFORMANCE PREPARATION Pads: (Snare, Tom 1/2/3) Pedal Open Hi-Hat Half-open Hi-Hat Closed Hi-Hat Rim shot Head shot Adjust the beater Cymbals: (Hi-Hat, Crash, Ride) Edge sensor Bow shot Adjust the center of Adjust the gradient gravity of beater of beater Edge shot Adjust the tightness of spring... - Page 11 COMPLETE THE INSTALLATION ACCORDING TO THE INSTALLATION GUIDE OF THE MODEL YOU PURCHASED. DED-500 DED-500P...
- Page 12 Tel: 0044 2080 895 663 Tel: 0061 384004871 Get in touch with our customer service at local time (hotline hours are listed on the Donner official website) MANUFACTURER: GUANGZHOU RANTION TECHNOLOGY CO., LTD. ADDRESS: Room 7002 and 7003, 7th Floor, Digital Entertainment Industrial Park, Greater Bay Area, No. 28 Huangpu Park West Road, Huangpu District, Guangzhou, China.
Need help?
Do you have a question about the DED-500 and is the answer not in the manual?
Questions and answers