
Related Manuals for Pfeiffer Vacuum UDV 046


Summary of Contents for Pfeiffer Vacuum UDV 046
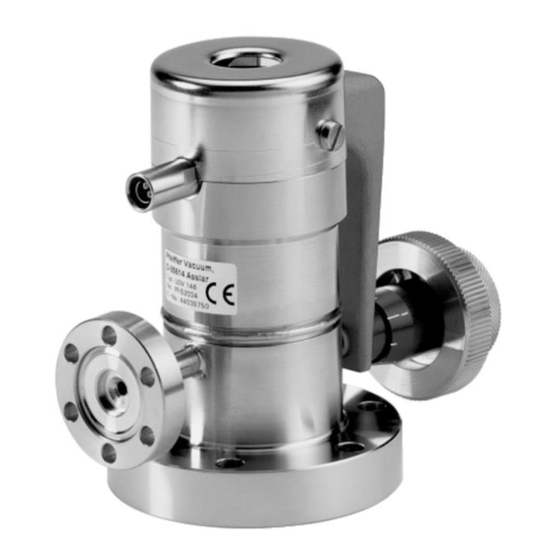
- Page 1 A P A S S I O N F O R P E R F E C T I O N UDV 046 All-Metal Dosing Valve, manually actuated Operating Instructions...
-
Page 2: Product Identification
We reserve the right to make technical change without prior notice. All dimensions in mm. Intended Use The UDV 046 All-Metal Dosing Valve is used for admitting a precise and reproducible gas flow into a vacuum system and is suited, for example, for •... -
Page 3: Table Of Contents
Contents Product Identification Validity Intended Use 1 Safety 1.1 Symbols Used 1.2 Personnel Qualifications 1.3 General Safety Instructions 1.4 Liability and Warranty 2 Technical Data 3 Installation 3.1 Capillary for Precisely Routing the Gas Flow 3.2 Installation in the Vacuum System 4 Operation 4.1 Setting the Gas Flow 4.2 Operation at Low Gas Flows... -
Page 4: Safety
Communicate the safety instructions to all other users. 1.4 Liability and Warranty Pfeiffer Vacuum assumes no liability and the warranty becomes null and void if the end-user or third parties • disregard the information in this document •... -
Page 5: Technical Data
2 Technical Data Actuation manual Connections Vacuum side DN 40 CF-F M5 (capillary) Inlet side DN 16 CF-R Mounting orientation Tightness of closed valve <10 mbar Pressure range <10 mbar … 30 bar (absolute) Operating pressure (vacuum side) <10 mbar … 1.5 bar Smallest adjustable gas flow <10 mbar l/s... -
Page 6: Installation
Always wear clean, lint-free gloves and use clean tools when working in this area. Overview Accessory Flange with tube DN 16 CF-F Heating jacket (accessory) Accessory Supplied by end-user 3.1 Capillary for Precisely Routing the Gas Flow Do not turn the knurled nut ø2×0.5 BP 5279 BEN (2010-10) UDV 046... -
Page 7: Installation In The Vacuum System
3.2 Installation in the • Remove the protective lids and install the valve into the vacuum system. Vacuum System • Ensure good accessibility of the knurled nut. Gasket (accessory) Screws, M4×20 (accessories) Do not turn the knurled nut DN 16 CF-F Protective lid Protective lid Gasket (accessory) -
Page 8: Operation
°C 55 °C 4.1 Setting the Gas Flow Open the valve by 3 counter clockwise turns of the knurled nut . Locked 3 turns Set the desired gas flow with the knurled nut. Locked BP 5279 BEN (2010-10) UDV 046... -
Page 9: Operation At Low Gas Flows
4.2 Operation at Low Gas When operating the valve at gas flows ≤10 mbar l/s, the orifice can be contami- nated by condensable vapors. Adsorbed vapors can be removed by baking the Flows valve in open position (at approx. 200 °C for 30 minutes). Such adsorption can be prevented by heating the valve during operation, for example with a heating jacket (→... -
Page 10: Deinstallation
Always wear clean, lint-free gloves and use clean tools when working in this area. Detach the flanges and put the protective lids in place. Gasket Protective lid Protective lid Gasket Use new gaskets when reinstalling the valve (→ 30). BP 5279 BEN (2010-10) UDV 046... -
Page 11: Maintenance
6 Maintenance DANGER DANGER: contaminated parts Contaminated parts can be detrimental to health and environment. Before beginning to work, find out whether any parts are contami- nated. Adhere to the relevant regulations and take the necessary precautions when handling contaminated parts. Caution Caution: vacuum component Dirt and damages impair the function of the vacuum component. - Page 12 Remove the screws and lift off the cap. Size 4 Screw the screws into the link bolts by one turn. Remove the cap screw. AF 6 Remove the link bolts by pulling the screws. BP 5279 BEN (2010-10) UDV 046...
- Page 13 Lift the lever off and carefully remove the bolt. Remove the hexagon nut and the cup springs. BP 5279 BEN (2010-10) UDV046.oi...
-
Page 14: Cleaning The Valve Mechanism
Clean the hexagon nut. Lubricate its thread with high temperature lubricant (e.g. Hi-Temp C100). Insert 5 new cup springs. Tighten the hexagon nut by hand. Make sure to correctly position the cup springs. Adjust prestress. Adjust the prestress of the cup springs (→ 15). BP 5279 BEN (2010-10) UDV 046... -
Page 15: Adjusting The Prestress Of The Cup Springs
6.4 Adjusting the Prestress Disassemble the valve mechanism (→ 11, steps … of the Cup Springs Unfasten the hexagon nut. Tighten the hexagon nut play-free. Prestress 1½ t urns. 6.5 Assembling the Valve We recommend using the high temperature lubricant Hi-Temp C100 Mechanism (→... - Page 16 Carefully turn in the cap screw until the mechanical stop can be felt. AF 6 Screw in carefully until the mechanical stop can be felt. Mount the cap and fasten it with the screws. Size 4 BP 5279 BEN (2010-10) UDV 046...
- Page 17 Lubricate the ball pin. • Connect the valve to a leak detector • Close the valve. Locked Close Set the desired gas flow (→ Set the desired gas flow. BP 5279 BEN (2010-10) UDV046.oi...
-
Page 18: Troubleshooting
We recommend returning the product to your local Pfeiffer Vacuum service center for repair. Pfeiffer Vacuum assumes no liability and the warranty becomes null and void if any repair work is carried out by the end-user or third parties. DANGER DANGER: contaminated parts Contaminated parts can be detrimental to health and environment. - Page 19 Unfasten the lock nut and turn it 5 turns counter clockwise. Hold stationary 5 turns Lock the knurled nut. Turn to mechanical stop Hold stationary Adjust to the required tightness. Locked Turn the knurled nut 2 turns clockwise in order to prestress the valve lever. Locked 2 turns BP 5279 BEN...
- Page 20 Unlock the knurled nut. Hold stationary Unfasten Turn the knurled nut to the mechanical stop. Released Turn to mechanical stop Lock the knurled nut. Hold stationary Turn to mechanical stop BP 5279 BEN (2010-10) UDV 046...
-
Page 21: Adjusting The Lever
7.3 Adjusting the Lever After the tightness of the valve has been adjusted a number of times, it may be necessary to adjust the lever. Adjust the lever if α ≥ 5° (a ≥ 64.5 mm) while the valve is closed. Valve closed Valve deinstalled (→... - Page 22 Afterwards tighten the hexagon socket set screw. Lock the knurled nut. Hold stationary Turn to mechanical stop Connect the valve to a leak detector. Leak detector Turn the knurled nut 2 turns counter clockwise. Locked 2 turns BP 5279 BEN (2010-10) UDV 046...
- Page 23 Carefully screw in the cap screw until the mechanical stop can be felt. AF 6 Check that the valve is tight. Valve tight? Max. 5 Nm Valve still not → tight Leak detector Turn the knurled nut 2 turns clockwise. Locked 2 turns BP 5279 BEN...
-
Page 24: Disassembling The Sealing Elements Of The Valve Seat
Always wear clean, lint-free gloves and use clean tools when working in this area. Valve deinstalled (→ 10). Turn the knurled nut 4 turns counter clockwise. Loched 4 turns Unfasten the cap screw. 2 turns AF 6 BP 5279 BEN (2010-10) UDV 046... - Page 25 Remove the valve seat. Approx. 40 Nm AF 8 Remove the valve plate. Special tool BP 5279 BEN (2010-10) UDV046.oi...
-
Page 26: Checking And Cleaning The Valve Body And The Sealing Elements Of The Valve Seat
(grain size 240 … 400). • Rinse the inlet and vacuum side of the valve body with alcohol and subsequently blow out with a dry, particle-free gas (e.g. nitrogen). Sealing surface Inlet BP 5279 BEN (2010-10) UDV 046... - Page 27 Valve plate Visual check: • Cracks or chipping etc. on the sealing surface (sapphire)? yes: replace valve plate Clean the valve plate with a lint-free cloth moistened with alcohol. Sapphire Sealing surface Valve seat Visual check: • Scratches on the sealing surface? yes: replace valve seat •...
-
Page 28: Assembling The Sealing Elements Of The Valve Seat
Always wear clean, lint-free gloves and use clean tools when working in this area. Screw in the valve plate. Tighten slightly Special tool Screw in the valve seat. AF 8 Approx. 40 Nm BP 5279 BEN (2010-10) UDV 046... - Page 29 Check that the valve is tight. If it is not, repeat section 7.4 to 7.6. Sealing surface Leak detector Rubber plug BP 5279 BEN (2010-10) UDV046.oi...
-
Page 30: Accessories
DN 40 CF silver-plated PF 501 504-T DN 40 CF gold-plated BN 845 930-T DN 16 CF PF 501 401-T DN 16 CF silver-plated PF 5015 01-T DN 16 CF gold-plated BN 845 929-T BP 5279 BEN (2010-10) UDV 046... -
Page 31: Spare Parts
9 Spare Parts When ordering spare parts, always indicate: • all information on the product nameplate • item number, description and ordering number according to the spare parts list Ordering number Valve plate, sapphire BP 414 656 -X Ordering number Valve seat complete, standard BP 414 652 –X Valve seat complete, gold plated... -
Page 32: Returning The Product
Contaminated products (e.g. radioactive, toxic, caustic or biological hazard) can be detrimental to health and environment. Products returned to Pfeiffer Vacuum should preferably be free of harmful substances. Adhere to the forwarding regulations of all in- volved countries and forwarding companies and enclose a duly com- pleted declaration of contamination Form under www.pfeiffer-vacuum.net... - Page 33 Notes BP 5279 BEN (2010-10) UDV046.oi...
- Page 34 A P A S S I O N F O R P E R F E C T I O N Pfeiffer Vacuum stands for innovative and custom Leading. Dependable. vacuum solutions worldwide. For German engineering art, Customer Friendly. competent advice and reliable services.
Need help?
Do you have a question about the UDV 046 and is the answer not in the manual?
Questions and answers
Hello, How are you? I would like to ask you about the Pfeiffer vacuum, as attached below, whether spare parts are available to replace when damaged or not in your company. Pfeiffer Vacuum, D-35614 Asslar Typ: UDV O46 (2008/10) No: PFI 52035 F-No: 44299135. And I would like to request you its manual, please. Best regards, Gadisa Deme Slovakia
Yes, spare parts are available for the Pfeiffer Vacuum UDV 046. When ordering, it is necessary to provide all information from the product nameplate, along with the item number, description, and ordering number from the spare parts list. Examples of available spare parts include valve plates and valve seats in different materials.
This answer is automatically generated