Table of Contents
Advertisement
Quick Links
Advertisement
Table of Contents

Subscribe to Our Youtube Channel
Related Manuals for Mayer MM038D


Summary of Contents for Mayer MM038D
- Page 1 Digital Electric Oven MMO38D...
-
Page 2: Important Safety Instructions
IMPORTANT SAFETY INSTRUCTIONS • Warning: Do not touch the accessories, surface of heating element and appliance which has extremely high temperature when using and a short period of time after using. • If white smoke appears when using the appliance for the rst time, it is neither an issue nor is the appliance faulty. - Page 3 • After cooking, clean the appliance only when it has completely cooled down. Wipe away any food debris or waste inside the oven. Top of the oven cavity gets burned easily and care should be taken to keep it clean. Keep the appliance completely dry by opening the door every time after cooking.
-
Page 4: Product Technical Parameters
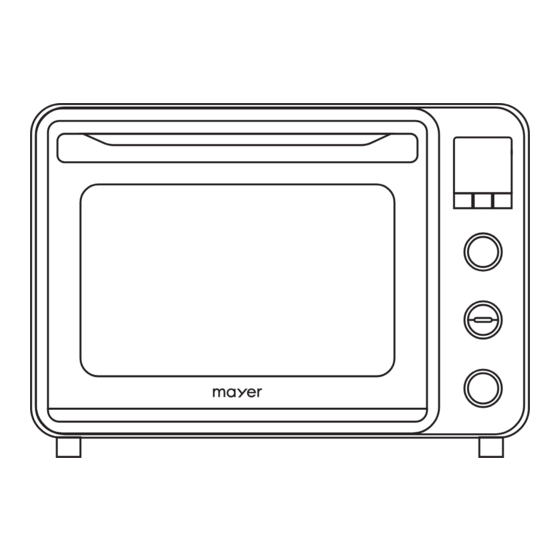
• Children being supervised not to play with the appliance. • Do not touch hot surfaces. Always use oven mitt when handling hot material, and allow metal parts to cool before cleaning. Allow the appliance to cool thoroughly before putting in or taking o parts. - Page 5 Control Panel LED Display & Sensor Touch Control Buttons: GRILL UPPER Temperature BROIL TOAST BAKE Functions DOWN PIZZA COOKIES STEAK Time CHICKEN FERMENT DRY FRUIT Light button Rotisserie button Convection Fan button Control Knobs & Buttons: Function Function knob - Temp + Upper heating control button UPPER Temperature knob...
-
Page 6: Controls And Operations
CONTROLS AND OPERATIONS Before rst use: • Wash all accessories in hot, soapy water. • Thoroughly dry all accessories and re-assemble in oven, plug oven into outlet and you are ready to use your new toaster oven. • After re-assembling your oven, it is recommended to heat up the oven at the highest temperature (230°C) for approximately 15 minutes to eliminate any packing residue that may remain, and also remove all traces of odour which may be initially present in the oven. - Page 7 2. Selecting the temperature: • To control top and bottom temperature together, turn the temperature knob without pressing the heating control buttons, and select your desired temperature. • To control and select the upper and lower heating temperature separately: a. Press the upper heating control button, then turn the temperature knob to select your desired upper heating temperature.
- Page 8 Sensor Touch Control Buttons For summary of which buttons can work for which functions, please refer to the table in page 9. • Light button: By default, the oven light will be turned on for all functions. Press the light button to turn on and o the oven light at any point of time.
- Page 9 Wire Rack • When using the wire rack, it must be placed in the shelf position. • Wire rack cannot be used individually. It should always be used together with the bake tray. • Place the bake tray at the below shelf position, under wire rack. This can help to keep the crumb tray and base of the oven dry.
- Page 10 Turn temperature knob and press heating control buttons to adjust temperature. Turn timer knob to adjust temperature. If needed, press rotisserie button to turn on rotisserie (especially when using DIY function). If needed, press convection fan button to turn on convection fan. Press Start / Stop button to start operating the oven.
-
Page 11: Cleaning And Maintenance
CLEANING AND MAINTENANCE Cleaning • Cleaning of the appliance should only be carried out when the appliance has cooled down to room temperature. • Turn o the main switch and disconnect the power plug from the main power supply. • Ensure that oven is thoroughly cooled down before cleaning. -
Page 12: Troubleshooting
TROUBLESHOOTING PROBLEM CAUSE SOLUTION DISPLAY E1 Please bring appliance to the Service Appliance PCB is faulty. Centre for repairs and maintenance. DISPLAY E2 Turn o and unplug the appliance and leave it to cool down. Once appliance has DISPLAY E3 Appliance is over heated been fully cooled down, you may plug in the appliance to turn on and use again.
Need help?
Do you have a question about the MM038D and is the answer not in the manual?
Questions and answers