Advertisement
Quick Links
Support and E-Warranty Certificate https://www.vevor.com/support
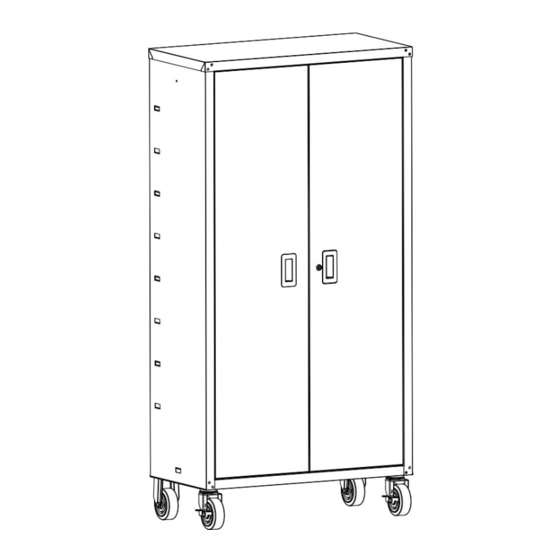
INSTRUCTIONS FOR TOOL CABINET
ASSEMBLY
We continue to be committed to provide you tools with competitive price.
"Save Half", "Half Price" or any other similar expressions used by us only represents an
estimate of savings you might benefit from buying certain tools with us compared to the major
top brands and doses not necessarily mean to cover all categories of tools offered by us. You
are kindly reminded to verify carefully when you are placing an order with us if you are
actually saving half in comparison with the top major brands.
Advertisement

Subscribe to Our Youtube Channel
Summary of Contents for VEVOR TC7200
- Page 1 Support and E-Warranty Certificate https://www.vevor.com/support INSTRUCTIONS FOR TOOL CABINET ASSEMBLY We continue to be committed to provide you tools with competitive price. "Save Half", "Half Price" or any other similar expressions used by us only represents an estimate of savings you might benefit from buying certain tools with us compared to the major top brands and doses not necessarily mean to cover all categories of tools offered by us.
- Page 2 CustomerService@vevor.com This is the original instruction, please read all manual instructions carefully before operating. VEVOR reserves a clear interpretation of our user manual. The appearance of the product shall be subject to the product you received. Please forgive us that we won't inform you again if there are any technology or software updates on our product.
- Page 3 Please read instructions carefully before assembly. Warning-To reduce the risk of injury, user must read instructions manual carefully. Assembly Parts List Part Description Screw-ST4.2*10 Bolt-M6*16 Bolt-M8*25 Shelf clip Door stop Swivel castor 5" Rigid castor 5" Left back - 2 -...
- Page 4 Right back Part Description Left side panel Right side panel Top cover Bottom Shelf Clothes rail Left door Right door - 3 -...
- Page 5 To clean and maintain your unit, we recommend periodic cleaning using a soft cloth and gentle natural cleaner. Table of Parameters Items Description Name Tool Cabinet Model TC7200 910×456×1828 mm External Dimensions 36×18×72 inch Package Size 1750×545×270 mm G.W. 57.2 kg...
- Page 6 Instructions for Installation Body Assembly STEP 1 Join left back(8) and right back(9) together with screw-ST4.2*10,as shown. STEP 2 Join left side panel(10) and right side panel(11) together with screw-ST4.2*10, as shown. Before assembling the side panels, remove the two U-shaped protection slots at the bottom of the side panels - 5 -...
- Page 7 STEP 3 Insert the back and side panels into the limit slots on the topcover,then use bolt-M6*16(2) to fix the top cover and side panels together. STEP 4 Attach theand two swivel castor 5"(6) to the front of the bottom with bolt-M6*16(3),two rigid castor 5"(7) are mounted at the rear of the bottom,as shown.
- Page 8 STEP 5 Insert the bottom into the side panel and back, and join bottom(8) front and side panel together with four bolts-M6*16 (2). - 7 -...
- Page 9 STEP 6 Flip the body over 90°,Install the four bolts-M6*16(2) on the back as shown. - 8 -...
- Page 10 Shelf Assembly Stand the body upright with the casters on the ground,as shown in the figure, first insert the rear ends of the shelf (14) into the side panel hanging buckle at the appropriate height, and then install the shelf clip(4)at the corresponding position. - 9 -...
- Page 11 Door Stop Assembly As shown, press door stop(5) into the holes of the top cover and the bottom . Clothes Rail Assembly Install the clothes rail(15) between the left and right side panels with two bolt-M6*16 (2). - 10 -...
- Page 12 Door Assembly Insert the pin at the bottom of the left door (16) into the bottom hole first,Then insert the spring latch at the top of the left door into the top cover hole,Install the right door (17) on the body in the same way. - 11 -...
- Page 13 Congratulations, your cabinet assembly is now complete! Remember maximum safe load limit per shelf is 200 lb evenly distributed. Always load bottom shelf before top shelf to help prevent any toppling issue. Please lock your castors when using. - 12 -...
- Page 14 Manufacturer:Zhongshan City CYZ Coating Tech.Co.,Ltd. Address:Plant1,No.78,Zhongheng Avenue,Baoyu Village, Henglan Town, Zhongshan City,Guangdong Province,China MADE IN CHINA - 13 -...
- Page 16 Support and E-Warranty Certificate https://www.vevor.com/support...


Need help?
Do you have a question about the TC7200 and is the answer not in the manual?
Questions and answers