Table of Contents
Advertisement
Advertisement
Table of Contents

Subscribe to Our Youtube Channel
Related Manuals for marposs P5

Summary of Contents for marposs P5
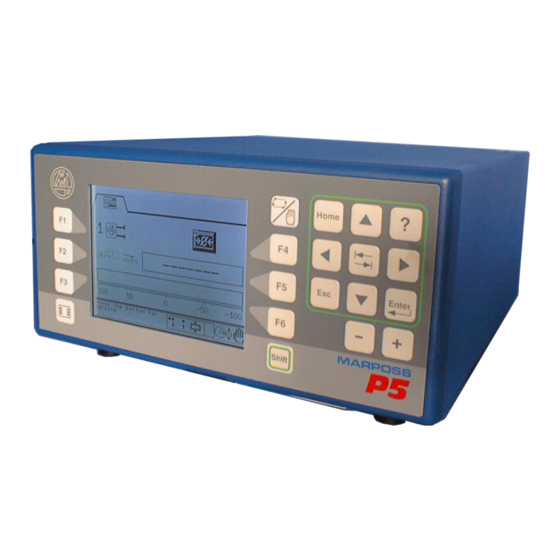
- Page 1 OPERATOR GUIDE In-process Application 15/05/02 P5_OperatorGuide.doc...
- Page 2 Marposs Distributor Office making reference to software code “CMxxxxxxxx” printed on the label in the electrinic gauge back. MARPOSS S.p.A. mai change the features and data reported in this booklet in any moment and without notice, in order to inprove the product.
-
Page 3: Table Of Contents
6. GAUGE SYSTEM TROUBLESHOOTING ...............21 6.1. Zero Troubleshooting....................21 6.1.1. Cannot Mechanically Zero....................21 6.1.2. Cannot Electrically Zero ....................21 6.1.3. Cannot make Zero Adjustments ..................21 6.1.4. Zeroing page is blank...................... 22 6.2. Part Types and Cycles....................23 P5 – Operator Guide... - Page 4 P5 – Operator Guide...
-
Page 5: Introduction
Numbers or choices that can be changed are within quotes; i.e. “100 µm". Front panel keys or software buttons are shown using the actual icon. Section title references within the text are in bold. Names of operator functions are followed by their icon. P5 – Operator Guide 1 . Introduction... - Page 6 P5 – Operator Guide 1. Introduction...
-
Page 7: How The Gauge Is Organized
Each page, sub-folder and folder is assigned an icon. Folders Sub-folders Each folder has three sections: Icons across the top indicate the folder. Sub-folders contained in the folder. Messages and information along the bottom. P5 – Operator Guide 2 . How the gauge is organized... - Page 8 “Single diameter measurement for external”. Data display The operator is viewing data Data entry The operator is changing data. In-process amplifier configured In-process measuring cycles. Manual Mode Automatic P5 – Operator Guide 2. How the gauge is organized...
-
Page 9: Folders
External Info for the specific application. Note: The Viewing, General Adjustments and Utilities folders are described in this Operator Guide. The other folders are described in the “Programming Manual”. P5 – Operator Guide 2 . How the gauge is organized... -
Page 10: Sub-Folders
Electrical zeroing can be done from this page (zeroing button). The measuring head used has retraction, so the status of that function is also shown. P5 – Operator Guide 2. How the gauge is organized... -
Page 11: Menu Maps
Only the menu map folders with operator functions (Viewing, General Adjustments and Utilities) are shown in this guide. The specific menu maps are in the section describing each measuring cycle type. P5 – Operator Guide 2 . How the gauge is organized... - Page 12 P5 – Operator Guide 2. How the gauge is organized...
-
Page 13: Use
(in remote version only) The function of the two panels is similar, they differ just in the keys arrangement. Standard front panel F keys Display Manual/Automatic Keypad Hot key Shift key F keys menu P5 – Operator Guide 3 . Use... -
Page 14: Keys
Displays the Hot keys on the screen and removes them. menu Automatic Switches the gauge system between Automatic and Manual Manual modes. Key used with other keys (see section 3.1.3 “Combination Shift Shift of keys” on page 11 ). P5 – Operator Guide 3. Use... -
Page 15: Keypad
Shift Upon programming they cancel all the changes made Shift before confirming. Upon programming these key disable/restore (with the Enter Shift last programmed value) the selected data, for the data allowing for it. P5 – Operator Guide 3 . Use... -
Page 16: F Keys
For instructions on how to define these keys, see section 3.1.5 on page 13. Hot keys are available at the folder, sub-folder or page level as shown below. Press to view the Hot keys currently defined. These are examples of typical hot keys definitions. P5 – Operator Guide 3. Use... -
Page 17: Defining The Hot Keys
With the hot key to be deleted, call out the page currently stored. Press to highlight the page icon. Press and hold the desired “F#” key until the icon is no longer highlighted, about 5 seconds. Release “F#”: the Hot Key is deleted. P5 – Operator Guide 3 . Use... -
Page 18: Getting Around The Program
At the folder or top level of the program, press to highlight the Utilities folder icon. Utilities folder Enter Press to go to the sub-folder or second level of the program. Press to highlight the Measure Setup sub-folder icon. P5 – Operator Guide 3. Use... -
Page 19: Hot Keys
Press as many times as needed to reach the folder level of the program. Then refer to the menu map for the path to the desired page or use a Hot key shortcut. P5 – Operator Guide 3 . Use... -
Page 20: Panel Test / View The Software Version
A sequence of five pages is displayed (three pages in the basic colors RGB for color display, a black page and a white page for the b/w display) to carry out a visual check of the display efficiency. <Escape> Press to continue. P5 – Operator Guide 3. Use... -
Page 21: Making Changes
If more than one digit needs changing, press to highlight the next digit, then press to increase or decrease the digit. Enter Press , the number has been changed. P5 – Operator Guide 4 . Making changes... -
Page 22: Undoing Changes
4.3. Undoing Changes Shift While holding down press to reset the values. P5 – Operator Guide 4. Making changes... -
Page 23: Part Types And Cycles
Example: Part type 2 and Cycle 1 have been selected. Enter Press to select the Part/Cycle required. The program automatically exits the selection box and returns to the page. P5 – Operator Guide 5 . Part types and cycles... - Page 24 P5 – Operator Guide 5. Part types and cycles...
-
Page 25: Gauge System Troubleshooting
6.1.3. Cannot make Zero Adjustments The accumulated Zero Adjustments have exceeded the zeroing range for the measuring head. Perform Mechanical Zeroing and Electrical Zeroing of the corresponding measuring head. P5 – Operator Guide 6 . Gauge System Troubleshooting... -
Page 26: Zeroing Page Is Blank
The gauge system has not been programmed into the hardware module. No measuring head programmed into Hardware module. Call Marposs service, the measuring head must be configured into the hardware module, followed by programming the measurement. P5 – Operator Guide 6. Gauge System Troubleshooting... -
Page 27: Part Types And Cycles
Selection box at the bottom of the screen, only ONE Part Type and Cycle has been defined. To define additional Part Types and Cycles see the setup section of the Installation Manual. *************************** End of Document *************************** P5 – Operator Guide 6 . Gauge System Troubleshooting...
Need help?
Do you have a question about the P5 and is the answer not in the manual?
Questions and answers