
Subscribe to Our Youtube Channel
Related Manuals for Gaggenau AW 400190


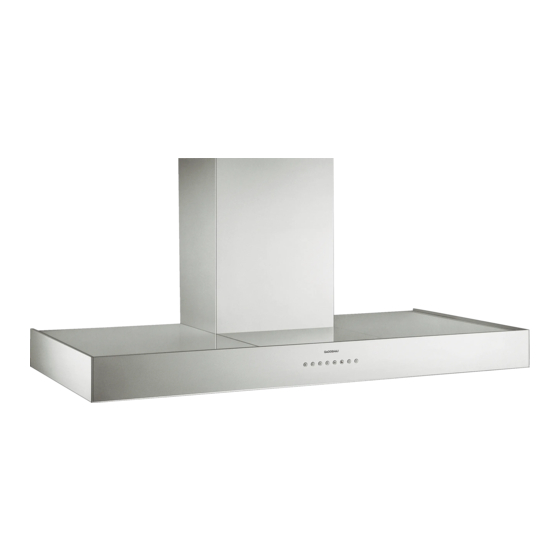
Summary of Contents for Gaggenau AW 400190
- Page 1 Gaggenau Operating and installation instructions AW 400190/400120/400150 AW 402190/402120/402150...
- Page 2 Abb. 1 Abb. 1 ELEKTRO ≥ 700 mm ≥ 600 mm...
-
Page 3: Table Of Contents
Table of contents Operating insructions Installation instructions General Information Installation instructions Information on protection of the environment Connecting pipes Before using the appliance for the first time Electrical Connections Safety Instructions Installation Intended use Installation preparations Technical safety Attachment Special information for gas cookers Installing the flue ducts Proper use Corect installation... -
Page 4: General Information
General Information Information on protection of the Before using the appliance for the environment first time Disposal of transport packaging Note: These operating instructions apply to several appliance models It is possible that individual Your new appliance was sent to you in protective features are described which do not apply to your packaging. -
Page 5: Safety Instructions
Safety instructions Intended use • If the appliance is improperly installed, serviced • or repaired, the user may be placed in This extractor hood complies with the stipulated considerable danger for which the safety regulations. Improper use may result in manufacturer is not liable. -
Page 6: Special Information For Gas Cookers
Special information for gas cookers • Safe operation is possible provided the low • pressure in the installation room of the heating When installing the extractor hood above gas appliance does not exceed 4Pa (0.04mbar). hobs, observe the appropriate national This can be achieved if the combustion air can statutory regulations (e.g. -
Page 7: Proper Use
Proper use Correct installation • • Clean the extractor hood thoroughly before Check the manufacturer’s specifications for the using for the first time. cooker to determine whether an extractor hood can be operated over it. • Before cleaning and servicing the extractor •... -
Page 8: Operating Modes
Operating modes Circulating-air mode • The extractor hood can be used in exhaust air and circulating air mode. The standard setting is exhaust air mode. Exhaust-air mode The air which is drawn in is cleaned by the grease filters and an activated carbon filter and conveyed back into the kitchen. -
Page 9: Operating Procedure
Operating procedure The most effective method of removing vapours produced during cooking is to: • Switch the ventilator ON as soon as you begin cooking. • Switch the ventilator OFF a few minutes after you have finished cooking. Fan OFF Saturation indicator Light Fan settings... - Page 10 Special functions Lighting: • Briefly press the button to switch the light Intensive time: on and off. • • You can set the intensive level running time to The light can be switched on at any time, even 3, 5 or 10 minutes by simultaneously pressing though the fan is switched off.
-
Page 11: Cleaning And Care
Cleaning and care RISK OF INJURY RISK OF FIRE Suitable cleaning agents and care products for your As the filters become more saturated with greasy appliance can be purchased via the Hotline or from residue, the flammability increases. The function of the Online Shop (see cover page). -
Page 12: Removing And Installing The Grease Filters
Removing and installing the grease filter Cleaning the glass plates RISK OF INJURY • Apply commercially available window cleaning Before removing and installing the grease filters, agent with a soft, moist cloth. always follow the instructions and warnings in the •... -
Page 13: Installing And Removing The Activated Carbon Filters
Changing the bulbs Activated carbon filter • Before changing the bulbs, always follow the • instructions and warnings in the chapter Activated carbon filters bind the odours in entitled ”Safety instructions”! circulating-air mode. • • The description of changing the bulbs applies Under normal operation (daily 1 to 2 hours) the to several appliance models. -
Page 14: Installation Instructions
Installation instructions Connecting pipes • Prior to installation, always follow the • instructions and warnings in the chapter The diameter of the exhaust air pipes should entitled ”Safety instructions”! not be less than 150 mm. • Exhaust-air mode Round pipes: We recommend an inner diameter of 150 mm, •... -
Page 15: Electrical Connections
Electrical connection If a permanent connection is required • • A disconnector must be provided on the Before connecting the appliance to the power installation side. Switches with a contact supply, always follow the instructions and opening of more than 3 mm and all-pole warnings in the chapter entitled ”Safety disconnection are regarded as disconnectors. -
Page 16: Installation
Installation Installation preparations The extractor hood is designed to be mounted on the wall. Remove the grease filter (refer to Operating • During installation, optional accessories may Instructions). also require fitting. Draw a line on the wall from the ceiling to the •... -
Page 17: Attachment
Attach the extractor hood. Attach the extractor hood and screw into Adjust the height and align horizontally with the position with the remaining 4 screws. adjusting screws. Stick protective film over the holes of the 2 lower mounting bolts in the protective grid. Check that the 4 lower fixing holes have been correctly marked. -
Page 18: Installing The Flue Ducts
12 Carefully remove the protective foil. 15 Carefully pull the upper flue duct upwards and screw the sides to the fixing bracket with Avoid damage to the sensitive surface. 2 screws. Warning: The interior walls of the flue panelling can have sharp edges –... - Page 19 AD010012 AD010022 AD010112 AD010122 KF001-010...
- Page 20 Gaggenau Hausgeräte GmbH Carl-Wery-Straße 34 D-81739 München www.gaggenau.com...
Need help?
Do you have a question about the AW 400190 and is the answer not in the manual?
Questions and answers