Advertisement
Quick Links
Advertisement

Subscribe to Our Youtube Channel
Related Manuals for Torque TR2-HR-101


Summary of Contents for Torque TR2-HR-101
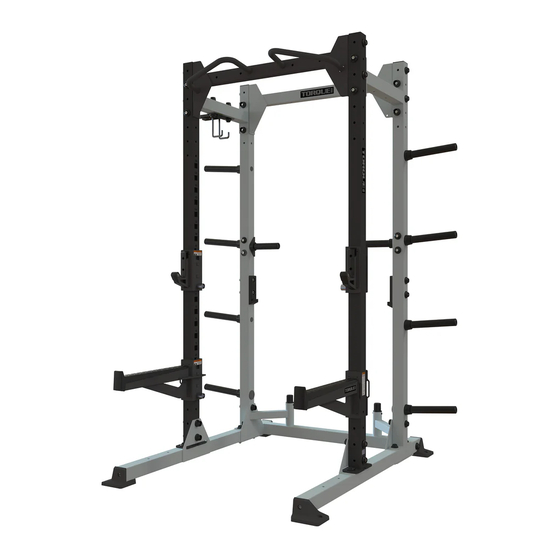
- Page 1 TR2 HALF RACK ASSEMBLY GUIDE VERSION: TR2-HR-101 PART #: 5929601-B...
- Page 2 Children and pets must not be allowed near this machine. Supervise teenagers. This product is not a toy. If unsure of proper use of this product, contact Torque Fitness Customer service at: 763-754-7533 or www.service@torquefitness.com Important Safety Instructions for Assembling Equipment Assistance is required.
-
Page 3: General Notes
• A 6" scale is provided at the bottom of this page. If any items are missing, contact Torque Fitness Customer service at: 763-754-7533 or page. To correctly measure the bolts, •... - Page 4 ITEM NO. PART NUMBER DESCRIPTION QTY. 5872501 WLDMT, HR LEFT BASE 5872801 CASTING, BASE FOOT 2 5872701 CASTING, BASE FOOT 1 5873001 WLDMT, HR RIGHT BASE 2006803 BOLT, 1/2-13 X 1" (25mm) SOCKET HEAD W/NP 4 5873101 WLDMT, REAR BASE CONNECTOR 5631801 WASHER COVER, NYLON BOLT 2006815...
- Page 5 STEP 1 NOTE: SECURELY tighten all bolt connections in this step.
- Page 6 STEP 2 NOTE: LOOSELY assemble bolt connections in this step.
- Page 7 STEP 3 NOTE: WEIGHT HORN UPRIGHT is shown in assembled position. NOTE: LOOSELY assemble bolt connections in this step.
- Page 8 STEP 4 NOTE: LOOSELY assemble bolt connections in this step.
- Page 9 STEP 5 NOTE: 8' UPRIGHT is shown in assembled position. NOTE: Make sure slots on Uprights face in towards center. NOTE: LOOSELY assemble bolt connections in this step.
- Page 10 STEP 6 NOTE: LOOSELY assemble bolt connections in this step.
- Page 11 STEP 7 NOTE: UPRIGHT CONNECTORS are shown in assembled position. NOTES: • LOOSELY assemble bolt connections in this step. • Some items have been hidden for assembly clarity.
- Page 12 STEP 8 NOTE: REAR UPPER CROSS is shown in assembled position. NOTE: LOOSELY assemble bolt connections in this step.
- Page 13 STEP 9 NOTE: MULTI-GRIP PULL-UP is shown in assembled position. OPTIONAL CROSSES NOTES: • LOOSELY assemble bolt connections in this step. • Some items have been hidden for assembly clarity.
- Page 14 FRAME BOLT TIGHTENING SEQUENCE 6) SECURELY tighten these bolt on both sides (4) 4) SECURELY tighten this bolt on both sides (4) 7) SECURELY tighten these bolt on both sides (4) 5) SECURELY tighten these bolt on both sides (4) 1) SECURELY Tighten these bolts on both sides (4) 3) SECURELY tighten...
- Page 15 ANCHORING Anchor Hole (2) NOTES: Make sure all bolts are SECURELY tighten. Position HALF RACK to desired location in the room. Anchor HALF RACK to the floor referencing X-RACK ANCHORING INSTRUCTIONS which can be downloaded at www.torquefitness.com/pages/assembly-manuals/x-series anchoring/ Anchor Hole (2) x-series floor anchoring inst WARNING! HALF RACKS ARE REQUIRED TO BE ANCHORED TO THE...
- Page 16 STEP 12 NOTES: SECURELY tighen bolt connections in this step.
- Page 17 STEP 13 NOTES: SECURELY tighen bolt connections in this step.
- Page 18 STEP 14 NOTE: SECURELY tighen bolt connections in this step.
- Page 19 STEP 15A NOTE: Insert Bar Supports and Bar Catches into desired slot height on Uprights. Push down to lock in place NOTE: Warning Label NOTE: To remove Bar Supports and Bar Catches from Uprights, pull Spring Pin out to unlock. Lift up and pull out NOTE: Some items have been hidden for assembly clarity.
- Page 20 STEP 15B (BAR CATCH STORAGE) NOTE: To store Left and Right Bar Catches, place slot on the Bar Catch over the hook of Storage Hanger as shown...
- Page 21 WEIGHT STORAGE NUMBERING KIT NOTE: Using a rubber mallet, install the desired WEIGHT STORAGE NUMBER CAP into the end of the WEIGHT HORN.
- Page 22 TR2 DOUBLE HALF RACK WITH STORAGE ASSEMBLY GUIDE VERSION: DHRWS-101 PART #: 5929601-B...
- Page 23 ITEM NO. PART NUMBER DESCRIPTION QTY. 5872501 WLDMT, HR LEFT BASE 5872801 CASTING, BASE FOOT 2 5872701 CASTING, BASE FOOT 1 5873001 WLDMT, HR RIGHT BASE 2006803 BOLT, 1/2-13 X 1" (25mm) SOCKET HEAD W/NP 8 5873101 WLDMT, REAR BASE CONNECTOR 5631801 WASHER COVER, NYLON BOLT 2006815...
- Page 24 STEP 1 NOTE: SECURELY tighten all bolt connections in this step.
- Page 25 STEP 2 NOTE: LOOSELY assemble bolt connections in this step.
- Page 26 STEP 3 NOTE: WEIGHT HORN UPRIGHT is shown in assembled position. NOTE: LOOSELY assemble bolt connections in this step.
- Page 27 STEP 4 NOTE: ACCESSORY STORAGE UPRIGHT is shown in assembled position. NOTE: LOOSELY assemble bolt connections in this step.
- Page 28 STEP 5 NOTE: BOOKSHELF STORAGE is shown in assembled position. NOTE: LOOSELY assemble bolt connections in this step.
- Page 29 STEP 6 NOTE: 8' UPRIGHT is shown in assembled position. NOTE: Make sure slots on Uprights face in towards center. NOTE: LOOSELY assemble bolt connections in this step.
- Page 30 STEP 7 NOTES: • LOOSELY assemble bolt connections in this step. • The BOOKSHELF STORAGE has been hidden for assembly clarity.
- Page 31 STEP 8 NOTE: UPRIGHT CONNECTORS are shown in assembled position. NOTES: • LOOSELY assemble bolt connections in this step. • Some items have been hidden for assembly clarity.
- Page 32 STEP 9 NOTE: REAR UPPER CROSSES are shown in assembled position. NOTE: LOOSELY assemble bolt connections in this step.
- Page 33 STEP 10 NOTE: MULTI-GRIP PULL-UPS are shown in assembled position. NOTES: OPTIONAL CROSSES • LOOSELY assemble bolt connections in this step. • Some items have been hidden for assembly clarity.
- Page 34 STEP 11 NOTE: Repeat this step on other end. NOTES: SECURELY tighen bolt connections in this step.
- Page 35 STEP 12 NOTES: SECURELY tighen bolt connections in this step.
- Page 36 STEP 13 NOTE: SECURELY tighen bolt connections in this step.
- Page 37 STEP 14 NOTE: 6' ACCESSORY TRAYS are shown in assembled position. NOTE: LOOSELY assemble bolt connections in this step.
- Page 38 STEP 15...
- Page 39 STEP 16 NOTE: 6' BALL STORAGE are shown in assembled position. NOTE: LOOSELY assemble bolt connections in this step.
- Page 40 FRAME BOLT TIGHTENING SEQUENCE 6) SECURELY tighten these bolt on both sides (8) 7) SECURELY tighten these bolt on both sides (8) 4) SECURELY tighten this bolt on both sides (8) 5) SECURELY tighten these bolt on both sides (8) 8) SECURLY tight all remaining bolts on uprights (18)
- Page 41 ANCHORING NOTES: Make sure all bolts are SECURELY tighten. Anchor Hole (4) Position RACK to desired location in the room. Anchor DOUBLE HALF RACK to the floor referencing X-RACK ANCHORING INSTRUCTIONS which can be downloaded at www.torquefitness.com/pages/assembly-manuals/x-series anchoring/ Anchor Hole (4) x-series floor anchoring inst WARNING! HALF RACKS ARE REQUIRED TO BE ANCHORED TO THE...
- Page 42 STEP 19A NOTE: Insert Bar Supports and Bar Catches into desired slot height on Uprights. Push down to lock in place NOTE: Warning Label NOTE: To remove Bar Supports and Bar Catches from Uprights, pull Spring Pin out to unlock. Lift up and pull out NOTE: Some items have been hidden for assembly clarity.
- Page 43 STEP 19B (BAR CATCH STORAGE) NOTE: To store Left and Right Bar Catches, place slot on the Bar Catch over the hook of Storage Hanger as shown...
- Page 44 WEIGHT STORAGE NUMBERING KIT NOTE: Using a rubber mallet, install the desired WEIGHT STORAGE NUMBER CAP into the end of the WEIGHT HORN.
- Page 45 OPTIONAL LOWER BAND PEGS 1/2 X 4" BOLT (4) BOLT COVER WASHER (4) LOWER BAND PEG, RIGHT 1/2" FLANGE LOCK NUT (4) LOWER BAND PEG, LEFT NOTES: • Use hardware included with LOWER BAND PEGS. • SECURELY tighen bolt connections in this step.
- Page 46 OPTIONAL UPPER BAND PEGS UPPER BAND PEG UPPER BAND PEG NOTES: • Use existing hardware for assembly. • SECURELY tighen bolt connections in this step. • Some items have been hidden for assembly clarity.
- Page 47 OPTIONAL GROUND ROTATIONAL TRAINER 1/2 X 4" BOLT (2) GROUND ROTATIONAL TRAINER 1/2" FLAT WASHER (4) 1/2 X LOCK NUT (2) NOTES: • Use hardware included with GROUND ROTATIONAL TRAINER • SECURELY tighen bolt connections in this step.
- Page 48 OPTIONAL BATTLE ROPE ANCHOR 1/2 X 4-1/4" BOLT (2) BATTLE ROPE ANCHOR 1/2" FLAT WASHER (4) NOTES: 1/2" LOCK NUT (2) • Use hardware included with BATTLE ROPE ANCHOR • SECURELY tighen bolt connections in this step.
- Page 49 OPTIONAL GROUND ROTATIONAL TRAINER WITH OPTIONAL LOWER BAND PEG LEFT 1/2 X 4-1/4" BOLT (2) BOLT COVER WASHER (2) GROUND ROTATIONAL TRAINER LOWER BAND PEG, LEFT 1/2" FLANGE LOCK NUT (2) NOTES: • Use hardware included with LOWER BAND PEGS. •...
- Page 50 OPTIONAL BATTLE ROPE ANCHOR WITH OPTIONAL LOWER BAND PEG RIGHT 1/2 X 4-1/4" BOLT (2) 1/2" FLAT WASHER (2) BATTLE ROPE ANCHOR LOWER BAND PEG, RIGHT 1/2" FLANGE LOCK NUT (2) NOTES: • Use hardware included with both LOWER BAND PEGS and BATTLE ROPE ANCHOR.
- Page 51 OPTIONAL SIGN BACKING BRACKET (STEP 1) 3/8 X 3-3/4" BOLT (2) 3/8" FLAT WASHER (4) SIGN BACKING BRACKET 3/8" LOCK NUT (2) NOTES: • Use hardware included with SIGN BACKING BRACKET. • LOOSELY tighen bolt connections in this step.
- Page 52 OPTIONAL SIGN BACKING BRACKET (STEP 2) 3/8" LOCK NUT (2) SIGN BACKING BRACKET 3/8 X 1" BOLT (2) 3/8" FLAT WASHER (4) NOTES: • Use hardware included with SIGN BACKING BRACKET. • Once this step has been completed, SECURELY tighen bolt connections in this step and previous step.
-
Page 53: Maintenance
MAINTENANCE: NUTS/BOLTS: Tighten and/or adjust as needed. FRAME & PADS: Wipe down and damp cloth. For customer service contact Torque Fitness Customer service at: 763-754-7533 or www.service@torquefitness.com...
Need help?
Do you have a question about the TR2-HR-101 and is the answer not in the manual?
Questions and answers