Table of Contents
Advertisement
Available languages
Available languages
Advertisement
Table of Contents

Subscribe to Our Youtube Channel
Related Manuals for Risco WL Panda


Summary of Contents for Risco WL Panda
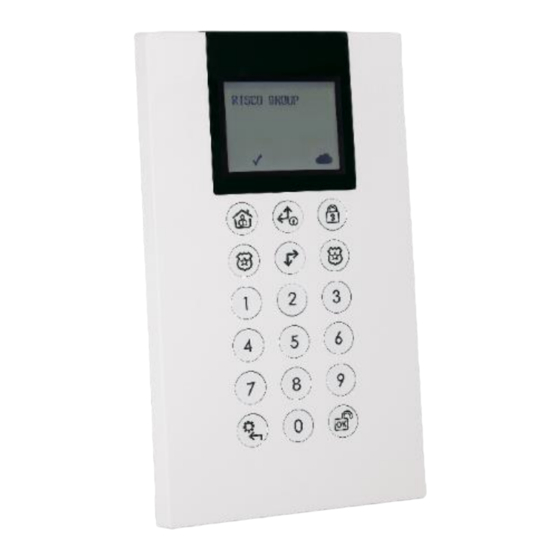
- Page 1 WL Panda for LightSYS Model: RW432KPP Installation and User Guide...
- Page 2 Language Page...
-
Page 3: Main Features
• Battery economy mode Communication Setup The WL Panda for LightSYS keypad must identify itself to the system receiver. This can be done by typing the 11-digit serial number of the keypad into the system or using RF mode. Setup using RF communication From the Wired Keypad, navigate to the Programing (installer) menu, select 7)Install >... - Page 4 Setup by Serial Number From the Wired Keypad, navigate to the Programing (installer) menu, select 7)Install > 2)WL Device > 2)Allocation > 2)By Code > 3) Keypad and then press If there are two receivers allocated to the system, select the receiver you wish to allocate and then press Select the Keypad location in the system and then press Enter the Keypad’s 11-digit Serial Number and then press...
-
Page 5: Mounting The Keypad
Mounting the Keypad Mount the keypad on the wall using the supplied mounting bracket. NOTE: Before mounting the keypad test the keypad communication with the system. Remove the fastening screw that secures the mounting bracket to the keypad (see Figure 1). Separate the mounting bracket from the keypad (see Figure 2). -
Page 6: Visual Indicators
Main Keypad Operations Visual Indicators The following visual indicators are displayed on the LCD Keypad: Icon Indication Operation System trouble System is operating normally Trouble System is ready to be armed System is not ready to be armed Slow Flash System is ready to be armed while exit/entry zone is open System is armed in Full Arm or Stay Arm... -
Page 7: User Operations
User Operations Control Keys The following lists details the user operations from the 2-Way WL Panda for LightSYS keypad. Operation In Normal Operation mode: Used for Away (Full setting). In User Functions menu: Used to change data. In Normal Operation mode: Used for Stay arming (Part Setting). - Page 8 Operation Away (Full Setting) partition 1/2/3/4 Code > > > Stay (Part Settings) partition 1/2/3/4 Code > > > Partition Disarm (Unset) Code > > > Duress Unset Duress Code > Quick Zones Bypass (Omit) Code > [Zone No.] Activate Output [Code] [Activities] [Output...
-
Page 9: Emergency Keys
Operation Changing Keypad Language simultaneously for 2 seconds > select language > Emergency Keys The following operations will send emergency notifications to the alarm monitoring station Operation Pressing both keys simultaneously for at least two seconds activates a Fire alarm Pressing both keys simultaneously for at least two seconds activates an Emergency alarm Pressing both keys simultaneously for at least two seconds... -
Page 10: Keypad Settings
Keypad Settings Note: The following settings must be defined individually for each keypad connected to the system. ➢ To define keypad settings when idle follow this procedure: Press for two seconds until the Keypad Settings menu appears Select the relevant icon using the keys: Brightness Contrast... -
Page 11: Sleep Mode
Sleep Mode For extending the battery life of the keypad, the keypad is designed with a Sleep mode function. By default, 10 seconds after the last key has been pressed, the keypad will turn off its display and LEDs. Replacing Batteries Remove the fastening screw that secures the mounting bracket to the keypad (see Figure 1). -
Page 12: Technical Specification
WL Panda for LightSYS Keypad Prox, 868 Standard Compliance RED Compliance Statement: Hereby, RISCO Group declares that this equipment is in compliance with the essential requirements and other relevant provisions of Directive 2014/53/EU. For the CE Declaration of Conformity please refer to our website: www.riscogroup.com. -
Page 13: Caratteristiche Principali
Introduzione La tastiera radio bidirezionale Panda permette di comunicare con la centrale LightSYS in modalità bidirezionale evidenziando gli stati del sistema e le conferme per ogni comando trasmesso. La tastiera permette l’utilizzo tramite codice utente oppure Tag di prossimità. Caratteristiche principali •... - Page 14 Memorizzazione tramite Numero di Serie Tramite tastiera cablata del Sistema, accedere al menu di programmazione tecnica e selezionare 7)Configurazione > 2)Accessori Radio > 2)Memorizza > 2)Via Nr. Di Serie > 3)Tastiere e premere Se ci sono due ricevitori radio configurati nel Sistema, selezionare il ricevitore in cui si vuole memorizzare la tastiera e premere Selezionare il numero della tastiera e premere Digitare le 11 cifre del numero di serie della tastiera e premere...
-
Page 15: Installazione Della Tastiera
Installazione della tastiera Installare la tastiera a parete utilizzando la staffa. NOTA: Prima di posizionare la tastiera verificare la comunicazione radio con la ricevente. Rimuovere la vite che blocca la staffa alla tastiera (vedere Figura 1). Sganciare la staffa dalla tastiera (vedere Figura 2). Rimuovere il coperchio del vano batterie della tastiera (vedere Figura 3). - Page 16 Principali Comandi da Tastiera Icone grafiche Le icone grafiche che seguono vengono visualizzate sul display LCD della tastiera: Icona Stato Significato Anomalia di sistema Il sistema sta funzionando normalmente Anomalia Il sistema è pronto per essere inserito Il sistema non è pronto per essere inserito Lampeggio Il Sistema è...
- Page 17 Operazioni Utente Tasti di Comando La tabella che segue descrive le operazioni disponibili per l’utente tramite tastiera radio bidirezionale Panda del sistema LightSYS. Tasto Funzione/operazione Nel modo normale di funzionamento viene utilizzato per inserire il sistema in Totale. Nel menu Funzioni Utente vene usato per modificare dati. Nel modo normale di funzionamento viene utilizzato per inserire il sistema in Parziale.
- Page 18 Tasto Operazione Inserimento Totale partizioni 1/2/3/4 Codice > > > Inserimento Parziale partizioni 1/2/3/4 Codice > > > Disinserimento partizioni Codice > > > Disinserimento sotto coercizione Codice coercizione > Esclusione veloce zone Codice > [Zona N.] Attiva uscita [Codice} [Attività] [Attiva uscite]...
-
Page 19: Tasti Funzione
Tasto Operazione Modifica lingua tastiera Premere simultaneamente per 2 secondi > selezionare la lingua > Tasti di Emergenza Le sequenze ti tasti della tabella in basso permettono di segnalare eventi di emergenza. Tasto Funzione/Operazione La pressione simultanea dei due tasti per due secondi attiverà una segnalazione antincendio La pressione simultanea dei due tasti per due secondi attiverà... - Page 20 Impostazioni della Tastiera Nota: le predisposizioni che seguono sono individuali per ogni singola tastiera configurata nel sistema. ➢ Per modificare le impostazioni della tastiera, procedere come segue: Premere per due secondi fino alla comparsa del menu seguente Selezionare l’icona della funzione da modificare usando i tasti Luminosità...
-
Page 21: Modalità Sleep
Modalità Sleep Per prolungare la durata della batteria della tastiera, la tastiera è progettata con una funzione di modalità “Sleep”. Per impostazione predefinita, 10 secondi dopo aver premuto l'ultimo tasto, la tastiera disattiva il display e i LED. Sostituzione delle batterie Rimuovere la vite di blocco della tastiera alla staffa di fissaggio (vedere Figura 1). -
Page 22: Specifiche Tecniche
Tastiera Radio Panda con Prossimità per LightSYS in 868 MHz Conformità standard Dichiarazione di Conformità RED: La sottoscritta RISCO Group, dichiara sotto la propria responsabilità che questo prodotto è conforme ai requisiti essenziali e alle altre rilevanti disposizioni della Direttiva Europea 2014/53/EU. -
Page 23: Funciones Principales
Introducción El teclado inalámbrico bidireccional Panda para LightSYS permite la comunicación entre el teclado inalámbrico y un panel de control de LightSYS. Al ser conexión bidireccional, el teclado recibe una indicación de estado de respuesta del panel para cada comando enviado. - Page 24 En el teclado con cable, presione para finalizar el procedimiento de asignación. Configuración mediante número de serie Desde el teclado con cable, vaya al menú Programación del Instalador, seleccione 7)Instalación > 2)Dispositivo Inalámbrico > 2)Asignación > 2)Por Código > 3)Teclado y presione Si hay dos receptores asignados al sistema, seleccione el receptor que desee asignar y presione Seleccione la ubicación del teclado en el sistema y presione...
- Page 25 Montaje del teclado Monte el teclado en la pared usando el soporte de montaje suministrado. NOTA: antes de montar el teclado, pruebe la comunicación del teclado con el sistema. Quite el tornillo de fijación que une el soporte de montaje al teclado (ver Figura 1). Separe el soporte de montaje del teclado (ver Figura 2).
- Page 26 Operaciones principales del teclado Indicadores visuales Los siguientes indicadores visuales se muestran en el teclado LCD: Icono Indicación Operación Encendido Problemas en el sistema Apagado El sistema funciona con normalidad Problema Encendido El sistema está listo para el armado Apagado El sistema no está...
-
Page 27: Botones De Control
Operaciones del usuario Botones de control La siguiente lista detalla las operaciones que el usuario puede llevar a cabo desde el teclado inalámbrico bidireccional Panda para LightSYS. Botón Operación En el modo Normal: se usa para Armar Total. En el menú de funciones de usuario: se usa para cambiar datos. En el modo Normal: se usa para Armado Parcial. - Page 28 Botón Operación Armado Total – Partición 1/2/3/4 Código > > > Armado Parcial – Partición 1/2/3/4 Código > > > Desarmado – Partición Código > > > Desarmado – Coacción Código Coacción > Anulación rápida de zona (omitir) Código > [N.º...
-
Page 29: Botones De Función
Botón Operación Cambiar idioma del teclado a la vez durante 2 segundos > seleccionar idioma > Botones de emergencia Las siguientes acciones enviarán notificaciones de emergencia a la central receptora de alarmas Botón Operación Al presionar los dos botones a la vez durante al menos dos segundos, se activa la alarma de incendio Al presionar los dos botones a la vez durante al menos dos segundos, se activa una alarma de emergencia... - Page 30 Ajustes del teclado Nota: es preciso definir los siguientes ajustes de forma individual en cada teclado conectado al sistema. ➢ Para definir los ajustes del teclado mientras está inactivo, seguir el procedimiento que se describe a continuación: Presionar durante dos segundos hasta que aparezca el menú Ajustes del teclado.
-
Page 31: Modo De Suspensión
Modo de suspensión Para ampliar la duración de la batería del teclado, éste está diseñado con una función de modo de suspensión. Por defecto, 10 segundos después de presionar la última tecla, el teclado apaga la pantalla y los LED. Reemplazar las pilas Quite el tornillo de fijación que une el soporte de montaje al teclado (ver Figura 1). -
Page 32: Especificaciones Técnicas
Cumplimiento de normativas Declaración de Conformidad RED : Por la presente, RISCO Group declara que este equipo cumple con los requisitos esenciales y otras disposiciones relevantes de la Directiva 2014/53/EU. Para la Declaración de Conformidad CE, por favor diríjase a nuestra web: www.riscogroup.com. -
Page 33: Caractéristiques Principales
Introduction Le clavier Panda sans fil bidirectionnel pour LightSYS permet la communication entre le clavier sans fil et une centrale LightSYS. Grâce à sa technologie bidirectionnelle, le clavier reçoit en réponse une indication d'état de la centrale pour chaque commande envoyée. Vous pouvez utiliser le clavier soit avec un code soit avec un tag de proximité. - Page 34 Sur le clavier filaire, appuyez sur pour terminer la procédure d’adressage. Adressage par numéro de série Depuis le clavier filaire, accédez au menu Programmation (installateur), sélectionnez 7)Install > 2)Access. SF > 2)Allocation SF > 2)Par N) Série > 3)Clavier, puis appuyez sur Si deux récepteurs sont adressés sur le système, sélectionnez celui sur lequel vous souhaitez adresser le clavier, puis appuyez sur Sélectionnez l'emplacement du clavier dans le système, puis appuyez sur...
- Page 35 Fixation du clavier Fixez le clavier au mur à l'aide du support de fixation fourni. REMARQUE : avant d'installer le clavier, vérifiez qu'il communique correctement avec le système. Retirez la vis qui fixe le support de fixation au clavier (voir Figure 1). Séparez le support de fixation du clavier (voir Figure 2).
- Page 36 Fonctions principales sur le clavier Indicateurs visuels Les indicateurs visuels suivants sont affichés sur le clavier LCD : Icône Indication Opération Allumé Défaut système. Éteint Le système fonctionne normalement. Défaut Allumé Le système est prêt à être armé. Éteint Le système n'est pas prêt à être armé. Clignotement Le système est prêt à...
-
Page 37: Fonctions Utilisateur
Fonctions utilisateur Fonction des touches Les listes suivantes détaillent les fonctions utilisateur sur le clavier sans fil bidirectionnel Panda pour LightSYS. Touche Opération En fonctionnement normal : utilisé pour Armer (mode complet). Dans le menu Fonctions utilisateur : utilisé pour modifier les données. En fonctionnement normal : utilisé... - Page 38 Fonction Opération Armement complet partition 1/2/3/4 Code > > > Armement partiel partition 1/2/3/4 Code > > > Désarmement par partition Code > > > Désarmement sous contrainte Code contrainte > Exclusion de zone rapide Code > [Nº zone] Activation de sortie [Code] [Activités] [Contrôle...
-
Page 39: Touches D'urgence
Touches d'urgence Les procédures suivantes permettent d'envoyer des notifications d'urgence au centre de télésurveillance. Touche Opération Appuyez simultanément sur ces deux touches pendant au moins deux secondes pour activer une alarme incendie. Appuyez simultanément sur ces deux touches pendant au moins deux secondes pour activer une alarme d'urgence. -
Page 40: Configuration Du Clavier
Configuration du clavier Remarque : vous devez définir individuellement les paramètres suivants pour chaque clavier connecté au système. ➢ Pour configurer le clavier lorsqu'il est en veille, procédez comme suit : Appuyez sur la touche pendant deux secondes jusqu'à ce que le menu de Configuration du clavier s'affiche. -
Page 41: Mode Veille
Mode veille Pour prolonger l'autonomie des piles, le clavier est doté d'un mode veille. Par défaut, l'afficheur et les voyants du clavier s'éteignent 10 secondes après avoir appuyé sur la dernière touche. Remplacement des piles Retirez la vis qui fixe le support de fixation au clavier (voir Figure 1). Faites glisser le clavier, puis retirez-le du support de fixation. -
Page 42: Caractéristiques Techniques
Conformité aux normes Rapport de Conformité de RED Par la présente, RISCO Group, déclare que cet équipement est en conformité aux conditions essentielles et à d'autres dispositions appropriées de la directive 2014/53/EU. Vous pouvez trouver la copie complète de la déclaration de conformité... -
Page 43: Características Principais
Modo de economia de bateria Configuração da comunicação O teclado WL Panda para LightSYS deve identificar-se para o receptor do sistema. Isto pode ser feito digitando o número de série do teclado com 11 dígitos no sistema ou usando o modo de RF. - Page 44 No teclado com fio, pressione para concluir o procedimento de alocação. Configuração através do número de série No teclado com fio, navegue até o menu Programming (programação) (do instalador), selecione 7) Install (instalar) > 2) WL Device (dispositivo sem fio) > 2) Allocation (atribuição) >...
- Page 45 Instalação do teclado Fixe o teclado na parede usando o suporte de Instalação fornecido. NOTA: Antes de instalar o teclado, teste a sua comunicação com o sistema. Remova o parafuso de fixação que prende o suporte de Instalação ao teclado (ver Figura 1).
- Page 46 Operações principais do teclado Indicadores visuais Os indicadores visuais a seguir são exibidos no teclado LCD: Ícone Indicação Operação Ligado Problema no sistema Desligado Sistema a operar normalmente Problema Ligado O sistema está pronto para ser armado Desligado O sistema não está pronto para ser armado Piscando O sistema está...
- Page 47 Operações do usuário Teclas de controlo As listas a seguir detalham as operações do usuário para o teclado sem fio bidirecional Panda para LightSYS. Teclas de controlo Tecla Operação Em modo de Operação Normal: Usado para o modo Away (ausência) (armado total). No menu User Functions (Funções do Usuário): Usado para modificar dados.
- Page 48 Tecla Operação Presente (Ativação parcial) Código > Desarmar (Desativar) e silenciar um alarme Código > Ausente (Ativação completa) partição 1/2/3/4 Código > > > Presente (Ativação parcial) partição 1/2/3/4 Código > > > Desarmar partição (Desativar) Código > > > Desativar coação Código de coação >...
-
Page 49: Teclas De Emergência
Tecla Operação Alterar idioma do teclado simultaneamente durante 2 segundos > selecionar idioma > Teclas de emergência As operações a seguir enviarão notificações de emergência à central de monitorização de alarmes Tecla Operação Pressionar as duas teclas simultaneamente pelo menos dois segundos ativa um alarme de incêndio. - Page 50 Configurações do teclado Nota: As configurações a seguir devem ser definidas individualmente para cada teclado conectado ao sistema. ➢ Para definir as configurações do teclado quando ocioso (não usado), siga o procedimento abaixo: Pressione durante dois segundos até aparecer o menu Keypad Settings (configurações do teclado) Selecione o ícone desejado usando as teclas Brilho...
-
Page 51: Modo De Repouso
Feche a tampa do compartimento de baterias, coloque o teclado de volta na parede e fixe o parafuso no seu lugar. CUIDADO: Há RISCO de explosão caso a bateria seja substituída por uma incompatível. Descarte baterias usadas de acordo com regulamentos locais. -
Page 52: Especificações Técnicas
Conformidade com normas Declaração de conformidade RED: Por meio deste, o RISCO Group declara que o seu equipamento está em conformidade com as necessidades essenciais e outras provisões relevantes da diretiva 2014/53/EU. l Para ver a declaração de conformidade CE, por favor consulte o nosso website: www.riscogroup.com... - Page 53 Introductie Het 2-Weg DL Panda bediendeel voor LightSYS laat de communicatie toe tussen een draadloze bediendeel en het LightSYS paneel. Door de bi-directionele functionaliteit is er voor elk commando dat verstuurd wordt naar het paneel een terugkoppeling met de status. U kan het bediendeel bedienen door middel van een code of proximity tag. Hoofdkenmerken •...
- Page 54 Druk op het bedrade toetsenpaneel op om de toewijzingsprocedure te voltooien. Aanleren via serienummer Via het bedrade bediendeel dient u te navigeren naar het programmeer (installateur) menu, selecteer 7)Instellen > 2)DL Apparaat > 2)DL aanleren > 2)dmv Code > 3) Keypad en druk dan op Indien er 2 ontvangers aangeleerd zijn op het systeem, selecteert u de ontvanger waar u het bediendeel wenst op aan te leren en druk op...
- Page 55 Installeren van het bediendeel Monteer het bediendeel op de muur door gebruikt te maken van de meegeleverde montage beugel. Opmerking: Alvorens het bediendeel te installeren dient u eerst de communicatie te testen met het systeem. Verwijder de bevestigingsschroef welke de montage beugel vergrendelt aan het bediendeel (zie Figuur 1).
- Page 56 Deels / Overbrug Geen overbrugging van zones in het systeem Zone/bediendeel/externe module heeft een sabotage Sabotage All zones in normale toestand Systeem verbonden met de RISCO Cloud Traag RISCO Cloud connectie probleem knipperen Cloud Geen RISCO Cloud connectie geconfigureerd /...
- Page 57 Bedieningstoetsen In de volgende lijst worden de gebruikershandelingen van de 2-weg WL Panda voor LightSYSYS-toetsenpaneel in detail beschreven. Bedientoetsen Toets Beschrijving In normale mode: Wordt gebruikt om volledig in te schakelen. In het gebruikersmenu: Wordt gebruikt om data te veranderen.
- Page 58 Toets Werking Afwezig (volledig inschakelen) partitie 1/2/3/4 Code > > > Thuis (deels inschakelen) partitie 1/2/3/4 Code > > > Partitie uitschakelen Code > > > Dwang uitschakelen Dwangcode > Snelle zoneoverbrugging (overslaan) Code > [Zonenummer] Uitgang activeren [Code] [Activiteiten] [Uitgangscontrole] [Nummer programma- uitgang]...
- Page 59 Toets Werking Taal toetsenpaneel wijzigen tegelijkertijd 2 seconden indrukken > selecteer taal > Noodtoetsen De volgende bewerkingen zullen een noodmelding versturen naar de meldkamer Toets Beschrijving Bij gelijktijdig induwen van beide knoppen, gedurende ten minste 2 seconden wordt er een Brand alarm gegenereert Bij gelijktijdig induwen van beide knoppen, gedurende ten minste 2 seconden, wordt er een Nood alarm gegenereert Bij gelijktijdig induwen van beide knoppen, gedurende ten...
- Page 60 Bediendeel instellingen Opmerking: De volgende instellingen dienen per bediendeel dat aangesloten is op het systeem apart ingesteld te worden. ➢ Volg volgende procedure wanneer het bediendeel in rust is: Druk op gedurende twee seconden tot het instelling menu van het bediendeel verschijnt Selecteer het relevante icoon door gebruik te maken van de toetsen:...
-
Page 61: Vervangen Van De Batterijen
Slaap Mode Voor het verlengen van de batterijduur van het bediendeel is er een slaap mode functie ontwikkeld. Standaard instelling is ingesteld op 10 seconden, hierna zal het bediendeel na de laatste toetsaanslag de display en led’s uitschakelen. Vervangen van de batterijen Verwijder de bevestigingsschroef welke de montage beugel vergrendelt aan het bediendeel (zie Figuur 1). -
Page 62: Technische Specificaties
WL Panda Prox bediendeel voor LightSYS, 868 Standaard Comformiteit RED conformiteitsverklaring: RISCO Group bevestigt dat dit product in lijn is met de essentiële verplichtingen en andere belangrijke voorzieningen van de 2014/53/EU richtlijnen. Voor de conformiteitsverklaring zie onze website: www.riscogroup.com 04/2021... -
Page 63: Standard Limited Product Warranty
RISCO, for a period of (i) 24 months from the date of connection to the RISCO Cloud (for cloud connected products) or (ii) 24 months from production (for other products which are non-cloud connected), as the case may be (each, the “Product Warranty Period”... - Page 64 FORESEEABLE OR RISCO HAS BEEN INFORMED OF THEIR POTENTIAL. RISCO does not install or integrate the product in the end user security system and is therefore not responsible for and cannot guarantee the performance of the end user security system which uses the product.
Need help?
Do you have a question about the WL Panda and is the answer not in the manual?
Questions and answers