Advertisement
Quick Links
Advertisement

Related Manuals for Sierra Flame WM-FML-STL Series


Summary of Contents for Sierra Flame WM-FML-STL Series
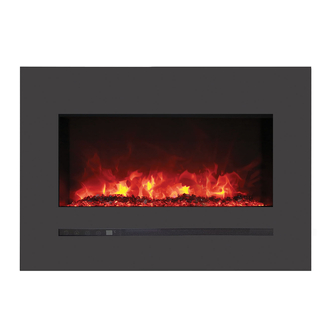
- Page 1 All manuals and user guides at all-guides.com Fix your Fireplace WM-FML-STL series...
- Page 2 All manuals and user guides at all-guides.com Contents • How to replace LED light • How to replace flicker motor • How to replace the heating element • How to replace the PCB board • How to replace the signal receiver •...
- Page 3 All manuals and user guides at all-guides.com Replace LED light Replace ember bed LED light Step 1 Unplug the mood light located on the left side behind the front panel Unplug the mood light before you remove the front panel...
- Page 4 All manuals and user guides at all-guides.com Step 2 Unscrew one screw on each side behind the front steel panel to remove Surround.
- Page 5 All manuals and user guides at all-guides.com ZOOMED VIEW Step 3 Unscrew 4 screws where red arrows marked to remove two side panels...
- Page 6 All manuals and user guides at all-guides.com Step 4 Unscrew 8 screws as circled in red to remove front bottom panel NOTE: Please be careful when you remove the steel panel and mind the ember bed glass panel.
- Page 7 All manuals and user guides at all-guides.com Move the front bottom panel outward slightly in order to access the glass ember bed panel. Carefully remove the glass ember bed panel and set aside in a safe place.
- Page 8 All manuals and user guides at all-guides.com Step 5 After the front bottom panel is removed, now you can change the ember bed LED light. Unplug and replace it with a new one.
- Page 9 All manuals and user guides at all-guides.com Replace flame effect LED light Step 6 Unscrew the screws circled in red to remove 2 fending bars and the flame effect plastic board.
- Page 10 All manuals and user guides at all-guides.com After the plastic board is removed, you can see the LED flame effect strip. Unplug to remove and replace with a new one.
- Page 11 All manuals and user guides at all-guides.com Replace flicker motor Please follow Step 1 to 6 in replacing LED light. The flicker motor is behind the flame effect plastic board.
- Page 12 All manuals and user guides at all-guides.com Step 1 Unscrew the screw and disconnect the flicker rod from the flicker motor.
- Page 13 All manuals and user guides at all-guides.com Step 2 Now you can Unscrew 4 screws replace the motor...
- Page 14 All manuals and user guides at all-guides.com Replace the heating element Please follow Step 1 to 6 in replacing LED light Unscrew 2 screws on each side of the steel bar fixing Step 1 the LED light In detail...
- Page 15 All manuals and user guides at all-guides.com Front Unscrew 2 screws on front bottom and 2 on back bottom as pictures Step 2 show( red circled) Back...
- Page 16 All manuals and user guides at all-guides.com Now you can remove the heating assembly...
- Page 17 All manuals and user guides at all-guides.com Step 3 Unscrews 4 screws at the bottom of the heating assembly and you can get out the heater. Now you can change a new heating element.
- Page 18 All manuals and user guides at all-guides.com Replace PCB board Please follow Step 1 and 5 in replacing LED light Unscrew 3 screws on front bottom as circled in red. These 3 screws Step 1 are connecting the PCB board setting with the front bottom panel.
- Page 19 All manuals and user guides at all-guides.com Now you can get out the PCB board and replace it with a new one.
- Page 20 All manuals and user guides at all-guides.com Replace signal receiver Please follow Step 1 to 6 in replacing LED light The receiver is fixed on the inner back wall of the fireplace...
- Page 21 All manuals and user guides at all-guides.com Zoomed view Step 1 Unscrew 2 screws at the back of the fireplace as circled in red. These 2 screws are connecting the signal receiver with the fireplace.
- Page 22 All manuals and user guides at all-guides.com Now you can replace the receiver...
- Page 23 All manuals and user guides at all-guides.com Replace touch panel Please follow Step 1 to 2 in replacing LED light to remove the front steel panel. Unscrew 4 screws on the front bottom panel as circled in red to remove Step 1 the touch glass panel...
- Page 24 All manuals and user guides at all-guides.com After the touch glass panel is removed you can see the touch panel PCB Step 2 board. Unscrews 4 screws, remove old PCB board and replace it with a new one.
Need help?
Do you have a question about the WM-FML-STL Series and is the answer not in the manual?
Questions and answers