Advertisement
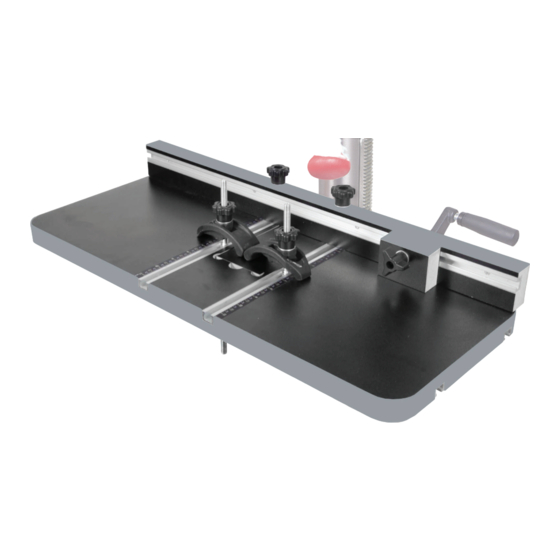
Drill Press Table
•
Universal design, fits a wide range of drill presses.
•
Large work surface for greater support.
•
Adjustable fence and sliding stop block for repeat
drilling.
•
Table Dimensions: 605mm x 300mm
•
Fence Dimensions: 600mm x 50mm
•
Drill Press Table Thickness: 25mm
•
T-Track Centre to Centre: 108mm
Removable insert allows you to
drill completely through the
workpiece without damaging
the table.
The table comes with five clamps
in total, three for use on the
underside and two for use as
work holding clamps on the top.
Code 109540
Original Instructions
AT: 31/05/2023
BOOK VERSION: 01
Advertisement
Table of Contents

Related Manuals for Axminster 109540


Summary of Contents for Axminster 109540
- Page 1 Code 109540 Original Instructions Drill Press Table • Universal design, fits a wide range of drill presses. • Large work surface for greater support. • Adjustable fence and sliding stop block for repeat drilling. • Table Dimensions: 605mm x 300mm •...
-
Page 2: Specification
Keep this manual available to all users during the entire life of the tool and review it frequently to maximize safety for both yourself and others. 1. SPECIFICATION : Drill Press Table Thickness: 1 Inch T-Track Center to Center Distance: 4-1/4 Inches Table Size: 23-7/8 in. -
Page 3: Electrical Safety
▲Use personal protective equipment. Always wear eye protection. Protective equipment such as a respiratory mask, non-skid safety shoes and hearing protection used for appropriate conditions will reduce the risk of personal injury. ▲Prevent unintentional starting. Ensure the switch is in the off-position before connecting to power source and/or battery pack, picking up or carrying the tool. -
Page 4: Assembling The Fence
3. Attach the clamp assemblies to the bolts in the following order: Clamp, clamp bushing, washer, knob. 4. Tighten the knobs on the clamp assemblies. Make sure that the drill press table is properly aligned and centered before the knobs are fully tightened. NOTE: For the most secure clamping, have the clamps resting against a flat surface underneath the table. - Page 5 3.3 ASSEMBLING THE STOP BLOCK 1. Place the M6x40 bolt (part 1) though the stop block (part 2) and washer (part 3). Loosely thread the stop block knob (part 4) onto the bolt. 2. Slide the bolt through the T track on the fence (part 1) such that the bottom of the stop block (part 2) lies against the top of the table (part 3).
- Page 6 The Axminster guarantee Buy with confidence from Axminster Tools! So sure are we of the quality, we cover all parts and labour free of charge for three years! For more information visit axminstertools.com/3years The packaging is suitable for recycling. Please dispose of it in a responsible manner.
Need help?
Do you have a question about the 109540 and is the answer not in the manual?
Questions and answers