Table of Contents
Advertisement
Available languages
Available languages
IMPORTANT INSTRUCTIONS -
AV Series
READ AND SAVE THESE INSTRUCTIONS
READ CAREFULLY BEFORE ATTEMPTING TO ASSEMBLE, INSTALL, OPERATE OR MAINTAIN THE PRODUCT DESCRIBED. PROTECT
YOURSELF AND OTHERS BY OBSERVING ALL SAFETY INFORMATION. FAILURE TO COMPLY WITH
INSTRUCTIONS COULD RESULT IN PERSONAL INJURY AND/OR PROPERTY DAMAGE!
RETAIN INSTRUCTIONS FOR FUTURE REFERENCE.
electric shock and injury to person, including the following:
WARNING:
TO REDUCE THE RISK OF FIRE, ELECTRIC SHOCK
AND INJURY TO PERSON, OBSERVE THE FOLLOWING:
1.
Read all instructions before installing or using range hood.
2.
Use this unit only in the manner intended by the manufacturer. If
you have questions, contact the manufacturer.
3.
Before servicing or cleaning the unit, switch power off at service
panel and lock the service disconnecting means to prevent power
from being switched on accidentally. When the service
disconnecting means cannot be locked, securely fasten a prominent
warning device, such as a tag, to the service panel.
4.
Installation work and electrical wiring must be done by qualified
person(s) in accordance with all applicable codes and standards,
including fire-related construction.
5.
Sufficient air is needed for proper combustion and exhausting of
gases through the flue (chimney) of fuel burning equipment to
prevent back drafting. Follow the heating equipment manufacturer's
guideline and safety standards such as those published by the
National Fire Protection Association (NFPA) and the American
Society for Heating, Refrigeration, and Air Conditioning Engineers
(ASHRAE), and the local code authorities.
CAUTION:
FOR GENERAL VENTILATING USE ONLY. DO NOT USE
TO EXHAUST HAZARDOUS OR EXPLOSIVE MATERIALS AND VAPORS.
6.
When cutting or drilling into wall or ceiling, do not damage electrical
wiring and other hidden utilities.
CAUTION:
TO REDUCE THE RISK OF FIRE AND TO PROPERLY
EXHAUST AIR, BE SURE TO DUCT AIR OUTSIDE - DO NOT VENT
EXHAUST AIR INTO SPACES WITHIN WALLS OR CEILINGS OR INTO
ATTICS, CRAWL SPACES, OR GARAGES.
7.
This unit must be grounded.
8.
To avoid motor bearing damage and noisy and/or unbalanced
impellers, keep drywall spray, construction dust, etc. off power unit.
6728002 Rev. E 1-07
OPERATING MANUAL
GENERAL SAFETY INFORMATION
When using electrical appliances, basic precautions
should always be followed to reduce the risk of fire,
SAVE THESE INSTRUCTIONS
WARNING:
NOT USE THIS FAN WITH ANY SOLID-STATE SPEED CONTROL DEVICE.
WARNING:
a) Never leave surface units unattended at high settings. Boilovers
cause smoking and greasy spillovers that may ignite. Heat oils
slowly on low or medium settings.
b) Always turn hood ON when cooking at high heat or when
flambéing food (ie. Crepes Suzette, Cherries Jubilee, Peppercorn
Beef Flambé).
c) Clean ventilating fans frequently. Grease should not be allowed
to accumulate on fan filter.
d) Use proper pan size. Always use cookware appropriate for the
size of the surface element.
WARNING:
THE EVENT OF A RANGE TOP GREASE FIRE, OBSERVE THE FOLLOWING:
a) SMOTHER FLAMES with a close-fitting lid, cookie sheet, or
metal tray, then turn off burner. BE CAREFUL TO PREVENT
BURNS. If the flames do not go out immediately, EVACUATE
AND CALL THE FIRE DEPARTMENT.
b) NEVER PICK UP A FLAMING PAN - You may be burned.
c) DO NOT USE WATER, including wet dishcloths or towels - a
violent steam explosion will result.
d) Use an extinguisher ONLY if:
I. You know you have a Class ABC extinguisher, and you already
know how to operate it.
II. The fire is small and contained in the area where it started.
III. The fire department is being called.
IV. You can fight the fire with your back to an exit.
WARNING:
DUCTWORK.
www.airkinglimited.com
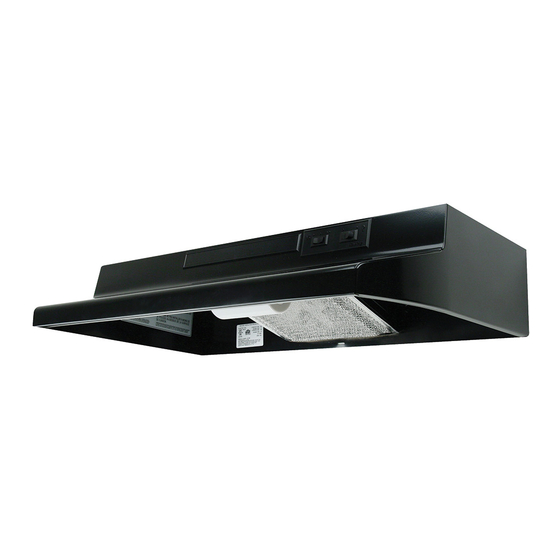
Range Hood
TO REDUCE THE RISK OF FIRE, ELECTRIC SHOCK, DO
TO REDUCE THE RISK OF A RANGE TOP GREASE FIRE:
TO REDUCE THE RISK OF INJURY TO PERSONS IN
TO REDUCE THE RISK OF FIRE, USE ONLY METAL
1
Advertisement
Table of Contents

Related Manuals for Air King Ventilation Hood


Summary of Contents for Air King Ventilation Hood
-
Page 1: Range Hood
IMPORTANT INSTRUCTIONS - OPERATING MANUAL AV Series READ AND SAVE THESE INSTRUCTIONS READ CAREFULLY BEFORE ATTEMPTING TO ASSEMBLE, INSTALL, OPERATE OR MAINTAIN THE PRODUCT DESCRIBED. PROTECT YOURSELF AND OTHERS BY OBSERVING ALL SAFETY INFORMATION. FAILURE TO COMPLY WITH INSTRUCTIONS COULD RESULT IN PERSONAL INJURY AND/OR PROPERTY DAMAGE! RETAIN INSTRUCTIONS FOR FUTURE REFERENCE. -
Page 2: Installation Instructions
INSTALLATION INSTRUCTIONS Unpack hood from the carton and confirm that all pieces are present. In addition to the range hood you should have: 1 - Aluminum Grease Filter 1 - 3-1/4"x 10" Damper 3 - Damper Mounting Screws 4 - #8 Mounting Screws 1 - Wire Compartment Cover and Screw 1 - Instruction/Safety Sheet Lay the hood flat on a table so the underside is facing you. - Page 3 Hood Body Damper Figure 5 Install an approved wire connector to the electrical knockout of the hood and guide the electrical cable through the hood, allowing at least 6" of wire for connections and tighten. NOTE: If installing into existing construction and you will not have access to the ductwork once the hood is in place, make ducting connections at this point.
-
Page 4: Troubleshooting Guide
Air King will not be held responsible for any bodily injury or damages to personal property or real estate whether caused directly or indirectly by the product. Some states and provinces do not allow the exclusion or limitation of incidental or consequential damages and some states do not allow limitations on how long an implied warranty lasts, so these exclusions or limitations may not apply to you. -
Page 5: Replacement Parts Diagram
REPLACEMENT PARTS DIAGRAM Description Replacement Part # Filter RF35 Push Nut Fan Blade #8 B Screw Hex Nut Motor Bracket Light Lens #6 AB Screw Wire Compartment Cover Lamp Holder Bushing #10 Ground Screw Jumper Wire Switch Plate - White Biscuit Almond Black... -
Page 6: Instructions Générales De Sécurité
INSTRUCTIONS IMPORTANTES – MANUEL D’OPÉRATION Séries AV LIRE ET CONSERVER CES INSTRUCTIONS LIRE SOIGNEUSEMENT AVANT DE TENTER D’ASSEMBLER, INSTALLER, OPÉRER OU DE RÉPARER LE PRODUIT DÉCRIT. PROTÉGEZ VOUS-MÊME ET LES AUTRES EN OBSERVANT TOUTE L’INFORMATION DE SÉCURITÉ. FAILLIR À SE CONFORMER AUX INSTRUCTIONS PEUT RÉSULTER EN BLESSURE PERSONNELLE GRAVE ET/OU EN DOMMAGE À... -
Page 7: Instructions D'installation
INSTRUCTIONS D’INSTALLATION Déballer la hotte de sa boîte et confirmer que toutes les pièces sont présentes. En plus de la hotte de cuisine vous devriez avoir: 1 - Filtre à graisse en aluminium 1 - Clapet de 8,25 x 25,4 cm (3-1/4 po x 10 po) 3 - Vis de montage de clapet 4 - Vis de montage #8 1 - Couvercle du compartiment de câblage et vis... - Page 8 section à onglets du clapet sous le corps de la hotte et en vissant les deux vis fournies. Pour un conduit rond de 17,78 cm (7 po), fixer soit un clapet modèle E-22A ou RCD7 (non inclus) à la hotte avec les 3 vis fournies (Figure 5).
-
Page 9: Guide De Dépannage
3. La hotte produit un son de crécelle. Tous les produits fabriqués par Air King Limited sont garantis pour un an à partir de la date d’achat contre les défauts de main d’œuvre et/ou de matériel. De plus, tous les ventilateurs / évacuateurs, chaufferettes, combinés ventilateur/ lumière et/ou les chaufferettes et les hottes de cuisine sont garantis pour cinq années à... - Page 10 DIAGRAMME DES PIÈCES DE REMPLACEMENT Description Filtre RF35 Écrou Hélice de ventilateur Vis #8 B Écrou hexagonal Support de moteur Lentille de lumière Vis #6 AB Couvercle de compartiment à câblage Support à lampe Bague Vis #10 de mise à la terre Cavalier Plaque d’interrupteur - Blanc Biscuit...
-
Page 11: Información General De Seguridad
INSTRUCCIONES IMPORTANTES – MANUAL DE OPERACIÓN Serie AV LEA Y GUARDE ESTAS INSTRUCCIONES LEA CUIDADOSAMENTE ANTES DE INTENTAR MONTAR, INSTALAR, OPERAR O MANTENER EL PRODUCTO DESCRITO. PROTÉJASE A USTED MISMO Y A LOS DEMÁS OBEDECIENDO TODA LA INFORMACIÓN DE SEGURIDAD. ¡EL HECHO DE NO CUMPLIR CON LAS INSTRUCCIONES PODRÍA RESULTAR EN DAÑOS PERSONALES Y/O A LA PROPIEDAD! CONSERVE LAS INSTRUCCIONES PARA REFERENCIA FUTURA. -
Page 12: Instrucciones De Instalación
INSTRUCCIONES DE INSTALACIÓN Desempaque la campana de la caja y confirme que todas las piezas están presentes. Además de la campana de extracción usted debería tener: 1 - Filtro Para Grasa de Aluminio 1 - Regulador de Tiro de 3-1/4"x 10" 3 - Tornillos de Montaje del Regulador de Tiro 4 - Tornillos de Montaje #8 1 - Cubierta del compartimiento de cables y tornillo... - Page 13 con lengüetas debajo del cuerpo de la campana y asegurándola con los dos tornillos provistos. Para tubos redondos de 7", asegure un Collar para Tubos modelo E-22A o RCD7 (no incluidos) a la campana con los tres tornillos provistos (Figura 5). Cuerpo de la Campana Lengüeta...
-
Page 14: Mantenimiento
Air King no será responsable por ninguna herida corporal o daños a la propiedad personal o de bienes raíces ya fueren causados directa o indirectamente por el producto. Algunos estados y provincias no permiten la exclusión o limitación de daños incidentales o por consecuencia y algunos estados no permiten limitaciones sobre cuánto tiempo dura una garantía implícita. - Page 15 Descripción Filtro RF35 Tuercas A Presión Aspa del Ventilador Tornillo #8 B Tuerca Hexagonal Ménsula del Motor Lentes de la Luz Tornillo #6 AB Cubierta del Compartimiento de Cable Soporte de la Lámpara Buje Tornillo a Tierra #10 Cable de Arranque Placa del Interruptor - Blanco Bizcocho Almendra...
- Page 16 6728002 Rev. E 1-07 www.airkinglimited.com...
Need help?
Do you have a question about the Ventilation Hood and is the answer not in the manual?
Questions and answers