Table of Contents

Related Manuals for Gaggia Milano Concetto Evo


Summary of Contents for Gaggia Milano Concetto Evo
- Page 1 INTERNAL USE ONLY Concetto Evo Espresso Machine Installation Instructions Distributed by Cafection | Evoca 2355, avenue Dalton, Québec (Québec) G1P 3S3, Canada Need assistance? www.cafectionevoca.com Technical Support: 800-561-6162, ext. 310...
-
Page 2: Table Of Contents
Installation Instructions Concetto Evo Espresso Machine INDEX Introduction ............................3 Dimensions ............................3 Product Specifications ........................4 Getting the machine out of the box………………………………………………………….……..……4 Location of the screws ……………………………………………………………………….……..……5 Sticker ID……………………………………………............……………..9 Connecting to a water network .....................10 Connecting to an electric network ....................11 Control Keypad and main features .................... -
Page 3: Introduction
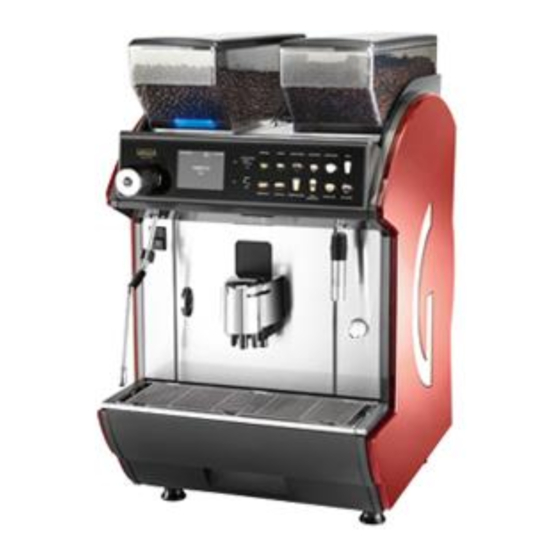
Concetto Evo Espresso Machine Introduction The Concetto Evo model falls under the super-automatic category, it has a capacitive back-lit keyboard with color icons, a 3.5” HD color display, it offers the possibility of a Cup warming boost unit (sold as an option). Also, it offers the ability of programming 12 different beverage selections or recipes. -
Page 4: Product Specifications
58.5Kg / 129lb Getting the machine out of the box When receiving the Concetto Evo machine, it comes in a cardboard box attached to a wooden pallet. Special care must be taken when handling the appliance to avoid causing damage to the appliance and people. -
Page 5: Location Of The Screws
Installation Instructions Concetto Evo Espresso Machine Tools needed: • Phillips screwdriver # 1 • 10 mm wrench tool, to adjust the grinders (included in the bag of accessories) • Pair of long nose pliers • Allen wrench # 6 •... - Page 6 Installation Instructions Concetto Evo Espresso Machine Next, remove the bottom drawer as shown in the illustration below. Remove the bottom drawer to access the water drip tray. Water drip tray & drain fitting Created: 14-05-2020 INTERNAL USE ONLY By Adelmo Ascencio...
- Page 7 Installation Instructions Concetto Evo Espresso Machine In case you need to remove one or both coffee bean hoppers proceed as follows: Remove cover (H) Use the grinder adjustment tool (C) to remove the 2 metal bolts (B) that hold the bean hopper in place.
- Page 8 Installation Instructions Concetto Evo Espresso Machine Back plate • Next, we will need to remove a bottom plate by removing two wing nuts located on each end (see fig below). Detach the two rubber protections. Use the two indentations to feed the electrical cord and to pass through it the plastic drainpipe, if you choose to connect directly to a drain.
-
Page 9: Sticker Id
Installation Instructions Concetto Evo Espresso Machine The kit of accessories for a Concetto Evo contains: (1) set of 2” supporting feet, (1) set of 4” supporting feet, (1) manual; brushes and a wire line for various cleaning operations; Adjustment tool, Suction tube for the milk. -
Page 10: Connecting To A Water Network
Installation Instructions Concetto Evo Espresso Machine Connecting to a water network Water connection options: • Standard water connection 3/4“fitting (1-8 bar) water supply • Optional water supply pump/independent water tank kit. Use a ¾” pipe fitting connector to connect to the main water supply. If needed, use a 90° fitting elbow to feed the water inlet valve. -
Page 11: Connecting To An Electric Network
Drain fitting Dispensing fitting Electric power cord Supporting feet Connecting to an electric network The Concetto Evo machine must be connected to a tri-phase circuit 208 V; 20 Amp; 60Hz. Warning: All connections and power supply must comply with all requirements &... -
Page 12: Control Keypad And Main Features
Installation Instructions Concetto Evo Espresso Machine Control Keypad & Main features Press these buttons to dispense the programmed beverages. Press these buttons to select choose Coffee hopper 1 or 2 Press this button to go through the different menus Large coffee... -
Page 13: Milk Programming
Installation Instructions Concetto Evo Espresso Machine Milk programming Milk Programming is a direct control allowing to program and store the milk quantity for the beverage chosen. Select “Milk Programming“ The display shows the programming icon The machine starts dispensing milk only. -
Page 14: Calibrating The Grinders
Installation Instructions Concetto Evo Espresso Machine Calibrating the grinders The espresso machines come with factory pre-set parameters and calibration; however, depending on the characteristics of coffee beans in use, some adjustments might be needed. To calibrate the grinders, we will need the following: •... - Page 15 Installation Instructions Concetto Evo Espresso Machine There are two parameters that we need to set: the granulometry of the coffee grinds (coffee grain particle size) and the amount of coffee grinds served. • The granulometry is set by manually regulating the distance between the grinder blades.
-
Page 16: Hot Water Mixing
Installation Instructions Concetto Evo Espresso Machine Select menu option 1.1.2 Grinder 1 setting. Once entering these settings: Press on the espresso key and a certain amount of coffee will be served. Collect it and weight it, to see how many grams of coffee grinds are served. - Page 17 Installation Instructions Concetto Evo Espresso Machine Select On. At the same time, we can evaluate the coarseness of the coffee grind. If is not up to our satisfaction, we will need to adjust it. Once the size of our coffee grinds has been defined to our satisfaction, the rest of the adjustments are done via software.
-
Page 18: Beverage Set-Up
Installation Instructions Concetto Evo Espresso Machine Beverage Set-up: To enter the setup of the recipes for the different beverages, access the technical menu by entering the password 1,2,3,4, then, press enter. The operations require to change the parameters in this menu are the same for any given menu. -
Page 19: Cleaning Of The Cappuccinatore
Installation Instructions Concetto Evo Espresso Machine Nettoyage du Cappuccinatore The Cappuccinatore must be clean every day it’s used, to avoid the solidification of deposits. All removable parts must be washed and rinse with the recommended cleaning products. To clean each part of the Cappuccinatore group separately, remove: •... -
Page 20: Cleaning The Milk Circuit
Recommended detergent tablets We recommend this detergent for the fully automated machines such Concetto Evo espresso machine. These tablets dissolve in hot water. Each package contains: 100 tablets (the - equivalent of 5 litres of liquid detergent). Detergent code: 962961. -
Page 21: Lubricating The Brew Group
Installation Instructions Concetto Evo Espresso Machine Lubricating the brew group Make sure that the lever on the rear part of the brew group touches the base Created: 14-05-2020 INTERNAL USE ONLY By Adelmo Ascencio... - Page 22 Installation Instructions Concetto Evo Espresso Machine Lubricate the brew group guides using the supplied grease only (fig. below) Created: 14-05-2020 INTERNAL USE ONLY By Adelmo Ascencio...
-
Page 23: Empty The Concetto Machine Procedure
Installation Instructions Concetto Evo Espresso Machine Empty the Concetto coffee machine procedure: In some cases, we will need to store or transport the machine. Follow this procedure to empty the Concetto Evo coffee machine. To start this process the machine must be at operation temperature. -
Page 24: Troubleshooting
Installation Instructions Concetto Evo Espresso Machine Troubleshooting Pump Error 1-2 or 3-4 One of the pumps is faulty. Follow procedure to troubleshoot Pump error Sensor error 1 - 2 It is displayed when there is a faulty temperature sensor. Switch off the machine. Follow procedure to troubleshoot sensor error. - Page 25 Installation Instructions Concetto Evo Espresso Machine Coffee is not hot enough The cup has not been preheated Preheat the cup on the cup warming surface The machine has not yet reached the right Wait for the machine to reach the...
-
Page 26: Maintenance Schedule
Installation Instructions Concetto Evo Espresso Machine Maintenance Schedule Component to be cleaned Maintenance Coffee dispensing spout See section “Cleaning the Coffee Dispensing Spout”. Brew group See section “Cleaning the Brew Group”. Drip tray and relative grill See section “Cleaning the Drip Tray and Relative Grill”. -
Page 27: Questions Before Attending A Technical Call
Installation Instructions Concetto Evo Espresso Machine Pre-installation Check list Before going to a location to install an espresso machine is always a good idea to make sure the following is available: Is there the proper voltage? Is there the proper amperage?
Need help?
Do you have a question about the Concetto Evo and is the answer not in the manual?
Questions and answers