Advertisement
Quick Links
Advertisement

Related Manuals for Tylo SAUNA REFLECTION WIDE GF


Summary of Contents for Tylo SAUNA REFLECTION WIDE GF
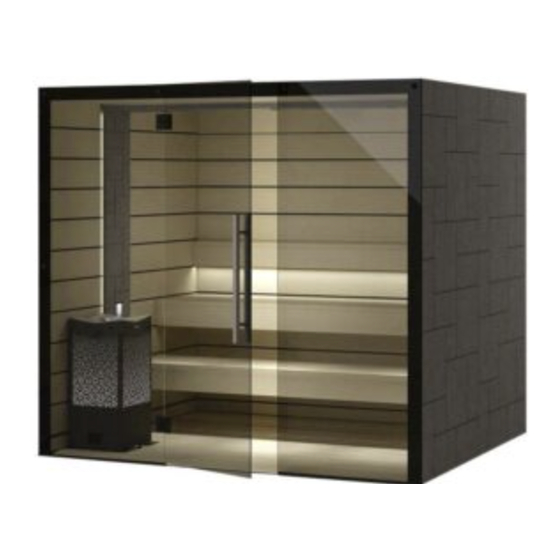
- Page 1 2023-09-11 SAUNA REFLECTION WIDE GF Art.nr 2900 4905...
- Page 2 Information Väggnumrering / Wall numbering Väggarna är numrerade på sidan. Motsvarande siffra finns på layouten. The walls are numbered on the side. The corresponding number is on the layout. Exempel/Example: Reflection 200x200 2: Undre vägg 4: Övre vägg 2: Lower wall 4: Upper wall...
- Page 3 Information Varning! Glas - hanteras varsamt! Warning! Glass - handle with care! Uwaga! Ostrożnie- szkło! Glasets kanter aktas för slag och stötar. The edges of the glass should be protected from knocks and impacts. Krawędzie szyby powinny być chronione przed uderzeniami i wstrząsami.
- Page 4 Information Hantering och skötsel Valchromat Handling and care Valchromat Rengöring av Valchromat: Blöt en trasa och torka. Vid ”svåra” fläckar (fettfläckar och dylikt): Gör roterande rörelser med medskickad slipkloss, borsta rent och torka med en blöt trasa. Cleaning Valchromat: Wet a cloth and wipe.For "difficult" stains (grease stains and the like): Make rotating movements with the included sanding block, brush clean and dry with a wet cloth.
- Page 5 Detaljer och profiler som medföljer rummet Information Details and profiles included with the room 13mm 16mm 30mm 1/4" 32mm 35mm 42mm Ø 2 Ø 3.5 100mm Golvram Floor frame 13x5mm...
- Page 6 Detaljer och profiler som medföljer rummet Details and profiles included with the room 6,5 m 4,8 m 10 m 19mm Detaljer och profiler som medföljer inredningen Details and profiles included with the interior 25mm 35mm 60mm...
- Page 7 OBS! Denna instruktionen kan skilja sig jämfört Note! This instruction can differ from the room med bastun som är levererad. that is delivered. Rummet som monteras i denna manual är ett The room that is mounted in this manual is a Sauna Reflection 200X200 Sauna Reflection 200X200 Se layouten som medföljer rummet för mer...
- Page 10 Väggen skall placeras kant i kant med golvramsprofilen. The wall must be placed edge to edge with the floor frame profile.
- Page 11 3x23mm...
- Page 14 Väggen skall placeras kant i kant med golvramsprofilen. The wall must be placed edge to edge with the floor frame profile.
- Page 15 Välj sida för inluft/aggregatplacering. Skruva fast plattan på den aggregatsektion som inte ska användas. Select side for exhaust air/heater placement. Screw the plate onto the heater section that is not to be used. 42mm...
- Page 16 Se till att styra flexrören i de bakre sidoväggarna för belysning genom hålen i taket. Be sure to route the flex pipes in the rear sidewalls for lighting through the holes in the ceiling. Taket ska ligga mot mdf:en som sitter på...
- Page 17 Se till att styra flexrören i de främre sidoväggarna för eldragning genom hålen i taket. Be sure to route the flex pipes in the front side walls for wiring through the holes in the ceiling. Lägg taket så att det linjerar med den främre väggen.
- Page 18 35mm Borra hål och skruva ihop de båda taken i utrymmet för takportalen. Bakre tak Front tak Back ceiling Front ceiling Drill holes and screw the two roofs together in the space for the ceiling portal.
- Page 19 32mm Kontrollera att främre tak och frontväggar linjerar med varandra. Ceiling Check that the front roof and front walls line up with each other. Vägg Wall Skruva fast fästblecken mellan främre tak och vägg. Screw the fastening plate between the front ceiling and wall.
- Page 20 Skruva fast taken uppifrån i mån det finns plats Screw the roofs from above if there is room 100mm Takportal med spotlights Ceiling portal with spotlights Koppla spotlighten enligt schema på takportalen Connect the spotlight according to the diagram on the ceiling portal TRAFO 200-240V~ Kopplas in på...
- Page 21 Trafoplåt Transformer plate Trafoplåten placeras på valfri sida av takportalen, med fördel där den är lättast att komma åt för inkoppling. OBS! Trafoplåten skall inte placeras ännu. Men tänk på att takportalen monteras så att kablarna till 200-240V~ från spotlighten hamnar på samma sida som Trafoplåten. The transformer plate is placed on any side of the ceiling portal, preferably where it is easiest to access for connection.
- Page 22 Lägg en bit kartong eller liknande emellan för att skydda portalen. Place a piece of cardboard or similar in between to protect the portal. Rikta in takportalen så den är centrerad på båda sidor. Align the roof portal so that it is centered on both sides. 32mm...
- Page 23 60mm...
- Page 24 Reflection 180x180 388mm x4 Bakre vägg Rear wall 56mm 374mm Reflection 200x200, 250x200 540mm x2 388mm x2 Bakre vägg Rear wall 56mm 598mm...
- Page 27 25mm Ø 2 Håll U-profilen mot övre kanten på hålet och se till att den är centrerad över hålet. Rita märke enligt bild. Borra hål och skruva upp profilerna på båda sidor av rummet. Hold the U-profile against the top edge of the hole and make sure it is centered over the hole.
- Page 28 Baksida Back side Baksida Back side 35mm Baksida Back side Montera distansklossen på baksidan av ryggstödet. Mount the spacer block on the back of the backrest. 20mm...
- Page 29 Ryggstödet kan monteras med kabeldragning Baksida Back side på höger eller vänster sida. The backrest can be mounted with cable routing on the right or left side. Baksida Back side Trafoplåt Transformer plate Tryck på ledlisten med träklossen för att få ner ledlisten i U-profilen. Press the led strip with the wooden block to bring the led strip down into the U-profile.
- Page 30 ceiling...
- Page 31 Väggportaler med ljuslister, högtalare och manöverpanel Wall portals with light strips, speakers and control panel Väggportalerna är likadana förutom att det sitter en manöverpanel i den ena. Välj vilken sida av rummet manöverpanelen ska placeras innan montering. OBS! Tänk på att om en extra sidolave ska monteras, att den inte hamnar framför panelen.
- Page 32 Sensorn till aggregatet placeras på den väggportal som är närmast aggregatet. För inkoppling av sensor, se manual som medföljer aggregatet. The sensor for the heater is placed on the wall portal closest to the heater. For connecting the sensor, see the manual that comes with the heater. Sensor 80mm Bastuaggregat...
- Page 33 6,5 m Kabel mellan högtalare Cable between speakers 4,8 m Kabel till 230V~ Cable to 230V~ 10 m Kabel mellan kontrollpanel och bastuaggregat Cable between control panel and sauna heater Kontrollpanel Kontrollpanel Control panel Control panel Bastuaggregat Bastuaggregat Sauna heater Sauna heater...
- Page 34 Koppla de 3 kablarna på portalen med manöverpanelen. Connect the 3 cables on the portal with the control panel. Dra kablarna till ledlisterna upp på taket enligt bild. Kablarna till högtalaren och eventuellt till manöverpanelen dras upp i mitten. Pull the cables to the led lists up on the ceiling as shown.
- Page 35 Sträck på kablarna och haka fast portalen i väggen. Kabel mellan högtalare dras över taket och ner till den andra portalen. Stretch the cables and hook the portal to the wall. Cable between speakers is pulled over the roof and down to the other portal.
- Page 36 Sätt dit packningarna på båda sidor av takportalen, dra kablarna till ledlisterna i hålet. Place the gaskets on both sides of the ceiling portal, run the cables to the led lists in the hole. Packning neråt Gasket downwards 42mm...
- Page 37 OBS! Det är viktigt att väggar och tak är vinkelräta, 90 . Det är också viktigt att måtten är samma mellan sidoväggarna både uppe och nere. ATTENTION! It is important that walls and ceiling are perpendicular, 90 . It is also important that the dimensions are the same between the side walls both at the top and bottom.
- Page 38 ~700mm Silicon ovanför dörren, sidan vänds mot taket Silicon above the door, the side 30mm facing the ceiling Kant i kant med insida tak Edge to edge with ceiling inside...
- Page 39 Kant i kant med tak-topp Edge to edge with ceiling top Min. 2mm Golv / Floor Kant i kant med tak-topp Edge to edge with ceiling top...
- Page 40 Dörren kan monteras höger- eller vänsterhängd. OBS! Gäller ej rum Glass Corner! The door can be mounted right- or left-hung. ATTENTION! Does not apply to Glass Corner rooms! Placering av glas Glass placement Varning! Alt. 1 Alt. 2 Glas - behandlas varsamt! Warning! Glass - handle with care! Gångjärn-höger...
- Page 41 Glaset skall monteras kant i kant med den svarta ramen men om måttet till golv är mindre än 3mm måste glaset höjas. The glass should be mounted edge to edge with the black frame, but if the dimension to the floor is less than 3mm, the glass must be raised.
- Page 42 32mm Ø 2...
- Page 43 70 6m m 32mm Mät mellan sidoglasen både uppe och nere så att måtten är samma. Öppningen skall vara 6mm bredare än dörrglaset. Glasen går att justera några millimeter i höjd- och sidled om man lossar lite på skruvarna. Measure between the side glasses both top and bottom so that the measurements are the same.
- Page 44 32mm Gör om steg 1-5 på föregående sida. Repeat steps 1-5 on the previous page. Insida Inside...
- Page 45 GÅNGJÄRN GLAS-GLAS HINGES GLASS-GLASS Sidoglas Side glass Montera gångjärnen på sidoglaset. Mount the hinges on the side glass Kant i kant Flush fitting Utsida Outside Insida Packning Packning Gasket Gasket Inside Packning hård - svart Gasket hard - black Packning Gasket Packning Gasket...
- Page 46 Tips! Distanser Höjd ca: 16mm Tip! Distance block Height ca: 16mm Dörrglas Door glass Lägg till packningar på gångjärnet och lyft glasdörren på plats i gångjärnen. Lägg sedan packningarna till rätta. Add gaskets on the hinge and put the door glass on the hinges. Then put the plastic gasket into place.
- Page 47 13x5mm Insida Inside Tips! Använd tvålvatten eller någonting liknande. Tip! Use soap water or something similar.
- Page 48 Dörrglas Door glass Utsida Insida Outside Inside...
- Page 49 13mm 42mm Ytterbeklädnaden sätts på den synliga sidan av rummet. The exterior cladding is placed on the visible side of the room. Vänster sida synlig Höger sida synlig Left side visible Right side visible...
- Page 50 Oavsett vilken sida av rummet ytterbeklädnaden skall sitta så sätts skivan med spår längs hela kanten mot fronten. Regardless of which side of the room the exterior cladding is to be on, the board with a groove along the entire edge is placed towards the front Ställ den främre skivan mot väggen i kant Monteringsblecken ska skruvas fast med fronten...
- Page 51 Montera blecken på ytterbeklädnaden Mount the plates on the exterior cladding 13mm Baksida Back side...
- Page 52 Häng ytterbeklädnaden på plats. Hang the exterior cladding in place. 13mm Ceiling Ceiling Vägg Vägg Wall Wall Skruva fast med några skruv i spåren på ytterbeklädnaden. Fasten with a few screws in the traces of the exterior cladding. 42mm...
- Page 53 Montera dörrkontakten Mount the door contact 19mm Ceiling Dörrkontakten ansluts till bastuaggregatet. Connect he door contact to the sauna heater. Dörrglas Door glass...
- Page 54 Silikon - golvram Silicon - floor frame Lägg en sträng silicon längs golvramsprofilerna. Put a string of silicon along the floor profiles.
- Page 55 Placera Trafoplåten ovanpå takportalen Place the transformer plate on the ceiling portal Elektrisk installation Electrical installation LED DRIVER 12V DC Max. 4,2A 50W LED LIST Portal Högtalare 200- Speakers 240V~ LIST 1 LIST 2 LIST 3 LIST 4 200- Spot 240V~ Lights LED LIST...
- Page 56 Hål ovanför trafoplåten Holes above the transformator plate Lägg vent.skivan på plats Put the ventilation board in place...
Need help?
Do you have a question about the SAUNA REFLECTION WIDE GF and is the answer not in the manual?
Questions and answers