Table of Contents
Advertisement
OASIS
SELF-SERVICE REFRIGERATED MERCHANDISERS
Model CO33R With Counter
End Panels / Continuous
Top & Front
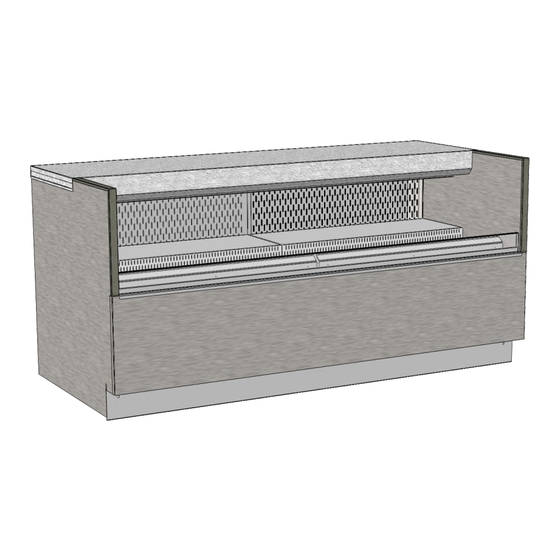
Model CO3324R Front
Access Condenser Package
Model CO43R-FS "Free
Standing" Unit With Optional
Flip-Down Rear Door /
Perforated Plenum Rear Door
Model CO33RM (Similar To
CO53RM) With Optional Security
Cover / Shown Without
Customer Supplied Countertop
USER MANUALS\20-24002_OASIS_USER MANUAL_CO(L)R_FS_RG_RM_UC_REF_SELF-SVC_CASE
READ AND SAVE THESE INSTRUCTIONS
®
USER MANUAL
P/N 20-24002
Model CO3034RG.5718 &
CO3034RG.5718A
With Product Steps
Under Counter Unit
Model CO63R With Counter
End Panels And Continuous Top & Front
Structural
Concepts Corp. ∙ 888 E. Porter Rd ∙ Muskegon, MI 49441 Phone: 231.798.8888 Fax: 231.798.4960 ∙ www.structuralconcepts.com
Model CO3436RG.5716
Withoug Front Panel / Angled
Riser & Vertical Sneeze Guard
Model CO43RM
Important!
See Counter
Installation Guide
Section In This
Manual Before
Proceeding With
Installation!
Model CO3324R.7397 (Extended
Height Version of CO3324R)
Model CO43R
With Curved End Panels
Model CO3436RG.5716,
CO4836R.5716 and CO4836RG.5716
(Glycol Unit) Includes SCC's Model
BDXXXX Removable Bread Display
On Counter (Next To Sneeze Guard)
REV AA DATE: 10/10/2023
Advertisement
Table of Contents
Troubleshooting

Related Manuals for Oasis CO33R


Summary of Contents for Oasis CO33R
- Page 1 Installation Guide P/N 20-24002 Section In This Manual Before Proceeding With Installation! SELF-SERVICE REFRIGERATED MERCHANDISERS Model CO33R With Counter Model CO3034RG.5718 & End Panels / Continuous Model CO3436RG.5716 CO3034RG.5718A Top & Front Withoug Front Panel / Angled With Product Steps Riser &...
-
Page 2: Table Of Contents
MAINTENANCE - OPTIONAL SECURITY COVER / OPTIONAL FLIP-DOWN DOOR …..…………… MAINTENANCE - MODEL CO4836R.5716 & CO4836RG.5716 / REMOVABLE BREAD DISPLAY... REFRIGERATION - EVAPORATOR AREA: MODELS CO33R / CO43R / CO4324R / CO53R / CO63R …………………………………………………………………………………………………... REFRIGERATION - EVAPORATOR AREA: MODELS CO43RM / CO63RM (AND SIMILAR UNITS) REFRIGERATION - EVAPORATOR AREA: MODELS CO3434RG.5716, CO3436RG.5716,... -
Page 3: Table Of Contents
SCC TECHNICAL SERVICE CONTACT INFORMATION / LIMITED WARRANTY ………………..… Models Represented In This Operating Manual* CO33R CO43R CO53R CO63R CO3324R, CO4324R, CO5324R and CO6324R (24" DEEP VERSION OF CO33R, CO43R, CO53R and CO63R) / CO43R-FS (FREE-STANDING WITH OPTIONAL FLIP-DOWN REAR DOOR) / CO33RM CO43RM CO53RM CO63RM (UNDER COUNTER MILK CRATE UNITS / REFRIGERATED MILK DISPLAYS);... -
Page 4: Overview / Type / Compliance / Warnings / Precautions / Wiring / Plugs - Page 1 Of 2
OVERVIEW / TYPE / COMPLIANCE / WARNINGS / PRECAUTIONS / WIRING / PLUGS - PAGE 1 of 2 store conditions with maximum ambient temperature of OVERVIEW 80 °F (27 °C) and maximum relative humidity of 55%. • These Structural Concepts merchandisers are designed •... - Page 5 OVERVIEW / TYPE / COMPLIANCE / WARNINGS / PRECAUTIONS / WIRING / PLUGS - PAGE 2 of 2 PRECAUTIONS REFRIGERANT DISCLOSURE STATEMENT • • Following are important precautions to prevent This equipment is prohibited from use in California damage to unit or merchandise. with any refrigerants on the “List of Prohibited •...
-
Page 6: Alignment
SHIPPING BRACKET REMOVAL / TOE-KICK REMOVAL / REMOVAL FROM SKID / CASE ALIGNMENT 1. Removing Shipping Brackets Attached To Skid • Remove screws holding case shipping brackets to Various Types Of skid. Shipping Brackets • Remove case shipping brackets from skid. Shown With •... -
Page 7: Case Adjoinment: Urethane And Silicone Application / Bolting Adjoined Units
CASE ADJOINMENT: URETHANE AND SILICONE APPLICATION / BOLTING ADJOINED UNITS #3 - Holes are accessible at underside of decking. Case Adjoinment Decking must be removed to attach bolts/nuts. >> Warranty is void if improper urethane/sealant is used #4 - Holes are accessible at base frame (through front of in this process. -
Page 8: Shimming Frame Support Rails / Adjusting Levelers
SHIMMING FRAME SUPPORT RAILS / ADJUSTING LEVELERS 1. Cases With Frame Support Rails: Shim • Adjust case so it is level and plumb. • You may need to remove front and/or rear • Illustration at top-left shows case with frame toe-kick to access levelers. -
Page 9: Counter Installation Information - For Models Co33R, Co43R, Co53R & Co63R
COUNTER INSTALLATION INFORMATION - FOR MODELS CO33R, CO43R, CO53R & CO63R THE FOLLOWING COUNTER INSTALLATION INFORMATION IS ONLY APPLICABLE TO MODELS CO33R, CO43R, CO53R and CO63R “UNDER-COUNTER” UNITS ---------------------- NOTE: ANY REVISIONS TO THIS INFORMATION MUST ALSO MADE TO SCC P/N 20-50848... -
Page 10: Case Front And Rear Dimensional Features
CASE FRONT AND REAR DIMENSIONAL FEATURES NOTE: THE FOLLOWING COUNTER INSTALLATION INFORMATION PERTAINS ONLY TO MODELS CO33R, CO43R, CO53R and CO63R “UNDER-COUNTER” UNITS MINIMUM “X” CASE DIMENSION CO33R 34” CO43R 45” CO53R 57” CO63R 69” --- Case Front --- 4.09* CASE “X”... -
Page 11: Side Section Dimensional And Layout Features
SIDE SECTION DIMENSIONAL AND LAYOUT FEATURES NOTE: THE FOLLOWING COUNTER INSTALLATION INFORMATION PERTAINS ONLY TO MODELS CO33R, CO43R, CO53R and CO63R “UNDER-COUNTER” UNITS COUNTER --- Side Section --- --- Side Section With Full Dimensions --- DISCHARGE THROUGH CUSTOMER SUPPLIED COUNTER TOE-KICK 3.00... -
Page 12: Case Top And Underside Dimensional And Layout Features
CASE TOP AND UNDERSIDE DIMENSIONAL AND LAYOUT FEATURES NOTE: THE FOLLOWING COUNTER INSTALLATION INFORMATION PERTAINS ONLY TO MODELS CO33R, CO43R, CO53R and CO63R “UNDER-COUNTER” UNITS MINIMUM “X” CASE DIMENSION CO33R 34” CO43R 45” CO53R 57” CO63R 69” TO FRONT OF DISPLAY;... -
Page 13: Counter Installation Information - For Models Co3324R, Co4324R, Co5324R
COUNTER INSTALLATION INFORMATION - FOR MODELS CO3324R, CO4324R, CO5324R & CO6324R THE FOLLOWING COUNTER INSTALLATION INFORMATION IS ONLY APPLICABLE TO MODELS CO3324R, CO4324R, CO5324R and CO6324R ------------------------- NOTE: ANY REVISIONS TO THIS INFORMATION MUST ALSO MADE TO SCC P/N 20-50862... -
Page 14: Case Front And Rear Dimensional Features
CASE FRONT AND REAR DIMENSIONAL FEATURES NOTE: THE FOLLOWING COUNTER INSTALLATION INFORMATION PERTAINS ONLY TO MODELS CO3324R, CO4324R, CO5324R and CO6324R MINIMUM “X” CASE DIMENSION CO3324R 34” CO4324R 45” CO5324R 57” --- Case Front --- CO6324R 69” 4.09* CASE “X” DIMENSION CO3324R 36.25”... -
Page 15: Side Section Dimensional And Layout Features
SIDE SECTION DIMENSIONAL AND LAYOUT FEATURES NOTE: THE FOLLOWING COUNTER INSTALLATION INFORMATION PERTAINS ONLY TO MODELS CO3324R, CO4324R, CO5324R and CO6324R 24" 9 7/8" COUNTER 15 5/8" 20 3/4" TOE-KICK 3” MINIMUM 24" --- Side Section --- --- Side Section With Full Dimensions --- DISCHARGE THROUGH CUSTOMER SUPPLIED COUNTER TOE-KICK... -
Page 16: Case Top And Underside Dimensional And Layout Features
CASE TOP AND UNDERSIDE DIMENSIONAL AND LAYOUT FEATURES NOTE: THE FOLLOWING COUNTER INSTALLATION INFORMATION PERTAINS ONLY TO MODELS CO3324R, CO4324R, CO5324R and CO6324R MINIMUM “X” CASE DIMENSION CO3324R 34” CO4324R 45” CO5324R 57” TO FRONT OF DISPLAY; CO6324R 69” NOT INCLUDING THE WALL &... -
Page 17: Start-Up And Operation: Thermostat / Main Power Switch / Lights Switch
START-UP AND OPERATION: THERMOSTAT / MAIN POWER SWITCH / LIGHTS SWITCH / FILTER 1. Merchandiser Start-Up • Obstruction or restriction of air can void warranty. • Do not use an extension cord with this appliance. • Thermometer is also at case rear (as shown •... -
Page 18: Product Placement / Honeycomb Airflow Consideration / Load Lines
START-UP AND OPERATION, CONTINUED: LOAD LIMITS PRODUCT PLACEMENT / HONEYCOMB AIRFLOW CONSIDERATION / LOAD LINES 1. Product Placement • Product can be placed on decking or steps (risers) within self-service display area. • A wide range of product may be displayed. UPPER LOAD 2. -
Page 19: Maintenance - Toe-Kicks / Light Fixtures / Night Curtain, Honeycomb
MAINTENANCE - TOE-KICKS / LIGHT FIXTURES / NIGHT CURTAIN, HONEYCOMB, THERMOMETER • See MAINTENANCE - LED LIGHT FIXTURES 1. Adjustable Front Toe-Kick (Models section in this manual for more specifics. CO33R, CO43R, CO53R, CO63R, Etc.) • Front toe-kick is adjustable. 3. Night Curtain •... -
Page 20: Maintenance - Removable Front Panels (Non-Magnetic)
• See previous page for adjustable front toe-kicks • See GENERAL CLEANING (TO BE (with screws) on models CO33R, CO43R, PERFORMED BY STORE PERSONNEL) - CO53R, CO63R, etc. INTERIOR in manual for instructions on cleaning •... -
Page 21: Maintenance - Removable Front Panels (Magnetic)
MAINTENANCE - REMOVABLE FRONT TOE-KICKS (MAGNETIC SYSTEM) • Remove toe-kick by pulling away from lower Removable Magnetized Front Panels magnet and lifting up and off hooks. • These panels are found on models • No screw removal is required. CO3434RG.5716, CO3436RG.5716, •... -
Page 22: Maintenance - Led Light Fixtures / Location / Repair / Replacement
MAINTENANCE - LED LIGHT FIXTURES / LOCATION / REPAIR / REPLACEMENT LED Style Light Fixtures Removal of Faulty LED Lights: • LED lights rarely require change-out. • Contact Structural Concepts’ Technical Service Depart- Plug ment for replacement LED lights. • Turn off LED light switch. -
Page 23: Maintenance - Optional Night Air Curtain Operating Instructions
MAINTENANCE - OPTIONAL NIGHT AIR CURTAIN OPERATING INSTRUCTIONS Night Air Curtain Installation & Operating Instructions NOTE: THE 1. Use caution when handling night air curtain. BELOW 2. Display case may come with night curtain already attached. If not, a retrofit kit will be provided. -
Page 24: Maintenance - Electrical Access And Components
MAINTENANCE - ELECTRICAL ACCESS AND COMPONENTS Electrical: Access and Components 2. Temperature & Defrost Control • The case temperature is set at the factory, as Warning, disconnect power before providing determined by the case size. The temperature is maintenance and service to unit. controlled by a thermostat. -
Page 25: Maintenance - Rear Component Layout (Model Co3436Rg.5716 Only)
MAINTENANCE - REAR COMPONENT LAYOUT (MODEL CO3436RG.5716 ONLY) 1. Vertical Glass Divider / Sneeze Guard 4. Sandwich Wrap Holder • Vertical glass divider/sneeze guard is held securely • Sandwich wrap holder is at rear-center. with mounts. DO NOT lean against or strike glass 5. -
Page 26: Maintenance - Optional Security Cover / Optional Flip-Down Door
MAINTENANCE - OPTIONAL SECURITY COVER / OPTIONAL REAR FLIP-DOWN HINGED DOOR 1. Security Covers (Optional) - Models COXXRM Upper • Security covers are designed to prevent Retaining access to merchandiser. Clip • Security cover is to be placed OVER upper latch retaining clip and UNDER lower latch Key/Locking Mechanism... -
Page 27: Maintenance - Model Co4836R.5716 & Co4836Rg.5716 / Removable Bread Display
MAINTENANCE - MODEL CO4836R.5716 & CO4836RG.5716 WITH REMOVABLE BREAD DISPLAY • Stainless steel removable wrap cubbies are 1. Merchandiser Overview accessible at case rear. • Model CO4836R.5716 and CO4836RG.5716 • See illustration below. also have s a bread display unit that sits atop counter and is protected by a glass sneeze 2. -
Page 28: Co63R
REFRIGERATION - EVAPORATOR AREA: MODELS CO33R / CO43R / CO53R / CO63R 1. Evaporator Fan Access 3. Drain • Remove lower decking. • Drain is located at center of tub (under evap. fan). • Lift decks straight up and out to avoid scratching •... -
Page 29: Refrigeration - Evaporator Area: Models Co43Rm / Co63Rm (And Similar Units)
REFRIGERATION - EVAPORATOR AREA: MODELS CO43RM / CO63RM (AND SIMILAR UNITS) 1. Evaporator Fan Access 3. Drain • Remove milk crates and lower decking. • Drain is located at center of tub (under TXV). • Lift decks straight up and out to avoid scratching •... -
Page 30: Co3034Rg.5718 & Co3034Rg.5718A
REFRIGERATION - EVAPORATOR AREA: MODELS CO3434RG.5716, CO3034RG.5718 & 5718A, ETC. 1. Evaporator Fan Access 3. Drain • Remove lower decking. • Drain is located at front right side of as shown • Lift decks straight up and out to avoid scratching below. -
Page 31: Refrigeration - Condensate Package Access (Screw Removal Required)
REFRIGERATION - CONDENSATE PACKAGE ACCESS (SCREW REMOVAL REQUIRED) Refrigeration Fundamentals View of Case Prior To Rear Grille Removal 1. Condensate Package Access With Screw Removal Required • Assembly or disassembly and servicing of condensate package is to be accomplished by a licensed refrigeration contractor. -
Page 32: Refrigeration - Rear Condensate Package Access
REFRIGERATION - REAR CONDENSATE PACKAGE ACCESS (NO SCREW REMOVAL REQUIRED) Refrigeration Fundamentals, Continued • Rear grille will then be free from rear panel magnets (one at each end). 2. Rear Condensate Package Access - No • Slots of rear grille (one at each end) grille may Screw Removal Required then be lifted up and off rear panel hooks (one •... -
Page 33: Refrigeration - Front Condensate Package Access
REFRIGERATION - FRONT CONDENSATE PACKAGE ACCESS (NO SCREW REMOVAL REQUIRED) Refrigeration Fundamentals, Continued 2C. View of hook that lower front panel rests on (typ.). 3A. Toe kick/front grille shown removed from case. 3. Front Condensate Package Access - 3B. View of magnets that toe-kick/front grille attaches No Screw Removal Required to. -
Page 34: Refrigeration - Condensate Package Illustrated Parts Breakdown (Co**R)
REFRIGERATION - CONDENSATE PACKAGE ILLUSTRATED PARTS BREAKDOWN (CO**R) Refrigeration Fundamentals, Continued 4. Condensate Package Illustrated Parts Breakdown • Assembly or disassembly and servicing to be accomplished by licensed refrigeration contractor. • After rear grille has been removed, slide condensate package out slowly and carefully. •... -
Page 35: Refrigeration - Condensate Package
REFRIGERATION - CONDENSATE PACKAGE (CO3436RG.5716 / CO3034RG.5718 / CO3034RG.5718A) Refrigeration Fundamentals, Continued 5. Condensate Package Illustrated Parts Breakdown • Assembly or disassembly and servicing to be accomplished by licensed refrigeration contractor. • After rear grille has been removed, slide condensate package out slowly and carefully. •... -
Page 36: General Cleaning (To Be Performed By Store Personnel)
GENERAL CLEANING (TO BE PERFORMED BY STORE PERSONNEL) FREQ. INSTRUCTIONS Daily Sides/Top/Front Panel: Clean with mild all-purpose cleaner and soft cloth. Daily Acrylic Air Deflector, Bread Bins, Bread Display Supports: • Clean with mild all-purpose cleaner and soft cloth. • Never use ammonia-based cleaners (nor household or commercial window cleaner) on acrylic. -
Page 37: General Cleaning (By Trained Service Providers Only)
PREVENTIVE MAINTENANCE - TO BE PERFORMED BY TRAINED SERVICE PROVIDERS ONLY - 1 of 4 WARNING! TURN OFF CASE BEFORE PERFORMING PREVENTIVE MAINTENANCE! QUARTERLY PREVENTIVE MAINTENANCE INSTRUCTIONS Tub, Coil, Drain, Fan Blades, Motors, Brackets: Caution! Do Not Clean or Perform Service On Unit While It Is Energized! 1. - Page 38 PREVENTIVE MAINTENANCE - TO BE PERFORMED BY TRAINED SERVICE PROVIDERS ONLY - 2 of 4 WARNING! TURN OFF CASE BEFORE PERFORMING PREVENTIVE MAINTENANCE! QUARTERLY PREVENTIVE MAINTENANCE INSTRUCTIONS Condensate Package (Including Overflow Condensate Pan): Caution! You must turn main power switch off before cleaning! •...
- Page 39 PREVENTIVE MAINTENANCE - TO BE PERFORMED BY TRAINED SERVICE PROVIDERS ONLY - 3 of 4 WARNING! TURN OFF CASE BEFORE PERFORMING PREVENTIVE MAINTENANCE! ANNUAL (OR AS NEEDED) PREVENTIVE MAINTENANCE INSTRUCTIONS Honeycomb Air Diffuser: A. Wedge a non-metallic device of suitable strength (such as a ballpoint pen) between honeycomb and its housing.
- Page 40 PREVENTIVE MAINTENANCE - TO BE PERFORMED BY TRAINED SERVICE PROVIDERS ONLY - 4 of 4 WARNING! TURN OFF CASE BEFORE PERFORMING PREVENTIVE MAINTENANCE! ANNUAL PREVENTIVE MAINTENANCE INSTRUCTIONS Optional Clean Sweep® Condensing Coil Cleaner: Important! Disconnect power from case before cleaning the Clean Sweep® Condenser Coil Cleaner! •...
-
Page 41: Troubleshooting (To Be Performed By Trained Service Providers Only)
TROUBLESHOOTING (TO BE PERFORMED BY STORE PERSONNEL) - PAGE 1 OF 2 CONDITION TROUBLESHOOTING Water Is On The Floor Call service provider. Fan Emits Excessive Noise Call service provider. No Case Lights Are Working Check that light switch is in the on position. Check that ALL of the light cords and plugs are properly connected. - Page 42 TROUBLESHOOTING (TO BE PERFORMED BY STORE PERSONNEL), CONT’D - PAGE 2 OF 2 LED Style Light Fixtures Replacement of LED light: • To replace LED light fixture, simply insert new Removal of faulty LED light: LED light at proper position (socket must be near •...
- Page 43 TROUBLESHOOTING (TO BE PERFORMED BY TRAINED SERVICE PROVIDERS ONLY) CONDITION TROUBLESHOOTING Water Is On The Floor Check that the drain trap is free of debris. Check that the drain hose is correctly positioned over evaporator pan. Check store conditions. • To prevent condensation in NSF/ANSI Type I environments, maximum conditions are to be 55% relative humidity / 75°...
- Page 44 TROUBLESHOOTING (TO BE PERFORMED BY TRAINED SERVICE PROVIDERS ONLY), CONTINUED CONDITION TROUBLESHOOTING No Case Lights Are Follow previous page’s System Not Operating instructions. Working Check voltage at LED driver. If voltage is entering but not exiting, LED driver may be faulty. Check connection at case rear (from field wiring box) for voltage.
-
Page 45: Troubleshooting (By Trained Service Providers Only) - Condensing System
TROUBLESHOOTING (BY TRAINED SERVICE PROVIDERS ONLY) - CONDENSING SYSTEM CONDITION TROUBLESHOOTING Head Pressure Too High Check that the condensing coil is not dirty or covered. Check that condensing fans are working. Check that refrigerant is not overcharged. Perform sub-cooling check and verify that no contaminates are in system. Check that liquid line filter dryer is not plugged. -
Page 46: System
TROUBLESHOOTING (BY TRAINED SERVICE PROVIDERS ONLY) - EVAPORATOR SYSTEM CONDITION TROUBLESHOOTING Low Suction Pressure Check if sight glass is flashing or showing low charge. Check that expansion valve (TXV) isn’t restricted. Check element charge. Check that liquid line or filter isn’t restricted. Check that refrigeration lines and/or hoses are not kinked on either high or low sides. -
Page 47: Serial Label & Location / Technical Information / Add'l Information
MODEL NRS3648RXV-SAMPLE SERIAL NO. 12345X30DZ098765 888 E. Porter Rd - Muskegon, MI 49441 Blend Addenda Harmony Grocerant Impulse Oasis Reveal 3048256 ELECTRICAL RATING 120/1/60 16 A Conforms to UL Std. 471 REFRIGERANT R513A AMOUNT 50 OZ Conforms to NSF/ANSI Stds. 2 & 7... -
Page 48: Programmable Controller Information
PROGRAMMABLE CONTROLLER (SELECT, CLICK ON OR SCAN QR CODE FOR INFORMATION) Determine Which Programmable Controller Is On Your Case (Controllers That Are Commonly Used By Structural Concepts Are Shown Below). Your Particular Programmable Controller May Differ. Carel® ir33 Platform Carel® PJEZ Platform Dixell®... -
Page 49: Scc Technical Service Contact Information / Limited Warranty
STRUCTURAL CONCEPTS TECHNICAL SERVICE CONTACT INFORMATION & LIMITED WARRANTY YOU MUST HAVE THE FOLLOWING INFO AVAILABLE TECH SERVICE/WARRANTY CONTACT INFO: BEFORE CONTACTING STRUCTURAL CONCEPTS: 1 (800) 433-9490 / EXTENSION 1 SERIAL NO. / MODEL NO. / STORE NO. / STORE DAYS/HOURS AVAILABLE: MONDAY - FRIDAY (CLOSED HOLIDAYS) ADDRESS / DETAILS (PHOTOS, LEAK LOCATIONS,...
Need help?
Do you have a question about the CO33R and is the answer not in the manual?
Questions and answers