
Subscribe to Our Youtube Channel
Related Manuals for Belden Grass Valley NV9641A


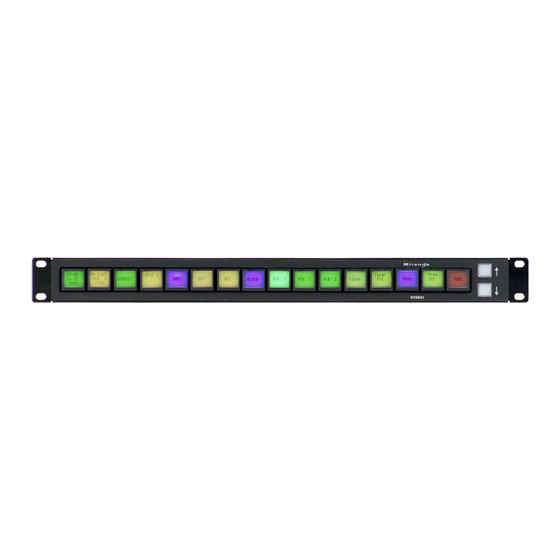
Summary of Contents for Belden Grass Valley NV9641A
- Page 1 NV9641A NV9000 CONTROL PANEL User’s Guide VERSION 1.3 UG0079-03 2015-07-02 www.grassvalley.com...
- Page 2 Copyright and Trademark Notice Copyright © 2015, Grass Valley USA, LLC. All rights reserved. Belden, Belden Sending All The Right Signals, and the Belden logo are trademarks or registered trademarks of Belden Inc. or its affiliated companies in the United States and other jurisdictions.
- Page 3 NV9641A User’s Guide Electrostatic Discharge (ESD) Protection Electrostatic discharge occurs when electronic components are improperly handled and can result in intermittent failure or complete damage adversely affecting an electrical circuit. When you remove and replace any card from a frame always follow ESD-prevention procedures: •...
- Page 4 Notices • Les cartes qui sont reliées à un châssis ou boîtier métallique mis à la terre ne nécessitent pas de protection antistatique spéciale. Précautions pour les écrans LCD et TFT Regarder l’écran pendant une trop longue période de temps peut nuire à votre vision.
- Page 5 NV9641A User’s Guide • EN 61000-4-2 Electrostatic discharge immunity • EN 61000-4-3 Radiated, radio-frequency, electromagnetic field immunity • EN 61000-4-4 Electrical fast transient immunity • EN 61000-4-5 Surge transient immunity • EN 61000-4-6 Conducted disturbances immunity • EN 61000-4-8 Power frequency magnetic field immunity •...
- Page 6 Notices...
-
Page 7: Table Of Contents
Table of Contents 1 Preface ..........1 Chapter Structure . - Page 8 Table of Contents Button Specification ............27 ‘Edit Navigation Button’...
- Page 9 NV9641A User’s Guide Buttons ..............57 Back .
- Page 10 Table of Contents Menu Mode ..............71 Software Versions .
-
Page 11: Preface
Preface Chapter 1 is an introduction to the NV9641A User’s Guide. Summary Chapter Structure ..............1 The PDF Document . -
Page 12: Terms, Conventions And Abbreviations
Preface Terms, Conventions and Abbreviations Use the ‘First Page’ , ‘Previous Page’ , and ‘Next Page’ , and ‘Last Page’ buttons to go to the first, previous, next, or last page within a PDF file. Note: To display the navigation buttons, right-click the Tool Bar area, and check ‘Navigation’ . Use Acrobat’s extensive search capabilities, such as the ‘Find’... -
Page 13: Introduction
Introduction Chapter 2 provides a functional description of the NV9641A. Summary Summary ................3 Panel Organization . -
Page 14: Behavioral Models
Introduction Behavioral Models Behavioral Models Configurers can place the NV9641A in one of two behavioral model: XY/MD and paging. The behavioral models are distinct and it is not possible for the operator to switch from one model to the other. XY/MD Model Under this model, the NV9641A provides a tree-structured (or hierarchical) button layout. -
Page 15: Up/Down Buttons
NV9641A User’s Guide Although a configurer can see the tree or list of pages during configuration, the structure of the button pages is not evident on the panel itself. The panel operator must commit the structure to memory to be able to use the panel. It is up to the person configuring the panel to design a simple and logical structure. -
Page 16: Modes Of Operation
Introduction Modes of Operation See Chapter 6, GPIO, on page 75, for complete detail. Modes of Operation Under the paging model, the panel operates in a limited X-Y mode. Under the XY/MD model, the panel operates in either X-Y mode or multi-destination (MD) mode. -
Page 17: Other Nv9641A Functions
NV9641A User’s Guide Other NV9641A Functions The NV9641A can be configured to perform the following additional functions: • Previous source, free source, and “quick” source. • Lock/protect/release for destinations. • Return to a pre-defined (or default) state. • Hold breakaway levels. •... - Page 18 Introduction Other NV9641A Functions...
-
Page 19: Installation
Installation Chapter 3 provides installation instructions for the NV9641A. Summary Package Contents ..............9 Installation . -
Page 20: Installation
Installation Installation Installation Follow these steps to install a NV9641A control panel: 1 Mount, and secure, the panel in the rack. The NV9641A is designed to mount in a 19© rack. This is not a requirement. Place the panel in position in your rack. Attach the panel to the rack frame, using screws appropriate for your rack. -
Page 21: Initialization
NV9641A User’s Guide Initialization Before your system controller can communicate with an NV9641A, you must give it a panel ID. Follow these steps for each NV9641A you are installing: 1 Power up the NV9641A. Do not connect its Ethernet cable (or disconnect it if it is connected). - Page 22 Installation Testing that panel should be loaded and the buttons appropriate for that configuration should light in the colors appropriate for that configuration. If you continue to see “No Server, ” “Acquiring IP Address, ” or “Locating Network” on button 2, you might have a problem. Reboot everything and try again. ...
-
Page 23: Configuration
Configuration Chapter 4 provides configuration instructions for the NV9641A. Summary Summary ................13 Adding a Panel to an NV9000 Configuration . -
Page 24: Adding A Panel To An Nv9000 Configuration
Configuration Adding a Panel to an NV9000 Configuration The Panel IP Configuration Utility is also available if you want the NV9641A to take a static IP address. Adding a Panel to an NV9000 Configuration You must create configurations for the NV9641A using NV9000-SE Utilities. We assume that you are familiar enough with NV9000-SE Utilities that you can understand the following material. - Page 25 NV9641A User’s Guide Click ‘Add Control Panel’ at the bottom of the configuration page. The ‘Add Control Panel’ page appears: Choose “NV9641” from the ‘Type’ field. Enter the panel ID you assigned to the panel (during initial power-up) in the ID field. Give a name to the panel in the name field and select a user. When you are creating a panel configuration you have 3 options.
- Page 26 Configuration Adding a Panel to an NV9000 Configuration Return to the ‘Control Panels’ page to view your new entry. To edit an NV9641A configuration, either double-click its list entry or select the entry and then click ‘Edit Panel Configuration’: You will then see the panel configuration page for the selected NV9641A. The following section of this guide discusses using the panel configuration page to configure an NV9641A.
-
Page 27: Nv9641A Panel Configuration Page
NV9641A User’s Guide NV9641A Panel Configuration Page This is the default NV9641A panel configuration page in NV9000-SE Utilities: Panel Image: Panel Function Image: Buttons Up/Down Buttons Button Definition Section Panel Options Button Page Table GPIO Definition Fig. 4-1: NV9641A Configuration Page (Default) Similar pages exist for NV9641A suffix templates and for global navigation templates. -
Page 28: Regions Of The Configuration Page
Configuration Regions of the Configuration Page Regions of the Configuration Page Above the ‘Revert to Saved’ and ‘Save’ buttons (always present) there are 5 main regions: • A graphic representation of the NV9641A panel. On the left are 16 LCD function buttons. Click on a button to assign a function to it. In some cases, you can click or double-click certain buttons to execute the button function. -
Page 29: Configuration Tasks
NV9641A User’s Guide Configuration Tasks The person configuring an NV9641A panel will want to consider how best to use the button page tree under the XY/MD model or the list structure of the button page list under the paging model to support the devices and routers in the router control system at hand. The task is non-trivial. -
Page 30: Panel Options
Configuration Panel Options Panel Options The first panel option selects the behavioral model of the panel: XY/MD or paging. The panel options differ between the two models. The default model is XY/MD mode. Changing from one behavioral model to the other will erase the panel configuration. A confirmation warning appears when you make the change: Options under XY/MD Model This is the top part of the panel options section, as it appears at the right of a configuration... - Page 31 NV9641A User’s Guide Release Mode Normal Release This panel can release “locks” and “protects” set by the designated user (at this panel or any other panel). Force Release This panel can release locks and protects set by any user. Default None After a reset, the panel displays no destination device.
-
Page 32: Checkbox Options
Configuration Options under XY/MD Model MD Data Automatic If a machine control (i.e., data) level is involved in a route, the Routing Mode system makes the route on the control level even if the control port is in use on the source or destination device. It breaks the previous control connection and then makes a new control connection for the route in progress. - Page 33 NV9641A User’s Guide A check in the box enables the option. Clearing the checkbox disables the option. The following items are the checkbox options under the panel options. • User-Programmable ID. Allows the panel ID to be changed locally at the control panel (in menu mode). •...
-
Page 34: Options Under The Paging Model
Configuration Options under the Paging Model • Flip-flop source to preset after take. Swaps the preset source and the currently routed source for this destination. • Enable force release. Allows operators to execute a force release. • Jump back after source selection. After you make a source selection, the panel reactivates the default button page. -
Page 35: Drop-Down Menus
NV9641A User’s Guide Drop-Down Menus These are the drop-down menu options under the paging model: Panel Behavior XY/MD Mode The panel configuration uses the XY/MD model. Model XY/MD supports a tree of button pages and allows the operator the choice of X-Y mode (multiple levels, single destination) or MD mode (all levels, multiple destinations) at any time. -
Page 36: Button Definitions
Configuration Options under the Paging Model • Source (Is) Master Default. Makes a control-level source the controlling device (or master device) by default. Otherwise, the destination is the master by default. (The option is specifically for use with NVISION series data routers.) “Source is master”... -
Page 37: Button Specification
NV9641A User’s Guide devices in a category can change over time (as the configuration database changes); the NV9641A device list changes also. The number and names of categories can also change over time and the NV9641A will track those changes too. When a device list appears on the panel, the system lights the ‘up’... - Page 38 Configuration Button Specification active. (An exception to this is the LCD brightness submenu when the panel is in menu mode.) Some button types are never high-tally. Check box “Place this button on all local pages. ” When the operator presses a ‘Navi- gate’...
- Page 39 NV9641A User’s Guide Type Paging Description Category Displays a category’s device list. When you assign a category button, two additional drop-down menus appear: ‘Src Category’ and ‘Dst Category’ . Choose a category from one of the category lists. When you choose a source category, the destination categories become inaccessible and vice versa: a category button must be either a source category or a destination category.
- Page 40 Configuration Button Specification Type Paging Description Destination Sets or removes a “protect” on the current destination device. The Protect protect can be removed only by the user that originally set the protect, or by a panel that has “Force Release” enabled. Note: a protect prevents others from routing to a destination;...
- Page 41 NV9641A User’s Guide Type Paging Description Name Set The button toggles the panel between its default name set and the Toggle “system name” set. One or the other becomes the active name set. The button definition has no fields to configure. If the default name set is the system name set, the button would be a no-op.
- Page 42 Configuration Button Specification Type Paging Description Salvo Executes a salvo. When you assign a Salvo button, a drop-down list appears in which you select a system salvo. The ‘None’ entry is merely a placeholder. Do not choose ‘None’ . (You can generate salvo buttons automatically in the ‘Edit Navigation Button’...
- Page 43 NV9641A User’s Guide Type Paging Description Source A source button selects a source. (Note that a quick source button selects a source and also performs an immediate take.) When you assign a source button, a drop-down menu appears: ‘Source Device’ . Choose a device from the list. The ‘None’...
- Page 44 Configuration Button Specification Type Paging Description Virtual Level In X-Y mode, this button causes the alphanumeric display to show Expand virtual levels at the lowest level of grouping (with the most detail). The button affects only virtual levels that have been grouped. See Level Grouping on page 56.
-
Page 45: Edit Navigation Button' Dialog
NV9641A User’s Guide ‘Edit Navigation Button’ Dialog Navigation buttons, and their corresponding target pages, are available only under the XY/MD model. The ‘Edit Navigation Button’ dialog is therefore available only under the XY/MD model. During configuration, when you choose ‘Navigate’ for a selected button, NV9000-SE Utilities displays an ‘Edit Navigate Button’... -
Page 46: Auto-Fill Options
Configuration ‘Edit Navigation Button’ Dialog • Jump to an existing page. This options does not create a new page in the button tree. The navigation button you are creating will cause the NV9641A to display the page you select in the associated drop down menu. - Page 47 NV9641A User’s Guide • Quick Source Devices Automatic fill using quick source buttons for source devices is the same as for source devices, except that quick source buttons are used. In the case of manual fill, blank quick source buttons are created. •...
-
Page 48: Button Page Table
Configuration Button Page Table Button Page Table The page table under the XY/MD models differs from the page table under the paging model. Under XY/MD, the page table represents a hierarchical (tree) structure of button pages. Under the paging model, the page table represents a list structure of button pages. XY/MD Model This page table lists the pages of the button page tree. -
Page 49: Paging Model
NV9641A User’s Guide During operation, panel operators will press navigation buttons, global navigation buttons, or category buttons to jump to other pages. Navigation buttons do not jump to global suffix pages or global navigation pages. Only global navigation buttons jump to global navigation pages; only category buttons jump to suffix pages. -
Page 50: Tally (Gpio) Window
Configuration Tally (GPIO) Window The ‘Links to Page Num(s)’ column lists, for any page, the other pages that refer to it. Under the paging model, only one such referring page exists and that is the predecessor in the list. The first page, named “Default, ” has no predecessor. Tally (GPIO) Window Below the tree window is the tally section of the configuration page. -
Page 51: Behavior
NV9641A User’s Guide Selection (of levels or MD devices) is affected by ‘Hold’ mode. (See the Hold button, page 30.) The user may toggle Hold mode at any time. Using the selection buttons follows hold mode or normal mode, whichever is in effect at the moment. Normal mode is the default —... -
Page 52: Md Mode - Normal
Configuration Configuration MD Mode — Normal When the user selects an MD device, all selection buttons are mutually exclusive: when the operator presses one button, any others that were selected turn off. To perform MD takes, the operator alternately selects an MD device and then a source until all intended devices have been preset. -
Page 53: How To Configure Selection Buttons
NV9641A User’s Guide On the configuration page, when there are more MD devices than selection buttons, the up and down buttons become active and you can scroll through the set of MD devices to assign them to selection buttons. (You can enable up to 512 MD devices, in multiples of 8. See the ‘Multidest Device Limit’ box under Panel Options on page 20.) You do not have to commit every selection button to an MD device. -
Page 54: Global Navigation
Configuration Global Navigation navigation button if you need it. This example shows 14 quick sources, a selection button, and one navigation button: for “Status” Quick Source Buttons to other pages One part of the configuration is specifying a default destination in the panel options during configuration. -
Page 55: Names
NV9641A User’s Guide Names After adding global navigation templates to your N9000 configuration, you will see them identified as such in the control panel list: Navigation Template Suffix Template The words “Navigate” and “Suffix” appear in the ‘Panel Type’ and ‘Configuration Name’ columns. -
Page 56: Referencing A Navigate Template
Configuration Referencing a Navigate Template When you check the option, an addition ‘Suffix Page’ field appears. Choose one of the suffix templates in the drop-down list. The suffix page appears in the panel configuration’s button page list: Suffix page The suffix page is a copy of the suffix template. -
Page 57: Composing Suffix Templates
NV9641A User’s Guide Choose a navigate template in that field. The global navigation page and any of its subpages appears in the panel configuration’s button page list: Global navigation page(s) The global navigation pages are copies made from the navigate template. They are not the template or a link to the template. -
Page 58: Template Changes
Configuration Composing Navigate Templates Template Changes If you make a change to a suffix template and it is in use (you’ll see the entries in the list) you’ll probably want to click ‘Push changes to panel configs’ . When you do, the configuration software adjusts all NV9641A panel configurations to use the modified suffix template. -
Page 59: Template Changes
NV9641A User’s Guide Template Changes If you make a change to a navigate template and it is in use by one or more panel configurations, you will want to click ‘Push changes to panel configs’ . You can see the panel configurations in the list under ‘Panel References’: List of panel configuration pages that use this navigate... - Page 60 Configuration Composing Navigate Templates...
-
Page 61: Operation
Operation Chapter 5 provides operating instructions for the NV9641A. Summary Summary ................51 Operating Concepts . -
Page 62: Modes Of Operation
Operation Modes of Operation Because the panel’s buttons can have arbitrary legends, a button’s legend might or might not indicate its function. Operators and configurers will have to communicate about the meaning of the buttons in the button tree. Physically, you will find •... -
Page 63: Button Legends
NV9641A User’s Guide Usually, only configurers need be concerned with setup mode. Setup Mode on page 73. • Salvo mode — pressing a salvo button and then a take button executes a salvo. The duration of a salvo is indeterminate. •... -
Page 64: Level Mapping
Operation Button Legends The top line of text identifies the current source. If the current destination had a breakaway take, the sources will be different across the set of level buttons. If the destination does not include a particular level, that button will be dark, but it will show the level name, as is the case with AES 3/4 here. -
Page 65: Lists
NV9641A User’s Guide If a breakaway occurred (in X-Y mode) for a particular destination, the MD destination button shows the destination mnemonic in reverse-field. The reverse field lets you know that this destination has a CAM1 CAM1 breakaway take. The top line of text represents the source for VTR3 the breakaway on the primary level of the route. -
Page 66: Level Grouping
Operation Level Grouping It is not possible to take different sources to the destination on the same level. For instance, you cannot take SD from two different sources. The outcome would be noise even if you could do it. (That is because routers are not mixers.) Level Grouping Virtual levels can be grouped. -
Page 67: Buttons
NV9641A User’s Guide NV9641A category buttons can represent either a source category or a destination category (but not both). When you pressing category buttons to begin device selection, one of two things occurs: • The panel displays a list of all devices in that category. If the list has more entries than will fit on the available buttons, you can scroll through multiple pages of devices using ‘Back’... -
Page 68: Back
Operation Buttons At present, there are 32 button types, not including “undefined” which is not a true button type: Back Global Navigate Save Preset Broadcast Hold Selection Category Level Map Source Chop Menu Source/Destination Clear Preset Name Set Toggle Source is Master Default State Navigate Take... -
Page 69: Chop
NV9641A User’s Guide back and forward buttons. If you press ‘Back’ while on the first page of the list, the NV9641A returns to the page containing the category button. The button text is normally the category name, but the configurer can give it any text. Category names tend to be short. -
Page 70: Clear Preset
Operation Buttons Select a preset source and press ‘Chop’ to start the chop function. Press ‘Chop’ again to stop the chop function. Clear Preset The ‘Clear Preset’ button erases all preset entries (while leaving the panel in the same mode). It is generally a “safety” feature. The clear preset button has the side effect of switching off ‘Save Preset’... -
Page 71: Destination Protect
NV9641A User’s Guide X-Y Mode In X-Y mode, you may lock or unlock the current destination on each of its levels. Select the level(s) and press the ‘Destination Lock’ button to perform the lock. Select locked levels and press the ‘Destination Lock’ button to unlock them. In X-Y mode, the ‘X-Y Display’... -
Page 72: Forward
Operation Buttons Forward Displays and activates the next button page in an automatically generated list. A forward button is never high-tally. A forward button is generated by the system when a list has more than 16 elements. Forward buttons are always accompanied by “back” buttons. -
Page 73: Menu
NV9641A User’s Guide Menu The button puts the NV9641A panel in menu mode and displays a menu, on the LCD buttons, that provides access to a variety of panel options. By pressing any of the menu buttons, you may enter data (such as panel ID) or change LCD brightness values. -
Page 74: Preset Release
Operation Buttons Preset Release This button removes locks and protects from preset source devices. (If source locks and protects are not used in your system, this button is not needed.) If you select a source and someone else has locked or protected the source, your panel will illuminate the ‘Preset Release’... -
Page 75: Selection
NV9641A User’s Guide The default button text is “Save Preset” but the button can have any legend. Selection Operators use selection buttons to select and unselect levels in X-Y mode and to select and unselect MD destinations in MD mode. A button page that has selection buttons will have up to 8 of them. -
Page 76: Source
Operation Buttons buttons visible. For instance, if your button page has 4 selection buttons, scrolling will show MD destinations 1–4, 5–8, 9–12, and so on. Source A source button selects a source. (Note that a quick source button selects a source and also performs an immediate take.) Quick source and source buttons are similar, except that the quick source performs a take. -
Page 77: Virtual Level Expander
NV9641A User’s Guide Virtual Level Expander In X-Y mode, this button causes the alphanumeric display to show virtual levels at the lowest level of grouping (with the most detail). The button affects only virtual levels that have been grouped. See Level Grouping on page 56. -
Page 78: Takes
Operation Takes Some control panels can lock or protect both sources and destinations. However, The NV9641A provides locks and protects for destinations only. A forced release is when the lock or protect is removed by someone other than the owner. A forced release can be performed: •... -
Page 79: Broadcast Routes
NV9641A User’s Guide Further, your panel can have a ‘Name Set Toggle’ buttons that allows you to switch between the “default” name set and the “system name” set. Whichever name set you are currently using is the active name set. There is always a ‘System Name’... -
Page 80: Removing Broadcast Routes
Operation Data Routing Removing Broadcast Routes To cancel a route, route the source to another destination normally. To remove a destination from the set of broadcast destinations, route another source (e.g., the free source) to the destination. Data Routing There are 3 data routing options that affect sources and destinations that have a machine control level (i.e., a data level). -
Page 81: Chop
NV9641A User’s Guide 3 Examine the display and the take button. 4 If the Take button is still high-tally (and the selection button for the machine control level is yellow), press the ‘Take’ button again to complete the take. You can cancel the control-level take by pressing a button other than ‘Take’ . Chop The chop function is a diagnostic function for routers that support chop. -
Page 82: Panel
Operation Panel User names are important in lock, protect, and release situations. The user who “owns” a lock or protect is identified by a user name. Press ‘Exit’ on the right to return to the menu. Panel Press the ‘Panel’ button to view panel data: Panel ID Panel ID PANEL... -
Page 83: Setup Mode
NV9641A User’s Guide Setup Mode Setup mode occurs when the NV9641A is disconnected from its network and is freshly powered up. In setup mode, you can set or change the panel ID, determine software versions, and perform a test of the panel’s buttons. It is in setup mode that you must initially set the panel ID. - Page 84 Operation Setup Mode When ‘Button Number’ appears, you can test individual buttons. Press any button except ‘Exit’ which is on button 16. When you do, the button number appears under “Button Number” on button 1 and the button you pressed blinks rapidly on and off for about a half second.
-
Page 85: Gpio
GPIO Chapter 6 provides information about the tally (GPIO) interface. Summary The Interface ............... . . 75 GPIO Configuration Concepts . -
Page 86: Output
GPIO Output When the input transitions off or transitions on, the NV9641A notifies the router control system, which carries out the task defined for the input (if a task has been configured). During contact closure, a current of 1.2 mA flows. A maximum of 48 VDC can be applied to the tally input for less than 5 seconds without failure. -
Page 87: The Gpio Section Of The Nv9641A Page
NV9641A User’s Guide The GPIO Section of the NV9641A Page SE’s NV9641A configuration page provides a GPIO section, below the tree window: Click on a button under ‘Outputs’ to configure one of the 4 tally outputs. Click on a button under ‘Inputs’ to configure one of the 8 tally inputs. ... - Page 88 GPIO Configuring Outputs Terms (i.e., operands) are generated by choosing entries in the other fields in this dialog and clicking ‘ADD’ . The example shows the following: Dest. Device: MON2 Dest. Level: Source Device: CAM1 Source Level: Choosing these items (and clicking ADD) produces the Boolean sub-expression: SD on CAM1 is switched to SD on MON2 In Figure 6-4, that sub-expression is ANDed with another sub-expression INPUT 3 OR INPUT 8...
-
Page 89: Configuring Inputs
NV9641A User’s Guide reconstruct the term in the appropriate entry fields, and click the ‘Change’ button to effect the change. Using the arrows is the only way to position between two items or at the end of the expression. You can double-click a term or an operator to select it directly. You can click ‘Check Syntax’... -
Page 90: Gpio Summary
GPIO GPIO Summary 3 Route the “previous source” switched by this panel to a destination, even if it is the same as the current source. If you choose this behavior, select a destination in the destination drop-down list. 4 Route a source to a destination. If you choose this behavior, select a source and a destination in the two drop-down lists. -
Page 91: Technical Details
Technical Details Chapter 7 provides electrical and mechanical specifications for the NV9641A. Summary Power Specifications ..............81 NV9641A Specifications . -
Page 92: Nv9641A Specifications
Technical Details NV9641A Specifications 2.39 [60.7] 5.24 [133.0] Indicator LED 1.62 [41.0] AC Input DC Output Fig. 7-1: The power output has Molex 4-pin plug. See Power Cord Retention page NV9641A Specifications NV9641A Physical Specifications Specification Detail Dimensions Height: 1.72 in (43.7 mm), fits EIA 1 RU (1.75 in or 44.5 mm), Width: 19.0 in (482.6 mm). -
Page 93: Environmental Specifications
NV9641A User’s Guide Environmental Specifications NV9641A Environmental Specifications Specification Detail Operating temperature 0–40 ° C, ambient. Relative humidity 0 to 90%, non-condensing. Cooling No fan required. Defaults Initial Panel State Multi-destination mode or X-Y mode, selectable. Destination: the configured default. Buttons: high-tally is maximum brightness;... -
Page 94: Drawings
Technical Details Drawings Drawings The drawings on the following pages identify features and provide overall and critical dimensions. - Page 95 NV9641A User’s Guide Fig. 7-2: Front and Top Views of the NV9641A...
- Page 96 Technical Details Drawings Fig. 7-3: Rear and Top Views of the NV9641A...
-
Page 97: Misc. Topics
Misc. Topics Chapter 8 provides the following. Summary LCD Buttons ................87 Scroll Button Legends . -
Page 98: Power Cord Retention
Misc. Topics Power Cord Retention To apply a label to a button, pull the clear plastic cap from the button, insert the label in the cap, and replace the cap. The caps come off easily. No tools are required. We recommend that you not use adhesive. -
Page 99: Ordering Information
NV9641A User’s Guide 6 Examine the strap though its path around the cord and power supply. Be sure that no slack exists and that it is tight the full length of the strap. If necessary, adjust and cinch it more tightly. Ordering Information These are the NV9641A components: PS0001... - Page 100 Misc. Topics Ordering Information...
- Page 101 Glossary AES/EBU (Audio Engineering Society/European Broadcasting Union). AES and EBU are standards organizations. Breakaway A condition where a destination has multiple sources on different levels. Category A category represents a set of devices. (The concept of categories exists to make it easier to select devices at a control panel.) A category can contain sources, destinations, or devices that are both sources and destinations.
- Page 102 Glossary one or more input ports. A destination is a device that is connected to one or more output ports. An example of such a device would be a monitor. A device can be both a source and destination. An example of such a device is a VTR. System The system administrator is the person responsible for installing, configuring, and administrator...
- Page 103 Index Broadcast mode ......69 Broadcast routes ......69 Button Acquiring IP address (message) .
- Page 104 Index virtual levels expand ..... 67 2, Introduction ......3 X-Y display .
- Page 105 NV9641A User’s Guide Data routing mode MD ........22, 83 XY .
- Page 106 Index Go to next view, Acrobat ..... 1 Ip configuration ..... . 10, 12, 83 Go to previous page, Acrobat .
- Page 107 NV9641A User’s Guide Manual data routing ......70 Name set toggle (button) ... . . 31, 63, 69 Manually fill devices (option) .
- Page 108 Index Power supply ....9–10, 81, 88–89 Preface about PDF documents ....1 Package contents .
- Page 109 NV9641A User’s Guide Salvo (button) ......32, 53, 64 Switching devices ......91 Salvo (defined) .
- Page 110 Index User interface ....... 13 User’s guide, chapter structure ....1 User-programmable panel ID .
- Page 111 Contact Us Grass Valley Technical Support For technical assistance, contact our international support center, at 1-800-547-8949 (US and Canada) or +1 530 478 4148. To obtain a local phone number for the support center nearest you, please consult the Contact Us section of Grass Valley’s website ( www.grassvalley.com An online form for e-mail contact is also available from the website.
Need help?
Do you have a question about the Grass Valley NV9641A and is the answer not in the manual?
Questions and answers