Table of Contents
Advertisement
Quick Links
Technical Support and E-Warranty Certificate
www.vevor.com/support
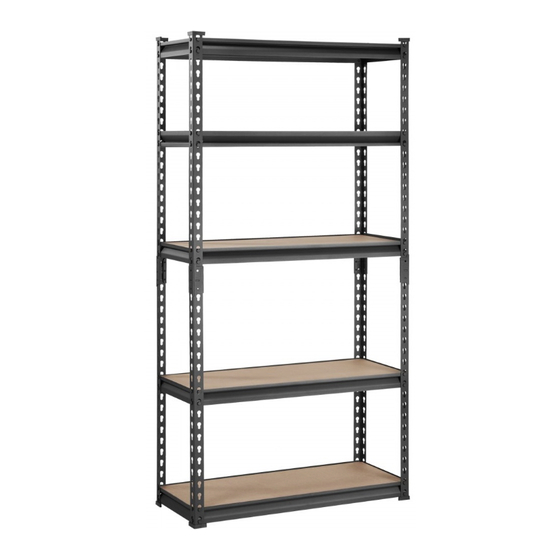
STEEL WIRE SHELF
USER MANUAL
We continue to be committed to provide you tools with competitive price.
"Save Half", "Half Price" or any other similar expressions used by us only represents an
estimate of savings you might benefit from buying certain tools with us compared to the major
top brands and doses not necessarily mean to cover all categories of tools offered by us. You
are kindly reminded to verify carefully when you are placing an order with us if you are
actually saving half in comparison with the top major brands.
Advertisement
Table of Contents

Related Manuals for VEVOR ZMV0


Summary of Contents for VEVOR ZMV0
- Page 1 Technical Support and E-Warranty Certificate www.vevor.com/support STEEL WIRE SHELF USER MANUAL We continue to be committed to provide you tools with competitive price. "Save Half", "Half Price" or any other similar expressions used by us only represents an estimate of savings you might benefit from buying certain tools with us compared to the major top brands and doses not necessarily mean to cover all categories of tools offered by us.
- Page 2 CustomerService@vevor.com This is the original instruction, please read all manual instructions carefully before operating. VEVOR reserves a clear interpretation of our user manual. The appearance of the product shall be subject to the product you received. Please forgive us that we won't inform you again if there are any technology or software updates on our product.
-
Page 3: Important Safety Instructions
IMPORTANT SAFETY INSTRUCTIONS Warning - To reduce the risk of injury, user must read instructions manual carefully. This symbol, placed before a safety comment, indicates a kind of precaution, warning, or danger. Ignoring this warning may lead to an accident. To reduce the risk of injury, fire, or electrocution, please always follow the recommendation shown below. -
Page 4: Use Precautions
4.Load bearing capacity and other product parameters are applied to the properly and completely assembled product only. 5.A hammer and a pair of gloves may also be used, provided a cloth or wood block is placed between the hammer head and the parts. USE PRECAUTIONS 1.This product is not a toy. -
Page 5: Product Parameters
PRODUCT PARAMETERS Model ZMV0 TAV0 5KV0 SCV0 12×30×60inch 18×36×72inch 18×48×72inch 24×48×72inch Product size 840×310×85mm 990×460×80mm 1300×465×80mm 1300×620×80mm G.W.: 13.7kg 20.5kg 29.3kg 34.4kg Total 2000lbs 2000lbs 2000lbs 2000lbs load limit load limit for each 400lbs 400lbs 400lbs 400lbs layer PART LIST... - Page 6 Top shelf long beam Fixings Post cap Reinforcer Height of separated 30inch 36inch 36inch 36inch shelfs Top shelf beam rivets has a design that allowing Steel mesh to sit. Attention: For additional information regarding the parts listed below, please refer to the Assembly Diagram of this manual. Unwrap and separate all parts in a clear work area.
-
Page 7: Assembly Step
ASSEMBLY STEP Step 1: Post Cap Assembly 1. Slide each post (B) into post cap (F) as shown. 2. Repeat for all 4 upright posts. Attention: post caps for upright feet only. Step 2: Short and Long Beam Assembly 1. Align short beams (D) & top shelf long beam (C) to aligned notches between four upright posts (B). - Page 8 Step 3: Fixings Assembly 1· Fix fixings(E) at the top of the upright post(B), and tap down to the end. Step 4:Install The Upright Post 1.The bottom of the upright post(B) is secured to each fixing(E), and tap down to the end. - 7 -...
- Page 9 Step 5:Install the third, fourth and fifth top shelf long beam(D) and short beam(C); the installation method is the same as Step 2 ep 6: Install the Reinforcer. 1. install part G on each part D. SKU1 and SKU2 are without part G - 8 -...
- Page 10 Step 7:7mm MDF Top Shelf Assembly 1.Insert 7mm MDF top shelf (A) on to the top shelf supports. 2. Ensure it sits flush with the top of the unit frame. Step8:Install The Top Glue Foot 1. Slide each post (B) into post cap (F) as shown. 2.
- Page 11 Attention: this product can be separated with two shelf. You can find the height of each shelf in the table of part list. Address:Baoshanqu Shuangchenglu 803long 11hao 1602A-1609shi Shanghai Imported to AUS: SIHAO PTY LTD, 1 ROKEVA STREETEASTWOOD NSW 2122 Australia Imported to USA: Sanven Technology Ltd., Suite 250, 9166 Anaheim Place, Rancho Cucamonga, CA 91730 Pooledas Group Ltd...
- Page 12 Technical Support and E-Warranty Certificate www.vevor.com/support...
Need help?
Do you have a question about the ZMV0 and is the answer not in the manual?
Questions and answers