Table of Contents
Advertisement
Quick Links
Advertisement
Table of Contents

Related Manuals for Analyticon combi scan 500


Summary of Contents for Analyticon combi scan 500
- Page 1 User‘s Manual Analyzer for CombiScreen 11 SYS ® urine test strips...
-
Page 3: Table Of Contents
Contents V4.2.3 revised 3/2009 Contents 1. Introduction ..................2 1.1. Methodology of the urine test ................2 1.2. The test strips ......................3 1.3. Intended use ......................3 2. Description of the reader..............4 2.1. Packing list ......................6 3. Installation .................... 7 4. -
Page 4: Introduction
Introduction 1. Introduction 1.1. Methodology of the urine test The urinalysis is part of the medical diagnosis methods frequently used by medical doc- tors in laboratories in order to reveal diseases. The most cost-effective device used to screen urine is a reagent test strip. This microchemistry system has been available for many years and allows qualitative or semi-quantitative analysis within one minute by sim- ple but careful observation. -
Page 5: The Test Strips
Introduction 1.2. The test strips The base of the urine analysis is the good quality of the urine test strip. These strips have separated pads for each parameter. The test pads contain reagents, which cause colour changes according to the parameter concentration in the urine. The CombiScan 500 is ®... -
Page 6: Description Of The Reader
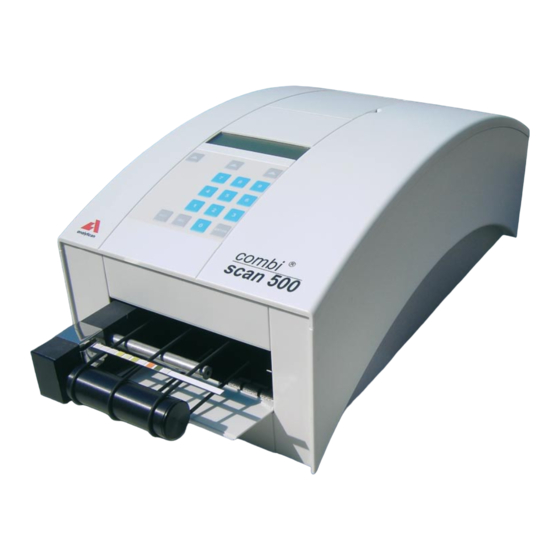
Description of the reader 2. Description of the reader The equipment is designed specifically for use in clinical laboratories. In its basic instal- lation the housing is almost fully closed, its physical appearance including colour meets the requirements raised by medical laboratories. Its throughput is about 500 test strip evaluations/hour. - Page 7 Description of the reader The carriage has three positions: Closed: The whole carriage is inside of the housing and the Frontdoor is closed. This is the stand-by or off position. Measurement: The front of the carriage is ejected of the reader housing in order to let the operator place the strip onto the three-belt conveyor.
-
Page 8: Packing List
Description of the reader 2.1. Packing list CombiScan 500 instrument 1 pc ® cylinder 1 1 pc cylinder 2 (with gearwheel) 1 pc belt 6 pcs power adapter 1 pc power cord 1 pc serial cable 1 pc users’ manual 1 pc printer paper 1 roll... -
Page 9: Installation
Installation 3. Installation The CombiScan 500 is shipped in a carton box. Prior to unpacking, clear the area where ® the instrument is to be operated, a surface of about 30x50 cm will be needed. While handling the package, please be cautious of the shipping marks on the box. Open the box. - Page 10 Installation Install all the three belts onto the cylinders (see fig. 5). Press the OK key. Now the convey- or slips back and the door closes automatically. Fig. 5 Fig. 5 Installation of the belts Open the printer cover. ...
-
Page 11: Operation
If the memory is free and the used strip counter is set to zero at the day’s first power on, the MAIN MENU appears on LCD. 2004/08/09 19:19:26 >>004 Combi Scan 500 <<005 V.4.01.05 WORKLIST START MENU If you want to switch off the reader, just press the QUIT button. -
Page 12: Worklist
If the worklist is entered through the internal keyboard, only numeric characters are possible. If you wish to delete an ID from worklist it can be done in the MENU/WORKLIST/CLEAR submenu. 2004/08/09 19:19:26 � 004 Combi Scan 500 � 005 V.4.01.05 WORKLIST START MENU... -
Page 13: Start
If there is no strip detected for 5 minutes a STOP function will be ex- ecuted automatically. During operation the following informations are displayed on the LCD: WORKLIST Combi Scan 500 MANUAL Combi Scan 500 � 001 MILLER, JOHN �... -
Page 14: Mesurement
Operation 4.4.1. Measurement The day-to-day operation of the CombiScan 500 is easy, and will be guided by the fol- ® lowing lines. Have the urine test sample tubes prepared. Press the START control key. Insert an unused strip into the urine specimen, rinse it at the edge of the container, briefly dap the edge of the test strip on a tissue paper and place it on the conveyor with the test pads upside. -
Page 15: Result Printout
Operation Note: The following error messages may appear during the measurement process. „The waste bin is full!“ This message is accompanied by a short beep. It means that the waste bin has not been emptied for 150 measurements. Interrupt the measurement process and empty the waste bin, then continue working. -
Page 16: Output Settings
Operation including the result units, the sensitivity of different pads, etc. To get familiar with these features please follow the flowchart below: 2004/08/09 19:19:26 � 004 Combi Scan 500 � 005 V.4.01.05 WORKLIST START MENU 2004/08/09 19:19:26 MENU SETUP SERVICE... -
Page 17: Strip Options
® essary to adjust the sensitivity of single parameters to special requirements of the user, although it is not recommended by ANALYTICON. To adjust the sensitivity, enter MENU/ SETUP/STRIP/SENS submenu. Pad measurement sensitivity can be set in two levels in both directions (+/-). The set val- ues on the display are as follows: –... -
Page 18: Pad Sequence In Printout
Operation IMPORTANT! The adjustment of the pad sensitivity effects the results of the measurement! When the reader is adjusted different from manufacturer setting it will be indicated by asterisks in the footer of the printout! 4.5.1.2.3. Pad sequence in printout By default, the reader prints out the result in the sequence of the pads physical position but it is also possible to customize the layout. -
Page 19: Service
Operation By selecting the MENU/SETUP/CLOCK submenu you can check the actual settings. By pressing the 12/24 control key you can change between 12 and 24 hour time format. The SEQUENCE option allows you to change the format of the date. By selecting the SET option you can adjust the correct date and time. -
Page 20: Calibration Settings
Operation 4.5.2.2. Calibration settings The calibration card is delivered with the reagent strips. Each calibration card has an in- dividual barcode printed on it. This code contains test strip related data and the number of measurements that can be carried out after calibration. If the number of measurement exceeds the predefined number, the reader will stop measuring, and a new calibration has to be carried out. -
Page 21: Memory Data Transfer
Operation 2004/08/09 19:19:26 MENU/MEMORY TRANSFER CLEAR TRANSFER REPORTS CLEAR MEMORY � 036 1234567890123 � 036 1234567890123 2004/08/11 2004/08/11 � � � � TRANSFER REPORTS CLEAR MEMORY 036 4110100135674 036 4110100135674 � 040 2004/08/11 � 040 2004/08/11 � � � � CLEAR MEMORY TRANSFER REPORTS PRINT... -
Page 22: Data Download
Operation If you confirm the first item with the “OK” control key the curser automatically moves to the next position where you have to enter the last item of the file to be deleted. After confirming the last item you automatically reach the next submenu, where you can start deleting by pressing the “OK”... -
Page 23: Care Of The Instrument
Care of the instruments 5. Care of the instrument Operation of the CombiScan 500 does not require any special maintenance. Only the ® cover, waste bin and conveyor of the instrument have to be cleaned and disinfected regu- larly. It should be done always after severe contamination, at least daily. Cleaning should be performed with a wet cloth and/or alcohol. -
Page 24: Warnings / Precautions
Warnings / Precautions 6. Warnings / Precautions The CombiScan 500 must be used in the manner described and specified in this manual ® in order to provide the saftety and performance standards specified. The instrument is calibrated for CombiScreen 11SYS test strips. With other CombiS- ®... -
Page 25: Troubleshooting
Troubleshooting 7. Troubleshooting During operation different errors and error messages may appear. Below you will find the list of error messages and some suggestions what to do: Error Error source Solve the problem E-11----E-17 Hardware error. Contact your local distributor E-18 CMOS memory error Contact your local distributor... -
Page 26: Technical Data
Technical data 8. Technical data methodology reflectance photometer detection CCD image processing max. throughput 500 strip/hour memory last 999 results display 4 x 24 character LCD printer 57 mm thermal printer (2 lines/sec) size 480 x 305 x 190 mm weight 10 kg external power-adapter... -
Page 27: Symbols
Please return it to your distributor at the end of the economic lifetime. Tested to comply with FCC standards For home or office use ANALYTICON BIOTECHNOLOGIES AG 35104 Lichtenfels Germany Phone: +49.64 54.79 91-0 Fax: +49.64 54.79 91-30 info@analyticon-diagnostics.com... -
Page 28: Appendix
Appendix Main menu structure 2004/08/09 19:19:26 � 004 Combi Scan 500 � 005 V.4.01.05 WORKLIST START MENU 2004/08/09 19:19:26 MANUAL CombiScan500 2004/08/09 19:19:26 MENU/WORKLIST � 001 MENU ITEM Nr: 0 � 000 EDIT/ADD CLEAR PRINT SKIP STOP SETUP SERVICE MEMORY... - Page 29 Appendix...
- Page 30 Appendix Table of results English Bilirubin Conv. mg/dl µmol/l Arbitrary Urobilinogen Conv. norm mg/dl norm µmol/l Arbitrary norm ++++ Ketones Conv. mg/dl mmol/l Arbitrary Ascorbic Conv. mg/dl acid Arbitrary Glucose Conv. norm 1000 mg/dl norm mmol/l Arbitrary norm ++++ Protein Conv.
- Page 31 Appendix Table of results Chinese Conv. mg/dl 胆红素 µmol/l Arbitrary Conv. norm mg/dl 尿胆原 norm µmol/l Arbitrary norm ++++ 酮体 Conv. mg/dl mmol/l Arbitrary 维生素C Conv. mg/dl Arbitrary 尿糖 Conv. norm 1000 mg/dl norm mmol/l Arbitrary norm ++++ 尿蛋白 Conv. mg/dl 0,15 Arbitrary...
- Page 32 Appendix Performance data Detection Limit Parameter Detection Limit * Ascorbic acid 15 mg/dl Bilirubin 0,6 mg/dl Blood 6-8 Ery/µL (as Hb) Glucose 40-50 mg/dl Ketones 4-6 mg/dl Leucocytes 10-15 Leu/ul Nitrite 0,1 mg/dl Protein 20 mg/dl Urobilinogen 1,5 mg/dl * Since the concentration of normal urine constituents may vary between different sam- ples, the detection limit also may show variations.
Need help?
Do you have a question about the combi scan 500 and is the answer not in the manual?
Questions and answers