Table of Contents
Advertisement
Quick Links
https://tehnoteka.rs
Uputstvo za upotrebu (EN)
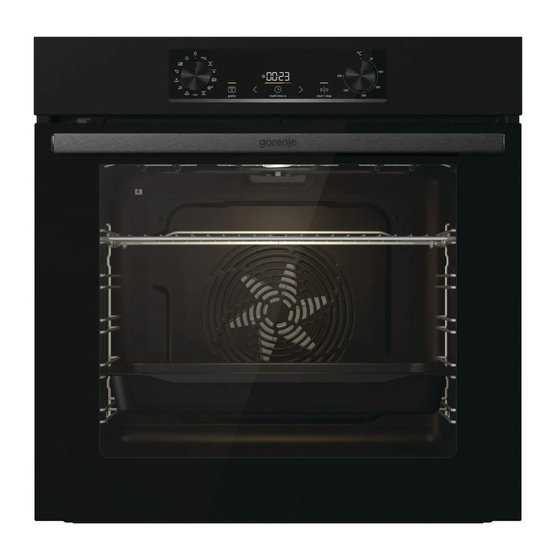
GORENJE ugradna rerna BPS6737E02B
Tehnoteka je online destinacija za upoređivanje cena i karakteristika bele tehnike,
potrošačke elektronike i IT uređaja kod trgovinskih lanaca i internet prodavnica u Srbiji.
Naša stranica vam omogućava da istražite najnovije informacije, detaljne karakteristike
i konkurentne cene proizvoda.
Posetite nas i uživajte u ekskluzivnom iskustvu pametne kupovine klikom na link:
https://tehnoteka.rs/p/gorenje-ugradna-rerna-bps6737e02b-akcija-cena/
Advertisement
Table of Contents

Subscribe to Our Youtube Channel
Related Manuals for Gorenje BPS6737E02B


Summary of Contents for Gorenje BPS6737E02B
- Page 1 Uputstvo za upotrebu (EN) GORENJE ugradna rerna BPS6737E02B Tehnoteka je online destinacija za upoređivanje cena i karakteristika bele tehnike, potrošačke elektronike i IT uređaja kod trgovinskih lanaca i internet prodavnica u Srbiji. Naša stranica vam omogućava da istražite najnovije informacije, detaljne karakteristike i konkurentne cene proizvoda.
- Page 2 INSTRUCTIONS FOR USE OF A BUILT-IN OVEN...
- Page 3 Instructions for installation and connection are supplied on a separate sheet. Instructions for use, installation and connection are also available at our website: http://www.gorenje.com The following symbols are used throughout the manual and they have the following meanings: INFORMATION!
-
Page 4: Table Of Contents
Contents Safety precautions ........................Safe and correct use of the oven during pyrolytic cleaning ............. Other important safety warnings ................... Appliance description ......................Rating plate product information ................... Control unit ..........................Push-pull knobs ........................Appliance equipment ......................Guides ............................Oven door switch ........................Cooling fan .......................... -
Page 5: Safety Precautions
Safety precautions IMPORTANT SAFETY PRECAUTIONS CAREFULLY READ THE INSTRUCTIONS AND SAVE THEM FOR FUTURE REFERENCE. Appliance must be connected to fixed wiring which has incorporated means of disconnection. Fixed wiring must be made in accordance with the wiring rules. Means for disconnection must be incorporated in the fixed wiring in accordance with the wiring rules. -
Page 6: Safe And Correct Use Of The Oven During Pyrolytic Cleaning
WARNING: The appliance and some of its accessible parts may become very hot during use. Care should be taken to avoid touching heating elements. Children less than 8 years of age shall be kept away unless continuously supervised. The appliance is not intended to be controlled by external timers or separate remote controll system. -
Page 7: Other Important Safety Warnings
During the automatic cleaning process, the oven heats up to a very high temperature and it is very hot on the outside as well. Risk of burns! Keep children away from the oven. Other important safety warnings The appliance is intended for household use. Do not use it for any other purpose, such as room heating, drying of pets or other animals, paper, fabrics, herbs etc. - Page 8 Pyrolytic cleaning involves very high temperatures that may cause smoke and fumes to be released form food residues. We recommend that you ensure thorough ventilation of the kitchen during the pyrolytic cleaning process. Small animals, or pets, are highly sensitive to any fumes released during pyrolytic cleaning of ovens.
-
Page 9: Appliance Description
Appliance description INFORMATION! Appliance functions and equipment depend on the model. Basic equipment of your appliance includes wire guides, shallow baking tray, and a wire rack. 1. Control unit 5. Rack levels (1 5) 2. Door lock with a switch 6. -
Page 10: Control Unit
Control unit (depending on the model) 1. System selector knob 2. Gratin, cancel or back key 3. Value decrease key 4. Timer function and settings key 5. Value increase key 6. start I stop key for confirming, starting, or stopping/pausing 7. -
Page 11: Appliance Equipment
Appliance equipment Guides • The guides allow cooking or baking on 5 rack levels. • The height levels of guides into which the racks can be inserted shall be counted from bottom up. • Guide levels 4 and 5 are intended for grilling/broiling. •... -
Page 12: Oven Door Switch
Click-on pull-out guides (depending on the model) The click-on pull-out guide can be inserted into any space between two wire guides. Place the guide symmetrically onto the wire guides on the left and the right side of the oven cavity. First, hook the upper clip of the guide under the wire of the wire guide. - Page 13 The WIRE RACK is used for grilling/broiling or as support for a pan, baking tray or baking dish with the food you are baking. INFORMATION! There is a safety latch on the wire rack. Therefore, the wire rack has to be lifted slightly at the front when pulling it out from the oven.
-
Page 14: Before First Use
Before first use • Remove oven accessories and any packaging (cardboard, polystyrene foam) from the oven. • Wipe the oven accessories and interior with a damp cloth. Do not use abrasive or aggressive cloths or cleaners. • Heat an empty oven for approximately one hour with the top and bottom heater system at a temperature of 250 °C. -
Page 15: Choosing The Settings
Choosing the settings CHOOSING THE COOKING SYSTEM Rotate the KNOB (left and right) to select the COOKING SYSTEM (see program table). INFORMATION! Appliance functions and equipment depend on the model. Symbol RAPID PREHEATING To reach the set temperature in the shortest possible time. When the oven is heated to the selected temperature, Prht will appear on the display unit and a short acoustic signal will be emitted. -
Page 16: Setting The Cooking Temperature
Table continued from last page Symbol SLOW BAKING For gentle, slow and even cooking of meat, fish and pastry on a single rack. This cooking method will leave the meat with a higher water content, making it juicier and more tender, while pastry will be evenly browned/baked. This system is used in the temperature range between 140 °C and 220 °C PIZZA SYSTEM This system is optimal for baking homemade pizza and pastry with higher water... -
Page 17: Timer Functions
TIMER FUNCTIONS Rotate the KNOB to set the desired SYSTEM and TEMPERATURE. Touch the multi time key to set the timer function. INFORMATION! During the last 10 minutes before the expiry of the set time, the remaining time is displayed in one-second intervals. - Page 18 While waiting to start operation, the oven is in a partial standby mode. The display is dimmed, and the fan system and oven lighting are on the entire time. The oven will switch on with the selected settings automatically (in our case at 16:00, or 4 p.m.). The oven will switch off at the set time (in our case, this is 18:00, or 6 p.m.).
-
Page 19: Starting The Cooking Process
Starting the cooking process The dash above the start I stop key is partially lit. Press this key to run the set program. During program operation, the dash above the key will be lit more brightly (will be fully illuminated). When the set temperature is reached, will appear on the display unit for a few seconds, and an acoustic signal will be emitted. - Page 20 INFORMATION! After the cooking process, all timer settings are also stopped and deleted, except for the minute minder. Time of day (clock) will be displayed. After the use of the oven, some water may be left in the condensate channel (underneath the door).
-
Page 21: General Settings
General settings Rotate the COOKING SYSTEM SELECTOR knob to position "0". To activate a function, press the multi time key and hold it for 3 seconds. SEtt will appear on the display unit for a few seconds. Then, the extra functions menu will appear. INFORMATION! Use the keys to navigate the menu. - Page 22 6. Adaptive function This function allows adjusting the set cooking time. The function is deactivated as a factory default, but it can also be activated. When the function is activated, the most recent cooking program duration settings are displayed. Values from the most recent cooking session will be used.
-
Page 23: General Tips And Advice For Baking
General tips and advice for baking • Remove all unnecessary equipment from the oven during baking • Use equipment made of heat-resistant non-reflective materials (supplied baking trays and dishes, enamel-coated cookware, tempered glass cookware). Bright-coloured materials (stainless steel or aluminium) materials reflect heat. As a result, thermal processing of food in them is less effective. •... -
Page 24: Cooking Table
Cooking table NOTE: Dishes requiring a fully pre-heated oven are indicated with a single asterisk * in the table. Dishes for which a 5-minute pre-heating cycle suffices are indicated with two asterisks ** . In this case, do not use the rapid preheat mode. Dish PASTRY AND BAKERY PRODUCTS pastry/cakes in moulds... - Page 25 Table continued from last page Dish biscuits, 2 levels 2, 4 150-160 * 20-25 meringue 80-100 * 120-150 meringue, 2 levels 2, 4 80-100 * 120-150 macarons 130-140 * 15-20 macarons, 2 levels 2, 4 130-140 * 15-20 bread rising and proofing 40-45 30-45 bread on a baking tray...
- Page 26 Table continued from last page Dish sirloin, medium done, 1 kg 170-190 * 40-60 beef roast, slow cooked 120-140 * 250-300 beef steaks, well done, thickness 220-230 25-30 4 cm burgers, thickness 3 cm 220-230 25-35 veal roast, 1.5 kg 160-170 120-150 pork...
- Page 27 Table continued from last page Dish stuffed potato (jacket potato) 190-200 30-40 French fries, home-made 210-220 * 20-30 mixed vegetables, wedges 190-200 30-40 + baking tray with water stuffed vegetables 190-200 30-40 CONVENTIONAL PRODUCTS FROZEN French fries 210-220 20-25 french fries, 2 levels 2, 4 190-210 30-40...
-
Page 28: Cooking With A Temperature Probe
Cooking with a temperature probe ( BAKESENSOR) (depending on the model) The temperature probe allows for accurate monitoring of the core temperature of the food during cooking. WARNING! The temperature probe should not be in direct vicinity of the heating elements. Stick the metal end of the probe into the thickest part of the food. -
Page 29: Recommended Doneness Levels For Different Types Of Meat
Correct use of the probe, by type of food: • poultry: stick the probe in the thickest part of the breast; • red meat: stick the probe into a lean part that is not marbled with fat; • smaller chunks with bone: stick them into an area along the bone; •... -
Page 30: Cleaning And Maintenance
Cleaning and maintenance WARNING! Before cleaning, unplug the appliance from the power mains and wait for the appliance to cool down. Children should not clean the appliance or perform maintenance tasks without proper supervision. For easier cleaning, oven cavity and baking tray are coated with special enamel for a smooth and resistant surface. - Page 31 • Remove all equipment from the oven, including the rack guides. Cleaning the equipment (all-purpose deep or shallow baking trays) with pyrolysis is possible only if the oven is equipped with additional wire guides (see chapter "Cleaning the supplied equipment with pyrolysis"). •...
-
Page 32: Removing Wire And Fixed Pull-Out (Extendible) Guides
• Insert the accessories into the groove on the second or third guide level never use the first guide level. • After the pyrolytic cleaning, wait for the equipment to cool down and clean it with hot soapsuds and a damp cloth. WARNING! If the oven is fitted with extendible guides, the equipment may not be cleaned with pyrolysis. -
Page 33: Removing And Replacing The Oven Door And Glass Panes
Removing and replacing the oven door and glass panes First, fully open the door (as far as it will go). Oven door is attached to the hinges with special supports that also include safety levers. Rotate the safety levers towards the door by 90°. -
Page 34: Replacing The Bulb
Replacing the bulb The bulb is a consumable and therefore not covered by warranty. Before replacing the bulb, remove all accessories from the oven. Halogen lamp: G9, 230 V, 25 W Unscrew and remove the cover (in anti-clockwise direction). Remove the halogen bulb. -
Page 35: Troubleshooting Table
Troubleshooting table Special warnings and fault reporting During the warranty period, only a service center authorized by the manufacturer may carry out any repairs. Before making any repairs, make sure the appliance is disconnected from the power mains either by removing the fuse or by disconnecting the power plug from the wall outlet. -
Page 36: Disposal
Disposal Our product packaging is made of environmentally friendly materials that can be recycled, disposed of, or destroyed without any hazard to the environment. To this end, packaging materials are labelled appropriately. The symbol on the product or its packaging indicates that the product should not be treated as normal household waste. -
Page 37: Cooking Test
Cooking test EN60350-1: Only use equipment supplied by the manufacturer. Always insert the baking tray all the way to the end position on the wire guide. Place pastry or cakes baked in moulds as shown in the image. * Preheat the appliance to desired temperature. Do not use the rapid preheat mode. ** Preheat the appliance for 10 minutes. - Page 38 Table continued from last page BAKING pljeskavica (minced wire rack + shallow meat patty) baking sheet as drip 25-40 *** tray...
- Page 39 843413-a18...
- Page 40 Ovaj dokument je originalno proizveden i objavljen od strane proizvođača, brenda Gorenje, i preuzet je sa njihove zvanične stranice. S obzirom na ovu činjenicu, Tehnoteka ističe da ne preuzima odgovornost za tačnost, celovitost ili pouzdanost informacija, podataka, mišljenja, saveta ili izjava sadržanih u ovom dokumentu.
Need help?
Do you have a question about the BPS6737E02B and is the answer not in the manual?
Questions and answers