Table of Contents
Advertisement
Quick Links
COMPAGNIE COMMERCIALE RIBOULEAU
N N O O T T I TI TI TI T T I TI TI TI T C C E E S S E E M
B B E E D
E I I E IE I I E IE IE IE IE I N
ED
ED
ED
ED
ED
ED
ED
EN
EN
EN
EN
EN
E E N
EN
EN
EN
E U U N
UN
UN
UN
UN
U G G S S A
UN
UN
U U N
G G G G G E E E E E E E B B
E E B
EB
EB
E E B
E E B
EB
EB
EB B
EB
EB B B B
E R R R R R R R R R R R R U U U U U U I I I I
U U I
U U I
UI
U U I
U U I
UI
U K K
UI
UI I I
U U I
U U I
IK K K K K K K K
I I K K K
IK
IK K
IK
I I K
I I K
IK
I S S S
IK
K A A
KS
KS
KS S
KS
KS
KS
KS S
KS
K K S
K K S
KS
NOTICE
D'UTILISATION
FE
FE
FE
FE
F F E
FE
F F E
F P
EP
EP
EP
EP
E E P
EP
EP
EP
E P P L L A A N N T T E
EP
SA
SA
SAN N L L E E I EI EI EI E E I EI EI EI E T T U
SA
SA
SA
SA A
SA
TU
TU
TU
TU
TU
TU
TU
T N
S S A
S S A
SA
S S A
SA
SA
SA A A
SA
SA A A A
S S A
SAA A A A A A A A A N N N N N N N N W W W W W W W I
SA
WI
W J J J J J IJ I I J I I J I I J I I J I I J I I J J J IJ I I J IJ IJ I Z Z
W W I
WI I I
WI
WI
WI
WI
W W I
WI
W W I
W W I
W W I
WI I
W W I
JZ Z
J I I ZI Z Z I Z Z I ZI I ZI Z Z I Z Z I ZI Z Z I ZI I I ZI Z N N
JZ
JZ Z Z Z
J J Z
JZ
J J Z
JZ
J J Z
J J Z
JZ
J J Z
USERS
MANUAL
www.monosem.com
EM
EMO O I I R
EM
EM
EM
EM
EM
EM
EM
EM
EM
IR
IR
IR
I I R
IR
IR
I I R
I S S F F E
IR
TE
TE
TE
TE
TE
TE
TE
T R
ER
ER
E
E E R
ER
ER
ER
ER
ER
ER
MAN N U U A
M M A
MA
MA
MA A
MA
MA
MA
MA
UAL L
UA
UA
U U A
UA
UA
UA A
UN
UN
U G G S S Ä
UN
U U N
UN
UN
UN
SÄ
SÄM M A
SÄ
SÄ
SÄ Ä
SÄ
SÄ
SÄ
MA
MA
MA
MA
MAS S C C H H I
MA
MA A
MA
I I N
I I N
IN
IN
I I N N
IN
IN N N
IN N
I G G G G G F F F F F F F E E E E
IN
F P P
F F E
FE
F F E
FE
F F E
FE E E E
FE
F F E
FE
F F E
EP P
EP
E E P P
EP
EP
EP P P
E - - Z Z Z Z Z Z Z Z Z Z A A
E E P
EP
E E P
EP
EP
ZAA A A A A A A A A I I I I I I I I I I M M
Z Z A
ZA A A A
Z Z A
ZA
Z Z A
Z Z A
Z Z A
ZA
ZA A
ZA
BEDIENUNGS
ANLEITUNG
FEP - 2020
Réf.10640203
FE
F P
FE
FE
FE
F F E
FE
EP
E E P
EP
EP
E
EP
EP
EP
EP
EP
HI
HI
HI
HI
HI
HI
HI
HI
HI
HI
H N
IN
IN
IN
I I N
IN
I I N
IN
I E E N
IN
EN
E
EN
EN
E E N
EN
EN
EN
EN
EN
F F E
FE
F F E
FE
FE
FE
FE
F P P
EP
E
EP P
E E P
EP
EP
EP P P P
EP
EP
EP
IM
I I M
IM M M A A
IM M M M
IM
IM M
IM M
IM
IM M
IM
I I M
MA A A A
MA A A
MA
MA
MA
M M A
M M A
M M A
MA
MA
MAC C C C C C H H H H H H H H H H H H I I I
HI
H H I
H N N
HI
HI I I
HI I
HI
H H I I
HI
H H I
HI
HI
I E E E E E E E S S S S S S S
IN N N
IN
I I N
I I N
IN N
IN
I I N N
IN
IN
GEBRUIKSAAN
WIJZING
Advertisement
Table of Contents

Subscribe to Our Youtube Channel
Related Manuals for Monosem FEP


Summary of Contents for Monosem FEP
- Page 1 FEP - 2020 Réf.10640203 COMPAGNIE COMMERCIALE RIBOULEAU N N O O T T I TI TI TI T T I TI TI TI T C C E E S S E E M EMO O I I R I I R...
- Page 2 Arbeit und von Zeit zu Zeit während des Säens. Les instructions de cette notice sont destinées à nos semoirs MONOSEM FEP ; elles ne concernent pas les sous ensembles utilisés seuls ou sur d’autres appareils (boîtiers , turbine...) The instructions in this manual are intended for our MONOSEM FEP planters;...
-
Page 3: Table Of Contents
SOMMAIRE 1 - Prescriptions de sécurité 2 - Introduction 3 - Description 4 - Montage et réglage courroie alternateur 5 - Montage et entretien de la batterie 6 - Montage et réglage des capteurs «fin de course» 7 - Vitesse de rotation du disque de distribution 8 - Description et utilisation de la console 9 - Stockage du matériel 10 - Piè... -
Page 4: Prescriptions De Sécurité
1 - PRESCRIPTIONS DE SÉCURITÉ La machine ne doit être utilisée, entretenue et réparée que par du personnel formé à cet effet et averti des risques inhérents. Il est impératif de respecter les consignes de sécurité mentionnées sur les autocollants de la machine, de ses accessoires et de la présente notice. Avant tout déplacement sur la voie publique, il est impératif de s’assurer du respect des dispositions du Code de la route en vigueur et de la conformité... - Page 5 - Il convient de vérifier réguli rement les pi ces exposées à une usure, et les remplacer si usées ou endommagées. - L’utilisation de pi ces de rechange MONOSEM est impérative, celles- ci correspondant aux caractéristiques définies par le constructeur.
- Page 6 1 - SAFETY REGULATIONS The machine should only be used, maintained and repaired by trained employees who are aware of the risks involved. It is essential to respect the safety regulations mentioned on the machine and accessory stickers and those given in this manual. Before transporting the machine on public highways, it is essential to ensure that the current Highway Code is observed and that the machine complies with occupational safety regulations.
- Page 7 - Parts subject to wear and tear should be checked regularly. Replace them immediately if they are damaged or worn - Spare parts should comply with the standards and specifications laid down by the manufacturer. Only use MONOSEM spare parts.
-
Page 8: Sicherheitsvorschiften
1 - SICHERHEITSVORSCHRIFTEN Die Maschine darf nur von speziell geschultem Personal benutzt, instandgehalten und repartiert werden, dass über die geräteeigenen Risiken informiert wurde. Die auf den Maschinenaufklebern, den ubehöraufklebern und in diesem Handbuch angegebenen Sicherheitsvorschriften müssen unbedingt eingehalten werden. Sich vor dem Befahren öffentlicher Verkehrswege davon überzeugen, dass die Bestimmungen der geltenden Straßenverkehrsordnung und die Gesetzgebung hinsichtlich der Sicherheit am Arbeitsplatz eingehalten werden. - Page 9 - Verschleiß unterliegende Teile müssen regelmäßig kontrolliert und bei Verschleiß oder Beschädigung ausgetauscht werden. - Der Einsatz von MONOSEM Ersatzteilen ist zwingend vorgeschrieben, da diese den vom Hersteller festgelegten Charakteristika entsprechen. - Vor elektrischen Schweißarbeiten am Traktor oder an der angekuppelten Maschine müssen die abel der Lichtmaschine und der Batterie abgeklemmt werden.
-
Page 10: Veiligheidseisen
1 - VEILIGHEIDSVOORSCHRIFTEN De machine mag alleen worden gebruikt, onderhouden en gerepareerd door daartoe opgeleid personeel, dat bekend is met de hiermee verbonden risico’s. Het is beslist noodzakelijk de veiligheidsvoorschriften en waarschuwingen in acht te nemen, zoals deze zijn vermeld op de stickers op de machine, op de accessoires ervan en in deze handleiding. - Page 11 - Het is nodig de aan slijtage onderhevige onderdelen regelmatig te controleren en ze te vervangen indien er sprake is van slijtage of beschadiging. - Bij vervanging is het verplicht gebruik te maken van MONOSEM-onderdelen, want deze voldoen aan de door de constructeur bepaalde eigenschappen.
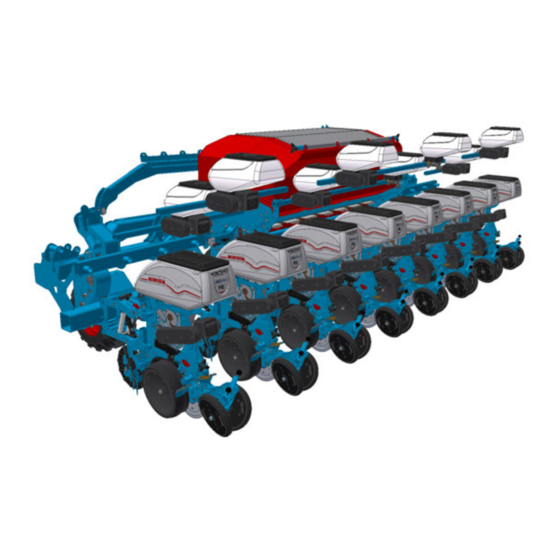
- Page 12 NG Plus M NG Plus NX M MECA V Semoir repliable TFC FEP TFC folding planter lapp-Sämaschine TFC Opklapbare zaaimachine TFC...
-
Page 13: Introduction
2 - INTRODUCTION 2 - INTRODUCTION Le contr leur de semis MONOSEM FEP ISOBUS est un dispositif The MONOSEM FEP ISOBUS sowing controller is a device that allows qui offre la possibilité de commander électriquement le semoir depuis you to electrically control the planter from the tractor cab. In this way, la cabine du tracteur. - Page 14 APERÇ U GÉNÉRAL - ARCHITECTURE FEP OVERVIEW - FEP ARCHITECTURE ALLGEMEINER ÜBERBLICK - FEP-AUFBAU OVERZICHT - FEP-ARCHITECTUUR 65031172 65031171 10239030 10230401 10239029 10230393 10230352 10230395 10230372 10230439 10230307 10230365 10230431 65031168 10230364 10230404 10230250 10230405 65030109 10230359 65034022 CAN-V 65031082...
- Page 15 APERÇ U GÉNÉRAL - ARCHITECTURE FEP OVERVIEW - FEP ARCHITECTURE ALLGEMEINER ÜBERBLICK - FEP-AUFBAU OVERZICHT - FEP-ARCHITECTUUR 65031172 65031171 10239030 10230401 10239029 10239036 10230395 10230393 10230372 10230338 10230307 10230365 10230431 65031168 10230364 10230404 10230250 10230405 65030109 10230359 65034022 65031082 65031083...
- Page 16 - 10230399 - 10230401 - 10230428 - 10230400 - 10230438 - 10230404 - 65037100 - 10230405 - 65030109 - 65034022 - 10230364 - 10230366 - 10230365 - 10230250 - 10230352 - 10230393 - 10239021 - 10239036 - 10230307 - 10230372 - 65031168 - 10230439 - 10230395...
-
Page 17: Description
3 - DESCRIPTION 3 - DESCRIPTION quipements électriques - semoir FEP FEP planter - electrical equipment - Microsem ECV unit - Boitier ECV Microsem - Supply harness for Microsem ECV unit - Faisceau d’alimentation pour boitier ECV Microsem - Connection harness between Microsem ECV units... - Page 18 Fig. Fig..Hz ... Hz Fig.
-
Page 19: Montage Et Réglage Courroie Alternateur
4 - MONTAGE ET RÉGLAGE COURROIE 4 - ALTERNATOR BELT ASSEMBLY AND ALTERNATEUR SETTING ► Fixation de l’alternateur : ► Fastening the alternator: -Mise en place de l’alternateur. -Putting in place the alternator. -Fixation du carter (fig. ). -Fastening the casing (fig. ). Avant chaque campagne, vérifier le serrage des vis (A , B &... -
Page 21: Montage Et Entretien De La Batterie
5 - MONTAGE ET ENTRETIEN DE LA 5 - ASSEMBLING AND MAINTAINING THE BATTERIE BATTERY ► Montage de la batterie OPTIMA : ► Installing the OPTIMA battery: Un support avec carter permet de protéger la batterie de la poussi re et A support with casing protects the battery from dust and moisture. -
Page 23: Montage Et Réglage Des Capteurs "Fin De Course
6 - MONTAGE ET RÉGLAGE DES 6 - ASSEMBLING AND SETTING CAPTEURS « fin de course » THE “ e nd of travel” SENSORS Semoirs NG Plus Me / NG plus 4e / NX Me NG Plus Me / NG PLUS 4e / NX Me planters ①- Semoir baissé, inverser le sens de la cale sur les éléments avec ①- Planter down in work position, rotate the unit stop like on the picture ►... - Page 27 MONTAGE ET RÉGLAGE DES CAPTEURS ASSEMBLING AND SETTING « fin de course » THE “ e nd of travel” SENSORS Semoir MECA V4e MECA V4e planter ①- Semoir baissé, positionner un rond de calage ①- Planter in a lowered position, fit a wedging spacer diam. mm and ►...
-
Page 28: Vitesse De Rotation Du Disque De Distribution
7 - VITESSE DE ROTATION DU DISQUE DE DISTRIBUTION EN tr/min 7 – ROTATION SPEED OF THE METERING DISK IN revolutions/min 10 11 12 13 14 15 16 17 18 19 20 km h 10 11 12 13 14 15 16 17 18 19 20 km h 10 11 12 13... - Page 29 7 - DREHZAHL DER SCHEIBE DES SÄGEHÄUSES IN U/min 7 - ROTATIESNELHEID VAN DE VERDEELSCHIJF IN tpm 10 11 12 13 14 15 16 17 18 19 20 km h 10 11 12 13 14 15 16 17 18 19 20 km h 10 11 12 13 14 15 16...
-
Page 31: Description Et Utilisation De La Console
8 - DESCRIPTION ET UTILISATION DE LA 8 - DESCRIPTION AND USE OF THE CONSOLE CONSOLE ► Description de la console TOUCH mini : ► Description of the console: A - Touche marche arrêt A - On off key B - Capture d’écran si clé USB branchée B - Screen capture if USB key plugged in C - Retour au menu d’accueil C - Back to the home menu... - Page 32 MENU WORK...
- Page 33 NAVIGATION MENU WORK WORK MENU NAVIGATION Ce menu s’utilise lors du semis, il permet This menu is used when sowing, it allows you to - de régler et visualiser la population de semis - display and set the seed population - de visualiser la vitesse d’avancement - display the travel speed - de remplir le disque de distribution avant chaque passe...
- Page 34 MENU WORK...
- Page 35 WORK MENU NAVIGATION NAVIGATION MENU WORK - Loading metering disk before start - Chargement du disque de distribution avant départ - Sequential row cut-off by the left and right switching off - Coupure de rang séquentielle par la gauche et par la the row droite arrêt du rang...
- Page 36 MENU WORK...
- Page 37 WORK MENU NAVIGATION NAVIGATION MENU WORK ► Disk loading: ► Le chargement du disque: The disk filling icon is used at the start of each plot. L’ic ne remplissage du disque s’utilise à chaque début de parcelle. Another example of when the icon is used if, in the middle of the plot, Autre cas d’utilisation, si en milieu de parcelle, l’utilisateur coupe the user switches off the turbine for any reason, it is necessary to reload la turbine pour des raisons diverses, il est nécessaire de refaire le...
- Page 38 MENU WORK...
- Page 39 WORK MENU NAVIGATION NAVIGATION MENU WORK ► Motor on/off management: ► Gestion marche/arrêt des moteurs : - Move the arrow to the right to choose the motor - Déplacer la che vers la droite pour choisir le moteur - Move the arrow to the left to choose the motor - Déplacer la che vers la gauche pour choisir le moteur - Arrow to indicate the motor...
- Page 40 MENU WORK...
- Page 41 WORK MENU NAVIGATION NAVIGATION MENU WORK ► Tramline mode management: ► Gestion du mode jalonnage : - Access to tramline settings - Acc s aux réglages du jalonnage - Access to manual tramline mode - Acc s au mode jalonnage manuel - Activation of the automatic tramline mode - Activation du mode jalonnage automatique - Return to the previous menu...
- Page 42 MENU WORK...
- Page 43 WORK MENU NAVIGATION NAVIGATION MENU WORK ► Tramline settings: ► Réglages du jalonnage : Settings: Paramétrages - Width of treatment - Largeur de traitement 2 - Track width 2 - Largeur de voie - Position of the edge of the field (start of sowing) - Position du bord du champ (départ du semis) - Tyre width - Largeur des pneus...
- Page 44 MENU WORK...
- Page 45 WORK MENU NAVIGATION NAVIGATION MENU WORK ► Manual tramline mode: ► Mode jalonnage manuel : Command allowing one or several rows to be cut off during a run. This Commande permettant de couper un ou plusieurs rangs lors d’un passage. function stops automatically during the next run.
- Page 46 MENU WORK...
- Page 47 WORK MENU NAVIGATION NAVIGATION MENU WORK ► Automatic tramline mode: ► Mode jalonnage automatique : - Access to tramline settings - Acc s aux réglages du jalonnage - Access to manual tramline mode - Acc s au mode jalonnage manuel - Activation of automatic tramline mode - Activation du mode jalonnage automatique - Tramline programme active...
- Page 48 MENU WORK...
- Page 49 WORK MENU NAVIGATION NAVIGATION MENU WORK ► Seed population management: ► Gestion de la population de semis : - Increasing the distance between seeds - Augmentation de la distance entre graines - Reducing the distance between seeds - Diminution de la distance entre graines - Increasing the amount per hectare - Augmentation de la dose par hectare - Reducing the amount per hectare...
- Page 50 MENU WORK...
- Page 51 WORK MENU NAVIGATION NAVIGATION MENU WORK ► Management of Microsem and fertilizer amounts: ► Gestion des doses d’engrais et de Microsem : - Increasing the required amount - Augmentation de la dose souhaitée - Decreasing the required amount - Diminution de la dose souhaitée - Return to the previous menu - Retour au menu précédent - Pressing and holding down the key allows you to increase or...
- Page 52 MENU WORK...
- Page 53 WORK MENU NAVIGATION NAVIGATION MENU WORK ► Management of permanent cut-offs: ► Gestion des coupures permanentes : Commands allowing you to cut off one or several rows permanently at Commandes permettant de couper un ou plusieurs rangs de fa on any time.
- Page 54 MENU TEST...
- Page 55 TEST MENU NAVIGATION NAVIGATION MENU TEST ► Description of the screen: ► Descriptif de l’écran : 1 - Software version 1 - Version du logiciel 2 - Software version 2 - Version du logiciel 3 - Software version 3 - Version du logiciel 4 - Version of the PCB motor ECU 4 - Version des cartes ECU moteur 5 - Arrow to indicate the motor...
- Page 56 MENU TEST test moteurs Fertiliseur Microsem n’est possible l’étalonnage été réalisé. Testing Microsem fertilizer placement unit motors only possible calibration been carried out. Düngerstreuer- Microsem-Motoren können erst getestet werden, wenn die Kalibrierung erfolgt ist. testen Meststof- Microsem-motoren alleen mogelijk kalibratie uitgevoerd.
- Page 57 TEST MENU NAVIGATION NAVIGATION MENU TEST ► Planter electric motor test: ► Test des moteurs électriques du semoir : - Move the arrow to the right to choose the motor - Déplacer la che vers la droite pour choisir le moteur - Move the arrow to the left to choose the motor - Déplacer la che vers la gauche pour choisir le moteur...
- Page 58 MENU DATA...
- Page 59 DATA MENU NAVIGATION NAVIGATION MENU DATA This menu allows parameters such as areas sowed and hours worked Ce menu permet de visualiser les param tres tels que les surfaces to be displayed. ①- Area sowed for meter no xx semées et les heures travaillées. ①- Surface semée pour le compteur n xx ②- Sowing time for meter no xx ②- Temps du semis pour le compteur n xx...
- Page 60 MENU DATA...
- Page 61 DATA MENU NAVIGATION NAVIGATION MENU DATA - Access to DATA menu - Acc s au menu DATA - Remise à zéro des compteurs N° 1 à N° 8 - Resetting meters N° 1 - N° 8 - Access to meter N° 1 data - Acc s aux données du compteur N - Starting meter N°...
- Page 62 MENU RÉGLAGES GLOBALES...
- Page 63 GENERAL SETTINGS MENU NAVIGATION NAVIGATION MENU RÉGLAGES GLOBAUX - Access to settings menu - Acc s au menu réglages - Acc s à l’étalonnage du radar de vitesse - Access to speed radar calibration - Access to rotary encoder calibration (available as an optional extra) - Acc s à...
- Page 64 MENU RÉGLAGES GLOBALES...
- Page 65 GENERAL SETTINGS MENU NAVIGATION NAVIGATION MENU RÉGLAGES GLOBAUX ► Planter speed calibration: ► Calibration de la vitesse semoir : - Access to speed radar calibration - Acc s à l’étalonnage du radar de vitesse - Access to rotary encoder calibration (available as an optional - Acc s à...
- Page 66 MENU RÉGLAGES GLOBALES...
- Page 67 GENERAL SETTINGS MENU NAVIGATION NAVIGATION MENU RÉGLAGES GLOBAUX ► Multi-purpose planter settings: ► Réglages des semoirs mixtes : - Planter configuration - Configuration semoir - Planter configuration active - Configuration semoir active - Planter configuration - Configuration semoir - Planter configuration - Configuration semoir - Planter...
- Page 68 MENU RÉGLAGES GLOBALES...
- Page 69 NAVIGATION MENU RÉGLAGES GLOBAUX GENERAL SETTINGS MENU NAVIGATION ► Réglages du contrôleur de tâches : ► Task controller settings: - Retour au menu précédent - Return to the previous menu Descriptif de l’écran : Description of the screen: - Activation de la fonction TC-SC pour l’ECU semoir - Activation of the TC-SC function for the planter ECU - Fonction TS-SC sur arrêt - TS-SC function off...
- Page 70 MENU RÉGLAGES DU SEMOIR...
- Page 71 PLANTER SETTING MENU NAVIGATION NAVIGATION MENU RÉGLAGE DU SEMOIR - Access to planter setting menu - Acc s au menu réglage du semoir - Retour au menu précédent - Return to the previous menu ► Description of the screen: ► Descriptif de l’écran : - Activation of planter section - Activation de la partie semoir 2 - Distance between seeds and density...
- Page 72 MENU RÉGLAGES DU FERTILISEUR...
- Page 73 FERTILIZER PLACEMENT UNIT SETTING MENU NAVIGATION NAVIGATION MENU RÉGLAGE FERTILISEUR - Access to fertilizer placement unit setting menu - Acc s au menu réglage du fertiliseur - Acc s à l’étalonnage du fertiliseur - Access to fertilizer placement unit calibration - Return to the previous menu - Retour au menu précédent ►...
- Page 74 MENU RÉGLAGES DU FERTILISEUR Acc s menu Pré-charge Vider le sceau Etalonnage 1 min 30 s...
- Page 75 Ils sont à vérifier obligatoirement sur le terrain par un amount hectare required. essai préalable afin de pouvoir rectifier le réglage, si nécessaire, pour RIBOULEAU MONOSEM shall not be held responsible for the flow rate obtenir réellement la dose hectare désirée. setting, which is at the user’s discretion.
- Page 76 MENU RÉGLAGES DU MICROSEM...
- Page 77 MICROSEM SETTING MENU NAVIGATION NAVIGATION MENU RÉGLAGE MICROSEM - Access to Microsem setting menu - Acc s au menu réglage du Microsem - Acc s à l’étalonnage du Microsem - Access to Microsem calibration - Return to the previous menu - Retour au menu précédent ►...
- Page 78 MENU RÉGLAGES DU MICROSEM Accès menu Pré-charge Vider le sceau Quantité pesée Poids pour une sortie pour deux sorties Valeur à retenir pour le test Etalonnage 1 min 30s...
- Page 79 RIBOULEAU MONOSEM shall not be held responsible for the setting of RIBOULEAU MONOSEM décline toute responsabilité dans le réglage the flow rate, which is at the user’s discretion.
- Page 80 MENU RÉGLAGES DU MICROSEM Gamme haute Gamme basse...
- Page 81 MICROSEM SETTING MENU NAVIGATION NAVIGATION MENU RÉGLAGE MICROSEM ► Range change: ► Changement de gamme : Si la valeur souhaitée (kg ha) ne rentre pas dans la plage de réglage, If the value required (kg ha) does not fall within in the adjustment range, change range and re-calibrate the product.
- Page 82 ACTIVATION DES LICENCES...
- Page 83 ► Activation et gestion des licences : ► Licence activation and management : Dans le menu Gestionnaire des licences , vérifier si les deux licences In the Licenses menu , check whether or not the two licences have sont activées been activated - TRAC -Leader II - TRAC -Leader II...
- Page 84 ACTIVATION DU MODE GPS...
- Page 85 ► Activation et réglage du mode GPS : ► Activating and setting the GPS mode: Positionnement de l’antenne GPS sur le tracteur Positioning the GPS antenna on the tractor Dans le menu Tractor-ECU , paramétrer la position de l’antenne. In the Tractor-ECU menu set the position of the antenna. Indiquer les valeurs en et Y entre l’antenne et le milieu de l’attelage Indicate the values in...
- Page 86 ACTIVATION DU MODE SECTION CONTROL...
- Page 87 ► Autorisation du mode SECTION Control « SC » ► Authorisation of the “SC” SECTION Control mode Dans le menu TRAC -Leader , puis dans réglage, activé la fonction In the TRAC -Leader menu, then in settings, activate the SECTION SECTION Control par oui .
- Page 88 LISTE DES ALARMES ①- Description de l’alarme ②- Numéro d’alarme ③- Localisation des pannes Code Cause possible Actions correctives alarme Alimentation ECU - Vérifier les fils d’alimentation ISOBUS et les fusibles. Se référer à la notice tracteur. Tension d alimentation régulée des capteurs - vérifier la continuité...
- Page 89 LISTE DES ALARMES Code Cause possible Actions correctives alarme Trop peu de graine - manque. - Vérifier la trémie et le disque. - Vérifier les seuils d’alarme. 3 20 - Vérifier la cellule et les connections. - Remplacer la cellule. - Remplacer l’ECU moteur.
- Page 90 LISTE DES ALARMES Code Cause possible Actions correctives alarme Connection impossible avec module ECV. - Vérifier les faisceaux du module ECV. - Vérifier la terminaison CAN sur le dernier ECV. - Vérifier les switches sur les modules ECV. 3 49 - Vérifier que le nombre de modules ECV correspond à...
- Page 92 ALARMS LISTING ①- Description of the alarm ②- Alarm number ③- Troubleshooting Alarm Cause To do code ECU PWR is lower than - Check ISOBUS power supply cables and fuses. Refer to tractor manual. Regulated sensor power supply voltage is lower than - Check sensor cable for a short circuit.
- Page 93 ALARMS LISTING Alarm Cause To do code Too few grains. - Check hopper and seeding disc. - Check lower threshold setting for grains. 3 20 - Check Grain sensor and connection. - Replace Grain sensor. - Replace seed motor ECU. Too many grains.
- Page 94 ALARMS LISTING Alarm Cause To do code Connection to ECV failed. - Check the connection cables of ECV. - Check the terminator connection on the last ECV. - Check the switches on the ECV. 3 49 - Check that there are enough ECV connected to the corresponding machine configuration. - Do Start a manual software update of the ECV.
- Page 96 ALARMLISTE ①- Alarmbeschreibung ②- Alarmnummer ③- Ursprung der Pannen Alarm- Nr. Beschreibung/Ursache Fehlersuche/Fehlerbehebung ECU PWR ist niedriger als - ontrollieren Sie die ISOBUS Stromversorgungskabel und Sicherungen. Nehmen Sie die Traktoranleitung zu Hilfe. Geregelte Sensorspannung ist niedriger als V. ontrollieren Sie das Sensorkabel ob ein urzschluss entstanden ist.
- Page 97 ALARMLISTE Alarm- Nr. Beschreibung/Ursache Fehlersuche/Fehlerbehebung u wenig örner. - ontrollieren Sie den Tank und die Säscheibe. - ontrollieren Sie die Einstellung für die untere orndurchsatzschwelle. 3 20 - ontrollieren Sie den ornsensor und dessen Verbindung. - Tauschen Sie den ornsensor aus. - Tauschen Sie die Säaggregat-Motor-ECU aus.
- Page 98 Alarm- Nr. Beschreibung/Ursache Fehlersuche/Fehlerbehebung Verbindung zur ECV gestört. - ontrollieren Sie die Verbindungskabel der ECV. - ontrollieren Sie die Abschlussverbindung an der letzten ECV. - ontrollieren Sie die Schalter der ECV. ontrollieren Sie, dass genügend ECV für die aktuelle Maschinenkonfiguration 3 49 angeschlossen sind.
- Page 100 ALARMLIJST ①- Beschrijving van het alarm ②- Alarmnummer ③- Lokalisering van storingen Alarm- Mogelijke oorzaak Corrigerende maatregelen code Stroomvoorziening ECU - Controleer de ISOBUS-voedingskabels en -zekeringen. ie de handleiding van de tractor. Gestabiliseerde sensorvoedingsspanning - Controleer de continu teit van de sensordraden. - Controleer de sensoren.
- Page 101 ALARMLIJST Alarm- Mogelijke oorzaak Corrigerende maatregelen code Te weinig zaadkorrels - gebrek. - Controleer de trechter en de schijf. - Controleer de alarmdrempels. 3 20 - Controleer de cel en de aansluitingen. - Vervang de cel. - Vervang de motor-ECU. Teveel zaadkorrels.
- Page 102 ALARMLIJST Alarm- Mogelijke oorzaak Corrigerende maatregelen code an niet worden aangesloten op de ECV-module. - Controleer de kabels van de ECV-module. - Controleer de CAN-afsluiting op de laatste ECV. - Controleer de schakelaars op de ECV-modules. 3 49 - Controleer of het aantal ECV-modules overeenkomt met de configuratie. - Voer een handmatige update van de ECV-module uit.
-
Page 104: Stockage Du Matériel
Den ustand der Verschleißteile prüfen. Indien onderdelen zijn beschadigd, deze uitsluitend vervangen met um Austausch von gebrochenen Teilen, ausschließlich Original-Ersatzteile originele onderdelen (Ribouleau MONOSEM). (Ribouleau MONOSEM) verwenden. Denk eraan uw onderdelen meteen na de werkzaamheden te bestellen, ze Daran denken, die Teile gleich nach Abschluss der Säkampagne zu zullen meteen beschikbaar zijn in onze winkels. - Page 105 Stockage de la machine : Storing the machine: Le respect des consignes suivantes est impératif It is essential that you observe the following instructions Toutes machines doivent être entreposées à l’abri de l’humidité sous All machines must be stored in a shed, to protect them from humidity. un hangar.
- Page 106 NOTES Par soucis d’amélioration continue de notre production, nous nous réservons le droit de modifier sans préavis nos matériels qui, de ce fait, pourront par certains détails être différents de ceux décrits sur cette notice. Photographies non contractuelles.
-
Page 107: Piè Ces De Rechange
PI CES DE RECHANGE SPARE PARTS ERSAT TEILE ONDERDELEN... - Page 108 DISTRIBUTION & ENTRAINEMENT NG Plus M ( 1) sup2018 20071971 10200252 10629019 30172038 10500092 10174020 10161036 20071772 20079431 65037099 10620088 10175042 10502016 20079433 20083121 20079430 10239031 10590070 10174020 10174020 20073750 10992327 10230304 10200254 10219128 10992410 10629007 10540035 10200253 10500092 10230101 10540034 10992363 10230110...
- Page 109 DISTRIBUTION & ENTRAINEMENT NG Plus M ( 2) 10150040 10990017 10043019 10072072 20071971 30530060 10590206 10600006 10600006 10179040 10629007 10072073 10200184 10200205 10604010 10090068 10601010 20071772 10072076 10600010 10175042 10604010 10072076 10161036 20022600 10072094 10172039 10174020 20021577 20071771 10591923 10090307 10200072 10072090 20071773...
- Page 110 COUVERCLE STANDARD NG Plus M 65064199 OPTION 10040036 COL A 10150041 10990086 66002159 10040062 20021580 10200054 10601005 10200053 10219004 10072078 30530060 10620004 20072300 10072091 10153086 20021588 20078502 10150026 10591992 10172099 66005868 10074054 20035480 10219079 P06 16 013 0 Réf. Réf. Désignation Réf.
- Page 111 PATTE FIXATION MOTEUR NG Plus M - NX M 10620022 20085523 10512020 10992076 10500091 10990086 10992076 10600010 10512020 20085521 >07/2019 10990086 20025120 10600010 10620095 20082871 20025120 P06 16 0190 Réf. Réf. Désignation Réf. Réf. Désignation 10500091 Vis H M x 10512020 Vis H M 10600010...
- Page 112 DISTRIBUTION & ENTRAINEMENT MECA V4 ( 1) sup2018 10200269 10230398 20081841 20081831 10200267 10620001 20030019 10530062 10239031 30500030 10172090 20081832 10219120 10591922 10226268 10601016 10502014 10075009 10609046 10161069 20030016 20064822 10161045 20081822 30992056 20081850 10230052 10530062 20081821 10590028 20081852 10540035 30620001 10219127 10992363...
- Page 113 BOITIER MECA V4 20064910 20064822 10073012 10601008 10992056 10071074 10501057 10172090 10125050 20046641 10500060 10153072 20064890 10512023 10501052 10531094 10601008 10075009 10591922 10590154 20030016 10601008 10172088 10172099 10161045 10590028 20077510 10161069 10591902 10620001 20046643 65012126 10153045 20030019 10500091 10620032 20046642 10621061 66003016 30601006...
- Page 114 ENTRAINEMENT MICROSEM ÉLECTRIQ UE 10200255 10219126 10540035 10992327 10992043 10200254 10226268 10992402 10603006 20082620 20081742 10500031 10540029 10620001 10200265 20081743 10629019 20081725 20073750 10629007 20081744 10501055 10500092 10620073 20042662 30520092 10174130 10609046 10161047 10609046 20082642 66008263 66008264 20081745 10501052 10510097 10230364 10600008 10200266...
- Page 115 MONTAGE ALTERNATEUR TURBINE ÉLECTRIQUE MD & GD sup2017 10620088 10603010 20073530 20073532 10219049 10219089 10600008 10629009 10620063 10219100 20072450 10090476 20078461 10620063 10511065 66008045 10230372 20072494 20072440 30507084 20072460 20080442 10600010 10621061 20077401 10561057 10600014 10629013 10620088 10502014 10603010 10620089 66007248 10603012 10219102...
- Page 116 MONTAGE ALTERNATEUR TURBINE ÉLECTRIQ UE DF sup2017 66008046 10600008 10629008 10603010 20080442 10620063 20072494 30512030 20072440 10561057 20072460 10620089 10603010 66008376 20083731 10621046 10230372 10603012 10621046 30507084 10219102 30500000 10600008 66007257 30512056 10629009 10600014 10620063 66008226 20082264 10219100 10620063 10603010 30511068 10620088 20063200...
- Page 117 MONTAGE ALTERNATEUR TURBINE ÉLECTRIQ UE TGD sup2018 10620088 10603010 20073532 10219090 10600008 10629009 10620063 20072450 10219100 20078461 10620063 10621061 10511066 20083731 20072494 66008374 30512056 20072440 10230372 10629013 20072460 10620088 30507084 10600010 10620089 10090515 10561057 10621046 10502014 66008046 10603010 10603012 20080442 30512030 30500000 10219102...
- Page 118 ACCESSOIRES ÉLECTRIQ UE NG Plus M ( 2) 10540034 20072821 20072820 20072822 10502017 10600016 10620088 10609034 20072829 20072829 10634020 10620088 10603010 10600010 10634020 20072820 10600016 20072821 10502017 30511070 30620069 10631009 20016596 20072826 20072822 10631009 10600010 10502016 20072821 10600010 10603010 30620069 10620089 10620088 20041060...
- Page 119 Carter de protection batterie 20082580 Tube entretoise (L. 10090519 Carter de protection avec coupe batterie au dessus 20084526 Bride support batterie sur ch ssis TFC FEP 9525 10200005 Embout de barre carré de 20085554 Rondelle inox de position ON - OFF...
- Page 120 SUPPORT RADAR TIP & TOP 10603016 10600016 66005207 66008474 10511007 66005398 10620022 10634019 10609046 10634020 10562016 10600010 10620095 10600010 66008322 10600016 10502014 66005399 66007619 30634040 10502024 30512063 66007268 10507076 20072684 20064875 10621044 20064872 10620088 10510097 66007270 20072700 10600010 10603012 10603006 P0401016 3 Réf.
- Page 121 CAPTEUR ÉLÉMENT NG Plus M S7000 - S8000 20077336 10603010 65030109 10580067 10629020 10179016 10609005 10502016 20077331 10603010 20077332 10603010 30512028 P06 16 0110 Réf. Réf. Désignation Réf. Réf. Désignation 10179016 Anneau élastique extérieur 10502016 Vis H M 10580067 Vis H M x inox 10603010 crou frein M...
- Page 122 CAPTEUR ÉLÉMENT NG Plus 4 S7000 - S8000 20077335 20077334 30510097 10603006 65030109 10580067 10629020 10609005 10603010 10502016 20077331 10502016 10603010 20077332 10603010 20077335 20077341 30512028 P06 1503 40 Réf. Réf. Désignation Réf. Réf. Désignation 10502016 Vis H M 10580067 Vis H M x inox 10603006...
- Page 123 CAPTEUR ÉLÉMENT MECA V4 S7000 - S8000 20077335 20077345 30510097 10603006 10603010 65030109 10580067 10629020 10609005 10502016 20077331 P06 040151 Réf. Réf. Désignation Réf. Réf. Désignation 10502016 Vis H M 10580067 Vis H M x inox 10603006 crou frein M 10603010 crou frein M 10609005...
- Page 124 CAPTEUR ÉLÉMENT NX M S7000 - S8000 20077339 10603010 10179016 20077338 10502016 65030109 10629020 10609005 10580067 10603010 20077332 10502016 20077331 20065982 10600010 10512021 10502018 P06 18006 0 Réf. Réf. Désignation Réf. Réf. Désignation 10179016 Anneau élastique extérieur 10502016 Vis H M 10502018 Vis H M 10512021...
- Page 125 ENSEMBLE CELLULES DE CONTRÔLEUR - DICKEY JOHN 10230118 10992007 10992033 65031038 10991026 10991025 10991024 65030025 10200169 10200221 65030027 20049850 65030028 10992238 10992322 10992323 10992324 10992082 P04500011 Réf. Réf. Désignation Réf. Réf. Désignation 7263 10200169 Carter de protection cellule NG Plus 10200221 Carter de protection cellule NG Plus et N 10230118...
- Page 126 ENSEMBLE CELLULES DE CONTRÔ LEUR TT2 - MONOSEM 20085558 10176044 10219145 10230427 10230433 10230430 10620000 10580062 65030021 65030035 10590082 10603005 20085556 10176044 20085551 20085553 10992079 10230445 65030029 P046 40011 Réf. Réf. Désignation Réf. Réf. Désignation 10176044 Rivert ALU-AC tête plate...
- Page 127 LARGEASSE (RIBOULEAU adressée en port payé et accompagnée du formulaire de demande de garantie MONOSEM) for inspection. An exchange for new part, repair or credit note à LARGEASSE (RIBOULEAU MONOSEM) pour analyse. Un échange à...
- Page 128 Revendeur : COMPAGNIE COMMERCIALE RIBOULEAU 15, rue Beaujon – 75008 PARIS Usines – Technique – Recherche – Informations 12, rue Edmond Ribouleau – 79240 LARGEASSE France TEL. 05 49 81 50 00 – FAX. 05 49 72 09 70 www.monosem.com...
Need help?
Do you have a question about the FEP and is the answer not in the manual?
Questions and answers