
Subscribe to Our Youtube Channel
Related Manuals for Vitrifrigo DRW Series


Summary of Contents for Vitrifrigo DRW Series
- Page 1 MANUALE ISTRUZIONI SERIE DRW ALL IN ONE GRAZIE PER AVER ACQUISTATO UN PRODOTTO VITRIFRIGO...
-
Page 3: Table Of Contents
Sommario 1. INTRODUZIONE 2. AVVERTENZE GENERALI Destinazione del prodotto Ricevimento Installazione Manutenzione e sicurezza Smaltimento 3. SCOPO DEL MANUALE Identificazione del costruttore 4. DESCRIZIONE DELL’APPARECCHIO 5. INSTALLAZIONE Incasso dell’apparecchio Tipologie di incasso Fissaggio del cabinet Scarico acqua di condensa Fissaggio con profilo frontale Fissaggio sulla cella Regolazione dei cassetti Fissaggio display termostrato (solo per versioni senza pannello inox) -
Page 4: Introduzione
1. INTRODUZIONE Gentile cliente, grazie per aver scelto un nostro prodotto. La Vitrifrigo si augura che Lei possa rimanere completamente soddisfatto dell’acquisto effettuato. Il presente manuale è considerato parte integrante del frigorifero e deve seguire il percorso di vendita fino all’utilizzatore. -
Page 5: Ricevimento
• L’apparecchio può essere utilizzato da bambini di età non inferiore a 8 anni e da persone con ridotte capacità fisiche, sensoriali o mentali, o prive di esperienza o della necessaria conoscenza, purché sotto sorveglianza oppure dopo che le stesse abbiano ricevuto istruzioni relative all’uso sicuro dell’apparecchio e alla comprensione dei pericoli ad esso inerenti. -
Page 6: Manutenzione E Sicurezza
• Non tentare di aprire o riparare il frigorifero. • Per eventuali problemi di funzionamento rivolgersi presso il centro assistenza Vitrifrigo più vicino; in ogni caso avvalersi di personale qualificato. • Non conservare sostanze esplosive in questo apparecchio, come bombolette per aerosol con propellente infiammabile. -
Page 7: Scopo Del Manuale
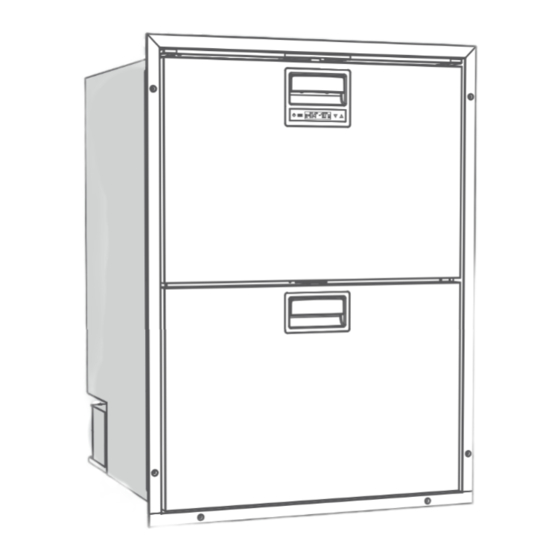
Vitrifrigo s.r.l. Via Mazzini 75 - fraz. Montecchio - 61022 VALLEFOGLIA(PU) – Italia tel. +39 0721 154500 - fax. +39 0721 497739 e-mail info@vitrifrigo.com - www.vitrifrigo.com 4. DESCRIZIONE DELL’APPARECCHIO • L’etichetta riportante matricola e dati tecnici è posizionata all’interno del frigo. Le prime quattro cifre della matricola identificano l’anno e la settimana di costruzione. - Page 8 DRW70A • A) Cassetto G) Profilo base M) Ventola B) Display comandi H) Griglia copri-scheda N) Condensatore C) Maniglia I) Scheda elettronica O) Copertura posteriore D) Divisorio interno J) Sede scheda elettronica P) Tubo di scarico E) Profilo di fissaggio K) Centralina F) Staffa chiusura L) Compressore...
-
Page 9: Installazione
DRW360A - Parte superiore • A)Griglie estraibili B) Ripiano vetro estraibile C) Cassetto portafrutta D) Balconcini estraibili 5. INSTALLAZIONE Assicurarsi che il frigorifero non sia danneggiato, all’apertura dell’imballo dopo il ricevimento. Eventuali danni di trasporto devono essere segnalati tempestivamente al rivenditore e comunque non oltre le 24 ore successive alla consegna. -
Page 10: Tipologie Di Incasso
Assicurare al gruppo frigorifero sufficiente aerazione predisponendo nel mobile contenitore due aperture laterali in corrispondenza delle due prese d’aria sul vano tecnico. Non accostare niente alle griglie di ventilazione ne coprirle o ostruirle con oggetti o altri materiali. L’incasso deve rispettare le distanze minime tra l’apparecchio e la struttura circostante ed avere adeguate aperture di ventilazione comunicanti direttamente nell’ambiente libero del locale, per ottenere la corretta circolazione dell’aria... -
Page 11: Fissaggio Del Cabinet
Fissaggio del cabinet Scarico acqua di condensa Nei modelli sprovvisti di smaltimento automatico dell’acqua di defrost (modelli con gruppo compressore remoto), prima di fissare il cabinet nel vano d’incasso, collegare il tubo (con diam. int. 12mm) in uscita dall’unità alla rete idrica di scarico dell’acqua. Fissaggio con profilo frontale Una volta definita la posizione del profilo di fissaggio e inserito il frigorifero nel vano dedicato, procedere fissando il profilo utilizzando i fori predisposti (Allegato 3, fig.1) -
Page 12: Fissaggio Display Termostrato (Solo Per Versioni Senza Pannello Inox)
Fissaggio display termostrato (solo per versioni senza pannello inox) Nelle versioni senza pannello inox il display termostato sarà fornito a corredo in un kit così composto: A) Cornice inox B) Display comandi C) Cavo prolunga display Le dimensioni del display sono mostrate nell’Allegato 4. Si consiglia di realizzare nel pannello, che sarà... -
Page 13: Collegamento A Batteria
Disporre i cavi di corrente in modo da evitare il rischio di inciampare o di recare danno. Il cavo di corrente non deve entrare in contatto con parti aventi una temperatura superiore ai 50 °C. Prima di collegare il prodotto assicurarsi che la tensione di rete corrisponda a quella riportata sulla targhetta di identificazione o a quella indicata sulla targhetta posta sul compressore. -
Page 14: Avviamento
7. AVVIAMENTO Al termine dell’installazione verificare la continuità del circuito di terra ed eseguire tutte le prove di sicurezza elettrica previste dalle normative vigenti. Proteggere e bloccare adeguatamente i cavi al fine di evitare che trazioni accidentali del cavo che possano disconnetterlo dalle connessioni o che possano venire a contatto con parti calde con temperatura superiore a 50°C o con parti taglienti. -
Page 15: Accensione / Spegnimento
Accensione / spegnimento Al collegamento dell’alimentazione il display si accende in modalità stand by con visualizzata la scritta “VITRIFRIGO”. Per accendere il frigorifero, tener premuto il tasto A, per 2 secondi. In questo momento tutte le funzioni sono attive. Nel caso siano presenti più alimentazioni (Vdc e Vac), l’alimentazione è... -
Page 16: Modifica Settaggio Temperature
DRW70A • L’unità è in grado di funzionare in 2 modalità distinte semplicemente selezionandole dal display. Per impostare una delle tre possibili modalità tenere premuto il tasto B per 3 secondi e fare riferimento alla tabella seguente: Questa modalità prevede che il cassetto sia utilizzato in modalità fridge quindi, in Total temperatura positiva +4°C. -
Page 17: Bloccaggio Tastiera
Bloccaggio tastiera La tastiera si blocca e visualizza il messaggio LOCK con un lampeggio dopo 60 secondi dall’ultima pressione tasti. Premendo un qualsiasi tasto per 2 secondi, la tastiera si sblocca e visualizza il messaggio UNLOCK con un lampeggio. Sbrinamento / Total no frost Le unità, a cui fa riferimento questo manuale, sono dotate di un sistema automatico di sbrinamento che ripristina le prestazioni ottimali del sistema di raffreddamento ad intervalli regolari. -
Page 18: Estrazione Dei Cassetti
onde evitare la formazione di muffe o cattivi odori, disinserire la spina, svuotarlo e procedere alla pulizia dell’interno e lasciare la porta semiaperta. Estrazione dei cassetti I cassetti posso essere rimossi all’occorrenza per pulizia e manutenzione. Per rimuovere il cassetto superiore staccare prima il cavo a molla evidenziato in figura, (Allegato 5) e poi premere le levette. - Page 19 Allarme Descrizione Possible cause Conseguenze Soluzione Il frigorifero continua Si consiglia di togliere Errore sonda cassetto a funzionare gli alimenti, spegnere il Sonda guasta inferiore temporaneamente in frigorifero e chiamare modalità recovery subito l’assistenza Il frigorifero continua Si consiglia di togliere Errore sonda cassetto a funzionare gli alimenti, spegnere il...
-
Page 20: Tacitazione Allarme
Tacitazione allarme È possibile disattivare l’allarme sonoro in qualsiasi momento tramite la pressione di un tasto qualsiasi. 10. COSA FARE SE IL FRIGO NON FUNZIONA Problema Possibili cause Soluzione La spina del cavo di alimentazione non Ricollegare correttamente la spina di è... -
Page 21: Specifiche Tecniche
11. SPECIFICHE TECNICHE Parametro Valore 12-24 Vdc Tutti Alimentazione 220-240Vac / 50-60Hz 1 , 2 8A a 12Vdc 1 , 2 4A a 24Vdc Assorbimento di corrente 4A a 12Vdc 2A a 24Vdc 10,5A a 12Vdc (126W)** Assorbimento di corrente max. 1 , 2 durante defrost 10,5A a 24Vdc (252W)**... - Page 22 INSTRUCTION MANUAL SERIES DRW ALL IN ONE THANK YOU FOR PURCHASING A VITRIFRIGO PRODUCT...
- Page 23 Index 1. INTRODUCTION 2. GENERAL WARNINGS Product uses Upon receiving the product Installation Maintenance and safety Disposal 3. PURPOSE OF THE MANUAL The manufacture 4. DESCRIPTION OF THE APPLIANCE 5. INSTALLATION Appliance recess Types of recess Fixing the cabinet Defrost water drain Fixing the front profile Fixing the cell Adjusting the drawers...
- Page 24 Dear client: Thank you for choosing one of our products. VITRIFRIGO hopes that you will be completely satisfied by your purchase. This manual is an integral part of the refrigerator and must accompany the refrigerator should it be sold or passed on.
- Page 25 We recommend leaving sufficient space to be able to disconnect the appliance from the power supply, should the need arise. • DRW series refrigerators are for in-built (recessed) installation. ATTENTION To avoid any hazard caused by the appliance being unstable, it must...
- Page 26 • Never try to open or repair the refrigerator. • For any operational problems contact the Vitrifrigo Service Centre closest to you; in any case, request the assistance of a suitably qualified person. • Do not store explosive substances in this appliance such as aerosol cans with flammable propellant.
- Page 27 The first four digits of the serial number identify the year and the week of manufacture. • The DRW series refrigerators – No frost All in one, to which this manual refers, has been designed to meet the superior requirements demanded, in order to guarantee that food is properly conserved.
- Page 28 DRW70A • A) Drawer G) Base profile M) Fan B) Command display H) Grille cover tag N) Condenser C) Handle I) Electronic board O) Back protection D) Internal partition J) Electronic board seat P) Drain tube E) Fixing profile K) Control Unit F) Handle lock L) Compressor DRW180A / Bottom DRW360A...
- Page 29 DRW360A - Top • A) Removable grilles B) Removable glass shelf C) Fruit basket D)Removable door shelves 5. INSTALLATION When opening the packaging, after having received the appliance, check that it is not damaged. Any transportation damage must be reported promptly to the reseller and, in any case, within 24 hours of taking delivery of the appliance.
- Page 30 Make sure that the refrigerator unit is adequately ventilated by arranging for two side openings in the storage unit in line with the two air ducts on the technical compartment. Do not place anything over the ventilation grilles, nor cover them. The recess must respect the minimum distances between the appliance and the surrounding structure, and must have adequate ventilation opening onto the room’s free...
- Page 31 Fixing the cabinet Defrost water drain In the model without automatic disposal of the defrost water (model with remote refrigerant unit) connect the drainpipe fig. 5.9 (with inner diameter of 12 mm) to the water disposal network before fixing the cabinet. Fixing the front profile Once the fixing profile’s position has been defined, and the refrigerator has been introduced into the dedicated compartment, fix the profile by using the holes provided.
- Page 32 Fixing the thermostat display (only for no inox panel version) In the version without inox panel the digital thermostat display will be supplied as kit like shown in the figure below: A) Inox frame B) Command display C) Display extended cable The display dimensions are shown in the Attached 4 .
- Page 33 The electrical cable must not come into contact with any part that could reach a temperature greater than 50°C. Before connecting the product, make sure that the voltage corresponds to that shown on the identification label or that shown on the label on the compressor. ATTENTION by law, the equipment must be earthed.
- Page 34 7. POWERING ON Once installation has been completed, check the continuity of the earth circuit and carry out all the electrical safety tests provided for by current regulations. Protect and adequately block the cables to avoid any risk of accidentally pulling the cable which could disconnect it or which could cause it to come into contact with a hot part of this appliance (or another one) at a temperature over 50°C or with a sharp part.
- Page 35 Switching on / Turning off When the power supply is connected, the display switches on in Stand By mode and displays the writing “VITRIFRIGO”. To switch the refrigerator on, press and hold button A for 2 seconds. Once on, all the functions are enabled.
- Page 36 DRW70A • The unit can operate in one of 2 distinct modes by simply selecting it from the display. To set one of the three modes, press and hold button B for 3 seconds and then refer to the following table: This mode allows the drawer to be used in fridge mode.
- Page 37 Locking the keypad The keypad locks and the message LOCK is displayed with a flash after 60 seconds from the last button being pressed.Press and hold any button for 2 seconds to unlock the keypad. The message UNLOCK is displayed with a flash. Defrosting / Total no frost The DRW180A unit has an automatic defrosting system that, at regular intervals, restores the cooling system’s performance.
- Page 38 Replacing the LED light must be done by a suitably qualified person who is able to adopt all the appropriate safety measures. The DRW series refrigerators have LED lights magnetically controlled by opening/closing the drawers. In the module with two drawers, you can replace the upper drawer’s light.
- Page 39 Alarm Description Possible cause(s) Effect Solution We recommend removing The refrigerator continues to any food, turning the Lower drawer sensor error Faulty sensor operate temporarily in recovery refrigerator off and mode immediately contacting the service centre We recommend removing The refrigerator continues to any food, turning the Upper drawer sensor error Faulty sensor...
- Page 40 Silencing alarms You can deactivate the sound of the alarm at any time by pressing any button on the keypad 10. WHAT TO DO IF THE REFRIGERATOR DOES NOT WORK Problem Possible cause(s) Solution The power cable plug has not been Plug the power cable in properly.
- Page 41 11. TECHNICAL SPECIFICATIONS Parameter Value 12-24 Vdc Power Supply 220-240Vac / 50-60Hz 1 , 2 8A a 12Vdc 1 , 2 4A a 24Vdc Max Consumption – Normal operation 4A a 12Vdc 2A a 24Vdc 10,5A a 12Vdc (126W)** Max Consumption during defrost 1 , 2 10,5A a 24Vdc (252W)** 1 , 2...
- Page 42 MANUEL D’INSTRUCTIONS SÉRIE DRW ALL IN ONE MERCI D’AVOIR ACHETÉ UN PRODUIT VITRIFRIGO...
- Page 43 Index 1. INTRODUCTION 2. CONSIGNES GÉNÉRALES Destination d’emploi du produit Réception de l’appareil Installation Maintenance et sécurité Élimination 3. BUT DU MANUEL Identification du constructeur 4. DESCRIPTION DE L’APPAREIL 5. INSTALLATION Encaissement de l’appareil Types d’encastrement Fixation de l’armoire Vidange de l’eau de condensation Fixation avec profil avant Fixing the cell Réglage des tiroirs...
- Page 44 1. INTRODUCTION Cher Client, Merci d’avoir choisi notre produit. VITRIFRIGO espère que vous serez entièrement satisfait de votre achat. Ce manuel est considéré comme faisant partie intégrante du réfrigérateur et il doit suivre le parcours de vente jusqu’à l’utilisateur. Chaque réfrigérateur, avant d’être expédié, est soumis à des contrôles et à des tests pour s’assurer de son bon fonctionnement.
- Page 45 prévus par le fabricant. • L’appareil peut être utilisé par des enfants d’au moins 8 ans et par des personnes ayant des capacités physiques, sensorielles ou mentales réduites, ou manquant d’expérience ou de connaissances nécessaires, à condition qu’ils soient surveillés ou après avoir reçu des instructions pour une utilisation sûre de l’appareil et pour la compréhension des dangers inhérents à...
- Page 46 • En cas d’anomalies de fonctionnement de l’appareil, contacter le centre d’assistance Vitrifrigo le plus proche ; dans tous les cas, faire appel à du personnel qualifié. • Ne conservez pas de substances explosives dans cet appareil, telles que des bombes aérosols contenant des agents propulseurs inflammables.
- Page 47 Vitrifrigo s.r.l. Via Mazzini 75 - fraz. Montecchio - 61022 VALLEFOGLIA(PU) – Italia tel. +39 0721 154500 - fax. +39 0721 497739 e-mail info@vitrifrigo.com - www.vitrifrigo.com 4. DESCRIPTION DE L’APPAREIL • L’étiquette avec le numéro de série et les données techniques se trouve à l’intérieur du réfrigérateur.
- Page 48 DRW70A • A) Tiroir G) Profil de base M) Ventilateur B) Afficheur des commandes H) Grille de couverture de la carte N) Condenseur C) Poignée I) Carte électronique O) Couvercle arrière D) Diviseur interne J) Siège de carte électronique P) Tuyau de vidange E) Profilé...
- Page 49 DRW360A - Haut • A) Grilles amovibles B) Tablettes en verre amovibles C) Tiroir à fruits D) Balconnets amovibles 5. INSTALLATION S’assurer que l’appareil n’est pas endommagé lors de l’ouverture de l’emballage après réception. Tout dommage dû au transport doit être signalé immédiatement au revendeur et, dans tous les cas, au plus tard dans les 24 heures suivant la livraison.
- Page 50 Assurer une ventilation suffisante du groupe frigorifique en prévoyant deux ouvertures latérales dans l’armoire aux deux entrées d’air du compartiment technique. Ne placez rien près des grilles de ventilation, ne les couvrez pas et ne les obstruez pas avec des objets ou d’autres matériaux. Le montage encaissé...
- Page 51 Fixation de l’armoire Vidange de l’eau de condensation Dans les modèles sans élimination automatique de l’eau de dégivrage (modèles avec groupe compresseur à distance), avant de fixer l’armoire dans le compartiment d’encastrement, raccorder le tuyau (avec diamètre int. 12 mm) sortant de l’unité (fig. 5.9 ) vers le réseau de drainage de l’eau.
- Page 52 Fixation de l’afficheur du thermostat (uniquement pour les versions sans panneau en acier inoxydable) Dans les versions sans panneau en acier inoxydable, l’afficheur du thermostat sera fourni dans un kit composé comme suit : A) Cadre en acier inoxydable B) Afficheur des commandes C) Rallonge de l’afficheur Les dimensions de l’afficheur sont indiquées à...
- Page 53 accidentelle du courant. En cas de doute, consulter un technicien qualifié. Disposer les câbles d’alimentation de manière à éviter le risque de trébucher ou de causer des dommages. Le cordon d’alimentation ne doit pas entrer en contact avec des pièces ayant une température supérieure à 50 °C. Avant de raccorder le produit, s’assurer que la tension du réseau corresponde à...
- Page 54 7. DÉMARRAGE À la fin de l’installation, vérifier la continuité du circuit de mise à la terre et réaliser tous les tests de sécurité électrique prévus par les normes en vigueur. Protéger et bloquer correctement les câbles afin d’éviter que des tractions accidentelles du câble puissent le débrancher des connexions ou qu’il entre en contact avec des parties chaudes d’une température supérieure à...
- Page 55 Marche / Arrêt Lorsque l’alimentation est branchée, l’afficheur s’allume en mode veille avec l’indication « VITRIFRIGO » affichés. Pour allumer le réfrigérateur, maintenir la touche A enfoncée pendant 2 secondes. À ce stade, toutes les fonctions sont actives. S’il y a plus d’une alimentation (Vdc et Vac), l’alimentation est choisie automatiquement, avant la source de courant alternatif.
- Page 56 DRW70A • L’appareil peut fonctionner en 2 modes distincts simplement en les sélectionnant à partir de l’afficheur. Pour définir l’un des deux modes possibles, maintenir enfoncée la touche B pendant 3 secondes et se reporter au tableau suivant : Ce mode nécessite que le tiroir soit utilisé en mode fridge, donc à une température Total positive de +4°C.
- Page 57 Verrouillage du clavier Le clavier verrouille et affiche le message LOCK avec un clignotement 60 secondes après la dernière pression des touches. En appuyant sur n’importe quelle touche pendant 2 secondes, le clavier se déverrouille et affiche le message UNLOCK par un clignotement. Dégivrage/Total no frost Les unités mentionnées dans ce manuel sont équipées d’un système de dégivrage automatique qui rétablit les performances optimales du système de refroidissement...
- Page 58 Si l’appareil n’est pas utilisé pendant une longue période, pour éviter la formation de moisissures ou d’odeurs désagréables, débrancher la fiche, vider le réfrigérateur et nettoyer l’intérieur en laissant la porte entrouverte. Extraction des tiroirs Les tiroirs peuvent être retirés si nécessaire pour le nettoyage et l’entretien. Pour retirer le tiroir supérieur, détacher d’abord le câble à...
- Page 59 Alarme Description Causes possibles Conséquences Solution Il est conseillé d’enlever Le réfrigérateur continue de Erreur de sonde du tiroir les aliments, d’éteindre Sonde défectueuse fonctionner temporairement inférieur le réfrigérateur et de en mode recovery demander de l’aide Il est conseillé d’enlever Le réfrigérateur continue de Erreur de sonde du tiroir les aliments, d’éteindre...
- Page 60 Interruption alarme Il est possible de désactiver l’alarme sonore à tout moment en appuyant sur n’importe quelle touche 10. OPÉRATIONS À EFFECTUER SI LE RÉFRIGÉRATEUR NE FONCTIONNE PAS Problème Causes possibles Solution La fiche du cordon d’alimentation n’est Rebrancher correctement la fiche pas correctement branchée sur une prise d’alimentation.
- Page 61 11. CARACTÉRISTIQUES TECHNIQUES Paramètre Valeur 12-24 Vdc Tous Alimentation 220-240Vac / 50-60Hz 1 , 2 8A a 12Vdc 1 , 2 4A a 24Vdc Absorption de courant 4A a 12Vdc 2A a 24Vdc 10,5A a 12Vdc (126W)** Absorption de courant maximale 1 , 2 pendant le dégivrage 10,5A a 24Vdc (252W)**...
- Page 62 HANDBUCH ALL IN ONE WIR DANKEN IHNEN SICH FÜR EIN VITRIFRIGO PRODUKT ENTSCHIEDEN ZU HABEN...
- Page 63 Inhaltsverzeichnis 1. EINLEITUNG 2. ALLGEMEINE HINWEISE Bestimmungszweck des Produkts Erhalt Installation Wartung und Sicherheit Entsorgung 3. ZIEL DES HANDBUCHES Angabe des Herstellers 4. BESCHREIBUNG DES GERÄTS 5. INSTALLATION Einbau des Geräts Einbauarten Schrankbefestigung Kondenswasserablauf Befestigung mit Frontprofil Befestigung an der Zelle Einstellen der Schubladen Befestigung des Thermostat-Displays (nur bei Versionen ohne Edelstahlplatte) 6.
-
Page 64: Einleitung
1. EINLEITUNG Lieber Kunde, vielen Dank, dass Sie sich für ein Produkt von uns entschieden haben. VITRIFRIGO hofft, dass Sie mit Ihrem Kauf vollkommen zufrieden sind. Das vorliegende Handbuch ist integraler Bestandteil des Kühlschranks und muss diesen vom Kauf bis zum Endnutzer begleiten. Jeder Kühlschrank wird vor dem Versand verschiedenen Kontrollen und Abnahmen unterzogen, um den ordnungsgemäßen... -
Page 65: Erhalt
• Es ist verboten, den Kühlschrank für anderweitige Zwecke als die angegebenen zu verwenden. • Das Gerät kann von Kinder mit einem Mindestalter von 8 Jahre und von Personen mit eingeschränkten körperlichen, sensoriellen oder mentalen Fähigkeiten sowie ohne Erfahrung und ohne das notwendige Wissen verwendet werden, sofern diese beim Gebrauch überwacht werden oder Anweisungen zum sicheren Gebrauch und Erläuterungen über die damit verbundenen Gefahren erhalten haben. -
Page 66: Wartung Und Sicherheit
Wartung und Sicherheit • Vor jeglichen Wartungs- oder Reinigungsarbeiten muss der Kühlschrank von der Stromversorgung getrennt werden. • Die Belüftungsöffnungen müssen saubergehalten werden. Zur Reinigung des belüfteten Kondensators weden Sie sich bitte an einen Fachmann. • Führen Sie immer die Prüfungen, Kontrollen und planmäßigen Wartungseingriffe aus, die in diesem Handbuch angeführt sind. -
Page 67: Ziel Des Handbuches
Vitrifrigo s.r.l. Via Mazzini 75 - fraz. Montecchio - 61022 VALLEFOGLIA(PU) – Italia tel. +39 0721 154500 - fax. +39 0721 497739 e-mail info@vitrifrigo.com - www.vitrifrigo.com 4. BESCHREIBUNG DES GERÄTS • Das Typenschild mit der Seriennummer und den technischen Daten befindet sich im Inneren des Kühlschranks. - Page 68 DRW70A • A) Schublade G) Basisprofil M) Lüfter B) Bediendisplay H) Platinenabdeckgitter N) Kondensator C) Griff I) Platine O) Hintere Abdeckung D) Interner Teiler J) Platinensitz P) Ablaufrohr E) Befestigungsprofil K) Steueraggregat F) Schließbügel L) Kompressor DRW180A / Unterseite DRW360A •...
-
Page 69: Installation
DRW360A - Spitze • A) Herausnehmbare Roste B) Ausziehbare Glasablage C) Schublade für Obst D) Ausziehbare Balkone 5. INSTALLATION Stellen Sie beim Öffnen der Verpackung nach Erhalt des Geräts sicher, dass dieses nicht beschädigt ist. Eventuelle Transportschäden müssen umgehend dem Händler und in jedem Fall innerhalb von 24 Stunden nach Erhalt gemeldet werden. -
Page 70: Einbauarten
Sorgen für eine ausreichende Belüftung Kühlaggregats, indem Sie zwei seitliche Öffnungen im Schrank an den beiden Lufteinlässen am technischen Fach vorsehen. Stellen Sie keine Gegenstände in der Nähe der Lüftungsgitter auf, decken Sie diese nicht ab und blockieren Sie sie nicht mit Gegenständen oder anderen Materialien. Der Einbau muss die Mindestabstände zwischen dem Gerät und der umgebenden Struktur einhalten und über ausreichende Belüftungsöffnungen verfügen, die direkt mit... -
Page 71: Schrankbefestigung
Schrankbefestigung Kondenswasserablauf Bei Modellen ohne automatischen Abtauwasserablauf (Modelle mit außenliegender Kompressor-Einheit) schließen Sie vor der Befestigung des Schranks im Einbaufach das aus dem Gerät kommende Rohr (Innendurchmesser 12 mm) an das Wasserabflusssystem Befestigung mit Frontprofil Nachdem die Position des Befestigungsprofils festgelegt und der Kühlschrank in das dafür vorgesehene Fach eingesetzt wurde, fahren Sie mit der Befestigung des Profils mithilfe der vorgesehenen Löcher fort. -
Page 72: Befestigung Des Thermostat-Displays (Nur Bei Versionen Ohne Edelstahlplatte)
Befestigung des Thermostat-Display (nur bei Versionen ohne Edelstahlplatte) Bei Versionen ohne Edelstahlplatte wird das Thermostat-Display in einem Kit geliefert, das sich wie folgt zusammensetzt: A) Edelstahlrahmen B) Bediendisplay C) Display-Verlängerungskabel Die Displayabmessungen sind in Abbildung (Beigefügt 4) dargestellt. Es wird empfohlen, in der Platte, mit der die Front der Schublade abgedeckt wird, eine geeignete Aussparung zur Unterbringung des Displays zu schaffen. -
Page 73: Batterieanschluss
Stromkabel darf nicht mit Teilen in Berührung kommen, die eine Temperatur von über 50 °C haben. Bevor Sie das Produkt elektrisch Anschließen müssen Sie sicherstellen, dass die Netzspannung mit den am Typenschild des Geräts oder Kompressors angegebenen Werten übereinstimmt. ACHTUNG: die Erdung des Geräts ist gesetzlich vorgeschrieben. -
Page 74: Inbetriebnahme
7. INBETRIEBNAHME Nach Abschluss der Installation müssen Sie die Kontinuität des Erdungskreislaufes prüfen und eine elektrische Sicherheitsprüfung laut geltenden Vorschriften durchführen. Schützen und blockieren Sie die Kabel angemessen, um ein versehentliches Ziehen der Kabel zu vermeiden, das sie von den Anschlüssen lösen oder mit heißen Teilen mit einer Temperatur von mehr als 50°C oder mit scharfen Teilen in Berührung kommen kann. -
Page 75: Ein-/Ausschalten
Sollwertanzeige Schublade Ein- / Ausschalten Wenn die Stromversorgung angeschlossen ist, leuchtet das Display im Standby-Modus mit den Worten “VITRIFRIGO”. Um den Kühlschrank einzuschalten, halten Sie die Taste A 2 Sekunden lang gedrückt. Zu diesem Zeitpunkt sind alle Funktionen aktiv. Wenn mehrere Spannungsversorgungen (Vdc und Vac) vorhanden sind, wird die Spannungsversorgung automatisch ausgewählt, wobei die AC-Quelle Vorrang hat. -
Page 76: Ändern Der Temperatureinstellung
DRW70A • Das Gerät kann in 2 verschiedenen Modi betrieben werden, die einfach über das Display ausgewählt werden können. Um einen der beiden möglichen Modi einzustellen, halten Sie die B-Taste 3 Sekunden lang gedrückt und beachten Sie die folgende Tabelle: In diesem Modus muss die Schublade im fridge-Modus verwendet werden, also bei Total einer positiven Temperatur von +4°C. -
Page 77: Tastatursperre
Tastatursperre Die Tastatur wird gesperrt und zeigt die Meldung LOCK 60 Sekunden nach dem letzten Tastendruck blinkend an. Wenn Sie eine beliebige Taste 2 Sekunden lang drücken, wird die Tastatur entsperrt und die Meldung UNLOCK blinkend angezeigt. Abtauen / Total no frost Die in diesem Handbuch genannten Aggregate sind mit einem automatischen Abtausystem ausgestattet, das in regelmäßigen Abständen die optimale Leistung des Kühlsystems wiederherstellt.Das während dieser Phasen anfallende Kondensat wird... -
Page 78: Herausnehmen Der Schubladen
Bei längerer Inaktivität des Geräts, um Schimmelbildung oder schlechte Gerüche zu vermeiden, ziehen Sie den Stecker heraus, leeren Sie den Kühlschrank, reinigen Sie das Innere und lassen Sie die Tür halboffen. Herausnehmen der Schubladen Die Schubladen können bei Bedarf zur Reinigung und Wartung entfernt werden. Um die obere Schublade zu entfernen, lösen Sie zuerst das in der Abbildung dargestellte Federkabel und drücken Sie dann die Hebel. - Page 79 Alarm Beschreibung Mögliche Ursachen Folgen Lösung Der Kühlschrank arbeitet Es ist ratsam, die Lebensmittel Fühler-Fehler untere vorübergehend im zu entfernen, den Kühlschrank Fehlerhafter Fühler Schublade Wiederherstellungsmodus auszuschalten und sofort weiter Unterstützung anzufordern Der Kühlschrank arbeitet Es ist ratsam, die Lebensmittel Fühler-Fehler obere vorübergehend im zu entfernen, den Kühlschrank...
-
Page 80: Alarm Ausschalten
Alarm ausschalten ÈSie können den akustischen Alarm jederzeit durch Drücken einer beliebigen Taste deaktivieren 10. WAS TUN, WENN DER KÜHLSCHRANK NICHT FUNKTIONIERT Problem Mögliche Ursachen Lösung Der Netzkabelstecker ist nicht ordnungsgemäß Schließen Sie den Netzstecker wieder richtig an. in eine Steckdose eingesteckt. Die Temperaturregelung ist nicht richtig Stellen Sie eine niedrigere Temperatur ein. -
Page 81: Technische Daten
11. TECHNISCHE DATEN Parameter Wert 12-24 Vdc Alle Stromversorgung 220-240Vac / 50-60Hz 1 , 2 8A a 12Vdc 1 , 2 4A a 24Vdc Stromaufnahme 4A a 12Vdc 2A a 24Vdc 10,5A a 12Vdc (126W)** Max. Stromaufnahme beim Abtauen 1 , 2 10,5A a 24Vdc (252W)** 1 , 2 Klimaklasse... - Page 82 MANUAL DE INSTRUCCIONES SERIE DRW ALL IN ONE GRACIAS POR HABER COMPRADO UN PRODUCTO VITRIFRIGO...
- Page 83 Índice 1. INTRODUCCIÓN 2. ADVERTENCIAS GENERALES Destino del producto Recepción Instalación Mantenimiento y seguridad Eliminación 3. FINALIDAD DEL MANUAL Identificación del fabricante 4. DESCRIPCIÓN DEL APARATO 5. INSTALACIÓN Empotrado del aparato Tipos de empotrado Fijación del armario Drenaje del agua de condensación Fijación con perfil frontal Fijación a la cámara Ajuste de los cajones...
-
Page 84: Introducción
1. INTRODUCCIÓN Estimado cliente: Gracias por haber escogido un producto nuestro. VITRIFRIGO espera que esté completamente satisfecho con su compra. Este manual se considera parte integrante del frigorífico y debe seguir el recorrido de venta hasta el usuario. Cada frigorífico, antes de su envío, se somete a controles y pruebas para asegurar su correcto funcionamiento.Para más información y aclaraciones, ponerse en contacto con... -
Page 85: Recepción
• El aparato puede ser utilizado por niños de al menos 8 años de edad y por personas con capacidades físicas, sensoriales o mentales reducidas, o que carezcan de experiencia o de los conocimientos necesarios, siempre que sean supervisados o después de haber recibido instrucciones para el uso seguro del aparato y para la comprensión de los peligros que conlleva. -
Page 86: Mantenimiento Y Seguridad
No intentar abrir o reparar el frigorífico. • Para posibles problemas de funcionamiento, comunicarse con el centro de asistencia Vitrifrigo más cercano; en cualquier caso, recurrir a personal cualificado. • No conservar sustancias explosivas en este aparato, como latas de aerosol con propulsor inflamable. -
Page 87: Finalidad Del Manual
Vitrifrigo s.r.l. Via Mazzini 75 - fraz. Montecchio - 61022 VALLEFOGLIA(PU) – Italia tel. +39 0721 154500 - fax. +39 0721 497739 e-mail info@vitrifrigo.com - www.vitrifrigo.com 4. DESCRIPCIÓN DEL APARATO • La etiqueta con el número de serie y los datos técnicos se ubica en el interior del frigorífico. - Page 88 DRW70A • A) Cajón G) Perfil de base M) Ventilador B) Pantalla de control H) Rejilla que cubre la tarjeta N) Condensador C) Manilla I) Tarjeta electrónica O) Cubierta trasera D) Divisor interno P) Tubo de escape Alojamiento de la tarjeta electrónica E) Perfil de fijación K) Centralita F) Abrazadera de cierre...
-
Page 89: Instalación
DRW360A - Arriba • A) Rejillas extraíbles B) Estante de vidrio extraíble C) Cajón frutero D) Estantes extraíbles 5. INSTALACIÓN Asegúrese de que el aparato no esté dañado al abrir el embalaje después de la recepción. Cualquier daño de transporte debe ser comunicado inmediatamente al vendedor y, en cualquier caso, a más tardar en 24 horas después de la entrega. -
Page 90: Tipos De Empotrado
Asegurar suficiente ventilación a la unidad de refrigeración realizando dos aberturas laterales en el mueble a la altura de las dos tomas de aire en el compartimento técnico. No apoyar nada en las rejillas de ventilación ni cubrirlas u obstruirlas con objetos u otros materiales. El empotrado debe respetar las distancias mínimas entre el aparato y la estructura circundante y tener adecuadas aberturas de ventilación que comuniquen directamente en el ambiente... -
Page 91: Fijación Del Armario
Fijación del armario Drenaje del agua de condensación En los modelos sin eliminación automática del agua de descongelación (modelos con unidad de compresor remoto), antes de fijar el armario en el compartimiento empotrado, conecte la tubería (con diámetro int. 12mm) que sale de la unidad a la red de drenaje de agua. -
Page 92: Fijación De La Pantalla Del Termostato (Solo Para Versiones Sin Panel De Acero Inoxidable)
Fijación de la pantalla del termostato (solo para versiones sin panel de acero inoxidable) En las versiones sin panel de acero inoxidable, la pantalla del termostato se suministrará en un kit compuesto de la siguiente manera: A) Marco de acero inoxidable B) Pantalla de control C) Cable de prolongación de la pantalla Las dimensiones de la pantalla se muestran en (Adjunto 4). -
Page 93: Conexión De La Batería
de tropezar o causar daños. El cable de alimentación no debe entrar en contacto con piezas que tengan una temperatura superior a 50 °C. Antes de conectar el producto asegurarse de que la tensión de red corresponda a la indicada en la placa de identificación o a la indicada en la placa del compresor. -
Page 94: Puesta En Marcha
7. PUESTA EN MARCHA Al final de la instalación, comprobar la continuidad del circuito de tierra y realizar todas las pruebas de seguridad eléctrica previstas por las normativas vigentes. Proteger y bloquear los cables de forma adecuada para evitar que tracciones accidentales del cable puedan desconectarlo de las conexiones o entrar en contacto con partes calientes con temperatura superior a 50°C o con partes cortantes. -
Page 95: Encendido / Apagado
Encendido / apagado Cuando la fuente de alimentación está conectada, la pantalla se ilumina en modo de espera mostrando la palabra «VITRIFRIGO». Para encender el frigorífico, mantenga pulsada la tecla A durante 2 segundos. En este momento todas las funciones están activas. -
Page 96: Modificación De Los Ajustes De Temperatura
DRW70A • La unidad puede funcionar en 2 modos distintos simplemente seleccionándolos de la pantalla. Para configurar uno de los dos modos posibles, mantenga pulsada la tecla B durante 3 segundos y consulte la siguiente tabla: Este modo requiere utilizar el cajón en modo frigorífico, por lo tanto a una Total temperatura positiva de +4 °C. -
Page 97: Bloqueo Del Teclado
Bloqueo del teclado El teclado se bloquea y muestra el mensaje LOCK con un parpadeo 60 segundos después de la última pulsación de la tecla. Al pulsar cualquier tecla durante 2 segundos, el teclado se desbloquea y muestra el mensaje UNLOCK con un parpadeo. Descongelación / Total no frost Las unidades mencionadas en este manual están equipadas con un sistema automático de descongelación que restablece el rendimiento óptimo del sistema de enfriamiento... -
Page 98: Extracción De Los Cajones
moho u olores desagradables, desconectar el enchufe, vaciarlo y limpiar el interior, dejando la puerta medio abierta. Extracción de los cajones Los cajones pueden quitarse, si es necesario, para la limpieza y el mantenimiento. Para retirar el cajón superior, primero desconecte el cable con resorte que se muestra en la figura y, a continuación, presione las palancas. - Page 99 Alarmas Descripción Causas posibles Consecuencias Solución Es aconsejable retirar El frigorífico sigue Error de sonda del cajón los alimentos, apagar el Sonda dañada funcionando temporalmente inferior frigorífico y pedir ayuda en modo de recuperación inmediatamente Es aconsejable retirar El frigorífico sigue Error de sonda del cajón los alimentos, apagar el Sonda dañada...
-
Page 100: Silenciar Alarma
Silenciar alarma Puede desactivar la alarma sonora en cualquier momento pulsando cualquier tecla 10. QUÉ HACER SI LA NEVERA NO FUNCIONA Problema Causas posibles Solución El enchufe del cable de alimentación no Vuelva a conectar el enchufe está conectado correctamente a una correctamente. -
Page 101: Especificaciones Técnicas
11. ESPECIFICACIONES TÉCNICAS Parámetro Valor 12-24 Vdc Todos Alimentación 220-240Vac / 50-60Hz 1 , 2 8A a 12Vdc 1 , 2 4A a 24Vdc Absorción de corriente 4A a 12Vdc 2A a 24Vdc 10,5A a 12Vdc (126W)** Absorción de corriente máxima 1 , 2 durante la descongelación 10,5A a 24Vdc (252W)**... -
Page 102: Annexes
ALLEGATI - ANNEXES Allegato MODELLI E MISURE DI INCASSO Annex MODELS AND RECESS MEASUREMENTS MODEL Door Inside Door Outside (mm) (mm) (mm) (mm) DRW70A DRW180A DRW360A 1710 Allegato INSTALLAZIONI Annex INSTALLATIONS Esempi di installazioni con aperture per aerazione in posizioni deifferenti Installation examples with different ventilation openings CONDENSATORE VENTILATO 75 mm... - Page 103 CONDENSATORE VENTILATO FAN CONDENSER 75 mm POSIZIONE GRIGLIE CON AERAZIONE LATERALE GRIDS POSITION WITH SIDE VENTILATION Hmin H min = 120 mm CONDENSATORE REMOTO Esempi di installazioni con posizioni differenti dell’unità refrigerante VENTILATO Installation examples with different cooling unit positions REMOTE FAN CONDENSER H min = 120 mm...
- Page 104 Allegato FISSAGGI DISPOSITIVO Annex INSTALLATIONS FIG.1 - FISSAGGIO MEDIANTE PROFILO FIXING WITH FITTING FRAME FIG.2 - FISSAGGIO SULLA CELLA CELL FIXING ALLEGATI ANNEXES...
- Page 105 Allegato FISSAGGIO DISPLAY TERMOSTATO (VERSIONI SENZA Annex PANNELLO INOX) FIXING THE THERMOSTAT DISPLAY (FOR NO INOX PANEL VERSION) INGOMBRO TERMOSTATO THERMOSTAT SIZE 147,5 INGOMBRO TERMOSTATO VISTA FRONTALE E POSTERIORE THERMOSTAT SIZE FRONT AND BACK VIEWS POSIZIONAMENTO TERMOSTATO THERMOSTAT PLACEMENT POSIZIONARE IL DISPLAY NELLA SEDE PLACE THE DISPLAY IN ITS HOUSING...
- Page 106 Allegato ESTRAZIONE DEI CASSETTI Annex DRAWER EXTRACTION FIG.1 SGANCIARE LA MOLLA E PREMERE VERTICALMENTE IN MANIERA SIMULTANEA I MECCANISMI LATERALI E TIRARE IL CASSETTO VERSO L’ESTERNO PER ESTRARLO DALLE GUIDE N.B. IL MECCANISMO PRESENTE SUL LATO DESTRO DEVE ESSERE PREMUTO IN DIREZIONE OPPOSTA A QUELLO POSTO SUL LATO SINISTRO FIG.1...
- Page 107 NOTE ALLEGATI ANNEXES...
- Page 108 - è conforme alla Direttiva Bassa Tensione (LVD) 2014/35 CE - è conforme alla Direttiva Compatibilità Elettromagnetica (EMC) 2014/30 CE UE DECLARATION OF CONFORMITY Vitrifrigo srl, with Registered Office in via Mazzini 75, 61022 locality Montecchio, VALLEFOGLIA, Italy declares under its own responsibility that the product:...
- Page 109 IDENTIFICAZIONE PRODOTTO / PRODUCT IDENTIFICATION SERIE DRW / DRW SERIES ALLEGATI ANNEXES...
- Page 110 VITRIFRIGO S.r.l. Via Mazzini, 75 Fraz. Montecchio 61022 Vallefoglia (PU) tel. +39 0721.154.500 fax +39 0721.497.739 www.vitrifrigo.com REV 06 - 2023 Made in Italy...
Need help?
Do you have a question about the DRW Series and is the answer not in the manual?
Questions and answers