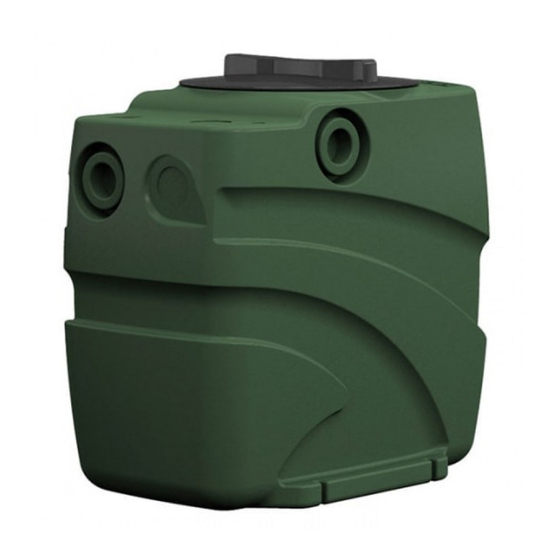
DAB FEKABOX 110 Instruction For Installation And Maintenance
Hide thumbs
Also See for FEKABOX 110:
- Instruction for installation and maintenance (168 pages) ,
- Instruction for installation and maintenance (220 pages) ,
- Instruction for installation and maintenance (256 pages)
Table of Contents
Advertisement
Quick Links
ISTRUZIONI PER L'INSTALLAZIONE E LA MANUTENZIONE
INSTRUCTIONS DE MISE EN SERVICE ET D'ENTRETIEN
INSTRUCTIONS FOR INSTALLATION AND MAINTENANCE
INSTALLATIONSANWEISUNG UND WARTUNG
INSTRUCTIES VOOR INGEBRUIKNAME EN ONDERHOUD
INSTRUCCIONES PARA LA INSTALACION Y EL MANTENIMIENTO
NÁVOD K INSTALACI A ÚDRŽB
INSTRUKCJA MONTA U I KONSERWACJI
KURMA VE BAKIM B LG LER
INSTRUC IUNI PENTRU INSTALARE I ÎNTRE INERE
UPUTSTVO ZA INSTALACIJU I ODRŽAVANJE
FEKABOX 110
NEW
EN 12050/2
Advertisement
Table of Contents

Subscribe to Our Youtube Channel
Summary of Contents for DAB FEKABOX 110
- Page 1 INSTRUCTIES VOOR INGEBRUIKNAME EN ONDERHOUD INSTRUCCIONES PARA LA INSTALACION Y EL MANTENIMIENTO NÁVOD K INSTALACI A ÚDRŽB INSTRUKCJA MONTA U I KONSERWACJI KURMA VE BAKIM B LG LER INSTRUC IUNI PENTRU INSTALARE I ÎNTRE INERE UPUTSTVO ZA INSTALACIJU I ODRŽAVANJE FEKABOX 110 EN 12050/2...
-
Page 2: Table Of Contents
ENGLISH CONTENTS WARNINGS .............................. 24 Responsibility ............................24 MANAGEMENT ............................24 Storage ............................. 24 Transport ............................24 EXAMPLE OF INSTALLATION ....................... 25 Dimensions and weights ........................ 26 TANK INSTALLATION ..........................26 Placing the tank inside the building ....................27 Placing the tank outside the building ................... 27 Making holes for the collection, delivery and ventilation pipes .......... -
Page 3: Warnings
ENGLISH 1. WARNINGS Before installation, carefully read this documentation and that supplied with the pump manual and the control panel. It is indispensable to have the electric and hydraulic connections made by skilled personnel, in possession of the technical qualifications indicated by the safety standards concerning the design, installation and maintenance of technical plants, in force in the country where the product is to be installed. -
Page 4: Example Of Installation
ENGLISH 4. EXAMPLE OF INSTALLATION FEKABOX 110 are preassembled systems, ready for installation, requiring no adjustment, ideal for collecting and disposing of sewage and domestic waste water from basement rooms, situated below the level of the sewer network. In compliance with the accident-prevention regulations in force, the FEKABOX 110 cannot be used for conveying inflammable or explosive liquids, such as petrol, diesel fuel, combustible oils, solvents, etc. -
Page 5: Dimensions And Weights
5. TANK INSTALLATION The lifting stations of the Fekabox 110 series have various inlet and outlet possibilities for the pipes. Depending on the type of installation and on the local standards in force it may be necessary to provide a siphon, a non-return valve on the pipe connecting to the public/private sewer network or to other ducts. -
Page 6: Placing The Tank Inside The Building
For Fekabox 110 the cover of the tank is trafficable (max. weight 100 Kg, see fig. 1). In indoor installations (garage, basement, technical room), the tank must be fixed to the FIX THE TANK TO THE GROUND ground using the slots provided to prevent rotations, as indicated in figure 4. -
Page 7: Gluing The Collection And Ventilation Pipes
5.5 Connecting the delivery pipe to the sewer network Fekabox 110 tanks have a 2” GAS outlet connection. It must be fitted as shown in figure 6 after having drilled the required outlet (see par. 4.1 / 5.3). -
Page 8: Closing The Cover
ENGLISH 5.7 Closing the cover The tank is shipped without the gasket fitted under the cover. Prepare it as in figure 7B after having removed the film, fig. 7A Check that the gasket of the cover is lying in the bottom of its seat and is not twisted before screwing the cover onto the tank. -
Page 9: Pump Installation
Fekabox 110 l: The Fekabox 110 is delivered with an installation kit containing respectively the parts in figure 8 for installation of both the vertical and the horizontal outlet. For the assembly of the kit, see figure 8 1. - Page 10 ENGLISH FEKABOX 110 l FEKA VS Fig. 9A FEKA 600 Fig. 9 PREPARED FOR THE FOLLOWING PUMPS FEKA 600 MA FEKABOX 110 FEKA VS-VX 550 MA FEKA VS-VX 750 MA...
-
Page 11: Electrical Connections
ENGLISH 7. ELECTRICAL CONNECTIONS Before connecting the system to the mains, ensure that the mains voltage is the same as the value indicated on the pump data plate. It is recommended to apply the pump data plate (supplied in the package in addition to the one already applied on the pump by the manufacturer) on the tank, in a clearly visible position, or on the control box. -
Page 12: Operation
11. DISPOSAL This product or any part of it must be disposed of correctly: 1. Use public or private local systems for waste collection. 2. If that is not possible, contact Dab Pumps or the nearest authorised service workshop.


Need help?
Do you have a question about the FEKABOX 110 and is the answer not in the manual?
Questions and answers