Advertisement
Quick Links
Preparation (structural engineer) → countersignature (electronic control, domestic sale/export market support)
1.
→ approval (development leader)
2.
For products of any development level, the process must be started to output the maintenance manual
3.
The preparation purpose of the Manual is to guide the market maintenance after the new product is launched,
and the using objects are pre-sales and after-sales maintenance outlets.
Pre-sales disposal of defective products by the agent: Including product packaging, appearance, structure,
performance fault
Consumer after-sales service maintenance: Mostly product appearance, structure, performance fault
4.
The mobility of market service outlets and personnel is higher, and even the maintenance personnel have never
contacted the products in the earlier stage and completely rely on the Manual in the process, so the accuracy and
completeness of the information must be ensured.
5.
When the PLM process of the Maintenance Manual is started, please attach the following decryption annexes, as
shown at right:
Manual PDF documents (Daily Maintenance Manual + Quick Start Manual, or Operating Instruction)
Exploded view PDF documents + Exploded view source file (source file format: dwg or svg)
Circuit diagram PDF documents (control board + power panel)
Heater NTH15-20AR Type Maintenance Manual
Prepared by: LI Chaoliang
Countersigned by: Luo Jin, Qin Jiesen
Approved by: Tan Chengbo
Product Model
NTH15-20AR
Product No.
22057014001339
Revision No.
D. 1
Version Date
April 20, 2020
Version Page
Advertisement

Related Manuals for Midea NTH15-20AR


Summary of Contents for Midea NTH15-20AR
- Page 1 Revision No. D. 1 Version Date April 20, 2020 Version Page Heater NTH15-20AR Type Maintenance Manual Prepared by: LI Chaoliang Countersigned by: Luo Jin, Qin Jiesen Approved by: Tan Chengbo Preparation (structural engineer) → countersignature (electronic control, domestic sale/export market support) →...
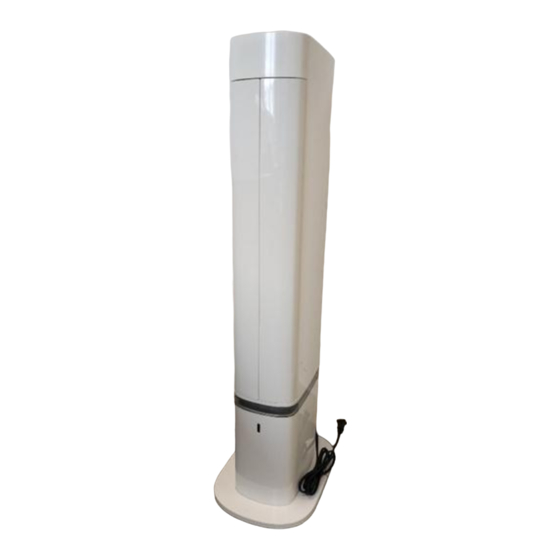
- Page 2 Picture of the Whole Machine of the Product Product model NTH15-20AR Product code Picture of the whole machine Packaging picture...
- Page 3 II. Product Manual...
- Page 8 III. Components List Position number Number Whether it is Procurement Remarks of the Part code Name of parts Description of part materials Picture of parts of parts the sample attribute (Optional) exploded used confirmation view CBB61-P2 , IEC/EN 60252-1: 17456000000035 Fan capacitor 2010+A1UL810 5,0µ...
- Page 9 Fan capacitor TF. C2M RoHS, 17457000003384, Fan capacitor REACH CQC, 4,0µ F, AC 250 V, 50/60Hz P2 Control circuit board NYCB207 Control 17156000011205 REACH, RoHS NTH15-20AR circuit board GB/GS/UL, Self-made Decorative Decorative parts HFY22ES_SJ-16 12157000007131 parts REACH, RoHS ABS Silver...
- Page 10 26AWG, Gray wiring, Harness sleeve wire, a total of 6 pieces Filter screen HFY22ES_SJ-28 12157000007377 Filter screen REACH, RoHS PP Control circuit board NYCB206 Control REACH, RoHS NTH15-20AR 17156000011206 circuit board GB/GS/UL Keyboard plate (Self-made), Self-made...
- Page 11 Circuit board of power supply 17156000011322 of power FYDC550E REACH, RoHS supply GB/GS/UL 24V@36W, Self-made Control circuit board NYCB185C Control REACH,RoHS NTH15-20AR 17156000011207 circuit board GB/GS/UL. High-end version display board Remote controller MDY-35-FAN-10110-D REACH, RoHS Number of buttons: 7 Switch, shaking head, mode,...
- Page 12 Decorative Decorative parts HFY22ES_SJ-14 12157000007127 parts REACH, RoHS ABS, Silver Lampshade HFY22ES_SJ-13 12157000007376 Lamp cover REACH, RoHS, Transparent FRPC, Front lampshade Screen cover HFY22ES_SJ-17 12157000007194 Screen cover REACH, RoHS, PAHs FRABS, White/MDW030 V0 Reel AC120-18AR_SJ-28 REACH, 12156100003666 Reel RoHS ABS, White/MDW030 Sealing ring HFY22ES_SJ-37 12656000000367 Sealing ring...
- Page 13 Air outlet HFY22ES_SJ-05 12157000007375 Air outlet REACH, RoHS PBT+30% GF V0 Black PCB box HFY22ES_SJ-42 12157000007389 PCB box REACH, RoHS FR ABS 5VA Rear shell HFY22ES_SJ-02 12157000007192 Rear shell REACH, RoHS FRABS, White/ MDW030 V0 Front shell NTH15-20AR_SY-04 REACH,RoHS FRABS 12157000009326, Front shell White/MDW030, After silk screen...
- Page 14 Tank lid White/MDW030, After silk screen, V0 Laser silk screen for European standard machine Swing vane components FY22ES_06 REACH,RoHS NTH15-20AR, Vertical blade, Swing vane 12157000009075, swing vane support, air outlet components pressing plate, air grid support, outer grille, eccentric wheel,...
- Page 15 M3*6 machine wire, Attached film Base components NTH15-20AR_01 REACH, RoHS Base NTH15-20AR Base, bottom cover, 12157000009071 components leg supporting component, clump weight for European standard machine Pearl cotton packing bag...
- Page 16 Air duct HFY22ES_SJ-19 REACH, 12157000007397 Air duct RoHS PP+20% GF V0 Air duct Air duct tongue HFY22ES_SJ-20 12157000007380 tongue REACH, RoHS PP+20%GF V0 Wind rotor ATY. 33 REACH, RoHS ABS+20%GF φ91*406*35 12156100003582 Wind rotor Applicable to: FZ10-17BR Air outlet grille HFY22ES_SJ-21 Air outlet 12157000007372 REACH, RoHS PBT+30% GF...
- Page 17 Wiring harness NTH15-20AR-LJX-01 Wiring 17401203020234 REACH,RoHS , Braided silicone harness wire, PVC wire UL3122 UL1015 16AWG 18AWG 20AWG Synchronous motor RoHS, Synchronous REACH RoHS,REACH 11002014002873 motor TB-50-20-8-2-15 100-120V or 100-127V 50/60Hz RTO bracket NTR-08 RoHS, 12157000000073 RTO bracket REACH PPS+45%GF V0...
- Page 18 Control circuit board YYCB134 Control 17257000000061 REACH, RoHS HD22B circuit board GS/GB/UL Water box components HFY22ES_09 REACH, RoHS HFY22ES/NFY-ES ABS, Water box, water box cover, steel ball Water box 12157000007444 sealing ring (water box sealing Piece components ring), silicone ring (water inlet sealing ring), sealing ring, ventilation fan components, reed switch, floater and oscillating plate...
- Page 19 Pressing Pressing plate HFY22ES_SJ-25 12157000007386 plate REACH, RoHS ABS Water fender HFY22ES_SJ-39 12157000007391 Water fender REACH, RoHS ABS Sealing ring HFY22ES_SJ-36 12656000000368 Sealing ring REACH, RoHS, Silicone, Primary color, Water box sealing ring Silicone ring HFY22ES_SJ-38 12656000000366 Silicon ring REACH, RoHS, Silicone, Primary color, Water inlet sealing ring General function board JSTY-04 REACH, RoHS GB/GS/UL/ PSE...
- Page 20 terminal (black), K terminal (white) Float FS40-13QR-34 RoHS, REACH PP + magnet 12156000002280 Floater φ25*φ10*10mm, Universal for humidifiers, Ring-shaped Sealing ring FS40-13QR-33 RoHS, 12656000000001 Sealing ring REACH silicone, green, heating panel sealing ring Reed switch KSTY-21A REACH, RoHS, number of reed switches: 1 13.8 mm 350mm XHD2.54/2PIN 17400511000804 Reed switch...
- Page 21 Rubber washer RoHS S20U-A1-30 Rubber Black OEM 12600401001454 washer (Juke-SC-3A25-M4-Fan silicone) (JS) Steel ball HFY22ES_WJ-05 12956000006685 Steel ball REACH, RoHS φ10mm steel ball Pressing chip FS40-13QR-31 12156000019898 Pressing chip REACH, RoHS ABS white MDW030 universal for humidifiers Product Installation and Dismantling Tools Product installation and dismantling and maintenance tools Screwdriver (cross, litter, star) Electric screwdriver (screwdriver mouth: cross, litter, star)
- Page 22 Heat blower Hot melt glue gun and hot melt glue Safety integrated test equipment V. Product Installation and Dismantling Guidance 6.1. Dismantling guidance Dismantle the rear shell (turn the Dismantle the rear shell (turn the base Dismantle the rear shell (open Dismantle the rear shell (take out the Dismantle the rear shell (take whole machine over, and take down...
- Page 23 Dismantle the rear shell (take down Dismantle the rear shell (take down 10 Dismantle the rear shell (take Dismantle the rear shell (pull up 2 Dismantle the rear shell (take one screw fixing the screen cover with screws under the screen cover with a down 2 screws in the top handle buckles at the bottom of the front and down the rear shell)
- Page 24 Disassemble the fan components Disassemble the fan components (take Disassemble the swing vane Disassemble the swing vane Disassemble the swing door (Release the wire fixed on the side of down the fan components) components (take down 2 components (grab the synchronous mechanism (take down one the air duct from the cable clip) screws fixing the swing vane...
- Page 25 the figure and take them down) Disassemble the circuit board Disassemble the top cover (pry off 2 Disassemble the top cover Disassemble the humidification Disassemble the humidification (disassemble and take down 1 screw buckles of the panel with a straight (Disassemble and take down 2 mechanism (disassemble and take mechanism (disassemble and...
- Page 26 Disassemble the humidification Disassemble the humidification Disassemble the humidification Disassemble the humidification Disassemble the humidification mechanism (disassemble and take mechanism (disassemble and take mechanism (disassemble and mechanism (pry off 3 clips with a mechanism (the humidification down the fan cover plate with a straight down 4 screws fixing the oscillation take down 4 screws of the straight screwdriver)
- Page 27 Install the front door components (take out the left and right door Install the front shell and lampshade components (take out the front shell, remove the water outlet, and snap the components, tear off the cover film, align it up and down (iron shaft facing lampshade components into the corresponding slots) upward) and place it in the tooling) Install the gear components and the pressing plate (take a gear...
- Page 28 Install the fan components (take one fan component (the motor is Fix the gear components, the pressing plate and the lampshade components Install the swinging components (take one swinging component (the facing the bottom of the whole (fasten the lampshade components, the gear components and the pressing synchronous motor facing downward of the whole machine) and press it machine) fit the corresponding plate on the front shell and the air outlet frame with four ST3.5*13 screws,...
- Page 29 Trim the wire (Arrange and fit the Fix the display circuit board (Snap the lead wire of the gear components display board of the circuit board Insert the wire (insert the lead wire and lamp wire of the gear components with the top cover cable clip, trim components into the corresponding into the terminal pair of the control circuit board properly, and fit the top...
- Page 30 Insert the wire (Insert the motor lead, PTC harness and control board wire in place according to the end product Install the water separation box (take one water separation box, install it and identification. Insert the zero line lead into the corresponding power panel end, and the live wire into the above the fog vent of the front shell, and fasten it with two ST3.5*13 screws) corresponding PTC harness brown wire terminal.) Weld the line (Conduct the tin spot...
- Page 31 Install the power box (After the Fix the trim strip lampshade (take high and low voltages are snapped one rear shell to connect the power Trim the wire (Trim and place leads in the water retaining box cable clip and baffle plate, connect the synchronous into from the cable clips on both cable clip to the trim strip motor lead end to the power panel harness terminal and clip them into the air duct side wall)
- Page 32 Install the chassis components (check that the leads of the humidification components are properly inserted and the wiring is good. Fit one chassis Fix the top cover (Fasten the top cover with two ST2.9*9.5 screws, and component to corresponding buckle of the whole machine, and align it remove the film on the display screen surface) with the screw hole.
- Page 33 Stick labels (After the qualified Pack the power line (Put the gum cover on the plug, take the plastic bag, inspection, peel off the label from open the bag mouth with both hands and put on the power cord, roll up the the sticker and stick it at the Clean up (pour a little clean water on the rag, prepare to clean the body bag mouth, press the bag mouth with the left hand, and take the small...
- Page 34 bag mouth)
- Page 35 (VI) Maintenance Guidance of Common Faults 7.1 Maintenance guidance of common no electricity problems Troubleshooting Troubleshooting Causes Maintenance measures Remarks/attached pictures order The indicator lamp of the Plug and socket disconnection, whole machine is off and Insert the plug and repair the socket poor contact has no electricity Check if the socket is...
- Page 36 The temperature limiter Temperature limiter damage and Replace the temperature limiter and fuse and fuse fail disconnection, blown fuse 7.2 Maintenance guidance of wind and no heat problem Troubleshooting Troubleshooting Causes Maintenance measures Remarks/attached pictures order Check if the internal line is disconnected, the PTC Loose PTC connection terminal is connected in...
- Page 37 Whether the motor is running Check the motor normally and there is abnormal Replace the asynchronous motor sound 7.4 Maintenance guidance of unsmooth swinging and abnormal sound problem Troubleshooting Troubleshooting Causes Maintenance measures Remarks/attached pictures order Dismantle the machine and check if the swing Apply the lubricating oil to the running contact Lack lubricating oil vane component is...
- Page 38 Disassemble the water box of the humidification The water blockage position of components and check the air vent hole changes, and Clean the air vent hole whether the air vent hole the maximum water level drops is blocked Check if the reed switch The reed switch fails Replace the reed switch is working properly...
- Page 39 The wiring is unreasonable and Whether the wiring Adjust the wiring harness, reinsert the wire, and the terminal is pulled out under harness is out fix it with glue tension VII. Electrical Schematic Diagram...
- Page 40 Power supply Temperature limiter (The HFY22ES model does not have this component) Fuse Display board Back-light panel Stepping motor Control panel Power panel Swing vane synchronous motor PTC swing synchronous motor One-way asynchronous motor capacitor One-way asynchronous motor Fan capacitor High gear of PTC heater PTC heater Low gear of PTC heater...
- Page 41 产品型号 NTH15-20AR 22057014001381 产品编码 版本编号 版本日期 2020-05-20 版本页数 取暖器品类 NTH15-20AR 型号维修手册 编制:李朝亮 会签:罗进、覃杰森 审批:谭成波 1、 编制(结构工程师)→会签(电控、内销/外销市场支持)→审批(开发负责人) 2、 无论任何开发级别的产品,均需启动流程输出维修手册 3、 本手册编制目的,为指引新品上市后的市场维修,使用对象为售前售后维修网点 代理商售前不良品处理:包含产品包装、外观、结构、性能故障 消费者售后服务维修:多为产品外观、结构、性能故障 4、 市场服务网点及人员流动性较大,甚至前期从未接触产品,过程完全依靠此手册指导, 因此务必保证资料的准确性、完整性 5、 维修手册 PLM 流程启动时,请附带以下解密附件,如右图: 说明书 PDF 文档(日常保养手册+快速入门手册,或使用说明书) 爆炸图 PDF 文档+爆炸图源文件(源文件格式:dwg 或 svg) 电路图 PDF 文档(控制板+电源板)...
- Page 42 一、产品整机图片 产品型号 NTH15-20AR 产品货号 整机图片 包装图片...
- Page 43 二、产品说明书...
- Page 48 三、零部件明细 爆炸 部件 采购 是否样品 备注 图位 部件编码 部件名称 部件物料描述 部件图片 使用 属性 确认单 (选填) 置号 数量 风机电容 风机电容器 TF.C7G RoHS UL 5.0μF 是 17456000000035 器 250V 胶耳 灰白 00mm 22AWG 面板 HFY22ES_SJ-10 REACH,RoHS 面板 12157000009072 FRPC 透明 喷漆 丝印 白色/MDW030 顶壳...
- Page 49 CQC, 4,0µF, AC 250 V, 17457000003384, 50/60Hz P2 胶耳 20AWG 电容电源线长 器 度 180mm 双黑 P2 控制电路 控制电路板 NYCB207 REACH,RoHS 17156000011205 板 NTH15-20AR GB/GS/UL 转自制 装饰件 HFY22ES_SJ-16 REACH,RoHS 装饰件 12157000007131 ABS 银色 水箱 HFY22ES_15 RoHS 透明 PE 配有 水箱 12157000007052 顶杆组件...
- Page 50 顶盖 NTH15-20AR_SJ-02 RoHS FRPC 顶盖 透明 背部丝印喷漆、电源灯圈镭雕 V0 12157000009070 欧洲标机专用 线束 NTH22-RDX-01 REACH,RoHS 线束 PVC UL2651 端子型号和胶壳颜色按图 17401203020233 纸描述 26AWG 灰排 线束套线,共 6 条 过滤网 HFY22ES_SJ-28 REACH,RoHS 过滤网 12157000007377 控制电路板 NYCB206 REACH,RoHS 控制电路 NTH15-20AR GB/GS/UL 按键板(转自 17156000011206 板 制)转自制...
- Page 51 电源电路 电源电路板 FYDC550E REACH,RoHS 17156000011322 板 GB/GS/UL 24V@36W 转自制 控制电路 控制电路板 NYCB185C REACH,RoHS 17156000011207 板 NTH15-20AR GB/GS/ULL 高配版显示板 遥控器 MDY-35-FAN-10110-D REACH,RoHS 按键数 7 开关、摇头、模 式、加、减、定时、扩展功能 外壳颜色白 遥控器 17117000004758 色,硅胶按键 MDH024,丝印 COOL GRAY10C / 面贴颜色无 / 剪 J1、J3、J4 跳线,外销标准化遥控器 灯罩 HFY22ES_SJ-15 REACH,RoHS 灯罩...
- Page 52 装饰件 HFY22ES_SJ-14 REACH,RoHS 装饰件 12157000007127 ABS 银色 灯罩 HFY22ES_SJ-13 REACH,RoHS 灯罩 12157000007376 透明 FRPC 前灯罩 滤网盖 HFY22ES_SJ-17 滤网盖 12157000007194 REACH,RoHS,PAHs FRABS 白色 /MDW030 V0 绕线架 AC120-18AR_SJ-28 绕线架 12156100003666 REACH,RoHS ABS 白色/MDW030 密封圈 HFY22ES_SJ-37 REACH,RoHS 密封圈 12656000000367 硅胶 原色 出雾口密封圈...
- Page 53 出风口 HFY22ES_SJ-05 REACH,RoHS 出风口 12157000007375 PBT+30%GF V0 黑色 PCB 盒 HFY22ES_SJ-42 REACH,RoHS PCB 盒 12157000007389 FR ABS 5VA 后壳 HFY22ES_SJ-02 REACH,RoHS 后壳 12157000007192 FRABS 白色/MDW030 V0 前壳 HFY22ES_SY-04 REACH,RoHS 前壳 12157000007393 FRABS 白色/MDW030 丝印后 V0...
- Page 54 前支架 HFY22ES_SJ-27 REACH,RoHS 前支架 12157000007387 FRPP V0 黑色/MDB001 水箱盖 NTH15-20AR_SY-03 水箱盖 REACH,RoHS FRABS 白色/MDW030 12157000009073 丝印后 V0 激光丝印 欧洲标机专用 摆叶组件 HFY22ES_06 REACH,RoHS HFY22ES/NFY-ES 竖向风叶、 摆叶支架、 摆叶组件 12157000007408 出风口压板、风栅支架、外格栅、偏心轮、 同步电机 齿轮组件 HFY22ES_07 REACH,RoHS 齿轮组件 HFY22ES/NFY-ES 大小齿轮、上下齿轮 12157000007410 盒、步进电机、轴套...
- Page 55 门组件 HFY22ES_10 REACH,RoHS 门组件 HFY22ES 左右门、左右门轴、大小固定 12157000007446 板、M3*6 机丝 附膜 底座组件 NTH15-20AR_01 底座组件 REACH,RoHS NTH15-20AR 底座 底盖 12157000009071 支脚组件 配重块 欧洲标机专用 珍珠棉包装袋 TY_BZD-142 包装指令 珍珠棉包 1200 *650 t=0.5mm 无警语 无印刷 打 16356000004966 装袋 孔 2-φ5mm 短边开口 单相异步 单相异步电机 REACH,RoHS 11002012036556 电机...
- Page 56 风道 HFY22ES_SJ-19 REACH,RoHS 风道 12157000007397 PP+20%GF V0 风道窝舌 HFY22ES_SJ-20 风道窝舌 12157000007380 REACH,RoHS PP+20%GF V0 风轮 ATY.33 REACH,RoHS 风轮 12156100003582 ABS+20%GF φ91*406*35 适用: FZ10-17BR 出风格栅 HFY22ES_SJ-21 出风格栅 12157000007372 REACH,RoHS PBT+30%GF 黑色 MDB001...
- Page 57 线束 NTH15-20AR-LJX-01 17401203020234 线束 REACH,RoHS 编织硅胶线 PVC 线 UL3122 UL1015 16AWG 18AWG 20AWG 同步电机 RoHS,REACH 同步电机 11002014002873 TB-50-20-8-2-15 100-120V 或 100-127V 50/60Hz PTC 支架 NTR-08 RoHS,REACH PTC 支架 12157000000073 PPS+45%GF V0 PTC 发热体 PTC-40 REACH,RoHS 120V PTC 发热 17417600000592 1500W 60Hz 402*44*15 2.4 mm 印字边为...
- Page 58 控制电路 控制电路板 YYCB134 REACH,RoHS 17257000000061 板 HD22B GS/GB/UL 水盒组件 HFY22ES_09 REACH,RoHS HFY22ES/NFY-ES ABS 水盒 水盒盖 水盒组件 钢球 密封圈(水盒密封圈) 硅胶圈(进 件 12157000007444 水口密封圈)密封圈 换气风机组件 干簧 管 浮子 振荡板 水盒 HFY22ES_SJ-24 REACH,RoHS 水盒 12157000007384...
- Page 59 水盒盖 HFY22ES_SJ-23 REACH,RoHS 水盒盖 12157000007385 压板 HFY22ES_SJ-25 REACH,RoHS 压板 12157000007386 挡水板 HFY22ES_SJ-39 REACH,RoHS 挡水板 12157000007391 密封圈 HFY22ES_SJ-36 REACH,RoHS 密封圈 12656000000368 硅胶 原色 水盒密封圈 硅胶圈 HFY22ES_SJ-38 REACH,RoHS 硅胶圈 12656000000366 硅胶 原色 进水口硅胶圈...
- Page 60 通用功能板 JSTY-04 REACH,RoHS GB/GS/UL/PSE 振荡电路板;带屏蔽 通用功能 罩;Φ20 换能片;振荡频率 1.7;带 24VDC 端 件 17156000005065 板 子(蓝色)、FAN 端子(红色)、LED 端子(白 色)、VR2 端子(黑色)、K 端子(白色) 浮子 FS40-13QR-34 RoHS,REACH 浮子 PP+磁铁 φ25*φ10*10mm 加湿器通用 12156000002280 环形 密封圈 FS40-13QR-33 RoHS,REACH 密封圈 12656000000001 硅胶 绿色 散热板密封圈 干簧管 KSTY-21A REACH,RoHS 干簧 干簧管...
- Page 61 考 MDL011) 灵敏度:AT2025 换气风机 换气风机组件 RoHS FLW40-33 降本方 17400801000001 组件 案 红色端子 橡胶垫 RoHS S20U-A1-30 黑色 OEM 橡胶垫 12600401001454 (巨科-SC-3A25-M4-风机硅胶) (JS) 钢球 HFY22ES_WJ-05 REACH,RoHS 钢球 12956000006685 φ10mm 钢珠...
- Page 62 压片 FS40-13QR-31 REACH,RoHS 压片 12156000019898 ABS 白色 MDW030 加湿器通用 四、产品装拆工具...
- Page 63 产品拆装及维修工具 1 螺丝批(十字、小一字、星字) 2 电批(批嘴:十字、小一字、星字) 3 斜口剪钳 4 钳子 5 扳手 6 静电手环 7 热吹风 8 热熔胶枪及热熔胶 9 安规综合测试仪 五、产品装拆指引...
- Page 64 6.1、拆指引 拆后壳(将整机翻到,十字螺丝批取 拆后壳(将底座顺时针翻转(按图示 拆后壳(打开水箱盖) 拆后壳(取出水箱) 拆后壳(用十字螺丝批取下水 下底座上的四颗螺钉) 方向) ,取下底座) 箱盖下面的 2 颗螺钉) 拆后壳(用十字螺丝批取下固定滤网 拆后壳(用十字螺丝批取下滤网盖下 拆后壳(用十字螺丝批取下顶 拆后壳(用一字螺丝翘开前后壳底 拆后壳(取下后壳) 盖的一颗螺钉,拆下滤网与滤网盖) 面的 10 颗螺钉) 部提手孔内的 2 颗螺钉) 部的 2 个扣位)...
- Page 65 拆后壳(拆开后壳的产品,如下图) 拆风机组件(用十字螺丝批取下固定 拆风机组件(将电控盒提起) 拆风机组件(用十字螺丝批取下固 拆风机组件(将顶部风道组件 风道组件顶部的 2 颗螺钉,注意螺钉 定风道组件底部的 2 颗螺钉,注意 与主电路板连接的端子拆开) 位置很深。 ) 螺钉位置很深。 ) 拆风机组件(将固定在风道侧边的 拆风机组件(将风机组件拆下) 拆摆叶组件(用十字螺丝刀取 拆摆叶组件(抓取同步电机,将摆 拆摆门机构(用螺丝刀取下固 线,从线扣中脱出) 下固定摆叶的 2 颗螺钉) 叶组件取出) 定白色支架的 1 颗螺钉,将图 示方向支架水平推出取下)...
- Page 66 拆摆门机构(用十字螺丝刀取下固定 拆摆门机构(将图示方向将齿轮组件 拆摆门机构(将门组件由前壳 拆电路板 (顶部控制板固定的螺钉 2 拆电路板(显示板固定的螺钉 1 固定齿轮组件的 3 颗螺钉) 取下) 外侧取出) 颗,用十字螺丝刀拆取,水平推出 颗,用十字螺丝刀拆取下) 取下) 拆电路板(显示板固定的螺钉 1 颗, 拆顶盖(用一字螺丝刀撬开面板扣位 拆顶盖(用十字螺丝刀拆取 2 拆加湿机构(用十字螺丝刀拆取 2 拆加湿机构(用十字螺丝刀拆 用十字螺丝刀拆取下) 2 处,在外侧将面板撬出) 颗螺钉,将顶盖取下) 颗螺钉,将水箱支架取下) 取 2 颗螺钉,将加湿组件取下)...
- Page 67 拆加湿机构(用一字螺丝刀拆取风机 拆加湿机构(用十字螺丝刀拆取固定 拆加湿机构(用十字螺丝刀拆 拆加湿机构(用一字螺丝刀撬开卡 拆加湿机构(拆开后加湿结构 盖板,取出小风机) 震荡片的四颗螺钉, 取出加湿震荡片) 取加湿组件的四颗螺钉) 扣 3 个) 如下图) 6.2、装指引 安装前门组件(取出左右门组件,撕掉覆膜,将其上下对齐闭合(铁轴 安装前壳与灯罩组件(取出前壳,去掉水口,将灯罩组件对应槽位卡入安装到位) 朝上方)放置于工装内)...
- Page 68 安装前壳与前支架(将安装好灯罩的前壳套入门安装,取一出风口去掉水口,对应门轴套入安装到前壳限位 安装齿轮组件和压板 (取一齿轮组件对应出风框上方门轴铁孔卡入安 柱内) 装,取一压板安装到螺钉孔对位) 固定齿轮组件、压板和灯罩组件(分别取 4 颗 ST3.5*13 螺钉将灯罩组 安装摆风组件(取一摆风组件(同步电机朝整机下方)对应出风口框 安装风机组件 (取一风机组件 (电 件、齿轮组件和压板紧固在前壳与出风口框上,自检合格后放入工装板 限位按压安装好,取 2 颗 ST3.9*9.5 螺钉紧固) 机朝整机下方)对应摆风组件限 上) 位套入安装在前壳内,螺钉孔对...
- Page 69 位) 固定控制电路板(取 1 颗 固定风机组件(分别取 4 颗 ST2.9*9.5 螺钉将控制板紧固在 安装控制电路板(取控制电路板与显示电路板将各排线线束对应端子接插到位,将控制电路板对应顶板卡扣 ST3.9*13 螺钉将风机组件紧固在 顶板上,将安装好电路板的顶板 安装到位) 出风口框的前壳上) 组件对应顶盖安装按压扣到位)...
- Page 70 固定显示电路板 (将电路板组件的显 理线(将齿轮组件引线整理卡在 示电路板对应前壳孔位入卡扣安装 插线(将齿轮组件引线及灯线与控制电路板端子对插好,并将顶盖组 顶盖线扣内,排线整理布于风机 好, 取 1 颗 ST2.9*9.5 螺钉将显示板 件对应前壳卡槽套入安装好) 组件线扣内,感温头卡于风机组 紧固在前壳上) 件限位柱内) 安装电容和电路板(取接线盒将电容卡入安装并扣好,取一电源板组件 安装加湿组件(取一加湿组件对应前壳出雾口安装,分别取 2 颗 固定电路板(取 2 颗 ST2.9*9.5 卡入安装并扣好) ST3.5*13 螺钉紧固) 螺钉将电源板固定)...
- Page 71 安装隔水盒 (取一隔水盒安装入前壳出雾口上方, 分别取 2 颗 ST3.5*13 插线(将电机引线、PTC 线束及控制板排线按端品及标识接插到位。将零线引线对应电源板端接插好, 螺钉紧固) 火线对应 PTC 线束棕线端子对插好) 焊线(将电源线火线对插端子加 插线(将各引线对应加湿组件电路板端口接插好,多余引线整理卡于风 扎扎带(将电源板组件各引线整理(高/低压分开走线)取 1 根扎带 锡点焊,将对插端子卡入安装并 机盖扣位内) 将高压引线捆扎好) 扣好)...
- Page 72 安装电源盒(将高/低压分开从电 固定装饰条灯罩(取一后壳将电 源线 2 侧线扣卡入后,将电源盒 理线 (各引线整理放置于档水盒线扣及档板内, 同步电机引线端与电源板线束端子对插好并卡于风道侧壁内) 源线扣及装饰条灯罩安装扣到 对应前壳内电机下方卡入按压安 位,取 1 颗 ST3.5*13 螺钉将装 装到位) 饰条灯罩打紧固在后壳上) 安装后壳组件(检查前壳内各引线接插到位,布线良好,将后壳组件对 固定后壳组件(将电源线对应后壳线槽安装卡到位,分别取 15 颗 固定后网(取一过滤网对应后网...
- Page 73 应前壳安装扣好,螺钉孔对位) ST3.5*13 螺钉将后壳紧固在前壳上) 盖安装好,将后网组件对应卡入 整机后壳上,取 1 颗 ST2.9*9.5 螺钉将其紧固) 安装底盘组件(检查加湿组件引线接插正确到位,布线良好,取一底 固定顶盖(分别取 2 颗 ST2.9*9.5 螺钉将顶盖紧固,将显示屏表面覆膜 盘组件对应整机扣位安装,螺钉孔对位 ,分别取 4 颗 ST3.9*25 螺 去除掉) 钉将底盘组件紧固在整机上)...
- Page 74 安装面板(取一面板对应整机前壳扣位孔插入安装,从一侧按压,再按 安装水箱(取一水箱放置入整机后壳孔位内,并盖上水箱盖) 压下方扣位,最后按压另一侧扣位) 包装电源线(取一胶套装在插头上,拿取胶袋,双手撑开袋口套上电 贴标贴(检测合格后从不干胶上 清洁(将抹布上倒一点清洁水,准备清洁机身,对机身从上自下,从左自 源线,并把袋口卷叠好,左手按处袋口,右手从文具座取小白胶粘贴 撕取标贴贴在对应的指定的位置 右,包括电源线,仔细擦拭干净) 袋口包装好) 上,并抹平,无起翘、起皱、歪...
- Page 75 斜现象,丝印清晰无模糊) 套机身胶带(检查合格后,拿取侧身机身胶袋,双手撑开袋口套上机身 总成,并把袋口卷叠好,左手按处袋口,右手从文具座取小白胶粘贴袋 口包装好)...
- Page 76 六、常见故障维修指引 7.1 常见不通电问题维修指引 排查顺序 问题排查 原因 维修措施 备注/附图 整机指示灯不亮, 不通电 插头、 插座问题断路、 接触不良 插好插头、维修插座 产品内部线故障 内部线断路、端子松脱 更换断路内部线束、插好脱落端子 电源线损坏 插头烧坏、电源线断路 更换电源线...
- Page 77 限温器、熔断器故障 限温器损坏断路、熔断器熔断 更换限温器、熔断器 7.2 有风但不发热问题维修指引 排查顺序 问题排查 原因 维修措施 备注/附图 用万用表检查内部线是否有 PTC 接线端子松脱、PTC 线 断线,PTC 端子是否插接良 插接好 PTC 线束 断路 好、端子是否接触良好 用万用表检查电源电路板是 电路板损坏 更换电源电路板 否正产工作 7.3 噪声问题维修指引 排查顺序 问题排查 原因 维修措施 备注/附图 检查蜗舌外形 蜗舌变形导致刮风轮 更换蜗舌...
- Page 78 检查电机 电机是否运行正常, 是否有异音 更换异步电机 7.4 摆风不顺畅、异音问题维修指引 排查顺序 问题排查 原因 维修措施 备注/附图 拆机检查摆叶组件是否 缺少润滑油 运转接触部位涂润滑油 正确打油 检查同步电机是否工作 同步电机异音 更换同步电机 正常 检查摆叶是否卡滞 摆叶磨损导致卡滞 更换摆叶或者摆叶组件 7.5 加湿模块不出雾问题 排查顺序 问题排查 原因 维修措施 备注/附图...
- Page 79 拆开加湿组件水盒, 检查 通气孔堵住水封位置变更, 最高 清理通气孔 通气孔是否堵住 水位下降 检查干簧管是否工作正 干簧管失效 更换干簧管 常 浮子由于水的张力吸附在水盒 水箱浮子无凸点面朝下 水箱浮子有凸点面朝下 底部不上浮 振荡板是否正常工作 振荡板不工作 更换振荡板 换气风机组件是否正常 换气风机组件不工作烧坏, 或者 更换换气风机组件 工作 转速慢,不能产生足够风压...
- Page 80 线束是否脱出 布线不合理,端子受拉力拉出 调整线束,重新插线,可打胶固定 七、电气原理图...
Need help?
Do you have a question about the NTH15-20AR and is the answer not in the manual?
Questions and answers