Table of Contents
Advertisement
Quick Links
Advertisement
Table of Contents

Subscribe to Our Youtube Channel
Related Manuals for BMPRO MiniBoostPRO


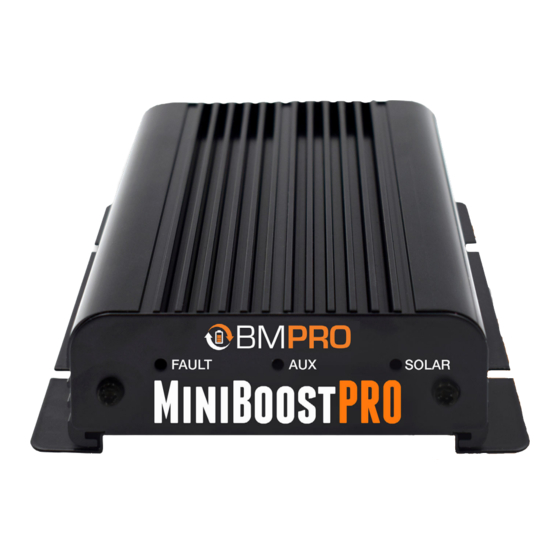
Summary of Contents for BMPRO MiniBoostPRO
- Page 1 OWNER’S MANUAL MiniBoostPRO TEAMBMPRO.COM...
-
Page 2: Safety Precautions
Take care to remove unwanted metal objects from the vicinity of the battery and MiniBoostPRO. Remove any personal metal adornment such as chain, watch or ring before handling the battery and MiniBoostPRO. - Page 3 Do not immerse the MiniBoostPRO in water. The MiniBoostPRO is a high precision electronic product. It contains no user-serviceable parts inside. Do not try to dismantle, modify or repair it yourself. Disassembly, service or repair by an unauthorised person will void the warranty.
-
Page 4: Table Of Contents
SAFETY PRECAUTIONS ..... . 2 ABOUT THE MINIBOOSTPRO ....6 TERMINOLOGY . - Page 5 FAQS AND TROUBLESHOOTING ....20 SPECIFICATIONS ......21 WARRANTY TERMS AND CONDITIONS (AUSTRALIA) .
-
Page 6: About The Miniboostpro
9 2x 2A Automotive Fuse COMPATIBLE BATTERY TYPES The MiniBoostPRO may be used to charge 12V batteries with capacities of 50- 300AH and of the following chemistries: AGM/Wet, Gel and LiFePO4 (lithium). WARNING Do not connect other types of Lithium batteries to the MiniBoostPRO. -
Page 7: Description Of Parts
(secondary). 2. Solar LED 7. Common Negative Blue LED illuminates when the MiniBoostPRO charges the Black cable to connect to the battery from its solar input. solar, primary and the battery’s secondary negative terminals. -
Page 8: Installation Instructions
VENTILATION AND THERMAL CONSIDERATIONS The MiniBoostPRO may be installed in any orientation. To prevent overheating of the MiniBoostPRO, install the unit in a well-ventilated area that allows for continuous airflow around the unit. Overheating of the MiniBoostPRO will affect the optimal operation of the unit. -
Page 9: Wiring Instructions
BatteryPlus35-II or ASPower. If using a power management system, connect the MiniBoostPRO’s Batt Out and Common Negative cables to the positive and negative primary input. The MiniBoostPRO may be wired direct to the secondary battery via a protective fuse. -
Page 10: Standard Installation Wiring Instructions
STANDARD INSTALLATION WIRING INSTRUCTIONS... -
Page 11: Installation With Batteryplus35-Ii Wiring Instructions
INSTALLATION WITH BATTERYPLUS35-II WIRING INSTRUCTIONS... -
Page 12: Installation With Aspower Wiring Instructions
INSTALLATION WITH ASPOWER WIRING INSTRUCTIONS... -
Page 13: Fusing
MiniBoostPRO will start charging the secondary battery when the primary battery voltage is above 12V. If the ignition is detected as off or the ignition wire is not utilised in the installation, the MiniBoostPRO will start charging when the primary battery voltage is above 12.6V. -
Page 14: Battery Chemistry Selection
Battery Positive Terminal Selecting 12V Gel Battery When using the MiniBoostPRO to charge a 12V Gel Battery, connect the green wire to the battery negative terminal or connect to the common negative. This will set the output voltage at 14.2V. - Page 15 Selecting 12V AGM/WET Battery When using the MiniBoostPRO to charge a 12V AGM/Wet Battery, terminate the green wire, leaving unconnected. This will set the output voltage at 14.4V. Selecting 12V LiFePO4 Battery When using the MiniBoostPRO to charge a 12V LiFePO4 Battery, connect the green wire to the secondary / output battery positive terminal.
-
Page 16: Battery Charging
Absorption Absorption ensures that the MiniBoostPRO's battery’s voltage is kept at its pre- set level. During this stage, the current is gradually reduced to less than 2A for 2 minutes. This allows the battery to absorb more power. -
Page 17: Charging Sequence Led Indicators
Battery Good seconds BYPASS MODE The MiniBoostPRO will operate in bypass mode when input voltage is greater than or equal to battery voltage. Output will shut off in bypass mode if the input voltage is higher than the voltage required for charging the battery. -
Page 18: Protective Features
The MiniBoostPRO has built-in protection features: Spark Free Protection If the MiniBoostPRO is not connected to a secondary battery, the unit provides prevention of sparking in the case of accidental short circuit on the output side. Reverse Polarity Connection Protection In the case of a reverse polarity connection protection on either inputs or the output, the MiniBoostPRO will automatically prevent any internal damage. -
Page 19: Fault Codes
FAULT CODES If there is a fault with the MiniBoostPRO set-up that prevents the battery from charging, the red fault LED will illuminate and flash a code to describe the fault. FLASHING FAULT SOLUTION SEQUENCE No source and The battery requires charging. Connect the... -
Page 20: Faqs And Troubleshooting
Can I use the MiniBoostPRO inside my engine bay? The MiniBoostPRO cannot be used inside an engine bay as it is rated to IP20. Does the MiniBoostPRO connect to home solar panels? No, the MiniBoostPRO will not connect if the voltage rating of your home solar panels is over 25V. -
Page 21: Specifications
SPECIFICATIONS MINIBOOSTPRO Auxiliary Input Voltage 9-14.6V DC Solar Input Voltage 9-25V DC Gel: 14.2V Output Voltage AGM/Wet: 14.4V LiFePO4: 14.6V Float Voltage 13.6V Auxiliary Bypass: max. 30A Auxiliary Boost: max. 22A Output Current* Solar Charging: max. 30A (360W) Blending Charging: max. 30A Auxiliary/Primary Battery: <25mA... -
Page 22: Warranty Terms And Conditions (Australia)
The warranty period of the product is XXXX years. If, before the warranty period has ended, a fault occurs with the product and BMPRO finds the product is defective in materials or workmanship, BMPRO at its discretion will subject to further rights accorded by the Australian Consumer Law to either: • ... - Page 23 (k) the fault is a result of common wear & tear. LIMITATIONS No express warranties or representations are made by BMPRO other than what is set out in this warranty. The absolute limit of BMPRO’s liability under this express warranty is the repair or replacement of the product or part of the product.
-
Page 24: Limited Warranty Terms And Conditions (Usa)
• BMPRO will not be liable for any costs, charges or expenses incurred in the process of returning a product to initiate a warranty claim. -
Page 25: Compliance
• Connect the equipment into an outlet on a circuit different from that to which the receiver is connected, • Consult the dealer or an experienced radio/TV technician for help. Warning: Any changes or modifications not expressly approved by BMPRO could void the user’s authority to operate this equipment. - Page 28 BMPRO TEAM customerservice@teambmpro.com BMPRO 19 Henderson Rd, Knoxfield VIC 3180 Australia Unit 1, 821 E Windsor Ave, Elkhart IN 46514 USA .COM teambmpro.com...
Need help?
Do you have a question about the MiniBoostPRO and is the answer not in the manual?
Questions and answers