Advertisement
Thank you for purchasing a BN Thermic product. Manufactured to a high standard, this product will,
if used according to these instructions and properly maintained, give you years of trouble free
performance. Please ensure instructions remain with your customer for their reference.
REGISTER: PLEASE REGISTER THIS PRODUCT ONLINE TO ACTIVATE
IMPORTANT: PLEASE READ THESE INSTRUCTIONS, NOTE THE SAFE
OPERATIONAL REQUIREMENTS, WARNINGS, AND CAUTIONS. USE THIS
PRODUCT CORRECTLY, AND WITH CARE FOR THE PURPOSE FOR WHICH IT
IS INTENDED. FAILURE TO DO SO MAY CAUSE DAMAGE AND/OR PERSONAL
INJURY AND WILL INVALIDATE THE WARRANTY.
S E C T I O N A – U S E R I N S T R U C T I O N S .
For installation instructions go to page 4
1 . INT RODUCT ION & SPECIF ICAT ION .
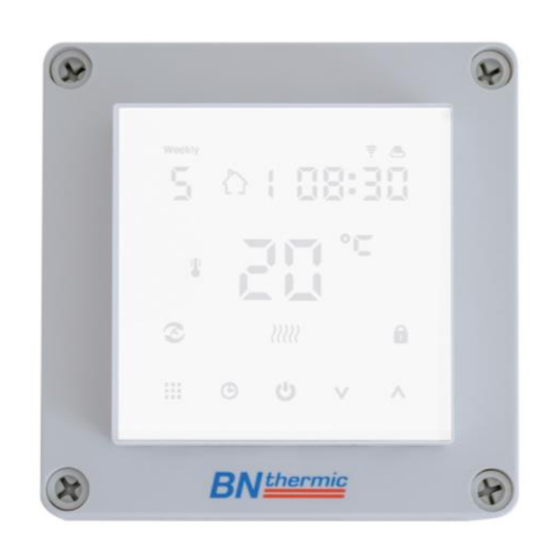
The WT26 Wi-Fi Thermostat is an easy to install and
use 7 Day, 6/1 Day or 5 / 2 Day Programmable Room
Thermostat which offers six time and temperature
changes per day. It is designed to provide automatic
time and temperature control for heating using its inbuilt
air temperature sensor or a remote sensor (optional
extra). The thermostat works in conjunction with an app
available on Google Play or the App Store. All settings
are stored in the controller with battery back-up.
Programming
Power Supply
Remote Sensor (Optional)
Temperature Range
Display
No. Events Per Day
Tamper Resistant
Dimensions
Electrical Protection
Complies with:
YOUR GUARANTEE AT www.bnthermic.co.uk
WT26- Programmable Heater Controller
7 Day, 6+1 Day or 5+2 Day (Default 5+2 Day)
230V ac 50 Hz 26A Maximum Load (Battery back-up)
CXS, CXSIP, BBS and BBSIP (IP versions are IP65 rated)
1°C to 45°C (Default 5°C to 30°C)
LED + Standby brightness setting.
6
Facility for locking the screen or the screen except "On / Off".
125mm (H) x 125mm (W) x 90mm (D).
Class II
EN 301489-1, EMC Directive 2014/30/EU,
EN60950-1:2006 + a11:2009 + a1:2010 +
a12:2011 + a2:2013
INSTRUCTIONS FOR:-
Wi-Fi PROGRAMMABLE CONTROLLER
Model:- WT26
IP20
Advertisement
Table of Contents

Related Manuals for BN Thermic WT26


Summary of Contents for BN Thermic WT26
- Page 1 Wi-Fi PROGRAMMABLE CONTROLLER Model:- WT26 Thank you for purchasing a BN Thermic product. Manufactured to a high standard, this product will, if used according to these instructions and properly maintained, give you years of trouble free performance. Please ensure instructions remain with your customer for their reference.
- Page 2 2 . O PERAT IN G GU IDE . Connecting Thermostat to Android or iPhone App You will need a 4G or 5G mobile phone and wireless router. Download “Smart RM” app from Google Play (Android users) or the App Store (iPhone users).
- Page 3 Programming - The controller is pre-set to the following times and temperatures:- Period 1 Period 2 Period 3 Period 4 Period 5 Period 6 06:00 20⁰C 08:00 15⁰C 11.30 15⁰C 13.30 15⁰C 17:00 20⁰C 22:00 15⁰C By default, the controller is set to 5+2 days. This means when programming Monday – Friday settings will all be the same and you can then program different settings for Saturday –...
-
Page 4: Installation Safety Instructions
Holiday Mode – Note: 1 day = 24 hours count down Holiday days (count down) and temperature set point can be set so that the heating runs at a lower temperature whilst you are away and reverts back to normal when you return. To access, make button for 3-5 seconds until the screen displays “Off”. -
Page 5: Installation
4 . IN ST ALLAT ION . The WT26 thermostat can be used with its internal air sensor or if required with an optional remote air sensor or optional remote black bulb sensor. Sensors are wired to terminals 5 and 6. Polarity of the sensor wires does not matter. - Page 6 4.2 INSTALLING THE WT26 Screw the WT26 in position using suitable fixtures and fittings. There are 4 holes in the corners of the case, or you can drill additional holes in the back. 1) Wire the thermostat as per picture to the right, making sure all the terminals are done up tightly.
- Page 7 5 . CHAN G ING T H E MA ST ER / DEFAU LT SET T ING S. There are various master / default settings that can be changed by entering the default settings. To enter these settings, turn off the thermostat by pressing the button.
- Page 8 7 . U SING A S A CONVENT IONAL T H ERM OST AT . It is easy to set up your WT26 thermostat to operate as a simple, conventional thermostat without the need to programme different times and temperatures. There are 2 steps.
Need help?
Do you have a question about the WT26 and is the answer not in the manual?
Questions and answers