Table of Contents
Advertisement
Quick Links
Advertisement
Table of Contents

Subscribe to Our Youtube Channel
Related Manuals for For-x MAESTRO-1


Summary of Contents for For-x MAESTRO-1
- Page 1 HIGH PERFORMANCE POWER AMPLIFIER MAESTRO-1...
- Page 2 Thank you for purchasing our car audio amplifier. These power amplifier has been designed to provide high quality performance with a minimum of maintenance. MAESTRO-1 MODEL However, it's performance will only be as good as the care and quality of components with which is installed.
- Page 3 RCA audio cable are very prone to interference; the remote cables are less prone. There is often interference caused by the generator (piping), ignition (cracking) or other MAESTRO-1 car electronic part. Most of these problems can be eliminated by correct and careful cabling, In doing so, there are the following guidelines : Use only a screenedio audio cable for the wiring between "low level in"...
- Page 4 PRECAUTIONS OPERATION This unit is designed for negative ground 12V DC operation only. After the amplifier has been installed and all connections have been made Use speakers with an impedance of 2 or 4 Ohms ( 2 to 4 Ohm when used as carefully and securely, turn the radio on so that the amplifier is switched on bridging amplifier ) automatically.
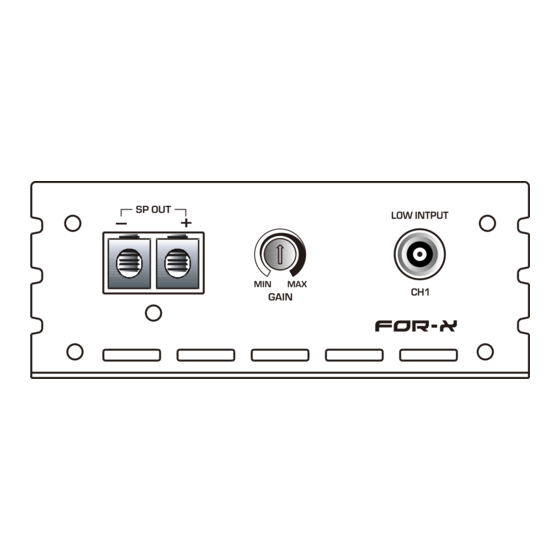
- Page 5 OPERATION WIRING INSTRUCTIONS POWER CONNECTION GND(-)=GROUND CONNECTION The battery terminal (+12V) must be connected directly to the positive terminal of Connect the GND terminal to the chassis ground of your car and take care of best the vehicle battery to provide an adequate voltage source and minimize noise. electric and mechanic contact.
- Page 6 STEREO MODE POWER CONNECTION LEADS MAESTRO-1 POWER +12V CAR STEREO HEAD UNIT BATTERY DC 12V SPEAKERS CONNECTIONS to a metal part of car MAESTRO-1 NOTES ON THE POWER SUPPLY : Connect the +12V power input lead only after all other leads have been connected .
Need help?
Do you have a question about the MAESTRO-1 and is the answer not in the manual?
Questions and answers