
Related Manuals for COMFORT-AIRE RG-61A


Summary of Contents for COMFORT-AIRE RG-61A
- Page 1 TEMPERATURE COOL COOL FAN ONLY SPEED POWER Wait 3 Minutes Before Restarting RG-61A 0010562911...
- Page 5 8-13 8-13 14-18 16-18 19-20 20-21...
- Page 6 Important: Test power plug before each use: 1. Press “reset “button. 2 . Press “test “button, unit should trip. 3. Press “reset” button again for use . Do not use if above test fail. In the event this device trips , the cause of the malfunction is to be corrected before further use of the device .
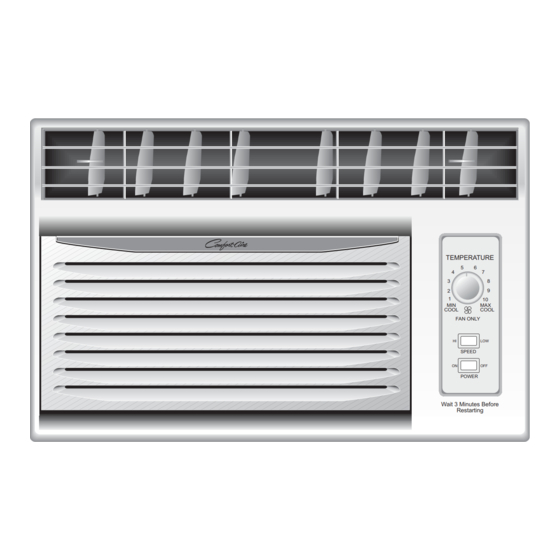
- Page 8 2-way airflow TEMPERATURE COOL COOL FAN ONLY SPEED POWER Wait 3 Minutes Before Restarting easy access filters control panel MODEL: RG-61A 5. How The Unit Drains 2. MODE Set Switch...
- Page 9 TEMPERATURE Fig. # 1 COOL COOL FAN ONLY SPEED POWER...
- Page 10 POWER Turns air conditioner off. SPEED "LOW" Low speed fan operation with cooling or not. SPEED "HI" High speed fan operation with cooling or not. This automatically controls the temperature of indoor air. Turn the knob so that arrow points to the cooler marks for more moderate cooling. Normal Fan 1.
- Page 12 31/32" top rail window seal gasket short screws 13/32" Model:RG-61A...
- Page 13 TEMPERATURE COOL COOL FAN ONLY SPEED POWER Wait 3 Minutes Before Restarting RG-61A ASSEMBLE CURTAINS/TOP RAIL Install top rail with 3 short screws13/32". Insert the side curtains into the top and bottom rails of the air conditioner. Fasten the curtains to the unit with 8 short screws 13/32".
- Page 14 INNER SILL 1. This unit is designed for installation in standard double hung windows with actual opening widths of 22 to 36 . The upper and lower sash must open sufficiently to allow a clear vertical opening of 14 from the OUTER bottom of the sash to the window sill.
- Page 15 INSTALL THE AIR CONDITIONER IN THE WINDOW WINDOW FRAME UPPER GUIDE Carefully lift the air conditioner and slide it into the open ABOUT 1/4 window. Make sure the bottom guide of the air conditioner drops into the notches of the basepan angle. While steadying the air conditioner ,carefully bring the window sash down behind the upper guide of the air conditioner.
- Page 16 Always unplug your air conditioner before cleaning. The air filter behind the front grille should be checked and cleaned at least once every 2 weeks or more often if necessary. To remove: 1. Open the inlet grille downward by pulling out the top of the inlet grille. 2.
- Page 18 (see page 8) (see page 18)
Need help?
Do you have a question about the RG-61A and is the answer not in the manual?
Questions and answers