
Subscribe to Our Youtube Channel
Related Manuals for DFI NXP i.MX8 Series


Summary of Contents for DFI NXP i.MX8 Series
- Page 1 VC900-M8M NXP i.MX8 Series ARM-Based In-vehicle System User’s Manual © May 10, 2023 DFI Inc.
- Page 2 Copyright FCC and DOC Statement on Class A This publication contains information that is protected by copyright. No part of it may be repro- This equipment has been tested and found to comply with the limits for a Class A digital duced in any form or by any means or used to make any transformation/adaptation without the device, pursuant to Part 15 of the FCC rules.
-
Page 3: Table Of Contents
Table of Contents Flash Images into eMMC/SD card using UUU tool ............29 Software Features ........................32 General Support List ......................32 Chapter 1 - Introduction........................ 6 Linux AP/API Support List ....................32 Overview ..........................6 Yocto Support List ......................32 Android Support List .....................34 Front View ........................ - Page 4 About this Manual About this Package This manual can be retrieved from the website. The package contains the following items. If any of these items are missing or damaged, please contact your dealer or sales representative for assistance. The manual is subject to change and update without notice, and may be based on editions that do not resemble your actual products.
- Page 5 Static Electricity Precautions other objects to make sure of proper air ventilation to protect the system from over- heating. It is quite easy to inadvertently damage your PC, system board, components or devices even before installing them in your system unit. Static electrical discharge can damage computer •...
-
Page 6: Chapter 1 - Introduction
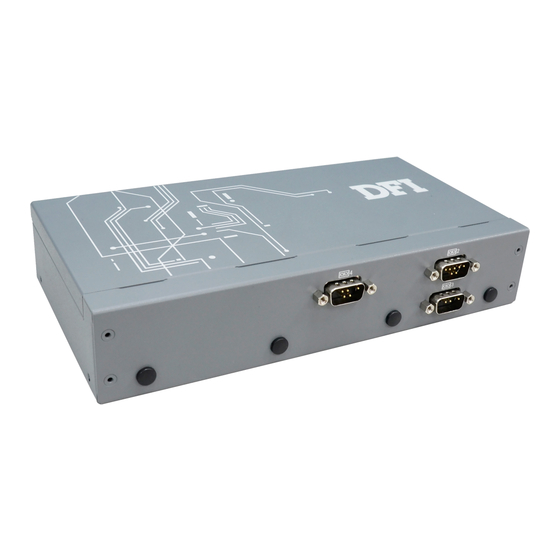
Chapter 1 INTRODUCTION Chapter 1 - Introduction X Overview Front View Rear View USB 3.0 COM 4 Power Input COM 2 COM 1 COM 3 Reset Button HDMI CAN BUS Status LED User's Manual | VC900-M8M... -
Page 7: Dimensions
Chapter 1 INTRODUCTION X Dimensions X Key Features ARM-Based System: Support Yocto Linux 2.5 and Android 9.0 (Optional) Storage Choice: 16GB/64GB eMMC and Micro SD card slot Rich I/O Connectivity: 1 GbE, 4 COM, 1 CAN Bus, 2 USB 3.0, 1 Micro USB (OTG) Wide-Voltage: 9~36V vehicle power input with ACC/IGN function Wide-Temperature:... -
Page 8: Specifications
Chapter 1 INTRODUCTION X Specifications SYSTEM Processor NXP i.MX8M Quad, Cortex-A53 1.3GHz (by model) NXP i.MX8M Dual, Cortex-A53 1.3GHz (by model) Memory On board memory 2GB/4GB (by model) Single channel LPDDR4 up to 3200 MHz GRAPHICS Display 1 x HDMI Resolution up to 1920x1080 @ 60 Hz STORAGE External... - Page 9 Chapter 1 INTRODUCTION Rear I/O Antenna 4 x Antenna holes for LTE 4G, WiFi and GPS Serial 1 x RS-232(TX,RX,RTS,CTS) (COM2, COM3, COM4) POWER Type Wide range 9~36V with ACC/IGN function Connector 3-pole terminal block OS SUPPORT Linux Yocto Linux 2.5 Android Android 9.0 (option) MECHANISM...
-
Page 10: Chapter 2 - Hardware Installations
Chapter 2 HARDWARE INSTALLATION Chapter 2 - Hardware Installations X Removing the Chassis Cover Please observe the following guidelines and follow the instructions to open the system. Step 3: The boards can be easily accessed after the chassis cover is removed. 1. -
Page 11: Installing An M.2 Card
Chapter 2 HARDWARE INSTALLATION X Installing an M.2 Card Please follow the steps below to install the card into the socket. Step 1: Insert the card into the socket at an angle while making sure the notch and key are perfectly aligned. -
Page 12: Installing An Antenna
Chapter 2 HARDWARE INSTALLATION X Installing an Antenna Before installing the antenna, please make sure that the following safety cautions are wellattended. 1. Make sure the PC and all other peripheral devices connected to it has been powered down. 2. Disconnect all power cords and cables. Step 1: There are antenna holes reserved on the right side of the system and by default cov- ered by rubber plugs. -
Page 13: Mounting Options
Chapter 2 HARDWARE INSTALLATION X Mounting Options DIN Rail Mount Wall Mount The DIN Rail Mount kit comes with one DIN Rail clip and screws. Please follow the steps to The wall mount kit containing two mounting brackets — purchased as optional items — can mount the system onto a DIN Rail. -
Page 14: Chapter 3 - System Settings
Chapter 3 SYSTEM SETTINGS Chapter 3 - System Settings X Board Layout Power Board Power Board ST-Link / SWD MCU Debug Remote Switch Remote Switch High/Low Active 12V DC Out 9V~36V In Host Bus Communication Host Bus Communication LED1(Red): Debug LED for the MCU LED2 (Green): R/W LED Important: Electrostatic discharge (ESD) can damage your board, processor, disk... -
Page 15: System Board
Chapter 3 SYSTEM SETTINGS System Board System Board M.2 B key M.2 E key USB2_4 USB2_3 HDMI VP IO Battery COM1 Debug Power Link Boot CFG SIM Slot LVDS USB3.0 LED Backlight DC-IN Audio Speaker User's Manual | VC900-M8M... -
Page 16: System Board - Usd Card Slot
Chapter 3 SYSTEM SETTINGS System Board - uSD Card Slot System Board uSD Card Slot User's Manual | VC900-M8M... -
Page 17: Jumper Settings- Power Board
Chapter 3 SYSTEM SETTINGS X Jumper Settings- Power Board Remote Switch High/Low Active (JP2) Host Bus Communication (JP3, JP4) „ 1-2 On: Reserved „ 2-3 On: TX/RX UART (default) „ 1-2 On: High Active (default) „ 2-3 On: Low Active User's Manual | VC900-M8M... -
Page 18: Sw1
Chapter 3 SYSTEM SETTINGS 24V / 12V Select Output Voltage 12V (default) POWER ON Delay Switch Delay On/Off On, delay duration defined by 4 and 5 Off, delay = 3 seconds by default POWER OFF Delay Switch Delay On/Off On, delay duration defined by 6, 7, and 8 Off, delay = 0 second by default Important: Power-off the system and then unplug the power cord prior to setting the switch-... -
Page 19: Power On Delay Time Select
Chapter 3 SYSTEM SETTINGS POWER ON Delay Time Select Delay Duration 10 seconds (default) 30 seconds 1 miniute 5 minutes POWER OFF Delay Time Select Delay Duration 30 seconds (default) 1 minute 3 minutes 5 minutes 10 minutes 15 minutes 30 minutes 1 hour User's Manual | VC900-M8M... -
Page 20: Jumper Settings- System Board
Chapter 3 SYSTEM SETTINGS X Jumper Settings- System Board LED Backlight (JP5) Boot Config (JP1) M.2 B key M.2 B key M.2 E key M.2 E key For VLED Backlight For VEN & VPWM „ 1-2 On: 3.3V (Default) „ 1-2 Off: Internal Boot (default) „... -
Page 21: Pin Assignment- Power Board
Chapter 3 SYSTEM SETTINGS X Pin Assignment- Power Board 9V~36V In (J1) 12V DC-Out (CN3) Assignment V_In Assignment V_In Ignition Ignition Power Button Host TX Host RX 12VSB The 9V~36V In box headers are for ignition and power input to the power board, which then converts to 12VDC for output to the system board. -
Page 22: Mcu Connector (J2)
Chapter 3 SYSTEM SETTINGS MCU Debug (JP1) MCU Connector (J2) Assignment Assignment UART_TX UART_RX SYS_SWDIO SYS_SWCLK STMCU_RST# User's Manual | VC900-M8M... -
Page 23: Remote Switch (J3)
Chapter 3 SYSTEM SETTINGS Remote Switch (J3) Assignment Power Button User's Manual | VC900-M8M... -
Page 24: Pin Assignment- System Board
Chapter 3 SYSTEM SETTINGS X Pin Assignment- System Board USB2_3 (UBJ1) COM1 Debug (J10) M.2 B key M.2 B key M.2 E key M.2 E key Assignment Assignment +3.3V USBDN UART1_RX USBDP UART1_TX User's Manual | VC900-M8M... -
Page 25: Speaker (Auj1)
Chapter 3 SYSTEM SETTINGS Speaker (AUJ1) Audio (AUJ2) M.2 B key M.2 B key M.2 E key M.2 E key Assignment Assignment Assignment SPK_R- LOUT_L SPK_R+ SPK_L+ LOUT_R SPK_L- AGND MIC_IN User's Manual | VC900-M8M... -
Page 26: Dio (Ioj1)
Chapter 3 SYSTEM SETTINGS DIO (IOJ1) I2C (J8) M.2 B key M.2 B key M.2 E key M.2 E key Assignment Assignment Assignment Assignment DIO0 DIO1 +3.3V_TP DIO2 DIO3 TP_SCL TP_ALT# DIO4 DIO5 TP_SDA TP_RST# DIO6 DIO7 User's Manual | VC900-M8M... -
Page 27: Vp Io (Vpj1)
Chapter 3 SYSTEM SETTINGS VP IO (VPJ1) I2C (J8) M.2 B key M.2 B key M.2 E key M.2 E key Assignment Assignment Function Function +3.3V_TP CAN_GND TP_SCL TP_ALT# SOUTN3 CAN_H TP_SDA TP_RST# LVDS_A2+ CAN_L SINN3 UR1_TX_232 SINN4 UR1_RX_232 SOUTN4 RTSN2 DTRN4 CTSN2... -
Page 28: Lvds (J11)
Chapter 3 SYSTEM SETTINGS LVDS (J11) Function Function LVDS_A2- LVDS_B3+ LVDS_A2+ LVDS_B3- LVDS_A3- LVDS_B2+ M.2 B key LVDS_A3+ LVDS_B2- M.2 E key LVDS_A0- LVDS_B1+ LVDS_A0+ LVDS_B1- LVDS_A1- LVDS_B0+ LVDS_A1+ LVDS_B0- LVDS_A_CLK- LVDS_B_CLK- LVDS_A_CLK+ LVDS_B_CLK+ +VDD_3.3V +VDD_5V +VDD_3.3V +VDD_5V +VDD_3.3V +VDD_5V User's Manual | VC900-M8M... -
Page 29: Flash Images Into Emmc/Sd Card Using Uuu Tool
Chapter 4 SOFTWARE USER GUIDE Chapter 4 - Software User Guide X Flash Images into eMMC/SD card using UUU tool 1. Before flashing images into VC900 device via UUU tool, user must configure BOOTCNFG 3. Connect with 12V adapter to BOOT Type, also enter Serial Download mode by plugging one jumper into JP1 V1.0 (short pin1 and pin2) as picture shown below. - Page 30 Chapter 4 SOFTWARE USER GUIDE For Windows 10 6. • Turn off the device after flashing process completes Command of flash all images into eMMC • Switch BOOTCNFG to BOOT Device, also enter Normal mode by removing pin1/pin2 uuu uuu_emmc_M8MT51_uboot-kernel-rootfs-HDMI.uuu jumper from JP1 (or uuu_emmc_M8MT51_uboot-kernel-rootfs-LVDS.uuu) Command of flash necessary images except rootfs image into eMMC...
- Page 31 Chapter 4 SOFTWARE USER GUIDE 8. Flash Image Into SD Card 8.3 SD card flash commands in Ubuntu 8.1 Insert SD card into SD socket on the back side of M8MT51 board. ・Flash u-boot/kernel/rootfs images: $ sudo ./uuu uuu_sdcard_M8MT51_uboot-kernel-rootfs-HDMI.uuu ・Flash u-boot/kernel images: $ sudo ./uuu uuu_sdcard_M8MT51_uboot-kernel-HDMI.uuu SD card flash commands in windows ・Flash u-boot/kernel/rootfs images: >...
-
Page 32: Software Features
Chapter 4 SOFTWARE USER GUIDE X Software Features Yocto Support List General Support List (*) is depended on the NXP support. (*) is depended on the NXP support. Component Support Status Component Name Base-Line Feature Yocto Version Yocto 2.5 (Default Preloaded on eMMC), Kernel 4.14.98 General OS Support Android 9.0 (Optional), Kernel 4.14.98... - Page 33 3. rootfs.tar.bz2: compressed: Around 481 MB UART3 - Free storage Around 11.7 GB free space (eMMC size 16GB, around 2.3GB used of 14GB file system Support Loopback test, BR 115200 (need DFI Linux user space utility). RS485 size size, /dev/root)
-
Page 34: Android Support List
Version For M.2 Kernel Version 4.14.98 UART2 - Support DTE mode, BR 115200 with CTS/RTS follow control loopback test (need DFI RS232 Android test utility). eMMC Support eMMC boot , eMMC v5.1, Linux ext4 file system UART3 - Support Loopback test, BR 115200 (need DFI Android test utility). - Page 35 Android No support suspend, set never to suspend by default. Suspend UART4 - Support Loopback test, BR 115200 (need DFI Android test utility). RS485 1. AOSP WebView Browser Tester: Browser APP. 2. AOSP Calculator: Calculator APP. 3. AOSP Calendar: Calendar APP.
Need help?
Do you have a question about the NXP i.MX8 Series and is the answer not in the manual?
Questions and answers