Table of Contents
Advertisement
Quick Links
Installation guide
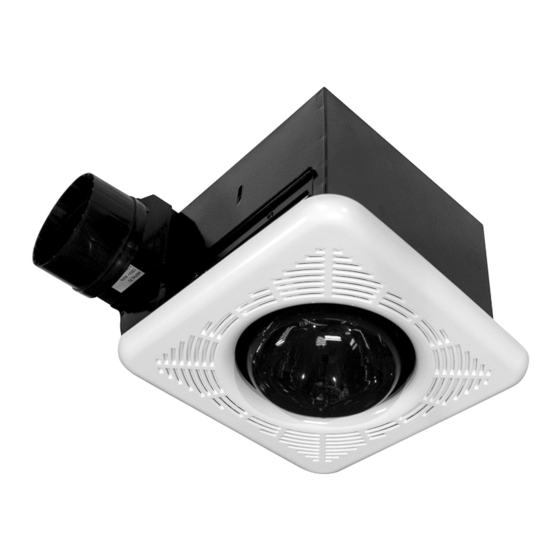
Bathroom fan
with heat lamp
Model: SBFHL070
WARNING
VERY IMPORTANT
WARNING
VERY IMPORTANT
WARNING
Before installing and operating this product, the user and/or installer must read, understand and follow these instructions and keep them handy for
future reference. If these instructions are not followed, the warranty will be considered null and void and the manufacturer deems no further responsibil-
ity for this product.
This product must be installed by a qualified person and connected by a certified electrician, according to the electrical and building codes effective in
your region.
The following instructions must be adhered to in order to avoid personal injuries or property damages, serious injuries and potentially fatal electric
shocks.
Switch off the power at the circuit breaker before installing, repairing and cleaning the unit.
Make sure the unit is appropriate for the intended use (if needed, refer to the product catalog or a representative).
If the installer or the user modifies the unit, he will be held responsible for any damage resulting from this modification.
This unit shall not be installed in wet locations such as, but not limited to, in a shower.
When cutting or drilling into a ceiling, do not damage electrical wiring and other hidden utilities.
To ensure proper air exhaust and to reduce the risk of fire, make sure all exhaust ducts lead outside. Do not exhaust air into walls, ceilings, attics, crawl
spaces or garages.
Use a specially designed dimmer to control fan speed.
Sufficient air is needed for proper combustion and exhausting of gases to prevent back drafting.
For general ventilating use only. Do not use to exhaust hazardous or explosive materials and vapours.
INSSBFHL0709
Advertisement
Table of Contents

Summary of Contents for Stelpro SBFHL070
- Page 1 Installation guide Bathroom fan with heat lamp Model: SBFHL070 WARNING VERY IMPORTANT WARNING VERY IMPORTANT WARNING Before installing and operating this product, the user and/or installer must read, understand and follow these instructions and keep them handy for future reference. If these instructions are not followed, the warranty will be considered null and void and the manufacturer deems no further responsibil- ity for this product.
- Page 2 BEFORE YOU BEGIN Ductwork may have a direct impact on fan performance. Therefore, we are proposing the following recommendations. Ducts We highly recommend the use of rigid ducts. Flexible ducts increase air restriction, resulting in poor fan performance and increased noise levels (sones).
- Page 3 COMPONENTS Housing Grille Sliding brackets (x4) Back draft damper Wire connectors (X3) (marettes) Cable clamp Screw 1⁄2 in. (x4) Screw 1 in. (x2) Screw 1 1⁄2 in. (x8) TOOLS • Hand saw (installation method using headers) • Measuring tape • Phillips screwdriver •...
- Page 4 POSITIONING AND SECURING THE FAN HOUSING Slide the fan into place with the side of the housing set against header B and the right-hand ceiling joist. Secure the housing to header B and the ceiling joist using four (4) screws. [1 1⁄2”screws] Slide and secure header A between the two ceiling beams with the side of the header set against the fan housing.
- Page 5 FINISHED CEILING OPENING The opening within the finished ceiling must reflect the shape and size of the fan housing. This is done to facilitate removal of the fan should repairs or replacement be necessary. Fig. 8.1 GRILLE INSTALLATION To install the grille, hook one Hook the second spring of the two spring clips to its clip with the opposite hook...
- Page 6 B) INSTALLATION USING SLIDING BRACKETS PREPARATION Before proceeding with the installation, plan ahead by taking into consideration the required clearances, ductwork and electrical wiring involved. Make sure it will not impact the existing wiring. SPACING Fan installation requires a vertical clearance of at least 7 inches within ceiling. If the joists have a height of less than 7 inches, add filler in order to reach that height.
- Page 7 ELECTRICAL WIRING Your exhaust fan offers 2 wiring possibilities either using a standard wall switch (SPST) or a 2 position selector switch. WARNING A) Before installing, switch off the appropriate circuit breaker in the electrical service panel. B) Installation must comply with local and national electrical codes. C) Must be installed by a certified electrician.
- Page 8 (other than that provided by Stelpro) will not be covered by this warranty. Stelpro Design disclaims any responsibility for bodily injuries, losses of income and material damages caused directly or indirectly by the product. Some States and provinces do not allow the exclusion or limitation of incidental or consequential damages and some States do not allow limitations on how long an implied warranty lasts, so these exclusions or limitations may not apply to you.


Need help?
Do you have a question about the SBFHL070 and is the answer not in the manual?
Questions and answers