Advertisement
Available languages
Available languages
Quick Links
Advertisement

Related Manuals for Rinnai RH-K609-GB


Summary of Contents for Rinnai RH-K609-GB
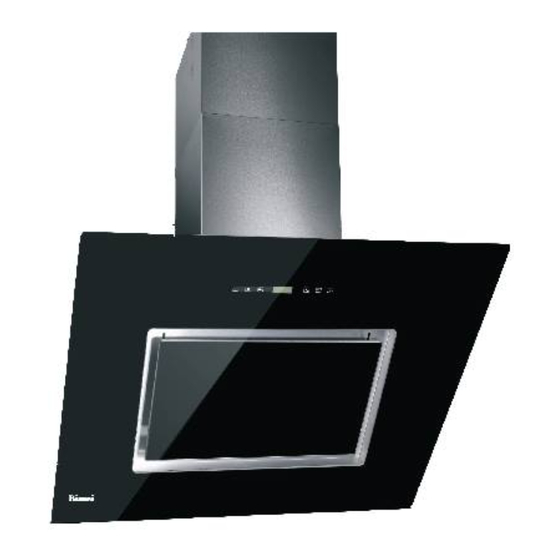
- Page 1 คู ่ ม ื อ การติ ด ตั ้ ง /การใช้ ง าน Chimney Hood 塔形烟机 Tudung Hisap Máy Hút Khói Mùi – Dòng Chimney เครื ่ อ งดู ด ควั น ชนิ ด กระโจมติ ด ผนั ง RH-K609-GB Rinnai Corporation...
- Page 2 TABLE OF CONTENTS English Page 1 - 8 中文 9 - 16 页 Bahasa Indonesia Hal. 17 - 24 Tiếng Việt Trang 25 - 32 ภาษาไทย หน้ า 33 - 40 Version: 201210...
-
Page 3: Table Of Contents
IMPORTANT To register your product warranty, please paste the serial numbers stickers enclosed with the packaging on your warranty card. Please contact your local Rinnai Customer Care Centre should you require further assistance. SAFETY WARNINGS Please read this user manual thoroughly before attempting to use this appliance for the first time. This manual contains important information on safe installation, use and care of the appliance. - Page 4 Do not flambé or grill with an open flame directly under the extractor hood. Flames could be drawn up into the hood by the suction and the grease filters may catch fire. Monitor cooking continuously as overheated oil increases the risk of self-ignition.
-
Page 5: Specifications & Components
SPECIFICATIONS Model RH-K609-GB Voltage 220V - 240V / 50Hz Power of 250W Motor Power of 2 x 10W Lamps Cable Length 1.5m Appliance 900 x 460 x 1162-1677 mm Dimension (W x D x H) Note: The manufacturer reserves the right to effect any technological improvement or modification without prior notice. -
Page 6: Installation
INSTALLATION This appliance can be installed in ducted or recirculation mode. Ducted mode (Fig. 4) In ducted mode, the extractor hood fan extracts the cooking vapours and passes them through the grease filter. The air then flows to the outside. ... - Page 7 Step 3 (Fig. 8) Step 4 (Fig. 9) Position upper duct bracket on the wall at the Fix the outer duct to the hood body using 2 (two) M4 desired height. Mark the center of the bracket holes. x 10 screws provided.
-
Page 8: Operation
OPERATION To achieve better air extraction, we recommend you to switch on the blower a few minutes before starting to cook. Leave it on for approximately 15 minutes after cooking or till all cooking smell is completely removed. Switch control Note: Touch the sensor buttons gently to operate this appliance. -
Page 9: Maintenance And Care
(Fig. 13). Disconnect the light connector (Fig. 13.1). Replace a new set of light assembly. Note: For purchase of spare part, please check with your local Rinnai Rinnai Customer Care Centre for assistance. Reverse the procedure for refitting. Fig. 10 Charcoal filter (where applicable) (Fig. -
Page 10: Troubleshoot
Replace the damaged lamps Lamps are loose Tighten the lamps If problem persists after the above checks, please contact Rinnai Customer Care Centre for assistance. Please quote the model number of your appliance as shown on the rating plate attached to your equipment (Fig. 13). - Page 11 目录 安全警告 ----------------------------------------------------------------------------------------9 规格及零部件 ------------------------------------------------------------------------------------11 安装---------------------------------------------------------------------------------------------12 操作 --------------------------------------------------------------------------------------------14 维修与保养---------------------------------------------------------------------------------------15 常见故障的识别与处理 ----------------------------------------------------------------------------16 重要提示 要注册您的产品保修,需要把序列号贴纸贴到随机器包装的保用证上。请联系当地的林内客户售后服务中心咨 询更新信息。 安全警告 在使用本器具前,请仔细阅读本使用手册。本手册包括重要的涉及人身安全以及器具使用和保养方面的信息。 开箱 给用户 如有明显的运输过程造成的损伤,请不要使用该 烟机是适合国内使用的,用于消除厨房的异味。 器具。 请不要把烟机使用于其他用途。 如果电源线破损,则必须由生产商,服务代理或 请不要让孩童玩弄或者操作器具。请监督年老体 者合格的技术人员进行更换,防止伤害风险。 弱者的使用。 请确保孩童远离塑料包装。 安装与维修只能让合格的技术人员进行。 对烟机任意的修改将导致危险。篡改电气连接配 件或机器配件都会导致运行错误并会使使用人员 给安装人员 陷入危险。 此油烟机罩可以安装在燃气炉和电炉上方。从台...
- Page 12 请注意不断观察,因为过热的热油会增加自燃的 危险。 请不要操作没有油脂过滤器的器具。 定期清理与更换过滤器很重要,因为油脂积聚会 增大着火的危险。 请在取出清理或维修之前务必切断电源。 请确认电源线远离任何热源或尖锐的物体。 禁止使用多用插头与延长电线 。有超负荷的危 险,会引发火灾。 处理 此器具与其包装都是环保及可循环再用的。 请帮助我们爱护环境,用适当的方式处置包装以 及旧的器具。 在处置旧器具前,请切断电源以及移走电源线防 止危险发生。 电源连接必须符合当地标准。请在插入电源之前 注意 : 生产商不会对由于任何安装或者通过非正当的 确认当地的电压是否正确。 方式安装与运行产生的损坏负责。 请使用符合当地的接地连接器。此器具的电源连 合适的 接必须接地 ( 绿色 & 黄色 = 接地;...
- Page 13 规格 型号 RH-K609-GB 电压 220V - 240V / 50Hz 马达功率 250W 灯泡功率 2 x 10W 电源线 1.5m 器具尺寸 (W x D x H): 900 x 460 x 1162-1677 mm 注意: 生产商拥有改造器具而不预先对消费者进行 告知的权利。 图. 部件名称 参照 数量 产品配件 安装支架 内罩 外罩...
- Page 14 安装 该器具必须以管道模式或回流模式安装。 管道模式 (图. 4) 在管道模式中,烟机的风扇会把煮食的油烟吸进管 道并通过油脂过滤器排出屋外。 油脂过滤器吸收煮食过程中油烟的固体物质。因此 在此模式中, 只安装油脂过滤器 (木炭过滤器是 可选择的). 图. 6 第二步 (图. 7) 图. 4 在管道模式,要连接排气管。把附带的Ø150mm 管 道 连 接 上 , 并 用 一 个 管 道 箍 紧 环 ( 不 提 供 ) 固 定...
- Page 15 第三步 (图 8) 第四步 (图 9) 在 设 定 的 高 度 处 安 装 好 上 部 分 的 架 子 . 用提供的 M4 x 10 螺丝将外罩固定到机体上。 在两个孔的中央标记中点. 钻一个 Ø 8mm 的孔并插入墙钉。用提供的两个 5 x 50 螺丝固定上部架子并固定螺丝。 用提供的两个...
- Page 16 操作 为了达到更好的抽气效果,我们建议在煮饭前几分钟先启动抽风。而在煮饭后 15 分钟左右或者等油烟完全消失之 后再关闭烟机。 开关控制 控制钮 注意 : 轻轻接触感应按键来启动机器. 速度设定 轻触选择低速。 轻触选择中速。 轻触选择高速。 延时时间设定 在运行模式时轻触此键来设定延迟停止计时器。最大设定为分钟。 输入时间闪烁秒钟,延迟时间正式启动。 当延迟时间倒数完毕,风机自动停止。 时间设定 轻触 ‘时间键’并停留 3 秒钟。 轻触 ‘高速键’来设定小时。 轻触 ‘灯键’来设定分钟. 输入的时间闪烁 10 秒钟之后,时钟的设定就完成了。 要重置时钟,重复上述步骤即可。 灯...
- Page 17 维修与保养 请确保主电源在清洗或保养维修之前已经被切断。 定期对过滤器清洗或更换是很重要的,因为油脂积 聚会增加着火的危险。 不要在没有油脂过滤器的情况下开动机器。 图. 11 油脂过滤器 (图. 10) 油脂过滤器是用于吸收煮饭过程中发出的油脂 清洗油杯 (图 12) 的。此过滤器必须根据使用频率每 4 周清洗或者 我们建议根据使用烟机的频度每两个星期清洗油杯一 移出。过滤器可以用手或洗碗机清洗。注意: 注 次。 意清洗时不要弯曲过滤网。 如果用手洗,用温水清洗液洗更容易洗掉油脂。 清洗机体 再重新安装回去之前,要擦洗干净并晾干过滤 清洗烟机要使用温水清洗液和软湿布。清洗之后, 器。 用无尘布来擦干。 如果用洗碗机,选择一个适合的清洗程序。重新 避免使用腐蚀性或研磨性的产品,因为这样会容易 安装回去之前要晾干过滤器。 刮花产品表面。 注意: 过滤器会有轻微的掉色现象。 移出与插入油脂过滤器: 灯的更换...
- Page 18 常见故障的识别与处理 问题 可能导致问题的原因 解决方法 烟机不运作 没电 确认插头已经插上,电源已经开 启。 风量小 油脂过滤器被油脂堵塞 清洗油脂过滤器,晾干后安装回去 木炭过滤器被油脂堵塞 更换新的木炭过滤器 抽油烟率太低 通风不足 确保厨房通风情况良好以使新 鲜空气能进入厨房内 木炭过滤器没安装 安装木炭过滤器,以设置为回流模 式 马达启动但是不能抽风 排风不好 请联系林内的售后服务中心 呼呼的声音 风扇页可能有外物碰触到 请联系林内的售后服务中心 灯不亮 灯泡损坏 更换掉烧坏的灯泡 灯泡松了 拧紧灯泡 如果进行了以上的确认之后问题依然存在,请联系林内的售后服务中心请 求帮助。 请找出产品的型号,型号在机体的铭牌上,如图所示。(图. 13). 如果需要保修服务,请提供购买产品的证明与有效的保修证。 图.13 - 注意: 铭牌只起插图提 示的作用,不同产品的铭牌不同。...
- Page 19 DAFTAR ISI Peringatan Keselamatan -------------------------------------------------------------------------------------------------------------------------------17 Spesifikasi & Komponen----------------------------------------------------------------------------------------------------------------------------- ---19 Pemasangan-----------------------------------------------------------------------------------------------------------------------------------------------20 Pengoperasian--------------------------------------------------------------------------------------------------------------------------------------------22 Pemeliharaan & Perawatan---------------------------------------------------------------------------------------------------------------------------23 Pemecahan Masalah------------------------------------------------------------------------------------------------------------------------------------24 PENTING Untuk meregistrasi garansi produk anda, silahkan menyalin nomer seri pada stiker yang ada pada kemasan kartu garansi anda. Silahkan hubungi layanan purna jual di kota anda jika anda memerlukan bantuan lebih lanjut. PERINGATAN KESELAMATAN Silahkan Anda membaca panduan manual ini sebelum Anda menggunakannya.
- Page 20 Jangan memasak atau memanggang langsung di bawah tudung hisap. Api bisa menyebabkan tudung terbakar karena terhisap dan mungkin penyaring bisa terkena api. Selalu pantau saat memasak secara terus menerus karena jika terlalu panas bisa meningkatkan resiko kebakaran. Jangan mengoperasikan tudung hisap tanpa penyaring minyak.
Need help?
Do you have a question about the RH-K609-GB and is the answer not in the manual?
Questions and answers