
Related Manuals for Origin Acoustics Composer LCR LCR36


Summary of Contents for Origin Acoustics Composer LCR LCR36
- Page 1 Installation Manual Composer LCR Collection Models: LCR36 LCR38 LCR64 LCR66 LCR68 V 2.1...
-
Page 2: Table Of Contents
Table of Contents Introduction Installation Requirements and Recommendations 1 What’s included Required Tools/Items Optional Tools/Items Speaker Placement Installation 1) Installing the Wire 2) Painting the Grille 3) Cutting the Hole 4) Connecting the Wires 5) Installing the Speaker 6) Listening Test and Adjustments 7) Installing the Grille Uninstallation Troubleshooting... -
Page 3: Introduction
Introduction Thank you for purchasing the Composer LCR In-Wall Speaker. At Origin Acoustics, we take pride in providing you with a high quality product. All of Origin Acoustics’ speakers are designed to have excellent sound quality, longevity, and a simple installation process. -
Page 4: Required Tools/Items
Required Tools/Items Speaker Wire Recommendations 1. Keyhole or drywall saw this setup, 2. Speaker wire multi-stranded wiring designed 3. Pencil for amplifier to speaker connec- 4. Wire stripper tions. The gauge of wire used 5. Measuring tape can have an impact on the per- formance of your speakers and we would recommend that you choose the largest wire size that... -
Page 5: Speaker Placement
COMPOSER LCR INSTALLATION MANUAL Speaker Placement Place the center channel (CC) speaker directly above or below the video display, pref- erably equidistant from the walls on the left and right. The left (L) and right (R) speakers should be on the same wall on either side of the video display, with the center speaker exactly between them. - Page 6 Left Front Center Channel Right Front In addition to the left, right, and center speakers described in the 3.1 setup, install the sur- round left and right speakers on the left and right walls. They should be a few feet behind the listening area, and about 5 feet Listening Area (1.5 m) from the floor.
-
Page 7: Installation
COMPOSER LCR INSTALLATION MANUAL Installation 1) Installing the Wire Strip ¼ to ½ inches (6 to 12 mm) of the insulation off both ends of the wire. To avoid stray strands, twist them at the end. Connect the wire to the am- plifier, and make sure the wire connected to the left speaker output will be routed to the left... - Page 8 Plan out how you’ll route the For New Construction wire to the desired speaker If these speakers are being location. There are several installed in a new home during methods for routing the wire, construction, the installation and you will most likely need process will be a bit different (al- to combine several of these though much simpler).
-
Page 9: Painting The Grille
COMPOSER LCR INSTALLATION MANUAL 2) Painting the Grille In some situations the speakers may look better if the color matched the walls, ceiling, or trim in the room. This can be accomplished by painting the grille. The grille must be paint- ed with spray paint, and most hardware stores will mix a can of paint to match whatever col-... -
Page 10: Cutting The Hole
3) Cutting the Hole When you’ve decided on the locations for all of the speakers, use the template to trace a rectangle lightly in pencil where the hole should be. If you’re unsure on whether there may be obstacles (such as pipes or wires) where you plan on installing the speaker, drill a ⅛... -
Page 11: Installing The Speaker
COMPOSER LCR INSTALLATION MANUAL 5) Installing the Speaker On the speaker, make sure all the SpringLocks are loaded in the upper notch, facing in- ward. Fit the speaker into the hole, and using a screwdriver or a coin, turn the SpringLock releases 90 degrees so the SpringLocks face outwards. -
Page 12: Listening Test And Adjustments
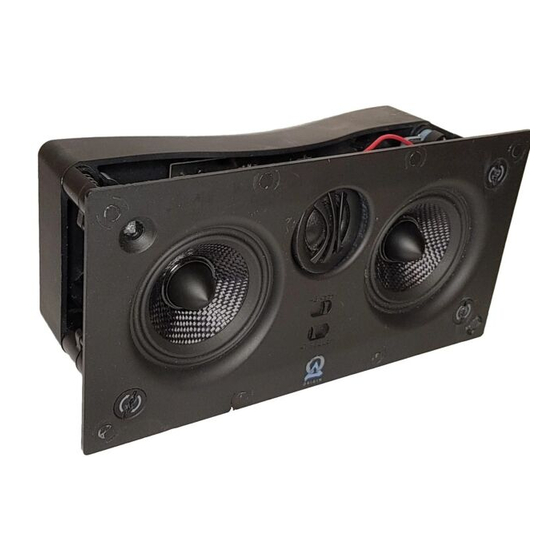
6) Listening Test and Adjustments The tweeter can be pivoted to direct the sound towards the listening area. Gently ap- ply pressure to the rim of the tweeter with your thumbs to aim. The LCR36, LCR38, LCR66, and LCR68 have two switches: one to adjust the treble, and one to adjust the bass. -
Page 13: Uninstallation
COMPOSER LCR INSTALLATION MANUAL Uninstallation Before beginning, orientate the illustration at the right to match your installation. The illustra- tion shows the orientation of the SpringLock releases when the speaker is fully installed. Follow the rotation of the ar- rows on the image. This should be THE OPPOSITE DIRECTION as the arrows printed onto the SpringLock releases. -
Page 14: Troubleshooting
Troubleshooting Troubleshooting If possible, it’s often good to try to isolate the problem first. For example, if you’re playing a DVD on a television and there’s no sound, try connecting an MP3 player to the system to see if that works. -
Page 15: Technical Assistance
If you are considering returning the product, it’s required that you contact Origin Acoustics prior to any return attempts. This way we can determine if the issue can be resolved without returning the product, or if needed we can provide instructions and support for the return process. - Page 16 Model Number LCR36 LCR38 Part Number SWML10600 SWML10800 Tweeter Dome Silk DPSD Silk DPSD Tweeter Diameter 1” (25mm) 1” (25mm) Woofer Cone Glass Kevlar Woofer Diameter 3.5” (89mm) 3.5” (89mm) Adjustments Treble & Bass Treble & Bass Frequency Response 70Hz-20kHz 70Hz-20kHz Impedance 8 ohm...
-
Page 17: Specifications
COMPOSER LCR INSTALLATION MANUAL Specifications Specifications LCR64 LCR66 LCR68 SWML14400 SWML14600 SWML14800 Aluminum Silk DPSD* Silk DPSD* 1” (25mm) 1” (25mm) 1” (25mm) Glass Kevlar 6.5” (165mm) 6.5” (165mm) 6.5” (165mm) Treble Treble & Bass Treble & Bass 55Hz-20kHz 55Hz-20kHz 53Hz-20kHz 8 ohm 8 ohm... -
Page 18: Warranty
Warranty Limited Lifetime Warranty Origin Acoustics warrants to the original retail purchaser only that this Origin Acoustics product will be free from defects in materials and workmanship, provided the speaker was purchased from an Origin Acoustics authorized dealer. If the product is determined to be defective, it will be repaired or replaced at Origin Acoustics’... -
Page 19: Requirements And Warranty Coverage
• Accidental damage • Damage caused by abuse or misuse • Damage caused by attempted repairs/modifications by anyone other than Origin Acoustics or an authorized dealer • Damage caused by improper installation • Normal wear, maintenance, and environmental issues • Damage caused by voltage inputs in excess of the rated maximum of the unit •... - Page 20 ©2014 Origin Acoustics. All copyrighted, trademarked and patented elements mentioned herein are the sole property of Origin Acoustics.
Need help?
Do you have a question about the Composer LCR LCR36 and is the answer not in the manual?
Questions and answers