Advertisement
Quick Links
Safe Operation Practices • Set-Up • Operation • Maintenance • Service • Troubleshooting • Warranty
O
'
M
peratOr
s
anual
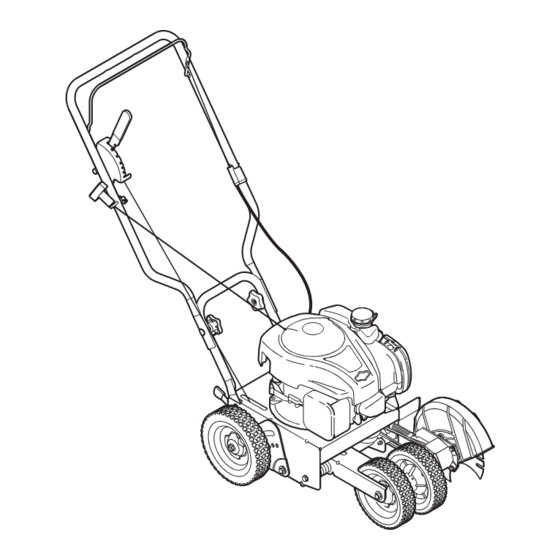
Lawn Edger — Model 554
WARNING
READ AND FOLLOW ALL SAFETY RULES AND INSTRUCTIONS IN THIS MANUAL
BEFORE ATTEMPTING TO OPERATE THIS MACHINE.
FAILURE TO COMPLY WITH THESE INSTRUCTIONS MAY RESULT IN PERSONAL INJURY.
NOTE: This Operator's Manual covers several models. Features may vary by model. Not all features in this manual are applicable to all
models and the model depicted may differ from yours.
MTD LLC, P.O. BOX 361131 CLEVELAND, OHIO 44136-0019
Printed In USA
Form No. 769-11010
(October 22, 2015)
Advertisement

Subscribe to Our Youtube Channel
Related Manuals for Rover 554


Summary of Contents for Rover 554
- Page 1 Safe Operation Practices • Set-Up • Operation • Maintenance • Service • Troubleshooting • Warranty ’ peratOr anual Lawn Edger — Model 554 WARNING READ AND FOLLOW ALL SAFETY RULES AND INSTRUCTIONS IN THIS MANUAL BEFORE ATTEMPTING TO OPERATE THIS MACHINE.
-
Page 2: Table Of Contents
To The Owner Thank You Thank you for purchasing this product. It was carefully If applicable, the power testing information used to establish engineered to provide excellent performance when properly the power rating of the engine equipped on this machine can be operated and maintained. -
Page 3: Safe Operation Practices
Important Safe Operation Practices WARNING! This symbol points out important safety instructions which, if not followed, could endanger the personal safety and/or property of yourself and others. Read and follow all instructions in this manual before attempting to operate this machine. Failure to comply with these instructions may result in personal injury. - Page 4 Never fill containers inside a vehicle or on a truck or trailer Muffler and engine become hot and can cause a burn. bed with a plastic liner. Always place containers on the Do not touch. ground away from your vehicle before filling. Never operate this machine without good visibility or Remove gas-powered equipment from the truck or light.
- Page 5 Keep children away from hot or running engines. They can According to the Consumer Products Safety Commission suffer burns from a hot muffler. (CPSC) and the U.S. Environmental Protection Agency (EPA), this product has an Average Useful Life of seven (7) years, Never allow children under 14 years of age to operate this or 70 hours of operation.
- Page 6 Safety Symbols This page depicts and describes safety symbols that may appear on this product. Read, understand, and follow all instructions on the machine before attempting to assemble and operate. Symbol Description READ THE OPERATOR’S MANUAL(S) Read, understand, and follow all instructions in the manual(s) before attempting to assemble and operate.
-
Page 7: Assembly & Set-Up
Assembly & Set-Up Contents of Carton • Edger (1) • Wing Knob and Rope Guide (1) • Trenching Blade Kit † (1) • Edger Operator’s Manual (1) • Engine Operator’s Manual (1) • Fast Start Guide (1) • Registration Card (1) •... - Page 8 Push the snap fitting down on the handle to secure it into Gently pull the starter rope out of the engine. place. Securing Blade Depth Control Cable WARNING! The edger blade WILL rotate when the starter rope is pulled. Unwrap the blade depth control cable from around the rear axle and route it up through the slot on the frame and up the right NOTE: The starter rope will not pull out of the engine side of the handle.
-
Page 9: Controls & Features
Controls and Features Blade Control Blade Depth Control Lever Primer Recoil Starter Bevel Adjustment Lever Curb Height Adjustment Lever Blade Control WARNING! Be familiar with all the controls and their proper operation. Know how to stop the Located on the upper handle, the blade control must be machine and disengage it quickly. -
Page 10: Operation
Operation Starting the Engine To start the edger’s engine, proceed as follows: Move the blade depth control lever back to the START position in the adjacent (top) notch. Push the primer three times. See Figure 5-1. Do not prime to restart a warm engine. NOTE: If you push the primer too many times, excessive fuel will flood the carburetor and the engine will be difficult to start. - Page 11 Edging Along a Curb Trenching (If Equipped) The right, rear wheel of the edger can be lowered into one of five You can utilize the edger’s optional trenching feature in order positions to ease the task of edging along a curb. To adjust the to create a wider cutting path for such things as laying wire for height of curb wheel, proceed as follows: landscape lighting.
-
Page 12: Maintenance & Adjustment
Maintenance & Adjustments Maintenance Lubrication Wheels WARNING: Always stop engine, allow engine to cool, disconnect spark plug, and ground against Lubricate the wheels and bearings at least once a season with a engine before performing any type of maintenance light oil. Also, if the wheels are removed for any reason, lubricate on your machine. -
Page 13: Service
Service Belt Replacement Make certain that the drive belt is on the engine flywheel pulley and idler pulleys, and retighten the flange lock nut Drive Belt on the top of the frame. NOTE: To aid in reassembly, note the orientation of the drive belt on the two idler pulleys and the engine flywheel pulley prior to Belt Guard performing the following steps. -
Page 14: Troubleshooting
Troubleshooting Problem Cause Remedy Engine fails to start 1. Dirty air cleaner. 1. Refer to the Engine Operator’s Manual. 2. Engine needs to be primed. (If Equipped) 2. Push primer bulb two or three times. 3. Fuel tank empty. 3. Fill tank with clean, fresh gasoline. 4. -
Page 15: Replacement Parts
Replacement Parts Component Part Number and Description 759-3336 Spark Plug BS-799579 Air Cleaner Kit BS-799585 Fuel Cap 734-1264 Front Wheel 734-1268 Rear Wheel 781-0748 Blade 954-04032B Belt (800) 828-5500 or (330) 558-7220 Phone to order replacement parts or a complete Parts Manual (have your full model number and serial number ready). - Page 16 Warranty Conditions — Australia (Not applicable to other Regions) The benefits given to you under this warranty are in addition to other rights and remedies that you have under Australian law in relation to the goods. MTD Products Australia Pty Ltd warrants that this machine is free from defects in material and workmanship. This warranty is limited to repairing or replacing any part which appears upon inspection by MTD Products Australia Pty Ltd or its agent to be defective in material or workmanship.
Need help?
Do you have a question about the 554 and is the answer not in the manual?
Questions and answers