Table of Contents
Advertisement
Advertisement
Table of Contents
Troubleshooting

Related Manuals for RCA RV-9900


Summary of Contents for RCA RV-9900
- Page 1 USER'S GUIDE RV-9900 RV-9950 AUDIO/VIDEO RECEIVER...
-
Page 2: Safety Information
Operate audio/video receiver only on 120 volts, 60 Hz AC power (normal house power). FCC Regulations state that unauthorized changes or modifications to this equipment may void the user’s authority to operate it. -
Page 3: Table Of Contents
Programming the Remote to Control a Laserdisc Player ... 34 Programming the Remote to Control A Satellite ... 35 Programming the AUX button on the Remote ... 35 Appendix A: Connecting Your Receiver ... 37 Connecting a TV and a VCR ... 39 Connecting a Satellite Receiver ... 40 Connecting a Laserdisc Player ... -
Page 5: First Things First
If you have a specific question, refer to the table of contents or the index. Call RCA Consumer Relations for further questions. (see back cover) PLEASE READ THE NOTES IN THE TEXT The engineers and designers gave me some great tips about this audio/video receiver. - Page 6 Step 1: Unpack the Receiver Unpack the receiver and the accessories. The accessories packed with the receiver include the RCA Remote (CRK67A1), 4 AAA cell batteries, an AM loop antenna, an FM “T” antenna, one paired (red/white) stereo cable, one single (yellow) video cable and Important Safeguards.
- Page 7 If your TV has more than one video input, make sure the VCR and VIDEO buttons tune the TV to the same channel that the receiver monitor out is plugged into. Refer to the TV’s user’s guide for more information.
- Page 8 If your TV has more than one video input, make sure the VCR and VIDEO buttons tune the TV to the same channel that the receiver monitor out is plugged into. Refer to the TV’s user’s guide for more information.
- Page 9 Be sure to insert the plug completely. Step 5: Turn on the receiver Press the POWER button on the receiver, the POWER button on the remote or any device button on the remote. ends of Read on…...
-
Page 11: Operating The Receiver
Operating the Receiver Tour of the receiver Programming the Remote Important: In order to safeguard your hearing, turn the volume down before turning on your receiver. Also, unless otherwise specified, the buttons mentioned in this chapter are on the remote control. -
Page 12: Tuning The Receiver
AUTO mode. “AUTO” appears in the display. Press TUNING up or down button on the receiver to search. The tuner finds and stops on the next station whose frequency is strong enough to be received. To continue the search, press TUNING up or down button again. -
Page 13: Preset Scanning
CHAN DOWN to tune to the previous preset station. Preset Scanning Use the PRESET SCAN button on the receiver’s front panel to review the preset stations stored in the tuner’s memory. “PRESET” and the station’s location in memory appear in the display. -
Page 14: Balancing The Speaker System
Dolby Pro Logic Surround or Dolby 3 Stereo Mode. To balance the speakers 1. Press the TEST TONE button on the receiver front panel. The front panel displays show the current settings as the receiver generates “pink noise” and applies it automatically at... -
Page 15: Using Swap Audio
1. Press TV on the remote to turn on the TV and put the receiver in TV mode. 2. Press the PIP button. The empty PIP appears on the screen. 3. Activate a video source for the PIP. The picture from the video source appears in the PIP. -
Page 17: Tour Of The Receiver
Tour of the Receiver Buttons and connections This section describes the receiver’s controls and connections, including: • The front panel • The front panel display • The remote control • The back panel First Things First Operating the Receiver Tour of the Receiver... -
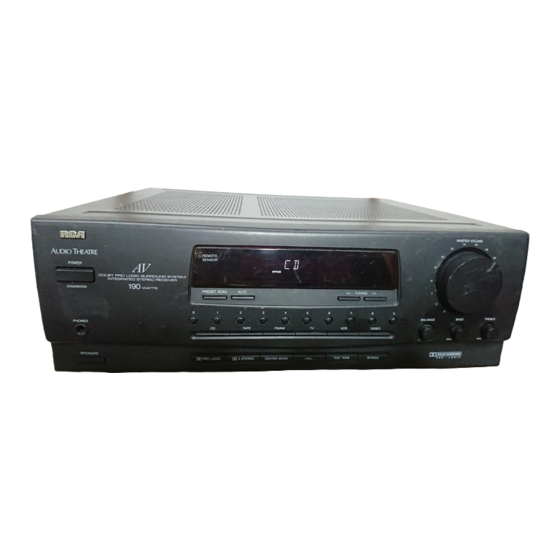
Page 18: Front Panel
Tour of the Receiver POWER STANDBY/ON PHONES SPEAKERS Front Panel AUTO Selects auto tuning mode or manual tuning mode. BALANCE Adjusts the sound from the left and right speakers. BASS Adjusts the bass listening level. BYPASS Turns off the Surround circuitry. Sound is generated without effects—conventional stereo. - Page 19 MASTER VOLUME Increases or decreases the volume. PHONES Provides a connection for headphones. POWER Turns the receiver on or off. PRESET SCAN Lets you review the preset stations. SPEAKERS Turns the speakers on and off.
-
Page 20: Front Panel Displays
DOLBY 3 STEREO CENTER MODE NORMAL WIDE PHANTOM HALL Front Panel Displays The receiver’s display panel shows the current status of the receiver and choices for some commands. Status Indicators AUTO Searches for AM or FM stations of sufficient signal strength. -
Page 21: Remote Control
Tour of the Receiver Remote Control Your RCA Remote Control is capable of operating most RCA audio and video equipment. To use the remote control effectively, always aim it directly at your receiver. The remote control operates on 4 AAA batteries, included with your system. - Page 22 REW Lets you manually move down the AM/FM band. TV Controls On some RCA TV models, used to adjust menu controls. - On some RCA TV models, used to adjust menu controls. ANTENNA Changes the antenna input. DELAY/CH CTRL In some RCA TV models, lets you control the channel that appears in the PIP window.
- Page 23 TV models. Number Buttons Let you enter channel numbers and time settings when needed. PIP Turns on and off picture-in-picture on most RCA TV models with PIP. POWER Turns the TV off. PREV CH•DISC Returns to the previous channel.
-
Page 24: Cd Player Controls
Tour of the Receiver REW Rewinds a tape. Also, searches backward while a tape is playing. SKIP Press once before changing channels and the TV waits 30 seconds before returning to the original channel. Press repeatedly to increase the time. -
Page 25: Troubleshooting Guide
POWER Turns the satellite receiver off. Troubleshooting Guide Before referring to the checklist below, make sure you have correctly followed the connecting and operating procedures. If you have any questions that this booklet cannot answer, please call your nearest RCA dealer. -
Page 26: Back Panel
Tour of the Receiver ANTENNA LOOP TAPE Back Panel AUDIO Connections Provides audio connections for components such as a VCR, TV, CD player, laserdisc player or tape player. IN Provides audio input from another component. OUT Sends audio output to another component, such as a minidisc, tape player or VCR. -
Page 27: Programming The Remote
If you want to use the remote with your TV or other component… The remote already works with most other RCA, GE and ProScan TVs and VCRs. However, you can program the remote to control most brands of remote controllable TVs, VCRs, cable boxes, satellite receivers, and audio equipment. -
Page 28: Programming The Remote
You can program the remote to control most brands of remote controllable TVs, VCRs and cable boxes. If you have an RCA, GE or ProScan VCR, you may not need to program the remote at all. Other manufacturer’s brands need to be programmed. -
Page 29: Remote Tv Codes
Proton ... 011, 027, 037, 072 Quasar ... 012, 038, 092 Radio Shack ... 000, 021, 025, 036, 037, 059, 064, 078 RCA ... 000, 006, 011, 019, 027, 034, 038, 044, 046, 088, 100, 101, 109 Realistic ... 021 Sampo ... -
Page 30: Programming The Remote To Control A Vcr
Programming the Remote Programming the Remote to Control a VCR To determine whether you need to program the remote, turn on the VCR, point the remote at the VCR’s remote sensor, and press VCR1. Then, press the POWER or CHAN UP or DOWN button to see if the VCR responds to the remote commands. -
Page 31: Remote Vcr Codes
Pioneer ... 005, 016, 050 Portland ... 044, 045, 052 ProScan ... 000 Quartz ... 002 Quasar ... 008, 053 RCA ... 000, 005, 007, 008, 028, 035, 037, 054, 069 Radio Shack/Realistic ... 002, 006, 008, 009, 012, 015, 019, 027, 043, 053 Samsung ... -
Page 32: Programming The Remote To Control An Audio Component
Programming the Remote Programming the Remote to Control An Audio Component To program the remote for a remote-controllable audio component, point the remote at the component and press the correct component button: CD for a CD player, TAPE for a tape player, etc. - Page 33 AM/FM ... 062 CD ... 061 Pioneer: AMP ... 014 AM/FM ... 042 CD ... 039 TAPE ... 040, 041 RCA: AMP ... 024 AM/FM ... 003 CD ... 007, 043, 044 TAPE ... 006 PHONO ... 005 AUX ... 004, 054 Realistic: CD ...
-
Page 34: Programming The Remote To Control A Cable Box
Programming the Remote Programming the Remote to Control a Cable Box Refer to the cable box connection page or contact your cable company to hook up your cable box. You may be able to program the remote for your remote controllable cable box. Use the codes in the code list on the right or on the sheet packed with your remote. - Page 35 Philips ... 007, 008, 019, 021, 026, 028, 029, 032, 033, 040, 041 Pioneer ... 018, 020, 044 Randtek ... 007, 008 RCA ... 000, 027 Regal ... 003, 012, 013 Regency ... 002, 033 Samsung ... 044 Scientific Atlanta ... 003, 022, 035, 063, 064 Signature ...
-
Page 36: Programming The Remote To Control A Laserdisc Player
6. Repeat steps 3 through 5 using the next code listed for your brand until the laserdisc player responds to the remote commands. Laserdisc Player Codes Pioneer ... 033, 037 ProScan ... 033, 037 RCA ... 033, 037 This remote may not operate all models of the brands shown. -
Page 37: Programming The Remote To Control A Satellite
4. Enter the three-digit code from the code list. 5. Release the DSS•CABLE button, then press POWER or CHAN UP or DOWN to see if the receiver responds to the remote’s commands. If it doesn’t, try pressing DSS•CABLE, then POWER again. -
Page 39: Appendix A: Connecting Your Receiver
Speaker Terminals Red for positive ( Black for negative (-) terminals. RCA Phono Type Terminals Red for the right (R) channel. White for the left (L) channel. Yellow for the video (V). Black for the subwoofer. (Not Included) •... - Page 40 • Insert all cable plugs firmly into their jacks. • Place audio/video cables to the sides of the receiver’s back panel instead of straight down the middle after you connect the components. • Try not to coil any power cables and keep them away from the audio/video cables as much as possible.
-
Page 41: Connecting A Tv And A Vcr
Appendix A: Connecting the Receiver TV and VCR This connection provides • stereo or surround sound from TV programs broadcast in stereo • stereo, surround sound or mono sound from a VCR • viewing one channel on TV while recording... -
Page 42: Connecting A Satellite Receiver
Do not stack electronic components or other objects on top of the satellite receiver. The slots on top of the receiver must be left uncovered to allow proper airflow to the unit. Blocking the airflow to the unit could impair performance or damage your receiver and other components. -
Page 43: Connecting A Laserdisc Player
Appendix A: Connecting the Receiver Laserdisc Player You can connect a laserdisc or a second VCR to the VIDEO connection. Using this connection, you can play a laserdisc in stereo, surround sound. This connection provides • stereo or surround sound from the laserdisc... -
Page 44: Connecting A Second Vcr
Appendix A: Connecting the Receiver Second VCR Using this connection enables you to play a video tape but not record a tape. This connection provides • stereo, surround sound, or mono on the VCR • VCR playback only To use this connection, you MUST HAVE •... -
Page 45: Connecting A Camcorder Or Video Camera
Appendix A: Connecting the Receiver Camcorder or Video Camera If your camcorder or video camera does not have an RCA type terminal for audio/video, you can purchase an adapter from an RCA dealer or electronics parts store. This connection provides •... -
Page 46: Connecting A Compact Disc Player
To play a CD 1. Turn on the CD player, if the remote is not programmed to control the CD player. 2. Press CD to put the receiver in CD mode. 3. Press PLAY. The AUDIO SOURCE connection can be used as input for any stereo audio signal. -
Page 47: Connecting A Tape Deck Or Minidisc Player
Appendix A: Connecting the Receiver Appendix A: Connecting the Receiver Tape deck or Minidisc player This connection provides • Stereo or surround sound, if available To use this connection, you Must have • (2) paired (red/white) stereo cables To Connect 1. -
Page 48: Connecting Antennas
Appendix A: Connecting the Receiver Antennas Extend the FM antenna to its full length and adjust it for the best reception. After you adjust the AM antenna, place it on a level surface or attach it to a wall using the holes in the antenna’s base. -
Page 49: Connecting Speakers
Appendix A: Connecting the Receiver CENTER AND SURROUND Speakers Connecting Speakers to the Receiver 1. If necessary, remove the vinyl covering from the ends of the speaker wire and twist the wire. 2. Press down and hold the lever on the speaker terminal. - Page 50 Appendix A: Connecting the Receiver PASSIVE SUBWOOFER Connecting Speakers to the Receiver 1. If necessary, remove the vinyl covering from the ends of the speaker wire and twist the wire. 2. Press down and hold the lever on the speaker terminal.
- Page 51 • (4) speaker wires (Only if your receiver does not have a subwoofer output jack) TO CONNECT 1. If your receiver has a subwoofer output jack, you will need to connect your receiver as shown in the diagram below. SUBWOOFER...
-
Page 52: Appendix B: Speaker Placement
Appendix b: Speaker placement Speaker Placement These diagrams offer suggested speaker placements that can enhance your home theater experience. Place the subwoofer anywhere you want. Example 1 This five-speaker configuration is an effective option for recreating in any room the full cinema experience. It can be adapted to suit your taste and listening space. -
Page 53: Appendix C: Troubleshooting Guide
Appendix c: Troubleshooting Receiver/Tuner Operation STEREO indicator is off. • Adjust the antenna. • The signal is too weak. Connect an external antenna. • The signal is Mono. Severe hum or noise. • The signal is too weak. Connect an external antenna. -
Page 54: Appendix D: Care And Cleaning
Appendix d: Care and Cleaning Care and Cleaning Unplug AC power cord before cleaning. Use a polishing cloth or other clean, dry cloth to wipe off dust and dirt. When the surface is very dirty, wipe with a soft cloth dipped in a mild soap solution. -
Page 55: Appendix E: Fcc Information
Appendix e: FCC Information FCC Information In accordance with FCC requirements, changes or modifications not expressly approved by Thomson Consumer Electronics could void the user’s authority to operate this product. Important Information Required by Federal Communications Commission Concerning Radio Frequency Interference: This device complies with Part 15 of the FCC Rules. -
Page 56: Appendix F: Limited Warranty
Appendix F: Limited Warranty Limited Warranty What your warranty covers: • Any defect in materials or workmanship. For how long after your purchase: • Two years. (The warranty period for rental units begins with the first rental or 45 days from date of shipment to the customer, whichever comes first.) What we will do: •... -
Page 57: Appendix G: Equipment Specifications
Appendix g: Equipment Specifications Equipment Specifications Amplifier Section Left/Center/Right (at 8 ): Rear Surround (at 8 ): Muting Attenuation: Frequency Response Video Section Input (Sensitivity/Impedance): Output (Level/Impedance): Frequency Response for Signal to Noise Ratio: Crosstalk @ 3.58 MHz: AM Tuner Section Frequency Response: Usable Sensitivity: Signal to Noise :... -
Page 58: Appendix H: Preset Station List Form
APPENDIX h: PRESET STATION LIST Form Preset Number Band Frequency Notes... -
Page 59: Index
Connections Antennas 46 Camcorder 43 CD player 44 Laserdisc 41, 42 Minidisc player 45 RCA DSS® Receiver 40, 46 Second VCR 41, 42 Tape deck player 45 TV and VCR 6, 39 Video Recorder 43 CTR MODE button 19 DELAY button 16... - Page 60 Basic Controls 19 CD player controls 22 inserting batteries 7 Laserdisc controls 22 programming 27, 32 RCA DSS® Receiver controls 22 Receiver Controls 19 Receiver/Tuner controls 20, 21, 22 surround sound level controls 19 tape deck controls 23 TV Controls 20...
- Page 61 23 TAPE/MD button 16 TEST TONE button 16 TREBLE control 16 TUNING knob 16 Tuning the receiver 10 Turning off Dolby Pro Logic 16 codes for programming the remote 27 connecting 6, 39 controls on the remote 20...
- Page 62 NOTES...
- Page 63 NOTES...
- Page 64 For your nearest RCA Home Entertainment Dealer or Authorized Servicenter, all toll-free in the USA. 1-800-336-1900 If your product needs service, please contact your dealer or the nearest Servicenter from the yellow pages. Please do not send any products to the Indianapolis address listed in this manual or on the carton.