Table of Contents
Advertisement
Quick Links
Advertisement
Chapters
Table of Contents
Troubleshooting

Subscribe to Our Youtube Channel
Related Manuals for arcelik 10140 PMI


Summary of Contents for arcelik 10140 PMI
- Page 1 Washing Machine User Manual 10140 PMI 2820529929/ EN/ / 21/04/2022 17:06...
-
Page 2: Table Of Contents
Auxiliary Function Selection.... 28 Table of Contents 6.8.1 Auxiliary Functions...... 29 1 Safety Instructions ......6.8.2 Functions/Programmes Selec- Intended Use ........ ted by Pressing the Function Safety of Children, Vulnerable Per- Keys for 3 Seconds ....sons and Pets ......End Time ........ - Page 3 Please read this user manual first! Dear Customer, Thank you for choosing Arçelik product. We hope that you get the best results from your product which has been manufactured with high quality and state-of-the-art technology. Therefore, please read this entire user manual and all other accompanying documents care- fully before using the product.
-
Page 4: Safety Instructions
1 Safety Instructions This section includes the safety – Personnel kitchens of instructions necessary to pre- stores, offices and other vent the risk of personal injury or work environments; material damage. – Ranches, Our company shall not be held – By customers of hotels, mo- responsible for damages that tels and other accommoda- may occur if these instructions... -
Page 5: Electrical Safety
with, climb on top or inside the • If the power cable is dam- product. Check inside the aged, it must be replaced by product before use. the authorised service in order • Use child lock to prevent chil- to avoid possible risks. dren from intervening with the •... -
Page 6: Handling Safety
make sure the electrical Handling Safety mains, clean water mains and • Unplug the product before water outlet are suitable. If not, moving, remove the water out- call a qualified electrician and let and water main connec- plumber to have them make tions. -
Page 7: Operational Safety
• Connect the product to a valve should be fitted. The grounding plug protected by a maximum allowed temperat- fuse suitable to the current val- ure is 25°C. ues on the type label. Make • Fit the end of the water dis- sure the grounding is carried charge hose to the dirty water out by an expert electrician. - Page 8 • Do not use chemical solvents • Do not force open the locked on the product. These materi- loading door. The door will als contain an explosion risk. open once the washing is • Do not operate defective or completed. If the door does damaged products.
-
Page 9: Maintenance And Cleaning Safety
• Take the following precautions • Do not use sharp or abrasive to prevent formation of biofilm tools to clean the product. Do and malodours: not use household cleaners, soap, detergent, gas, gasol- – Make sure the room where ine, thinner, alcohol, varnish, the washing machine is etc. -
Page 10: Package Information
ate the locking mechanism of the loading door before disposing of the product for chil- dren’s safety. 2.2 Package Information Packaging materials of the product are man- ufactured from recyclable materials in ac- cordance with our National Environment Regulations. Do not dispose of the pack- aging materials together with the domestic or other wastes. -
Page 11: Technical Specifications
3 Technical Specifications Supplier’s name or commercial brand Arçelik 10140 PMI Model name 7175750100 Nominal Capacity (kg) Maximum spin speed (cycle/min) 1400 Built-In Height (cm) Width (cm) Depth (cm) Single Water inlet / Double Water inlet + / - Electrical input (V/Hz) -
Page 12: Installation
4 Installation • Total weight of the washing machine and Please read the “Safety Instructions” the dryer -with full load- when they are section first! placed on top of each other reaches to approx. 180 kilograms. Place the product Your washing machine automatically on a solid and flat floor that has sufficient detects the amount of laundry load carrying capacity. -
Page 13: Removing Transportation Safety Bolts
Cover B NOTICE Keep the transportation safety bolts in a safe place to reuse when the product needs to be moved again in the future. Install the transportation safety bolts in reverse order of the disassembly procedure. Never move the product without the transportation safety bolts properly Rest the tabs of Cover B against the lower fixed in place. -
Page 14: Connecting The Drain Hose To The
longer than 3.2 m. To prevent water 4.5 Connecting the Drain Hose to leaks, always secure the connection the Drain between the extension hose and the a. Attach the end of the drain hose directly draining hose of the product with a suit- to waste water drain, washbasin or able clamp so that it does not come off bathtub. -
Page 15: Start Up
• If the current supply to the fuse or breaker tion”. To prepare the product for washing in the house is less than 16 Amps, have a laundry, perform first operation in Drum qualified electrician install a 16 amp sup- Cleaning programme. -
Page 16: Tips For Energy And Water Saving
The product automatically adjusts the water 5.3 Tips for Energy and Water Sav- amount according to the weight of the laun- dry put inside it. Following information will help you use the product in an ecological and energy/water- Follow the instructions in “Pro- efficient manner. - Page 17 Detergent, Softener and Other Cleaning Only detergents, softeners and ad- Agents ditives suitable for washing ma- • Add detergent and softener before starting chines should be used. the washing programme. Do not use soap powder. • Do not leave the detergent drawer open Adjusting the Detergent Amount when the washing programme is on.
-
Page 18: Tips For Efficient Washing
Using Anti-Limescale • When necessary, only use anti-limescale produced for washing machines. Using Bleach and Decolourants • Select a programme with pre-washing and add bleach at the start of pre-washing. Do not put detergent in the pre-wash com- partment. As an alternative application, se- Use of Gel and Tablet Detergents lect a programme with additional rinsing •... -
Page 19: Displayed Programme Duration
It may be necessary to Powder and liquid deter- pre-treat the stains or per- gents recommended for form prewash. colours can be used at Prefer liquid deter- dosages recommended Liquid detergents Powder and liquid deter- gents produced for heavily soiled clothes. suitable for colours gents recommended for for delicate... -
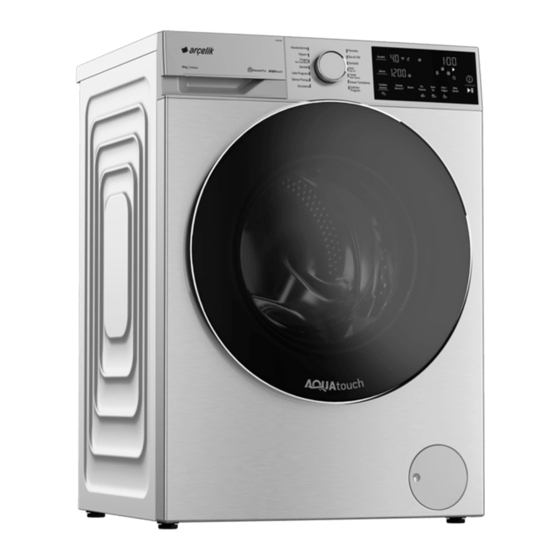
Page 20: Control Panel
6.1 Control Panel 1 Programme Selection Button 2 Spin Speed Adjustment Button 3 Temperature Setting Button 4 Display 5 ON/OFF Button 6 Start/Pause Button 7 End Time Setting Button 8 Auxiliary Function Button 5 9 Auxiliary Function Button 4 10 Auxiliary Function Button 3 11 Auxiliary Function Button 2 12 Auxiliary Function Button 1 13 Remote Control Button... -
Page 21: Symbols On The Display
6.2 Symbols on the Display 1 Temperature Indicator 2 Wireless Connection Indicator 3 Remote Control Indicator 4 Programme follow-up indicator 5 Duration information 6 Programme Start Indicator 7 Delayed Start Enabled Indicator 8 Door Lock Engaged Indicator 9 Auxiliary Function Indicators 4 10 Child Lock Engaged Indicator 11 Auxiliary Function Indicators 3 12 No Water indicator... -
Page 22: Programme And Consumption Table
6.3 Programme and Consumption Table Auxiliary Functions Programme Temperature °C 2,75 1400 • • • • • • Cold - 90 Pamuklu 2,00 1400 • • • • • • Cold - 90 1,10 1400 • • • • • •... - Page 23 Please read Installation section of You can see the washing duration the manual before first use. on the display of your machine while The auxiliary functions in the table selecting a programme. Depending may vary according to the model of on the amount of laundry you have your machine.
-
Page 24: Programme Selection
into the wash cycle, depending on the load 6.4 Programme Selection and temperature selection. In certain pro- a. Determine the programme suitable for the grammes, spraying system will be activated type, quantity and soiling level of the at the beginning of the cycle. The spraying laundry in accordance with "Programme system starts within 3 to 10 minutes in these and consumption table". -
Page 25: Yünlü / Elde Yıkama
• Yünlü / Elde Yıkama chine. Load the duvet into the machine while paying attention that it will not contact the Use to wash your woollen/delicate laundry. door gasket or the glass. Select the appropriate temperature comply- Besides, use this programme to wash your ing with the tag of your clothes. -
Page 26: Mix
programme to help the wrinkle reducing als) suitable for washing machines when the function. The special spin profile and steam powder detergent function is selected. Leave applied at the end of the programme reduce the loading door half closed after the pro- the wrinkles on your shirts. -
Page 27: Temperature Selection
sheets, duvet covers, pillowcases, bath- If you want to use HomeWhiz feature beach towels, towels, socks, cotton under- and Remote Control function, you wear that are suitable for washing at high must select Downloaded Pro- temperature and long time). gramme. Detailed information can In the automatic stain programme, you can be found in HomeWhiz Feature and wash 24 types of stains divided into three... -
Page 28: Auxiliary Function Selection
Whenever a new programme is selected, the want to drain the water without spinning recommended spin speed of the selected your laundry. Programme will resume and programme is displayed on the Spin Speed complete after draining the water. indicator. It is possible that the recommen- If you want to spin the laundry held in water, ded spin speed value is not the maximum adjust the Spin Speed and press Start/... -
Page 29: Auxiliary Functions
• Hızlı / Yoğun When an auxiliary function button You can shorten or extend the programme that cannot be selected with the cur- rent programme is pressed, the duration with this function. Depending on the programme selection, there may be differ- washing machine will make a warn- ences in time increases and decreases. -
Page 30: Functions/Programmes Selec- Ted By Pressing The Function Keys For 3 Seconds
The Soaking in Water auxiliary function en- • Uzaktan Kontrol sures that the stains that have penetrated You can use this auxiliary function key to into the laundry are cleaned better by soak- connect your product to smart devices. For ing the laundry in detergent water before the detailed information, see HomeWhiz Func- washing process starts. - Page 31 the remote control button. The wireless con- Once your request successfully reaches nection icon blinks when the product is con- customer services, the symbol will illu- necting the internet. If connection is suc- minate continuously. cessful, icon will remain on. Customer representatives will contact you over the phone number you entered To deactivate wireless connection:...
-
Page 32: End Time
If you want to cancel the End Time function, 6.9 End Time turn off and on the product by pressing the Time display On/Off button. When the end time function is selected, the remaining time until the programme starts is shown in hours such as 1h, 2h, and the re- maining time to complete the programme after your programme starts is shown in... -
Page 33: Loading Door Lock
c. Programme follow-up indicator lights on the display will show the current pro- gramme step. If no programme is started or no button is pressed within 10 minutes during programme selection pro- cess, the product will automatically turn off. Display and all indicators turn off. -
Page 34: Cancelling The Programme
If the water level in the machine is not suit- 6.13 Cancelling the Programme able when you press Start/Pause button, the When the machine is turn on and off the pro- door lock cannot be deactivated and the gramme gets cancelled. Press and hold On/ door lock icon on the display remains on. -
Page 35: Homewhiz Setup
In order to use the Bluetooth feature of your 6.15.1 HomeWhiz Setup machine, you must download HomeWhiz In order for the application to run, a connec- application from the application store of your tion between your appliance and the Home- smart appliance. -
Page 36: Setting Up A Washing Machine Connected To Someone Else's Account
e. Wait until the installation is complete. When setup is complete, give your wash- ing machine a name. Now, you can tap and see the product you have added in the HomeWhiz Application. Your washing machine will automat- ically turn off if you cannot realize the setup successfully within 5 minutes. -
Page 37: Deleting The Homewhiz Account Match
bluetooth connection. If the symbol is flash- 6.15.3 Deleting the HomeWhiz Ac- ing, the product is trying to connect. If the count Match symbol is off, you have no connection. Follow the following steps in order to delete a washing machine previously matched with When the bluetooth connection is on someone else’s account. -
Page 38: Troubleshooting
If the Remote Control function is Off, all the a. Check whether your smart device is con- operations are handled on the washing ma- nected to the relevant home network. chine and only status follow-up is allowed on b. Restart the product application. the application. -
Page 39: Cleaning The Loading Door And The Drum
a. Press the marked part of the syphon We recommend you to wipe the door gasket within the softener compartment and with a dry and clean cloth at the end of the then pull the drawer towards yourself to programme. This will remove residues on the take it out. -
Page 40: Draining Remaining Water And Cleaning The Pump Filter
b. Open the filter cover. 7.5 Draining Remaining Water and Cleaning the Pump Filter The filter system in your product prevents solid items such as buttons, coins and fabric fibres clogging the pump impeller during draining of washing water. Thus, the water will be drained without any problem and the service life of the pump will extend. - Page 41 • It may be difficult to close the loading door • Excessive laundry is loaded in the product. in case of excessive loading. >>> Reduce >>> Take out some of the laundry from the amount of laundry and make sure that the product or distribute the load by hand the loading door is closed properly.
- Page 42 Washing takes longer than specified in Product does not switch to spinning the user manual. (*) step. (*) • Water pressure is low. >>> Product waits • There is unbalanced load in the product. until taking in adequate amount of water to >>>...
- Page 43 • Excessive laundry is loaded in. >>> Do not washing machine and your laundry. Keep load the product in excess. Load with detergents closed in an environment free amounts recommended in the "Pro- of humidity and do not expose them to ex- gramme and consumption table".
- Page 44 Detergent residue in the detergent • Softener is being taken early by the drawer. (**) product. >>> There may be problem in the valves or in the detergent drawer. Call the • Detergent was put in wet drawer. >>> Dry Authorised Service Agent.
- Page 45 EN / 45...
-
Page 46: Disclaimer / Warning
lik.com.tr/destek.
Need help?
Do you have a question about the 10140 PMI and is the answer not in the manual?
Questions and answers