Table of Contents
Advertisement
Advertisement
Table of Contents

Related Manuals for Pioneer Elite PRO-1000HD


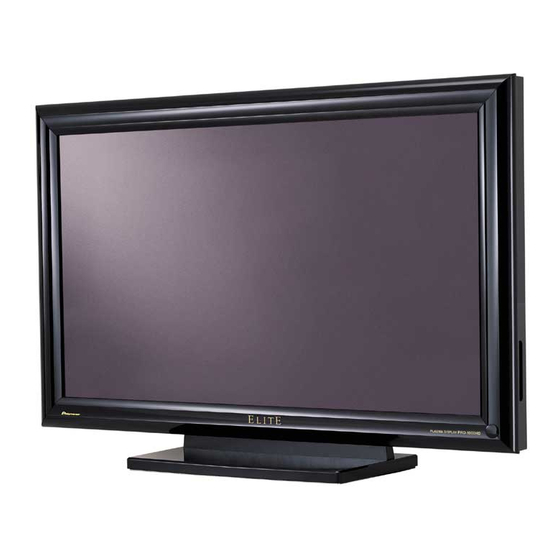
Summary of Contents for Pioneer Elite PRO-1000HD
- Page 1 PLASMA DISPLAY PRO-1000HD PRO-800HD Operating Instructions...
-
Page 2: Safety Precautions
WHEN POSITIONING THIS EQUIPMENT ENSURE THAT THE MAINS PLUG AND SOCKET IS EASILY ACCESSIBLE. PRO-1000HD / PRO-800HD The following symbols are found on labels attached to the product. They alert the operators and service personnel of this equipment to any potentially dangerous conditions. -
Page 3: Important Safety Instructions
WALL OR CEILING MOUNTING — The product should be mounted to a wall or ceiling only as recommended by the manufacturer. ANTENNA LEAD IN WIRE ANTENNA DISCHARGE UNIT (NEC SECTION 810-20) GROUNDING CONDUCTORS (NEC SECTION 810-21) PRO-1000HD / PRO-800HD... -
Page 4: Declaration Of Conformity
Address: P.O. BOX 1760, LONG BEACH, CA., 90801-1760 U.S.A. Phone: (800)421-1625 http://www.Pioneerelectronics.com Please do not ship your product to Pioneer without first calling the Customer Support Division at the above listed number for assistance. Pioneer Electronics [USA] Inc. Customer Support Division P. -
Page 5: Table Of Contents
This product is marketed assuming that it is installed by qualified personnel with enough skill and competence. Always have an installation specialist or your dealer install and set up the product. PIONEER cannot assume liabilities for damage caused by mistake in installation or mounting, misuse, modification or a natural disaster. -
Page 6: Before Proceeding
The example screen displays provided in this manual are those for the PRO-1000HD model. The PRO-800HD display differs as shown: Example of PRO-1000HD Screen Display: ÷ The PRO-1000HD screen display has a non- displaying border at each side of the display. MAIN MENU PICTURE... -
Page 7: Checking Supplied Accessories
Check that the following accessories were supplied. Power cord Remote control unit EXIT AA (R6) batteries (x 2) Cleaning cloth (for wiping front panel) EXIT Speed clamps (x 2) EXIT Bead bands (x 2) ÷ Operating Instructions ÷ Warranty Before Proceeding PRO-1000HD / PRO-800HD... -
Page 8: Part Names And Functions
Press to put the display in operation or standby mode (page 20). INPUT button Press to select input (page 20). PRO-1000HD / PRO-800HD Operation panel on the main unit MENU button Press to open and close the on-screen menu (pages 18 to 32). -
Page 9: Remote Control Unit
¶ Do not charge, short, disassemble or throw the provided batteries in a fire. When disposing of used batteries, please comply with governmental regulations or environmental public instruction’s rules that apply in your country or area. Part Names and Functions H048 En PRO-1000HD / PRO-800HD... -
Page 10: Connection Panel
Connect a speaker whose impedance is 8 –16 (page 14). CONTROL IN/OUT (monaural mini jacks) For connection of PIONEER components that bear the Î mark. Making CONTROL connection enables control of this unit as a component in a system (page 15). - Page 11 For connection of an external left speaker. Connect a speaker that has an impedance of 8 –16 Part Names and Functions (ON SYNC) INPUT2 (H/V SYNC) AUDIO OUTPUT INPUT OUTPUT (ANALOG RGB) (INPUT1/2) Ô 89 0 AC INLET SPEAKER – (page 14). PRO-1000HD / PRO-800HD...
-
Page 12: Installation And Connections
PIONEER stand or installation bracket (sold separately) ÷ When possible, please install using parts and accessories manufactured by PIONEER. PIONEER will not be held responsible for accident or damage caused by the use of parts and accessories manufactured by other companies. -
Page 13: About The Input Connectors On This Unit
Connect the Y signal to the G terminal, the C the B terminal, and the C On-screen setup is necessary after connection. Please see page 18. Installation and Connections OUTPUT (ANALOG RGB) INPUT2 (H/V SYNC) Ô signal to signal to the R terminal. PRO-1000HD / PRO-800HD... - Page 14 When making G ON SYNC connections, do not make any connections to the VD or HD terminals. If connections are made, the picture may be not displayed normally. PRO-1000HD / PRO-800HD Connection of composite SYNC analog RGB source Make composite SYNC connections for a component with output that has the vertical synchronization signal layered on top of the horizontal synchronization signal.
-
Page 15: Connection To A Personal Computer
With this unit, it is possible to output the video signal to an external monitor or other component from the OUTPUT (INPUT1) terminal. Note A video signal will not be output from the OUTPUT (INPUT1) terminal when the main power of this unit is off or in standby. PRO-1000HD / PRO-800HD... - Page 16 When making G ON SYNC connections, do not make any connections to the VD or HD terminals. If connections are made, the picture may be not displayed normally. PRO-1000HD / PRO-800HD Connection of composite SYNC analog RGB source Make composite SYNC connections for a personal...
-
Page 17: Connection To Input3
INPUT4 AUDIO VIDEO OUTPUT Terminals where connection is possible Video signal format INPUT1 INPUT2 INPUT3 Component Composite S Video Component Component To a monitor or a recording device AV component INPUT4 PRO-1000HD / PRO-800HD... -
Page 18: Audio Connections
Pin jacks (L/R) • SPEAKER terminals INPUT3 • Stereo mini jack (L/R). Pin jacks (L/R) INPUT4 PRO-1000HD / PRO-800HD Audio connections for component (computer) connected to INPUT 1 or INPUT 2 AUDIO INPUT OUTPUT (INPUT1/2) Ô... -
Page 19: Control Cord Connection
Installation and Connections Control Cord Connection When control cord connections are made, remote control operation of connected PIONEER components that bear the Î logo mark is done through the remote sensor on this unit. When the connection is made to the CONTROL IN terminal on another unit, the remote sensor of that component will no longer receive signals. -
Page 20: Power Cord Connection
If you use a power source converter plug, use an outlet with a ground terminal and screw down the ground line. PRO-1000HD / PRO-800HD... -
Page 21: How To Route Cables
Installation and Connections * As viewed from the rear of the display. Bunch separated cables together and secure them with the provided bead bands. Note Cables can be routed to the right or left. Illustration depicts PRO-1000HD model. PRO-1000HD / PRO-800HD... -
Page 22: Setting Up The System
B L E V E L H E NH AN CE V E NH AN CE R S E T SELECT ENTER MENU PRO-1000HD / PRO-800HD Press 2/3 to select SET UP. MAIN MENU PICTURE [When inputting a computer signal] MAIN MENU PICTURE Press 5/∞... - Page 23 : V G A INPUT1 SCREEN SET UP OPTION I N P UT 1 M NA GEME OF F : L O CK E D P S I T I O N : V G A 3 AUTO LOCKED 2 PRO-1000HD / PRO-800HD...
-
Page 24: Operations
Press STANDBY/ON to put this unit in the operation mode. The STANDBY/ON indicator turns green. PRO-1000HD / PRO-800HD Press INPUT on the remote control unit or the main unit to select the input. Input changes each time the main unit’s INPUT is pressed as follows. -
Page 25: To Mute The Sound
The currently selected input, screen size and refresh rates will be displayed for about 3 seconds. I N P U T 1 Note The displayed refresh rates may be slightly different from the actual values. PRO-1000HD / PRO-800HD Operations D OT... -
Page 26: Screen Size Selection
5/∞. Automatic screen size When a High-Definition Television signal (1080i, 720p, 1080p) is detected, the screen size is automatically changed to FULL. PRO-1000HD / PRO-800HD During video signal input How the picture looks WIDE Suitable for when viewing news or sports programs. -
Page 27: Partial Image Enlargement (Point Zoom)
3 x 2.0 x 4.0 2 x 3.0 2 AREA 3 x 4.0 x 3.0 x 2.0 x 1.5 AREA 6 x 4.0 x 3.0 x 2.0 x 1.5 AREA 9 x 4.0 x 3.0 x 2.0 x 1.5 PRO-1000HD / PRO-800HD... -
Page 28: Automatic Power Off
: V G A S E T T I N SELECT ENTER MENU PRO-1000HD / PRO-800HD Press 5/∞ to select either the POWER MANAGEMENT or AUTO POWER OFF mode. [When computer signal is input to INPUT 1] MAIN MENU PICTURE... -
Page 29: Display Panel Adjustments
INPUT1 SCREEN SET UP OPTION : 6 0 : 6 0 ENTER EXIT MENU INPUT1 SET UP OPTION ENTER EXIT MENU MENU EXIT P I C T U RE R E S E Y E S MENU EXIT PRO-1000HD /PRO-800HD... -
Page 30: Adjusting The Image Position And Clock (Automatic Adjustment)
“Manual Adjustment of Screen Position and Clock” to make more precise adjustments. PRO-1000HD / PRO-800HD Manual Adjustment of Screen Position and Clock This setting can be adjusted when a computer signal is input. - Page 31 RESET, then press SET. EXIT SELECT Press 2/3 to select YES, and press SET. All SCREEN mode settings are returned to the factory set default. Display Panel Adjustments SCR EE N R E S E Y E S EXIT MENU PRO-1000HD /PRO-800HD...
-
Page 32: Other Operations
0 1 2 3 4 5 6 / – ( " ? & SELECT MENU PRO-1000HD / PRO-800HD Press 2/3/5/∞ to select the first desired character (here, “C”), then press SET to confirm (repeat this step to input up to eight desired characters.) MAIN MENU ÷... -
Page 33: Changing The Color Temperature (Color Temp)
C N MA : A U T O P S I T I O N : V I D E O : R G B S I GNA L CHANGE EXIT MENU 3 OFF MIDDLE 2 LOW 2 PRO-1000HD / PRO-800HD... -
Page 34: Setting The Purecinema Mode
3 STANDARD 3 HQ Following completion of the setting, press MENU once again to return to the normal display. PRO-1000HD / PRO-800HD Viewing a Fast Moving Picture (3D Y/C MODE) When viewing a fast moving picture such as might be experienced with a sports program, setting this mode to “MOTION”... -
Page 35: Viewing In A Bright Location (High Contrast)
: 6 0 : 6 0 ENTER EXIT MENU INPUT1 SCREEN SET UP OPTION POWE R S T A A RD A U T O OF F A UD I O O 3 STANDARD MODE 1 2 PRO-1000HD / PRO-800HD... -
Page 36: Auto Function
SYNC or composite SYNC analog RGB signal is input. (When a G on SYNC or component video signal is input, AUTO FUNCTION is disable.) PRO-1000HD / PRO-800HD Audio Output (AUDIO OUT) The signal level produced at the AUDIO OUT terminal can be set to FIXED or VARIABLE (linked to the VOLUME) as desired. -
Page 37: Additional Information
Vents Vents Vents Vents Illustration depicts PRO-1000HD model. Troubleshooting What may at first seem to be a malfunction, may be remedied with a quick check. Please check to see if a warning is displayed on the screen. If displayed, refer to the table below and check the mode. -
Page 38: General Problems
• Stripes appear on the screen. • May be caused by radio wave mingling from TV station, FM station, amateur radios, public radios (simplified radios) etc., or a nearby personal computer, TV, or video/audio component. - Page 39 Such images may become less noticeable if moving images are later displayed, but they will not disappear completely. • The power control function can be set to help prevent damage from screen burning (page 31). PRO-1000HD / PRO-800HD...
-
Page 40: Specifications
HD/CS, VD ... TTL level /positive and negative polarity/ or 2.2 k (impedance switch) G ON SYNC ... 1 Vp-p/75 /negative sync. PRO-1000HD / PRO-800HD 2 Component video signal Y ... 1 Vp-p/75 /negative sync..0.525 Vp-p/75 (75% satulation level) INPUT 3... -
Page 41: Supplement 1
1024x768 1280x768 ± ± ± ± ± ± 1280x768 ± ± Additional Information : Not available. Remarks NEC PC-9800 NEC PC-9800 (852x480) (864x480) Apple Macintosh 13” (1072x600) Apple Macintosh 16” (1376x768) ( ) indicates Apple Macintosh 19” PRO-1000HD / PRO-800HD... -
Page 42: Supplement 2
: Picture will be enlarged but some fine detail will be hard to see. : Simple reproduction. Fine detail will not be reproduced. Screen size will be displayed as “~ (TYPE)”. PRO-1000HD / PRO-800HD Screen size (Dot x line) DOT BY DOT... -
Page 43: Supplement 3
FULL Explanation of Terms Aspect ratio The TV screen’s width to height ratio is referred to as its aspect ratio. The aspect ratio on standard TVs is 4:3 and on wide TVs or High Definition TVs it is 16:9. S jack (S VIDEO jack) This jack separates and transmits the video signal as two signals;... - Page 44 PIONEER CORPORATION 4-1, Meguro 1-Chome, Meguro-ku, Tokyo 153-8654, Japan PIONEER ELECTRONICS (USA) INC. P.O. BOX 1540, Long Beach, California 90801-1540, U.S.A. PIONEER ELECTRONICS OF CANADA, INC. <TSZZF/02E00000> 300 Allstate Parkway, Markham, Ontario L3R OP2, Canada Published by Pioneer Corporation. Copyright © 2002 Pioneer Corporation.