Table of Contents
Advertisement
Available languages
Available languages
Quick Links
Advertisement
Chapters
Table of Contents

Related Manuals for TE Connectivity Positive Lock A


Summary of Contents for TE Connectivity Positive Lock A
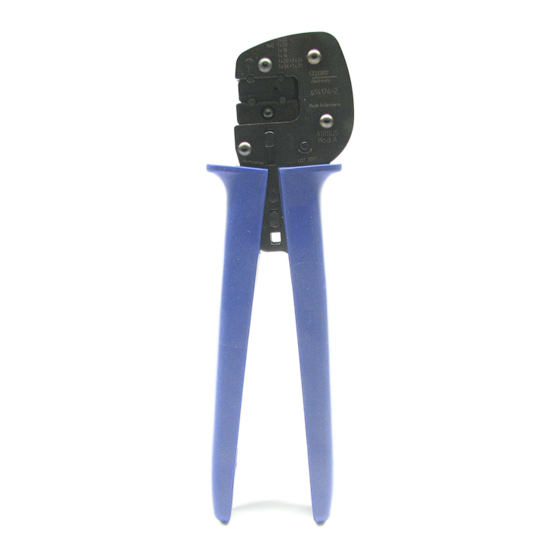
- Page 1 Bedienungsanleitung Operating instructions Handzange Hand Tool Positive Lock Positive Lock Model A Model A TE PN 654174-2 TE PN 654174-2 411-18341 / 2-744014-3 31.07.2015, LS, Rev.C1 ECR-15-011428 Page 1 / 18 ECOC: EGC0 ; LOC: AI...
- Page 2 TE PN 2-744014-3 411-18341 Rev.C1 Deutsch..........................3 English ..........................11 Page 2 / 18...
-
Page 3: Table Of Contents
TE PN 2-744014-3 411-18341 Rev.C1 Inhaltsverzeichnis Umgang mit der Betriebsanleitung.................. 4 Grundlegende Sicherheitshinweise ................4 2.1 Zuständigkeit ........................4 2.2 Hinweise zum Einrichten und Betreiben des Werkzeugs ..........4 2.3 Hinweise zum Warten und Instandhalten des Werkzeugs ..........5 Verwendungszweck ......................5 Technische Daten ...................... -
Page 4: Umgang Mit Der Betriebsanleitung
TE PN 2-744014-3 411-18341 Rev.C1 Umgang mit der Betriebsanleitung Die Betriebsanleitung muss ständig an dem Werkzeug verfügbar sein. Jeder, der mit Arbeiten an dem Werkzeug beauftragt ist, muss die Betriebsanleitung kennen und beachten. Die Firma Tyco Electronics lehnt jede Haftung für Schaden ab, der durch Nichtbeachten von Hinweisen an dem Werkzeug oder in der Betriebsanleitung entsteht. -
Page 5: Hinweise Zum Warten Und Instandhalten Des Werkzeugs
TE PN 2-744014-3 411-18341 Rev.C1 Achtung: Beim Berühren von Stromführenden Teilen besteht Lebensgefahr! Wenn anzunehmen ist, dass sich das Werkzeug nicht mehr gefahrlos betreiben lässt, ist es außer Betrieb zu setzen und gegen unbeabsichtigtes Einschalten zu sichern. Das Werkzeug ist ausschließlich für den in der Betriebsanleitung beschriebenen Zweck zu verwenden. Für Schäden, die aus nicht bestimmungsgemäßer Verwendung entstehen, haftet der Hersteller bzw. -
Page 6: Technische Daten
TE PN 2-744014-3 411-18341 Rev.C1 !!! HINWEIS !!! Alle Abmessungen in dieser Betriebsanleitung werden in Millimeter [mm] angegeben. Die abgebildeten Komponenten sind nicht maßstabsgetreu dargestellt. !!! HINWEIS ZUR ANWENDUNG !!! Kumulative traumatische Beschwerden können die Folge einer dauerhaften Anwendung von Handzangen sein. -
Page 7: Einrichten (Beinhaltet Rüsten)
TE PN 2-744014-3 411-18341 Rev.C1 Kontakt- positionierer Verriegelung Abbildung 2 Einrichten (beinhaltet Rüsten) Einlegen des Kontaktes 1. Vor dem Einlegen eines Kontaktes wird die Crimpzange vollständig geöffnet. Nun wird die Verriegelung durch Drehen geöffnet, der Kontaktpositionierer nach Vorn geschwenkt und der Kontakt bis zum Anschlag in den Positionierer geschoben. -
Page 8: Bedienen
TE PN 2-744014-3 411-18341 Rev.C1 Abbildung 5 Bedienen 1. Der Handgriff der Crimpzange wird zuerst nur leicht geschlossen bis der eingelegte Kontakt in der Einlaufschräge des Crimpprofils gehalten wird. 2. Jetzt wird der Leiter so weit in den Kontakt eingeschoben, dass die Isolierung zwischen Isolationscrimphülse und der Drahtcrimphülse liegt (siehe Abbildung 6). -
Page 9: Wechseln Der Verschleißteile
TE PN 2-744014-3 411-18341 Rev.C1 Wechseln der Verschleißteile !!! HINWEIS !!! Zum Wechseln der Verschleißteile ist im Lieferumfang ein Innensechskant-Stiftschlüssel mit Schlüsselweite 2,5 enthalten. Kontaktpositionierer Um den Kontaktpositionierer zu wechseln, wird mit Hilfe des Stiftschlüssels die Linsenkopfschraube entfernt. Danach kann der Positionierer abgenommen und ersetzt werden (siehe Abbildung 8 und 9). Abbildung 8 Abbildung 9 Crimper... -
Page 10: Ersatz- Und Verschleißteile
TE PN 2-744014-3 411-18341 Rev.C1 Abbildung 12 Abbildung 13 Ersatz- und Verschleißteile Abbildung 14 Abbildung 15 4-1579021-1 Matrizen-Satz (Crimper, Amboss) 7-1579015-9 Kontaktpositionierer Wartung und Instandhaltung Das Werkzeug muss vor Arbeitsbeginn in einem ordnungsgemäßen und sauberen Zustand sein. Rückstände sind zu entfernen. Die Gelenke sind regelmäßig mit leichtem Feinmechanikeröl zu ölen und vor Verschmutzung zu schützen. - Page 11 TE PN 2-744014-3 411-18341 Rev.C1 Table of contents Using the operating manual ................... 12 Basic safety instructions ....................12 2.1 Responsibilities ......................12 2.2 Notes on setting up and operating the tool ..............12 2.3 Notes on service and maintenance ................13 Intended use ........................
-
Page 12: Using The Operating Manual
TE PN 2-744014-3 411-18341 Rev.C1 Using the operating manual The operating manual must be constantly within reach of the tool. Each person entrusted with the job of operating the tool must be familiar with the operating manual and strictly observe the instructions therein. Tyco Electronics decline to accept any liability for damages that are incurred due to the fact that the instructions on the tool or in the operating manual have been disregarded. -
Page 13: Notes On Service And Maintenance
TE PN 2-744014-3 411-18341 Rev.C1 Attention: Touching live parts can cause danger of electrocution with fatal consequences! If you suspect that the tool cannot be operated safely, it must be switched off and secured against anyone accidentally switching it on. The tool may only be used for the purpose specified in the operating manual. -
Page 14: Technical Data
TE PN 2-744014-3 411-18341 Rev.C1 !!! NOTE !!! Dimensions on this sheet are in millimetres [mm]. Figures and illustrations are not drawn to scale. !!! NOTE ON APPLICATION !!! Cumulative Traumatic Disorders can result from a prolonged use of manually powered hand tools. Tyco Electronics hand tools are intended for occasional use and low volume applications. -
Page 15: Set-Up (Including Equipping)
TE PN 2-744014-3 411-18341 Rev.C1 Contact Positioner Locking Figure 2 Set-up (including equipping) Inserting a contact 1. Before inserting a contact the tool needs to be opened fully. Now the locking is opened by turning it, the contact positioner is swievelled out to the front and the contact is pushed to the stop into the positioner. -
Page 16: Operation
TE PN 2-744014-3 411-18341 Rev.C1 Figure 5 Operation 1. At first the handle needs to be closed slightly until the inserted contact is held in the inlet bevel of the crimping profile. 2. Now the wire is inserted so that the insulation ends between the insulation barrel and the wire barrel (see figure 6). -
Page 17: Changing The Expendable Parts
TE PN 2-744014-3 411-18341 Rev.C1 Changing the expendable parts !!! NOTE !!! For changing the expendable parts a hex socket head wrench with size 2,5 is supplied. Contact positioner In order to change the contact positioner the fillister-head screw needs to be removed. After that the positioner can be removed and exchanged (see figure 8 and 9). -
Page 18: Spear And Wear Parts
TE PN 2-744014-3 411-18341 Rev.C1 Figure 12 Figure 13 Spear and wear parts Figure 14 Figure 15 4-1579021-1 Die set (crimper, anvil) 7-1579015-9 Contact positioner Maintenance and preventive maintenance Prior to operation the tool must be in a proper and clean condition. Any residues should be removed. The joints should be oiled regularly with light precision mechanics oil and protected against soiling.
Need help?
Do you have a question about the Positive Lock A and is the answer not in the manual?
Questions and answers