Table of Contents
Advertisement
Quick Links
Advertisement
Table of Contents

Subscribe to Our Youtube Channel
Related Manuals for Stihl RE 125.0 X


Summary of Contents for Stihl RE 125.0 X
- Page 1 RE 125.0 X, 125.0 2 - 21 Instruction Manual...
-
Page 2: Table Of Contents
STIHL expressly commit themselves to a sus‐ tainable and responsible handling of natural resources. This user manual is intended to help you use your STIHL product safely and in an environmentally friendly manner over a long service life. We thank you for your confidence in us and hope you will enjoy working with your STIHL product. -
Page 3: Overview
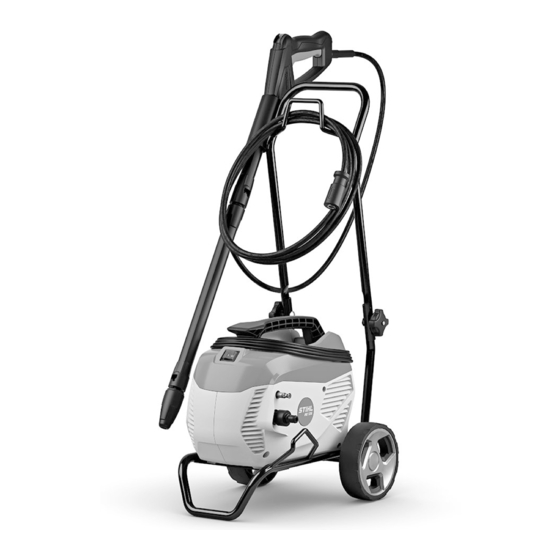
3 Overview English Overview RE 125.0 RE 125.0 X 1 Rocker switch 2 Handlebar 1 Rocker switch 3 Holder 2 Mains plug 4 Star knob nut 3 Clip 5 Mains plug 4 Connector 6 Clip 5 Connector 7 Connector 6 Handle... -
Page 4: Safety Precautions
In this position the retaining latch locks the Intended Use lever. The STIHL RE 125.0 X and RE 125.0 high-pres‐ sure washers can be used to clean vehicles, Drain the spraying set before transport trailers, patios, paths and facades, for example. - Page 5 – The user has received ► Always use the high-pressure washer as instruction from a STIHL described in this user manual. STIHL RE 125.0 X and RE 125.0 high-pressure servicing dealer or other washers are not intended for the following appli‐ expert before operating cations: –...
- Page 6 ■ If you work in the rain or in a damp environ‐ the high-pressure washer. ment, an electric shock may occur. The user ► Fit original STIHL accessories for this high- may be seriously injured or killed and the pres‐ pressure washer.
- Page 7 4 Safety Precautions English high-pressure washer is then in stand-by ► Vehicles or machinery should only be mode and is still switched on. If the spray gun cleaned at places where there is an oil trap trigger is squeezed, the high-pressure pump in the water drain.
- Page 8 ► Keep electrical appliances and the high- ► STIHL recommends the use of genuine pressure washer away from the surface to STIHL detergents. be cleaned.
- Page 9 4 Safety Precautions English 4.10 Connecting to the power supply the data on the rating plate of the pressure washer. Contact with live parts can occur for the following ■ Electrical components may be overloaded dur‐ reasons: ing operation if more than one electric power –...
-
Page 10: Preparing The Pressure Washer For Operation
This may result in serious injury to people and ► If it is not possible to carry out these steps: Do damage to property. not use the pressure washer. Consult a STIHL ► Lock the spray gun trigger. servicing dealer. -
Page 11: Assembling The Pressure Washer
6 Assembling the pressure washer English Assembling the pressure ► If the coupling (1) is difficult to push onto the connector: Lubricate the gasket on the con‐ washer nector (2) with a grease suitable for faucets. Attaching the Handlebar Removing the high-pressure hose: ►... -
Page 12: Connecting To A Water Source
English 7 Connecting to a water source ► Turn on the water tap fully and flush the water ► Press the spray lance (1) and spray gun (2) hose with water. together and turn counterclockwise to the limit Sand and dirt will be flushed out of the water stop. -
Page 13: Connecting The Pressure Washer To The Power Supply
(a), ► Switch off the high-pressure washer. ► Connect the spray gun to the high-pressure The appropriate STIHL suction set must be used. hose. The suction set includes a water hose with a ► Press and hold down the spray gun trigger. -
Page 14: Operating The Pressure Washer
English 10 Operating the pressure washer ► Press and hold the trigger (2). The high-pressure pump starts up automati‐ cally and water flows out of the nozzle. Locking the spray gun trigger: ► Release the trigger (2). The high-pressure pump switches off automat‐ ically and water stops flowing out of the noz‐... -
Page 15: After Finishing Work
Detergents can increase the cleaning effect of ► Remove the high-pressure hose and let the the water. The use of the STIHL spraying set is rest of the water run out of the high-pressure required for working with cleaning agents. The hose. -
Page 16: Transporting
English 12 Transporting ► Connect the shortest possible water hose to Transporting the High-Pressure Washer in a the pressure washer. Vehicle The shorter the water hose, the less antifreeze ► Secure the high-pressure washer so that it is needed. cannot turn over or move. ►... -
Page 17: Maintenance
► Reassemble the water filter. 15 Maintenance 15.1 Maintenance intervals Maintenance intervals depend on the ambient conditions and the operating conditions. STIHL recommends the following maintenance inter‐ vals: Monthly ► Unscrew the connector (1) of the water con‐ ► Clean water intake screen. - Page 18 ► Allow the pressure washer to cool for 5 minutes. ► Clean the nozzle. The high-pressure There is a leak in the high-pressure ► Ask a STIHL servicing dealer to pump repeatedly pump, high-pressure hose or spray inspect the pressure washer. switches on and off attachment.
-
Page 19: Specifications
18 Specifications – Working pressure (p): 9.5 MPa (95 bar) – Max. permissible pressure (p max.): 14 MPa 18.1 STIHL RE 125.0 X high-pres‐ (140 bar) sure washer – Max. water supply pressure (p in max.): 1 MPa (10 bar) Version 230 V to 240 V / 50 Hz –... -
Page 20: Spare Parts And Accessories
Improper disposal can be harmful to health and – Cord length 10 m up to 30 m: AWG 12 / pollute the environment. 3.5 mm² ► Take STIHL products including packaging to a suitable collection point for recycling in accord‐ 18.4 Sound and vibration levels, ance with local regulations. - Page 21 21 EC Declaration of Conformity English – Type: high-pressure washer – Manufacturer's brand: STIHL – Type: RE 125.0 X; RE 125.0 – Serial number: 4950 conforms to the specifications of Directives 2011/65/EU, 2006/42/EC, 2014/30/EU, 2009/125/EC, and 2000/14/EC and has been developed and built in compliance with the ver‐...
- Page 22 English 21 EC Declaration of Conformity 0458-016-0101-A...
- Page 23 21 EC Declaration of Conformity English 0458-016-0101-A...
- Page 24 *04580160101A* 0458-016-0101-A...
Need help?
Do you have a question about the RE 125.0 X and is the answer not in the manual?
Questions and answers