
Related Manuals for arcelik 63102/WF


Summary of Contents for arcelik 63102/WF
- Page 1 Bulaşık Makinesi Kullanma Kılavuzu Dishwasher User’s Manual 63102 I WF Document Number : 1728763649_AA_ARCELIK_63102 I WF_EN/ 11-01-17.(17:31)
- Page 2 Please read this user manual first! Dear Customer, We hope that you get the best results from your product which has been manufactured with high quality and state-of-the-art technology. Therefore, please read this entire user manual and all other accompanying documents carefully before using the product and keep it as a reference for future use.
- Page 3 Dishwasher User’s Manual 63102 I WF Document Number : Document Number : 1 728763649_AA_ARCELIK_63102 I WF_EN/ 11-01-17.(17:31)
- Page 4 Please read this user manual first! Dear Customer, We hope that you get the best results from your product which has been manufactured with high quality and state-of-the-art technology. Therefore, please read this entire user manual and all other accompanying documents carefully before using the product and keep it as a reference for future use.
-
Page 5: Table Of Contents
CONTENTS 1 INSTRUCTIONS FOR SAFETY 4 PREPARATION Tips for energy saving ......13 AND ENVIRONMENT Water softening system ....13 General safety ........4 Adjusting the water softening system 13 Intended use ........5 Adding salt ........15 Children’s safety .........5 Detergent ..........16 Disposing of packaging material..5 Adding detergent ......16 Transportation of the product .....5 Combined tablet detergents .....17... - Page 6 CONTENTS 5 OPERATING THE PRODUCT 37 Keys..........38 Preparing the machine .....38 Programme selection......38 Auxiliary functions......40 WLAN Setup ........40 Programming the washing time ..43 Starting the programme ....44 Programme follow-up .......45 Child Lock .........45 Cancelling the programme ....46 Changing the auxiliary function ..46 Machine settings.......46 Warning messages ......49 End of programme ......50...
-
Page 7: Instructions For Safety And Environment
INSTRUCTIONS FOR SAFETY AND ENVIRONMENT This section contains safety spreading or pouring water instructions that will help to onto it! There is the risk of get protected from risk of electric shock! • personal injury or property Never touch the plug damage. -
Page 8: Intended Use
instructions for safety and environment Children’s safety hot vapour when you need to open the door. • Electrical products are dangerous for the children. Intended use Keep children away from • This product has been the product when it is in designed for domestic use. -
Page 9: Compliance With Weee Directive And Disposing Of The Waste Product
instructions for safety and environment consult your local authorities If you need to move to learn about these collection the product, do it centers. in upright position and hold from the Compliance with RoHS rear side. Slanting Directive the product onto its The product you have front side may cause purchased complies with EU... -
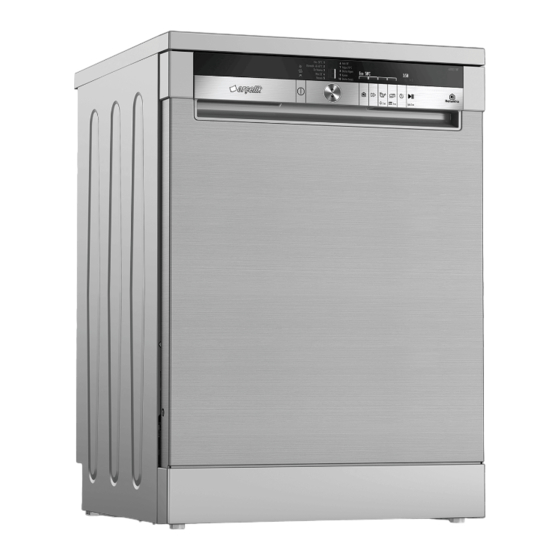
Page 10: Dishwasher Overview
DISHWASHER Overview 1. Upper basket 2. Upper impeller 3. Lower impeller 4. Silverware basket 5. Door 6. Rating Label 7. Control panel 8. Detergent dispenser 9. Lower basket 10. Filters 11. Salt reservoir lid 12. Upper basket rail 13. Upper cutlery basket 14. -
Page 11: Fan Drying System
Data required for performance tests shall be provided upon request. Requests can be e-mailed to the following address: standard.test@arcelik.com Do not forget to provide the code, stock and serial numbers of the product to be tested in your request e-mail along with your contact information. Code, stock and serial numbers of the product may be found on the type label attached to the side wall of the door. -
Page 12: Installation
INSTALLATION Refer to the nearest Authorised When placing the product, pay Service Agent for installation of your attention not to damage the floor, walls, product. To make the product ready piping, etc. Do not hold the product for use, make sure that the electricity, from its door or panel to move it. -
Page 13: Connecting Water Supply
Installation Connecting water supply Use a screw-on hose connector to connect the We recommend attaching water inlet hose to a water a filter on the house/ tap with a ¾ inch external apartment supply water thread. If required, use a inlet to protect the machine filter insert to filter deposits from damages that may... -
Page 14: Adjusting The Feet
Installation Drainpipe must be Damaged power cables connected to the sewage must be replaced by the system and it should not be Authorised Service Agent. connected to any surface If your dishwasher is water. equipped with internal illumination, lamp should Adjusting the feet only be replaced by the If the door of the product cannot be... -
Page 15: Aquasafe
Installation Aquasafe+ (depends on model) The Aquasafe+ system protects against water leaks that may occur at the hose inlet.Water contact with the valve box of the system must be avoided to prevent damage to the electrical system. If the Aquasafe+ system is damaged, unplug the product and call the Authorised Service Agent. -
Page 16: Preparation Tips For Energy Saving
PREPARATION Tips for energy saving Adjusting the water softening system Following information will help you use the product in an ecological and Cleaning, rinsing and drying energy-efficient manner. performance of your dishwasher will Wipe away any coarse food remnants increase when water softening system on the dishes before putting them in is adjusted properly. - Page 17 Preparation 1 min. 1 Second 1 Minute Remove the test Turn on the tap and Hold the test strip in Remove the test Wait for 1 minute. The test strip shows strip from the let the water run for the water for about strip from the water you the hardness packet.
-
Page 18: Adding Salt
Preparation If salt is not put in the machine, the 1. First take the lower basket out to Automatic Water Hardness Detection add softening salt. System will not work properly. 2. Turn the salt reservoir lid in counter If your machine is equipped clockwise to open it (A, B). -
Page 19: Detergent
Preparation 3. Fill the salt reservoir with salt by Only use in the detergents using salt funnel (D). To speed up produced particularly for use dissolution rate of salt in water, stir with dishwashers. Never it with a spoon. use washing up liquids. We recommend you not to use detergents that contain chlorine and phosphate... -
Page 20: Combined Tablet Detergents
Preparation In programmes with pre-washing and high temperature, in which you may use tablet detergents, make sure that the detergent dispenser lid is closed firmly. 2. Put suggested amount of powder, liquid/gel or tablet detergent in the dispenser. Use powder detergent in short programmes without prewash since the solubility of the tablet detergent... -
Page 21: Rinse Aid
Preparation The best washing Depending on the model, performance in dishwashers salt indicator and/or rinse is obtained by using aid indicator should be detergent, rinse aid and enabled again if they are water softening salt disabled before. individually. Rinse aid Combined tablet detergents are available as 3in1, 5in1, Allin1 etc. -
Page 22: Items Not Suitable For Washing In The Dishwasher
Preparation 2. Fill the reservoir until “MAX” level. cutlery with wooden or bone stems, glued pieces, or pieces that 3. Turn the rinse aid amount are not resistant to heat, as well as adjuster manually to a position copper and tin-plated containers in between 1 and 6 (C). - Page 23 Preparation • Place the hollowed dishes such as bowls, glasses and pans upside down in the dishwasher. Thus, accumulation of water in deep hollows is prevented. To prevent possible injuries, always place the sharp and pointed dishes such as service fork, bread knife, etc.
- Page 24 Preparation Suggestions for loading the dishwasher Improper Loading Of Dishware Lower basket Upper basket Improper Loading Of Dishware Dishwasher / User’s Manual 21 / 59 EN...
-
Page 25: Silverware Basket Piece
Preparation Silverware basket piece Silverware basket (depends on model) (depends on model) You can place your forks, spoons and Silverware basket is designed to wash etc. to upper basket with the additional your dishes such as fork, spoon and piece in the figure.. etc. -
Page 26: Cutlery Basket
Preparation Cutlery basket Cutlery basket (depends on model) (depends on model) Cutlery basket is designed to wash Cutlery basket is designed to wash your dishes such as knife, fork, spoon, your dishes such as knife, fork, spoon, etc. in an efficient manner. etc. -
Page 27: Collapsible Lower Basket Wires (6 Pieces)
Preparation Collapsible lower basket wires Bringing the wires to (6 pieces) the horizontal position byholding them from the (depends on model) tips may cause them to The foldable wires (A) located at bend. Therefore, it will the lower basket of the machine are be appropriate to bring designed for an easier placement of the wires in the middle to... -
Page 28: Collapsible Lower Basket Wires (4 Pieces)
Preparation Collapsible lower basket wires Collapsible lower basket wires (4 pieces) (2 pieces) (depends on model) (depends on model) The four piece foldable wires located The two piece foldable wires located at the lower basket of the machine at the lower basket of the machine are are designed for an easier placement designed for an easier placement of of large pieces such as pans, bowls,... -
Page 29: Collapsible Lower Basket Tines
Preparation Collapsible lower basket tines (depends on model) There are foldable tines (A) located at the lower basket of the machine are designed for an easier placement of large pieces such as pans, bowls, etc. You can create larger spaces by folding each tines individually or all of them at once. -
Page 30: Collapsible Lower Basket Tines
Preparation Collapsible lower basket tines (depends on model) There are foldable tines (A) located at the lower basket of the machine are designed for an easier placement of large pieces such as pans, bowls, etc. You can create larger spaces by folding each tines individually or all of them at once. -
Page 31: Softtouch Accessory
Preparation SoftTouch Accessory Tray Wash Supports (depends on model) (depends on model) The SoftTouch Accessory found in the Use the supports to wash trays in the lower basket of your machine enables bottom basket. a safe washing for your fragile glasses. See the Auxiliary functions section for appropriate programme and function selection. -
Page 32: Lower Basket Multipurpose / Height Adjustable Service Rack
Preparation Lower basket multipurpose / Make sure that the impeller height adjustable service rack does not touch the dishes (depends on model) you placed on the racks. This accessory located at the lower To close the racks: basket of your machine allows you 1. -
Page 33: Upper Basket Height Adjustable Rack
Preparation Upper basket glass support Upper basket height piece adjustable rack (depends on the model) (depends on model) When placing long stemmed glasses or Use the lower and upper parts of the wine glasses, do not lean them against height adjustable racks in the upper other pieces but to the edge of the basket of the machine by sliding them basket or to the rack (1). -
Page 34: Upper Basket Glass Support Piece
Preparation Upper basket glass support Collapsable upper basket piece wires (depends on the model) (depends on the model) When placing long stemmed glasses or To bring the collapsable wires on the wine glasses, do not lean them against upper basket of the machine into other pieces but to the edge of the horizontal position, press on the latch basket or to the rack (1). -
Page 35: Collapsible Upper Basket Tines
Preparation Collapsible upper basket tines Collapsible upper basket tines (depends on model) (depends on model) There are foldable tines on the upper Upper basket of the machine is basket of the machine that you can lay equipped with tines with gradual folding down when you need larger space for system (A) that you can lay down big dishes. -
Page 36: Adjusting The Height Of The Upper Basket
Preparation Adjusting the height of the upper basket (depends on model) Basket adjustment mechanism on the loaded upper basket of the machine is designed to allow you create taller areas in the upper or lower section of the machine based on your requirements by adjusting the height of the loaded basket in up or down directions. -
Page 37: Adjusting The Height Of Loaded Upper Basket
Preparation Adjusting the height of loaded 3. Make sure that both sides of the basket height adjustment upper basket mechanism are at the same level (depends on model) (down or up). Basket adjustment mechanism on the upper basket of the machine is designed to allow you create wider areas in the upper or lover section of the machine based on your... -
Page 38: Height Setting With Empty Basket
Preparation Height setting with empty basket (depends on model) In this model, the height setting of the upper basket may be changed using the wheels which are mounted at two different heights. Release the latches on both the right and left tracks of the upper basket by pushing them outwards Pull out the basket out completely. -
Page 39: Upper Cutlery Basket
Preparation Upper cutlery basket (depends on model) The upper cutlery basket is designed for small dishes, or long items that cannot fit into the lower cutlery basket. After taking out the basket by lifting it up, remove the carrier part from the rails by pulling it towards yourself (C). -
Page 40: Operating The Product
OPERATING THE PRODUCT 1. On / Off key 2. Programme Selection keys 3. Function keys a) HomeWhiz key b) Quick Wash key c) Extra Shining (Child Lock) key d) TurboWash (Settings Menu) key 4. Time Delay key 12 13 5. Start / Pause / Cancel key 10. -
Page 41: Keys
Operating the product Keys Preparing the machine On / Off key 1. Open the tap. It is used to turn on or off the machine. 2. Plug in to the socket. Press the On / Off key for 1 second to 3. - Page 42 Operating the product Dishwasher / User’s Manual 39 / 59 EN...
-
Page 43: Auxiliary Functions
Operating the product Auxiliary functions WLAN Setup Washing programmes of your Using the wireless connection, dishwasher are designed to obtain your smart device can perform all the best cleaning effect, considering the actions on your Dishwasher the type of the soil, soiling degree and except for the child lock. - Page 44 Operating the product “WLAN Setup: Off”. and start it again. • Restart the application by 5. If the connection cannot be connecting to your home network established following the again through your smart instructions above, repeat the initial device. You can start using your setup settings on the product.
- Page 45 Operating the product Tablet detergent function HomeWhiz function works This function provides better drying independently of your performance with the multi-purpose machine's being switched on detergents such as 2in1, 3in1, 4in1, or off. 5in1, all in one, etc., depending The function will be disabled when on the hardness level of the mains the door of the dishwasher is open, water.
-
Page 46: Programming The Washing Time
Operating the product Functions Lower Programme Extra QuickWash Basket Shining TurboWash Auto Prewash Mini 30' GlassCare QuickWash 58' Intensive Hygiene All-in-Wash Silent “-” sign indicates that the relevant function cannot be selected and “+” sign indicates that it can. Selected functions may cause changes in the programme duration. -
Page 47: Starting The Programme
Operating the product minutes up to 6 hours and after You can select and start a that with 1 hour increments up to new programme after the 24 hours every time you press the cancellation of time delay key. function. 4. -
Page 48: Programme Follow-Up
Operating the product flow and time delay while the machine Pay attention not to open the is running. door of the machine when it To activate the child Lock: is running. Stop the machine 1. Press and hold the Child Lock key by pressing Start / Pause / for three seconds (the same key as Cancel key if you have to... -
Page 49: Cancelling The Programme
Operating the product Cancelling the programme Machine settings 1. Press and hold the Start / Pause / In order to change “Water Hardness”, Cancel key for 3 seconds to cancel “Active Self-Cleaning Filter”, “Inner the programme. Illumination”, “Doormatic”, “Volume”, “Brightness”, “Language”, “WLAN”, 2. - Page 50 Operating the product that suits the properties of your water You will be asked for your mains. approval when changes are Adjust the water hardness made in "Language" or " level according to the Factory Settings?" menus. Water hardness level 6.
- Page 51 Operating the product When you switch “Doormatic” feature Inner Illumination to Off position, it will be disabled for all When you enable this function, internal programmes. illumination lamp will light every time you open the door of your machine. There are two options, namely “On” and “Off”...
-
Page 52: Warning Messages
Operating the product changes or press HomeWhiz key Your machine will give you some to exit the language menu without important feedbacks while it is running. saving. Check the filter Factory Settings? Proceed as indicated below to cancel all of your personal settings and Take out and clean your filters as restore the factory settings: explained in the "Maintenance and... -
Page 53: End Of Programme
Operating the product Rinse Aid indicator ( ) Please check the rinse aid indicator on the display to see whether there is Please call the service when you see adequate amount of rinse aid in the this warning on the Display Information dishwasher or not. -
Page 54: Maintenance And Cleaning
MAINTENANCE AND CLEANING Cleaning the filters Service life of the product extends and frequently faced problems decrease if Clean the filters at least once every it is cleaned at regular intervals. three months in order for the machine Unplug the product and turn operates efficiently. -
Page 55: Cleaning The Hose Filter
Operating the product Cleaning the hose filter Damages on the machine that may be caused by impurities coming from the urban supply water or your own water installation (such as sand, dirt, rust, etc.) can be prevented by means of the filter attached to the water inlet hose. -
Page 56: Cleaning The Impellers
Operating the product Cleaning the impellers Upper impeller Clean the impellers at least once a Check if the holes on the upper week in order for the machine operates impeller (1) are clogged. If they efficiently. are clogged, remove and clean the impeller. -
Page 57: Ceiling Impeller
Operating the product Ceiling Impeller Check if the holes on the top ceiling impeller (1) of your machine are clogged. If they are clogged, remove and clean. To remove them, slightly push them upwards and then rotate to left. To install the impeller, seat it into its slot, push slightly upwards and turn it rightwards until it is securely tightened. -
Page 58: Troubleshooting
TROUBLESHOOTING Machine does not start. • Power cable is unplugged. >>> Check if the power cable is plugged in. • Fuse is blown. >>> Check the fuses in your house. • Water is cut. >>> Make sure that the water inlet tap is open. •... - Page 59 Troubleshooting • Rinse aid is not sufficient. >>> Check the rinse aid indicator and add rinse aid if necessary. Increase the rinse aid setting if there is enough amount of rinse aid in the machine. • Machine is unloaded right after the programme is over. >>> Do not unload your machine right after washing process is completed.
- Page 60 Troubleshooting • Salt leakage exists. >>> Pay attention not to spill salt around the salt filling hole while adding salt. Make sure that the salt reservoir lid is tightly closed after finishing the filling process. Run the prewash programme to remove the salt that spilled inside the machine.
- Page 61 Troubleshooting • Cutlery are made of low quality stainless steel. >>> Corrosion on such items is inevitable; they should not be washed in dishwashers. • Kitchen utensils that are already corroded are washed in dishwasher. >>> Rust on a corroded item can migrate to other stainless steel surfaces and cause corrosion on those surfaces as well.
- Page 62 Troubleshooting • Dishes are not placed orderly in the machine. >>> When placing the glasses and other glassware into the basket lean them not against other dishes but the edges or racks of the basket or the glass support tines. Striking of the glasses to each other or to other dishes due to the impact of water during washing can cause breaks, or scratches on their surfaces.
Need help?
Do you have a question about the 63102/WF and is the answer not in the manual?
Questions and answers