Table of Contents
Advertisement
Quick Links
KA01481C/07/EN/01.21
71524766
2021-01-31
Products
Brief Operating Instructions
Liquiline CM42
Two-wire transmitter for pH/ORP, conductivity or
oxygen
Measurement with digital or analog sensors
These instructions are Brief Operating Instructions; they are
not a substitute for the Operating Instructions pertaining to
the device.
Detailed information on the device can be found in the
Operating Instructions and in the other documentation
available at:
• www.endress.com/device-viewer
• Smart phone/tablet: Endress+Hauser Operations App
Solutions
Services
Advertisement
Table of Contents

Subscribe to Our Youtube Channel
Related Manuals for Endress+Hauser Liquiline CM42


Summary of Contents for Endress+Hauser Liquiline CM42
- Page 1 These instructions are Brief Operating Instructions; they are not a substitute for the Operating Instructions pertaining to the device. Detailed information on the device can be found in the Operating Instructions and in the other documentation available at: • www.endress.com/device-viewer • Smart phone/tablet: Endress+Hauser Operations App...
- Page 2 Liquiline CM42 Order code: XXXXX-XXXXXX Ser. no.: XXXXXXXXXXXX Ext. ord. cd.: XXX.XXXX.XX Serial number www.endress.com/deviceviewer Endress+Hauser Operations App A0040778 Endress+Hauser...
-
Page 3: Table Of Contents
Liquiline CM42 Table of contents Table of contents About this document ............. . 3 Symbols used . -
Page 4: Symbols On The Device
Basic safety instructions Liquiline CM42 Symbols on the device Symbol Meaning Reference to device documentation Do not dispose of products bearing this marking as unsorted municipal waste. Instead, return them to the manufacturer for disposal under the applicable conditions. Basic safety instructions Requirements for personnel •... -
Page 5: Workplace Safety
Liquiline CM42 Basic safety instructions 2.2.2 Non-designated use Use of the device for any purpose other than that described, poses a threat to the safety of people and of the entire measuring system and is therefore not permitted. The manufacturer is not liable for damage caused by improper or non-designated use. -
Page 6: Incoming Acceptance And Product Identification
• Firmware version • Safety information and warnings • Ex marking on hazardous area versions • Certificate information ‣ Compare the information on the nameplate with the order. 3.2.2 Manufacturer address Endress+Hauser Conducta GmbH+Co. KG Dieselstraße 24 D-70839 Gerlingen Endress+Hauser... -
Page 7: Scope Of Delivery
Liquiline CM42 Installation Scope of delivery The scope of delivery comprises: • 1 transmitter in the version ordered • 1 mounting plate incl. 4 flat head screws • 1 set of adhesive labels (nameplate, terminal connection signs) • 1 test certificate according to EN 10204-3.1 (optional) •... - Page 8 Installation Liquiline CM42 For transmitter with plastic housing 100° 90° 253 (9.96) 224 (8.82) 98 (3.86) 151 (5.94) A0032495 2 Dimensions in mm (inch) For transmitter with stainless steel housing 270 10.6 4 x Ø 6.1 (0.24) 300 (11.8) A0032496 ...
-
Page 9: Mounting The Measuring Device
Liquiline CM42 Installation Mounting the measuring device 4.2.1 Wall or field mounting You have the following installation options: • Wall mounting • Mounting on a vertical pipe or post (round or square) • Mounting on a railing or horizontal pipe (round or square) Diameter of a pipe, post or railing suitable for mounting: 30 to 61 mm (1.18 to 2.40 "). - Page 10 Installation Liquiline CM42 Mounting on a vertical pipe or post A0010372 6 Mounting example Transmitter (illustrated in image: plastic version) Mounting plate (included in the delivery) Pipe or railing (circular/square) Mounting plate (post retainer, accessory) Threaded bolts with spring washer, washer and nut (included in the delivery of the post retainer)
- Page 11 Liquiline CM42 Installation Mounting on the horizontal pipe or railing A0010370 7 Mounting example Transmitter (illustrated in image: stainless steel version) Mounting plate (included in the delivery) Pipe or railing Mounting plate (post retainer, accessory) Threaded bolts with spring washer, washer and nut (included in the delivery of the post retainer) You require the post retainer to mount the device on a post, pipe or railing.
-
Page 12: Post-Installation Check
Installation Liquiline CM42 Plastic version 121 (4.76) 220 (8.66) 76 (2.99) A0043872 8 Panel mounting: left side view, right front view, dimensions in mm (in) Stainless steel version 121 (4.76) 220 (8.66) 76 (2.99) A0043870 9 Panel mounting: left side view, right front view, dimensions in mm (in) Post-installation check After installation, check the transmitter for damage. -
Page 13: Electrical Connection
Liquiline CM42 Electrical connection Electrical connection Connection conditions 5.1.1 Installation in hazardous areas CM42-*E/I/J/K Zone 0 Zone 1 4 … 20 mA A0032486 10 Installation in hazardous area Ex ib (ia Ga) Transmitter Active barrier, e.g. RN221 HART handheld terminal... - Page 14 Electrical connection Liquiline CM42 CM42-*F Zone 2 Zone 22 4 … 20 mA A0032487 11 Installation in hazardous area Ex tc (ic) Transmitter Active barrier, e.g. RN221 HART handheld terminal Supply and signal circuit (4 to 20 mA) FieldCare via PROFIBUS/FOUNDATION Fieldbus...
- Page 15 Liquiline CM42 Electrical connection CM42-*V Zone 2 A0032488 12 Installation in hazardous area Ex nA (ic) Transmitter Supply and signal circuit Ex nA (4 to 20 mA) HART handheld terminal Intrinsically safe sensor circuit Ex ic FieldCare via PROFIBUS/FOUNDATION Fieldbus...
- Page 16 Electrical connection Liquiline CM42 CM42-*P/S Zone 0 Div. 1/2 4 … 20 mA A0032489 13 Installation in hazardous area FM/CSA Transmitter Active barrier, e.g. RN221 HART handheld terminal Supply and signal circuit (4 to 20 mA) FieldCare via PROFIBUS/FOUNDATION Fieldbus...
- Page 17 Liquiline CM42 Electrical connection CM42-*U Zone 1 4 … 20 mA A0032491 14 Installation in hazardous area JPN Transmitter Active barrier, e.g. RN221 HART handheld terminal Supply and signal circuit (4 to 20 mA) FieldCare Intrinsically safe sensor circuit...
- Page 18 Electrical connection Liquiline CM42 Loosen the 4 screws on the front with a Phillips head screwdriver. ≤180° Open the housing. Grounding the housing Plastic housing WARNING Electrical voltage at non-grounded cable mounting rail No shock protection is provided! ‣ Connect the cable mounting rail to the foundation ground using a separate ≥2.5 mm (14...
- Page 19 Liquiline CM42 Electrical connection Cable mounting rail ≥2.5 mm (14 AWG) functional ground A0003617 15 Grounding the housing Stainless steel housing WARNING Electrical voltage at non-grounded housing No shock protection is provided! ‣ Connect the external ground connection on the housing to the foundation ground using a separate cable (GN/YE) (≥2.5 mm...
-
Page 20: Connecting The Measuring Device
Electrical connection Liquiline CM42 Connecting the measuring device WARNING Device is live! Incorrect connection may result in injury or death! ‣ The electrical connection may be performed only by an electrical technician. ‣ The electrical technician must have read and understood these Operating Instructions and must follow the instructions contained therein. - Page 21 Liquiline CM42 Electrical connection 5.3.2 4 to 20 mA / HART You must use a two-wire cable grounded on both sides to ensure secure communication via the HART protocol and to comply with NAMUR NE 21 specifications. ‣ Connect the transmitter with a two-wire cable grounded at both sides.
- Page 22 Electrical connection Liquiline CM42 – Fieldbus – A0046122 A0043635 21 In-device view (CPU module) 22 Wiring diagram "Capacitive ground connection" with the C-module Pull back the braided shield, put the stranded extension wire of the C-module (item 1) onto the exposed shield and tighten the clip: ...
- Page 23 Liquiline CM42 Electrical connection c=470 nF – Fieldbus – A0027322 A0027323 23 In-device view (CPU module) 24 Wiring diagram "Fieldbus connection socket" Screw the fieldbus connection socket into the corresponding housing gland. Shorten the socket connection wires to approx. 15 cm.
-
Page 24: Sensor Connection
Electrical connection Liquiline CM42 Sensor connection NOTICE No shield against electrical and magnetic interference Interference can lead to incorrect measurement results! ‣ Connect shielded connections or terminals to the functional ground () (there is no protective ground on the plastic housing ()). - Page 25 Liquiline CM42 Electrical connection 5.4.1 Memosens sensors Connection via Memosens cable CYK10 Device Sensor cable Sensor – Com A Com B A0027328 A0027329 27 In-device view (sensor module) 28 Wiring diagram Endress+Hauser...
- Page 26 Electrical connection Liquiline CM42 Connection via sensor fixed cable Device Sensor cable Sensor – Com A Com B A0027335 A0027329 29 In-device view (sensor module) 30 Wiring diagram CLS50D: from serial numbers J3xxxx05LI0 CLS54D: from serial numbers H9xxxx05LI1...
- Page 27 Liquiline CM42 Electrical connection 5.4.2 Analog pH/ORP sensors Glass electrodes, with PML (symmetrical) Device CPK9 Sensor CPK1 A0027330 A0046123 31 In-device view (sensor module) 32 Wiring diagram Endress+Hauser...
- Page 28 Electrical connection Liquiline CM42 Glass electrodes, without PML (asymmetrical) Device CPK9/CPK1 Sensor CPK1 d.n.c. d.n.c. A0027333 A0046124 33 In-device view (sensor module) 34 Wiring diagram Endress+Hauser...
- Page 29 Liquiline CM42 Electrical connection ISFET sensors, with PML (symmetrical) Device Cable Sensor A0027340 A0046125 35 In-device view (sensor module) 36 Wiring diagram Endress+Hauser...
- Page 30 Electrical connection Liquiline CM42 ISFET sensors, without PML (asymmetrical) Device Cable Sensor d.n.c. d.n.c. A0027342 A0046126 37 In-device view (sensor module) 38 Wiring diagram Endress+Hauser...
- Page 31 Liquiline CM42 Electrical connection pH enamel electrodes With PML (symmetrical) With PML (symmetrical) Pfaudler electrode, absolute Pfaudler electrode, relative Type 03 / type 04 Type 18 / type 40 Device Pfaudler Device Pfaudler 03/04 18/40 Shield Shield A0027344 A0027345 39 Wiring diagram ...
- Page 32 Electrical connection Liquiline CM42 With PML (symmetrical) Without PML (asymmetrical) pH-Reiner Pfaudler electrode, absolute Type 03 / type 04 Device pH-Reiner Device Pfaudler 03/04 GN/YE Shield Shield A0027346 A0027347 41 Wiring diagram 42 Wiring diagram Endress+Hauser...
- Page 33 Liquiline CM42 Electrical connection Single electrodes (e.g. CPS64 glass or antimony), without PML (asymmetrical) Device Sensor 2x CPK9 / CPK1 d.n.c. d.n.c. d.n.c. d.n.c. CPK9 YE, WH, GN: d.n.c. A0027348 A0027349 43 In-device view (sensor module) 44 Wiring diagram...
- Page 34 Electrical connection Liquiline CM42 Glass electrode and ORP sensor for rH measurement For rH measurement, connect a pH Device CPK9 Sensor sensor (e.g. CPS11 with CPK9 sensor cable) and an ORP sensor (e.g. CPS12 with CPK1 sensor cable). CPK1 d.n.c.
- Page 35 Liquiline CM42 Electrical connection 5.4.3 Analog conductivity sensors Sensors with conductive measurement of conductivity, two-electrode sensors Device Cable Sensor d.n.c. A0027352 A0027353 46 In-device view (sensor module) 47 Wiring diagram Endress+Hauser...
- Page 36 Electrical connection Liquiline CM42 Sensors with conductive measurement of conductivity, four-electrode sensors Device Cable Sensor A0027354 A0027355 48 In-device view (sensor module) 49 Wiring diagram Endress+Hauser...
-
Page 37: Ensuring The Degree Of Protection
Liquiline CM42 Electrical connection Sensors with inductive measurement of conductivity Device Cable Sensor Device Cable Sensor 50 Wiring diagram CLS50 51 Wiring diagram CLS54 Ensuring the degree of protection Only the mechanical and electrical connections which are described in these instructions and which are necessary for the required, designated use, may be carried out on the device delivered. -
Page 38: Post-Connection Check
Electrical connection Liquiline CM42 • The display is not fully secured (risk of moisture entering due to inadequate sealing) • Loose or insufficiently tightened cables/cable ends • Conductive cable strands are left in the device Post-connection check WARNING Connection errors... -
Page 39: Operation Options
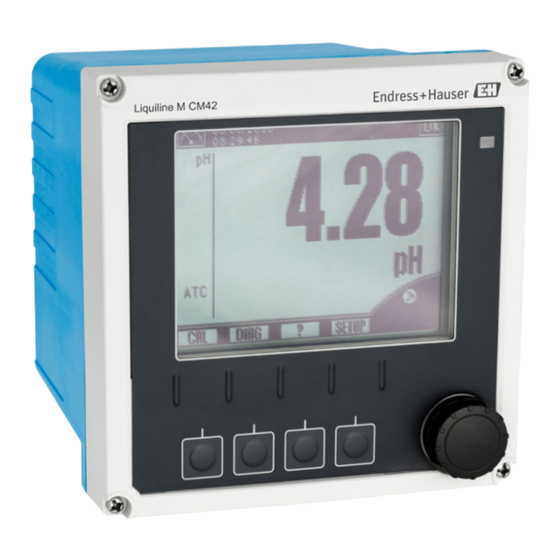
Liquiline CM42 Operation options Operation options Display and operating elements A0032528 52 Overview of operation Display, current display: pH measuring mode Alarm LED Navigator 4-7 Soft keys Displays the soft key function (menu-dependent) Endress+Hauser... -
Page 40: Access To The Operating Menu Via The Local Display
Operation options Liquiline CM42 Access to the operating menu via the local display Display Language Deutsch Messwertformat Auto Temperatureinheit °C Temperaturformat xxx.x DAT-Menü A0036017 A0036011 54 Turn the navigator: move the cursor 53 Press the soft key: select the menu directly... -
Page 41: Access To The Operating Menu Via The Operating Tool
Liquiline CM42 Operation options Access to the operating menu via the operating tool 6.3.1 HART Communicator If a Liquiline-DD (Device Description) is installed on your Communicator, you can make all the parameter settings via the Communicator. Only limited parameterization or operation is possible with a (pre-installed) universal DD. -
Page 42: Commissioning
Commissioning Liquiline CM42 Downloading DTM files https://www.endress.com/download Select "device driver" from the list. Select "Device Type Manager (DTM)" as the type and then set the product root as an additional filter criterion. The DTMs that are available are displayed. - Page 44 *71524766* 71524766 www.addresses.endress.com...
Need help?
Do you have a question about the Liquiline CM42 and is the answer not in the manual?
Questions and answers