
Subscribe to Our Youtube Channel
Related Manuals for Brandt BPE6410 Series


Summary of Contents for Brandt BPE6410 Series
- Page 1 GUIDE D’INSTALLATION ET D’UTILISATION FR GUIDE FOR INSTALLATION AND USE EN Table de cuisson Cooking hob BPE6410* BPE6411*M...
- Page 2 Dear Customer, You have just acquired a BRANDT product and we would like to thank you. We have designed and made this product with you, your lifestyle and your requirements in mind so that it meets your expectations. We have devoted our know-how, our innovative spirit and the passion that has been guiding us for over 60 years.
-
Page 3: Table Of Contents
SOMMAIRE • Safety indtructions _____________________________________ 28 • Caring for the environment ______________________________ 31 • Description of your appliance _____________________________ 32 1 / INSTALLING YOUR APPLIANCE • Choice of location ______________________________________ 33 • Fitting _______________________________________________ 33 • Tips for flush mounting _________________________________ 34 •... -
Page 4: Safety Indtructions
SAFETY INSTRUCTIONS IMPORTANT SAFETY INSTRUCTIONS - READ CAREFUL- LY AND RETAIN FOR FUTURE USE. This user guide is available for download on the brand’s website. > We have designed this use of the appliance may cooking hob for use by private require additional ventilation, individuals their... - Page 5 WARNING: > It must be possible to disconnect the appliance from > Only use protection sys- the power supply, either using tems designed by the manu- a plug or by fitting a switch on facturer cooking the fixed wiring system in appliance or systems men- accordance with installation tioned by the manufacturer...
- Page 6 SAFETY INSTRUCTIONS > CAUTION: The cooking > Never use aluminium process must be monito- foil for cooking. Never red. A short cooking pro- place products wrapped in cess must be continuously aluminium foil or in alumi- monitored. nium trays onto your hob. The aluminium will melt >...
-
Page 7: Caring For The Environment
CARING FOR THE ENVIRONMENT > This appliance’s packing materials are recyclable. Recycle them and play a role in protecting the environ- ment depositing them in local authority containers provided for this purpose. Your appliance also contains various recyclable materials. It is therefore marked with this logo to indicate that, in European Union countries, used appliances must not be... -
Page 8: Description Of Your Appliance
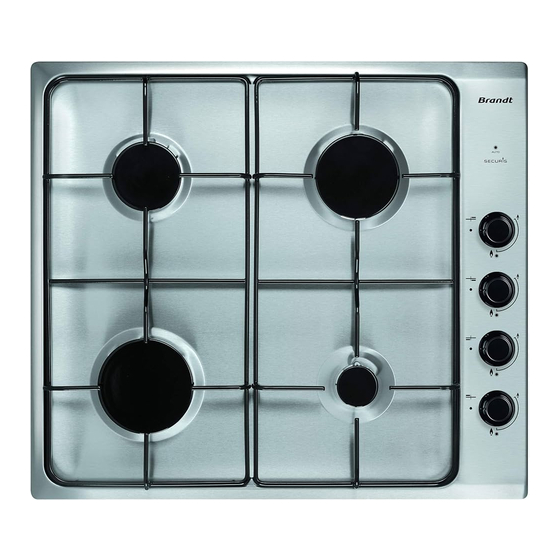
1 / DESCRIPTION OF YOUR APPLIANCE • DESCRIPTION OF THE HOB Grill Burner support Fig. 01 OB MODEL GAS BURNERS ELECTRIC PLATE Fig. 02 Burner cover Injector Burner head Knob Thermocouple Gasket This Guide to Installation and Use is valid for several models. Minor differ- ences in details and fittings may emerge between your appliance and the descriptions provided. -
Page 9: Installing Your Appliance
1 / INSTALLING YOUR APPLIANCE APPLIANCE Width Depth Thickness 56 cm 49 cm next cabinet cabinet Total 60 cm 53 cm 5,8 cm dimensions above the work Total 55 cm 47,5 cm 3,4 cm dimensions below the work Fig. 01 •... -
Page 10: Tips For Flush Mounting
1 / INSTALLING YOUR APPLIANCE TIPS FOR FLUSH MOUNTING - Place your hob in the opening of the sup- port cabinet, carefully pulling the table towards you. Underside view of the housing - Reposition the burner heads, burner cov- ers and pan supports on the hob. - Connect your hob to the gas supply (See “Gas Connection”... -
Page 11: Electric Connection
1 / INSTALLING YOUR APPLIANCE • ELECTRICAL CONNECTION CROSS-SECTION OF CABLE TO BE USED The oven must be plugged in 220-240 V ~ 50 Hz using a standardized power Gas and dual cable with 3 conductors each 1,5 mm² ( 1 ph + 1 N + H05V2V2F - T90 3 conductors ground) -
Page 12: Gas Connection
1 / INSTALLING YOUR APPLIANCE • GAS CONNECTION • Preliminary comments If your hob is installed above an oven or if proximity to other heating elements poses a threat of overheating the connection, you absolutely must insulate the cable in a rigid pipe. If a hose or soft pipe (in the case of butane gas) is used, it should not come into contact with a moving part of the cabinet, nor should it pass through a location that may become blocked. - Page 13 1 / INSTALLING YOUR APPLIANCE Gas supplied by cylinder or In an existing system, a flexible pipe fitted • with hose clips (complant with the XP D 36- tank (gas butane/propane) 110 standard)with a 5-year guarantee may For your safety, you must choose from the be used.
-
Page 14: Changing Of Gas Supply
1 / INSTALLING YOUR APPLIANCE CHANGING THE GAS SUPPLY • Warning Each time you change the gas supply, tick Your appliance is sold pre-set the box corresponding to the new gas level for natural gas. on the label found in the plastic bag. The injectors required for adaption Refer corresponding... - Page 15 1 / INSTALLING YOUR APPLIANCE • Adjust the hob connections: they are located underneath the knobs (Fig. 04). — Proceed one tap at a time. — Remove the knobs and the gaskets by Knob pulling them up. WITCHING FROM NATURAL GAS TO BUTA PROPANE With a small flat-head screwdriver, screw Gasket...
- Page 16 1 / INSTALLING YOUR APPLIANCE • Marking on the injectors The adjacent table shows where the Example: injectors are positioned on your appliance Injector marking 94 according to the type of gas used. Each number is marked on the injector. Four-burner gas model * Natural gas Butane/Propane gas...
- Page 17 1 / INSTALLING YOUR APPLIANCE • Gas properties FR-GB FR-GB FR-GB Butane Propane Natural Natural Appliance intended to be installed in: FR......cat : II2E+3+ GB .......cat : II2H3+ Hourly rate below: 28-30mbar 37mbar 20 mbar 25 mbar At 15°C under 1013 mbars SPEED BURNER Marking engraved on injector Nominal heat release rate...
-
Page 18: Description Of The Worktop
2 / USING YOUR APPLIANCE • DESCRIPTION OF THE TOP BPE6411*M BPE6410* Auxiliary burner 0.85 kW (*) High-speed burner 2.25 kW (*) Super fast burner 3.05 kW (*) Semi-fast burner 1.50 kW (*) Electric plate 1.50 kW - diameter 145 mm (*) Power obtained with natural gas G20. -
Page 19: Using Your Appliance
2 / USING YOUR APPLIANCE • LIGHTING THE HOB Each burner is supplied by a tap which can be opened by pressing it and turning it in in a counterclockwise motion. The “ ” point corresponds to closing the tap. Choose the desired burner by using the symbols located near the knobs (e.g.: Rear right burner... -
Page 20: Cookware Suitable For The Gas Burners
2 / USING YOUR APPLIANCE • COOKWARE FOR GAS BURNERS • Which burner should you use depending on your cookware? Diameter of the cookware Burner Frying - Boiling 18 to 28 cm Super fast 16 to 28 cm Searing foods High-speed Semi-fast Sauces - Reheating... -
Page 21: Cookware For Electric Plate
2 / USING YOUR APPLIANCE • MOST SUITABLE COOKWARE FOR THE ELECTRIC PLATE (depending on model) Use cookware with flat bottoms that perfectly hug the surface of the burner: — in stainless steel with a thick, tri metal or “sandwich” bottom”, —... -
Page 22: Daily Care Of Your Appliance
3 / DAILY CARE OF YOUR APPLIANCE • MAINTAINING YOUR APPLIANCE MAINTENANCE... WHAT TO DO ? PRODUITS/ACCESSOIRES A UTILISER Of the spark If the spark igniters become dirty, clean . Small, hard-bristled plugs and them using a small, stiff-bristled brush brush. -
Page 23: Special Messages, Incidents
4 / SPECIAL MESSAGES, INCIDENTS • DURING USE YOU OBSERVE THAT : WHAT SHOULD YOU DO? • . Check the electrical connection of your appliance Lighting of burners: . Check that the spark plugs are clean. There are no sparks when . -
Page 24: Cooking Guides
5 / COOKING GUIDES • GAS COOKING GUIDE PREPARATIONS TIMES SUPER FAST SEMI AUXILIAIRY FAST FAST SOUPS Broths 8-10 minutes Thick soups FISH Court-bouillon 8-10 minutes Grilled food 8-10 minutes SAUCES Hollandaise, béarnaise Béchamel, aurore 10 minutes VEGETABLES Chicory, spinach Cooked peas 25-30 minutes Provençal tomatoes... - Page 25 6 / PERSONAL NOTE...
- Page 26 6 / PERSONAL NOTE...
- Page 27 6 / PERSONAL NOTE...
-
Page 28: After-Sales Service
(model, type and serial number). This information appears on the manufactur- er’s nameplate attached to your equip- ment. (Fig. 01). BRANDT BPI*/* Fig. 01 Brandt France - SAS with share capital of €100.000.000 RCS Nanterre 801 250 531. CZ5702871_02 - 05/16...
Need help?
Do you have a question about the BPE6410 Series and is the answer not in the manual?
Questions and answers