
Related Manuals for Skandika Freeland


Summary of Contents for Skandika Freeland
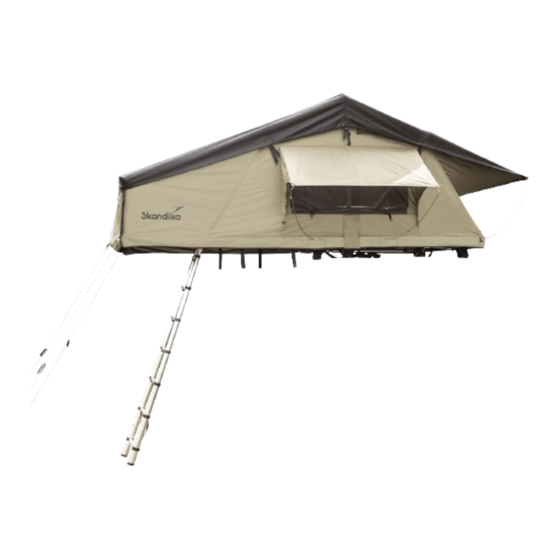
- Page 1 Rooftop Tent Manual Instruction Extension Model Dachzelt / Roof tent Skandika Modell:Freeland Art.Nr. 60100 / 60110 / 60120 / 60130...
- Page 2 Aufbauanleitung Vorzelt (nur Art. 60110 und 60130) Produktspezifikationen Garantiebedingungen Die Videos zum Auf- und Abbau sowie FAQ und die Anleitungen zum Down- loaden findest Du auf unserer Skandika Service Seite. Für weitere Informa- tionen kannst Du einfach unsere Website besuchen www.skandika.com...
- Page 3 LIEFERUMFANG Packing List Zelt-Stangen Alu-Stangen Schraubensets U-Profil-Halterungen Führungen Abspann- leinen Gelenkbefestigungen Heringe Leiter Zelt Maul- Schlüssel Innensechskant...
- Page 4 SICHERHEITSHINWEISE...
- Page 5 SICHERHEITSHINWEISE WICHTIGE INFORMATIONEN Der Hersteller haftet nicht für Schäden oder Unfälle, die durch Nichtbeachtung dieser Gebrauchsan- weisung, durch Veränderungen an Teilen oder durch die Verwendung von anderen als den Originalteilen des Herstellers entstehen können. Die Warnungen, Vorsichtshinweise und Anweisungen in diesem Dokument kön- nen nicht alle möglichen Situationen abdecken - daher versteht der Betreiber, dass gesunder Menschenver- stand und Vorsicht angewendet werden müssen.
- Page 6 INSTALLATIONSANLEITUNG Öffnen Sie den Reißverschluss der Zeltplane und lösen Sie die Gurte. Nehmen Sie alle Teile vorsichtig heraus und prüfen Sie diese auf Vollständigkeit. Drehen Sie den Zeltboden nach oben und montieren Sie die Alu-Stangen (B) wie abgebildet mit den Schraubensets (D).
- Page 7 INSTALLATIONSANLEITUNG Drehen Sie das Zelt um und befestigen Sie nun die Leiter (L) wie folgt: Montieren Sie die Gelenkbefestigungen (F) an den Seiten und stecken Sie dann die Seiten der Leiter durch die Gelenke. Achten Sie darauf, dass die Schlitze korrekt ausgerichtet sind. ②...
- Page 8 INSTALLATIONSANLEITUNG Installation S ③ Put the tent to car roof and install the ten Entscheiden Sie zunächst, ob Sie den Zelteingang an der Seite oder an der Rückseite des Fahrzeugs Installation Steps haben möchten. Montieren Sie dann Ihr Dachzelt parallel zum Fahrzeug entsprechend ausgerichtet wie folgt: Befestigen Sie die U-Profil-Halterungen (E) an den beiden Schrauben und sichern Sie sie mit jeweils einem Federring, einer Unterlegscheibe und einer Sterngriffmutter.
- Page 9 INSTALLATIONSANLEITUNG Installation Steps Drücken Sie die Kunststoffstopfen auf die Enden der Alu-Stangen. Verpacken Sie das Zelt in der Hülle, ④ Slide the cover to base rail schließen Sie den Reißverschluss und nutzen Sie die Gurte zur Sicherung. Prüfen Sie vor der Fahrt, ob alle Schnallen geschlossen sind.
- Page 10 AUFBAUANLEITUNG Lösen Sie die Gurte und öffnen Sie die Hülle. Ziehen Sie die Leiter herunter und passen Sie gegebe- Tent Set up nenfalls ihre Länge an. Stellen Sie sicher, dass die Leiterteile beim Herausziehen einrasten. ① Undo zip of cover, loose the strap and pull the ladder...
- Page 11 AUFBAUANLEITUNG Stecken Sie die Stangen in die Führungen des Erweiterungsbereichs und verbinden Sie sie mit den Ösen.
- Page 12 AUFBAUANLEITUNG Ziehen Sie die Gurte an der Vorderseite des Zeltes nach vorne, bis sie die Heringe erreichen und befestigen Sie sie dann. Durch Zug an den Abspannleinen können Sie Tür und Fenster ausrichten.
- Page 13 (NUR ART. 60110 UND 60130) Set up the Annex Room Die Freeland-Modelle inklusive Vorzelt (Art. 60110 / 60130) bieten zusätzlichen Platz oder Stauraum für verschiedene Anwendungsmöglichkeiten. Das Vorzelt stellen Sie wie folgt auf: Schieben Sie zunächst eine Seite des Vorzelts in die Führungen des Dachzeltbodens.
- Page 14 Innenzeltabmessungen ca. 240 (L) × 160 (B) cm Packmaß ca. 125 × 29 × 165 cm Bruttogewicht ca. 70 kg Art. 60110 Freeland L mit Vorzelt: Personenzahl 2 - 3 Innenzeltabmessungen ca. 240 (L) × 160 (B) cm Packmaß ca.
- Page 15 Zelte sollten über den örtlichen Sperrmüll oder einen Recyclinghof entsorgt werden. Nähere Auskunft über die Entsorgungsmöglichkeiten an Ihrem Wohnort erteilt Ihnen die zuständige Kommunalbehörde. Im Zuge ständiger Für Ersatzteile kontaktieren Sie bitte folgende E-Mail-Adresse: service@skandika.de Produktverbesse- Der Service erfolgt durch: MAX Trader GmbH, Wilhelm-Beckmann-Straße 19, 45307 Essen,...
-
Page 16: Table Of Contents
Installation guide Set-up instructions Set-up instructions for the annex (only art. 60110 and 60130) Product specifications Guarantee conditions Please visit the Skandika Service portal on our website for setup & help videos, FAQs and downloa- dable instructions. For more information... -
Page 17: Scope Of Supply
SCOPE OF SUPPLY Packing List Tent poles Aluminium poles Screw sets U-profile brackets Guides Guy ropes Hinge attachments Tent pegs Ladder Tent Spanner Allen key... - Page 18 SAFETY INFORMATION...
-
Page 19: Safety Information
SAFETY INFORMATION IMPORTANT INFORMATION The manufacturer is not liable for any damage or accident that may occur as a result of non-compliance with these instructions for use, modifications made to parts or the usage of any parts other than the manufacturer’s original parts. -
Page 20: Installation Guide
INSTALLATION GUIDE Open the zip of the tent cover and loosen the straps. Carefully take out all the parts and check them for completeness. Turn the tent floor upwards and mount the aluminium poles (B) as shown with the screw sets (D). Installation Steps ①... - Page 21 INSTALLATION GUIDE Turn the tent over and now attach the ladder (L) as follows: Mount the hinge attachments (F) on the sides and then put the sides of the ladder through the hinges. Make sure that the slots are aligned correctly. ②...
- Page 22 INSTALLATION GUIDE Installation S ③ Put the tent to car roof and install the ten First decide whether you want the tent entrance on the side or on the rear of the vehicle. Then mount Installation Steps your roof tent parallel to the vehicle aligned accordingly as follows: Attach the U-profile brackets (E) to the two screws and secure each with a spring washer, washer and star knob nut.
- Page 23 INSTALLATION GUIDE Installation Steps Press the plastic plugs onto the ends of the aluminium poles. Pack the tent in the cover, close the zip ④ Slide the cover to base rail and use the straps to secure it. Before driving, check that all buckles are closed. Installation Steps Install Slide the cover to base rail...
-
Page 24: Set-Up Instructions
SET-UP INSTRUCTIONS Loosen the straps and open the cover. Pull down the ladder and adjust its length if necessary. Make Tent Set up sure that the ladder parts lock into place when pulled out. ① Undo zip of cover, loose the strap and pull the ladder... - Page 25 SET-UP INSTRUCTIONS Insert the poles into the guides of the extension section and connect them with the eyelets.
- Page 26 SET-UP INSTRUCTIONS Pull the straps at the front of the tent forward until they reach the pegs and then fasten them. You can align the door and windows by pulling on the guy ropes.
- Page 27 (ONLY ART. 60110 AND 60130) Set up the Annex Room The Freeland models including annex (art. 60110 / 60130) offer additional space or storage for various uses. Set-up the annex as follows: First push one side of the annex into the guides of the roof tent floor.
-
Page 28: Product Specifications
Inner tent dimensions approx. 240 (L) × 160 (W) cm Pack size approx. 125 × 29 × 165 cm Gross weight approx. 70 kgs Art. 60110 Freeland L with annex: Number of persons 2 - 3 Inner tent dimensions approx. 240 (L) × 160 (W) cm Pack size approx. -
Page 29: Guarantee Conditions
For more information about disposal options in your area, please contact your local authority. In accordance with our policy of continual product impro- For spare parts please contact: service@skandika.de vement, we reserve the right Service centre: MAX Trader GmbH, Wilhelm-Beckmann-Straße 19, 45307 Essen, to make technical and visual Germany changes without notice. - Page 30 NOTIZEN / NOTES _____________________________________________________ _____________________________________________________ _____________________________________________________ _____________________________________________________ _____________________________________________________ _____________________________________________________ _____________________________________________________ _____________________________________________________ _____________________________________________________ _____________________________________________________ _____________________________________________________ _____________________________________________________ _____________________________________________________ _____________________________________________________...
- Page 31 NOTIZEN / NOTES _____________________________________________________ _____________________________________________________ _____________________________________________________ _____________________________________________________ _____________________________________________________ _____________________________________________________ _____________________________________________________ _____________________________________________________ _____________________________________________________ _____________________________________________________ _____________________________________________________ _____________________________________________________ _____________________________________________________ _____________________________________________________...
- Page 32 Vertrieb & Service durch / Sales & Service by MAX Trader GmbH Wilhelm-Beckmann-Straße 19 45307 Essen Deutschland / Germany Art. 601x0 Freeland DE_GB 02/2023 V1.0...
Need help?
Do you have a question about the Freeland and is the answer not in the manual?
Questions and answers